Blog Hop/Instagram Hop, Butterflies, Designer/Patterned/Specialty Papers (DSP), Handmade Cards, Stampin' Up!, Techniques & Tutorials, Thank you

Beautiful Butterflies square card

This handmade card features  the Beautiful Butterflies products.

For this card, I began with a Basic White card base, and embossed the front with the Beautiful Butterflies Hybrid Embossing Folder. This not only embosses, but also die cuts the large butterfly at the same time, how cool is that!

I die cut [Beautiful Butterflies dies] the intricate piece from the 2024-2026 In Color™ Glimmer Specialty Paper.  

Before adhering these to the card, I placed another diecut piece in Summer Splash cardstock into the hole where the white butterfly came from (see below). The adding the white and glimmer butterflies on top gluing through the centre so the wings can pop up. Some 2024-2026 In Color™ Shimmer Gems are added down the body. The sentiment is from the Greetings for All Mix & Match Euphemera Pack.

Thanks for dropping by.

Have you browsed the new 2025-2026 Annual Catalogue yet and created your shopping list?

Shop with Kate Morgan


Be sure to download a PDF copy of current catalogues from my SU Catalogue Library page.

Don’t forget to Follow My Blog to receive blog updates and all the latest news and specials!

Birthday, Butterflies, Designer/Patterned/Specialty Papers (DSP), Handmade Cards, Stampin' Up!, Techniques & Tutorials

Faux Camera Shutter card

This handmade card features  the Beautiful Butterflies products.

I shared this Faux Camera Shutter technique the other day, you can see it here and download my free PDF Tutorial to make it yourself.

For this card, I began with a Basic White card base, then a Basic White layer that was dry embossed with the Mini Corrugated Embossing Folder and adhered down the centre of the card front.

The Faux Camera Shutter uses a piece of 6″x6″ 2024-2026 In Color™ Designer Series Paper (DSP). There are lots of YouTube videos on how to create these.

I die cut some of the smaller butterflies using the Beautiful Butterflies dies and some flowers/leaves from the Country Birdhouse dies, currently in the Last Chance section of the online store for $39.20 from $56.  I sure will miss these gorgeous dies.

The sentiment [Greetings for All Mix & Match Euphemera Pack] is added on Dimensionals with the flowers and leaves placed around it. A piece of White Baker’s Twine. is tied in a bow and added on a Glue Dot. Some 2024-2026 In Color™ Shimmer Gems are added.

Thanks for dropping by.

Have you browsed the new 2025-2026 Annual Catalogue yet and created your shopping list?

Shop with Kate Morgan


Be sure to download a PDF copy of current catalogues from my SU Catalogue Library page.

Don’t forget to Follow My Blog to receive blog updates and all the latest news and specials!

Birthday, Blog Hop/Instagram Hop, Butterflies, Designer/Patterned/Specialty Papers (DSP), Fancy Folds, Handmade Cards, Stampin' Up!, Techniques & Tutorials

Beautiful Butterflies fun closure card

This handmade card features  the Beautiful Butterflies products.

I made this style of card back in 2018, you can see it here, where I was inspired by Terri Gaines, a US Demonstrator. Her video tutorial is in that link.

For this card, I began with a Summer Splash cardbase, then a Basic White layer before adding the 2024-2026 In Color™ Designer Series Paper ( DSP), making sure to only add glue around the edges. Once these layers were adhered, I die cut the large label die [Beautiful Butterflies dies] through the card front. The DSP piece keep for the inside.

The butterflies were die cut in the 2024-2026 In Color™ Glimmer Specialty Paper.  Adhere the smaller butterflies, add the sentiment [Beautiful Butterflies stamp set] on Dimensionals with a piece of White Baker’s Twine. Some 2024-2026 In Color™ Shimmer Gems are added.

Fold her wings together to open the card…

Here’s the card open with white panel to write your message. This is where that DSP label die cut is adhered. Once the Basic White insert is glued in place, close the card and place that DSP through the gap so it is in the perfect position. Then you can glue the body of the large butterfly in place and fold her wings together to fit through the gap.

Thanks for dropping by.

Have you browsed the new 2025-2026 Annual Catalogue yet and created your shopping list?

Shop with Kate Morgan


Be sure to download a PDF copy of current catalogues from my SU Catalogue Library page.

Don’t forget to Follow My Blog to receive blog updates and all the latest news and specials!

Baby, Birthday, Designer/Patterned/Specialty Papers (DSP), Easter, feminine, Flowers, Free Product, Handmade Cards, Kids Cards, Mini Catalogue and Sale-a-bration (SAB), Stampin' Up!

Storybook Friends and Storybook Moments DSP

The Storybook Moments Collection caught my eye immediately when browsing through the new 2025 Jan-Apr Mini catalogue. It has all my favourite Beatrix Potter inspired characters, including Peter Rabbit, Jemima Puddleduck, etc. These images are pop out diecuts which are part of the DSP pack! Here’s what is included in this collection: 

164681

This cute little mouse sits on a Bubble Bath frame [Storybook Friends dies] with some text stamped it in Basic Beige ink using the Elements of Text stamp set. The Perennial Postage dies cut out the white layer which sits on a Bubble Bath matt. The flowers and leaves are from the Country Flowers dies.

Storybook Moments DSP field mouse card by Kate Morgan Stampin up Australia 2025

This one features Lost Lagoon and these flowers are from the Country Birdhouse dies.

Storybook Moments DSP Jemima card by Kate Morgan Stampin up Australia 2025

This features Boho Blue, with the Starstuck Embossng Folder, one of the free Saleabration offerings. The sentiment is from the Storybook Friends stamp set.

Storybook Moments DSP Peter Rabbit card by Kate Morgan Stampin up Australia 2025

Here is that same embossing folder in the backgound and the addition of some Petal Pink card and the Petal Pink Scalloped Ribbon and Petal Pink Low Profile Dots.

Storybook Moments DSP little duck card by Kate Morgan Stampin up Australia 2025

Again the Starstruck Embossing Folder and the amazing Everyday Arches dies. These are going to be a huge favourite of mine!

Storybook Moments DSP dressed lamb card by Kate Morgan Stampin up Australia 2025

Pecan Pie card features on this one with the Elements of Text stamp set.

Storybook Moments DSP swinging squirrell frame card by Kate Morgan Stampin up Australia 2025

The Elements of Text stamp set and those Everydy Arches dies again with some Calypso Coral circles.

Storybook Moments DSP badgercard by Kate Morgan Stampin up Australia 2025

Click the image below to choose which product you would select for free with a qualifying order.

2025 SAB Cover

Thanks for dropping by

Shop with Kate Morgan


Be sure to download a PDF copy of current catalogues from my SU Catalogue Library page.

Don’t forget to Follow My Blog to receive blog updates and all the latest news and specials!

Happy Crafting!

Designer/Patterned/Specialty Papers (DSP), Fancy Folds, feminine, Handmade Cards, Mother's Day, Online Exclusives, Stampin' Up!, Techniques & Tutorials, Wedding

Hearts of Elegance Half Hexagonal card

Today I feature a fun fold card, but do not be dismissive thinking it is too difficult as it is really easy to recreate. Read on and I’ll explain more about it. You will be surprised!

The Hearts of Elegance bundle and the Marbled Elegance Specialty DSP are available in the Online Exclusives section of the online store. This could suit any occasion; Birthday, Wedding Day, Valentine’s Day, Mother’s Day, etc.

Half Hexagonal Fun Fold card using Stampin Up Hearts of Elegance and Marbled Elegance SDSP by Kate Morgan Australia 2024

Here is the view from the top of the card where you can see that half hexagon.

Half Hexagonal Fun Fold card using Stampin Up Hearts of Elegance and Marbled Elegance SDSP by Kate Morgan Australia 2024 top view

and it folds flat like this to fit into an envelope for posting!

Half Hexagonal Fun Fold card using Stampin Up Hearts of Elegance and Marbled Elegance SDSP by Kate Morgan Australia 2024 flat to fit in envelope

Step by step details
Card base: 11cm x 14.5cm, score the long edge @ 2cm from each end and fold them to the front (valley folds). Decorate the inside with the following.
DSP (inside): 10.5cm x 2cm and 2 pieces 10.5cm x 1.5cm

Cardstock strips x 2: 18.5cm x 3cm, score @ 2cm & 6.5cm from each end. Fold and burnish all scorelines as mountain folds. Add adhesive of choice to the end tabs and adhere them to the outisde of the two side folds of the cardbase, lining them up along the top of the card. Repeat with the second strip along the base. The card base will fold flat to fit into an envelope for postage. Use the following DSP measurements to decorate.
DSP (decorate the strips): 13cm x 2.5cm, cut so you have 4cm piece, 5cm, 4cm (to keep the continuous pattern) you need two lots of these.

White card:
10.5cm x 10cm (adhere to the back for your message).
Extra: DSP and cardstock to cut your heart features and the sentiment!

Thanks for dropping by. Wishing you all a festive season and a safe New Year. See you again in 2025!

Product List
Stamps: 
Hearts of Elegance*
Dies: Hearts of Elegance*, Stylish Shapes
Card/DSP/Specialty Paper: Basic White, Melon Mambo, Gold Foil, Marbled Elegance Specialty Designer Series Paper, Basic White C6 Envelopes
Inks: Melon Mambo
Embellishments: Purple Adhesive-backed Sequins
Accesories/Adhesives/Tools: H Block, Paper Snips, Bone Folder, Paper Trimmer, Multipurpose Glue, Glue Dots, Stampin’ Dimensionals, Stampin’ Cut & Emboss Machine, Take Your Pick Tool, Simply Shammy.
*can be purchased together as a bundle to save 10%

Shop with Kate Morgan


Be sure to download a PDF copy of current catalogues from my SU Catalogue Library page.

Don’t forget to Follow My Blog to receive blog updates and all the latest news and specials!

Happy Crafting

Birthday, Designer/Patterned/Specialty Papers (DSP), Handmade Cards, Stampin' Up!, Sympathy

Charming Duck Pond Cards

Today I feature the Charming Duck Pond and Lily Pond Lane Designer Papers in these three cute cards.

Card 1 – Gray Granite cardbase with a layer of the DSP and another Gray Granite piece over the top that has the diecut centre.  This creates a gorgeous focal point. The duck is diecut directly from the DSP and the extra coloured cardstock diecut for the reeds, lilypads and flowers; Pretty in Pink, Granny Apple Green and Peach Pie.

Card 1 - Charming Duck Pond and Lily Pond Lane DSP by Kate Morgan, Stampin Up Australia 2024

Card 2 – Pretty Peacock cardbase with a layer of Peach Pie dry embossed with the So Swirly 3D embossing folder. A layer of DSP on top of that at the opposite angle then a Heartfelt Hexagon Punch label with Granny Apple Green ink sponged around the edges.

Card 2 - Charming Duck Pond and Lily Pond Lane DSP by Kate Morgan, Stampin Up Australia 2024

Card 3 – Pretty Peacock cardbase with a layer of Badic White ink blended with Balmy Blue ink and dry embossed with the So Swirly 3D embossing folder. A Basic White panel stamped across three times with the reed stamp. This was stamped again and diecut twice to pop them up in front on Dimensionals. A small strip of Peach Pie Glimmer paper is added for sparkle! For the sentiment, I inked the Thoughtful Moments Hybrid embossing folder with Balmy Blue ink, placed some white card over it, then the die and ran it through my die cutting machine.

Card 3 - Charming Duck Pond and Lily Pond Lane DSP by Kate Morgan, Stampin Up Australia 2024

Thanks for dropping by.

Product List
Stamps: 
Charming Duck Pond*
Dies: Charming Duck Pond*, Thoughful Moments Hybrid Embossing Folder/Die
Card/DSP/Specialty Paper: Pretty in Pink, Basic White, Gray Granite, Granny Apple Green, Pech Pie, Pretty Peacock, Balmy Blue, 2024-2026 In Color™ Glimmer, Lily Pond Lane DSP, Basic White C6 Envelopes
Inks: Balmy Blue, Granny Apple Green, Pretty Peacock
Embellishments: Adhesive-backed Dappled Dots, Linen Thread
Accesories/Adhesives/Tools: Sponge Dauber, So Swirly 3D TIEF, Blending Brushes,Heartfelt Hexagon Punch, Paper Snips, Bone Folder, Paper Trimmer, Multipurpose Glue, Stampin’ Dimensionals, Stampin’ Cut & Emboss Machine, Take Your Pick Tool, Simply Shammy
* can be purchased together as a bundle to save 10%

Shop with Kate Morgan


Be sure to download a PDF copy of current catalogues from my SU Catalogue Library page.

Don’t forget to Follow My Blog to receive blog updates and all the latest news and specials!

Blog Hop/Instagram Hop, Designer/Patterned/Specialty Papers (DSP), Fancy Folds, feminine, Flowers, Gift Ideas, Handmade Cards, Markers for Colouring, Stampin' Up!

CCBH Cinnamon Cider – Post It Note Holder, matching Card and Envelope

CCS Logo 2021-22

Each week some of the Art With Heart team are joining the Colour Creations Blog Hop to bring you creative inspiration to showcase our range of 50+ gorgeous Stampin’ Up! colours.

Week 11 – Cinnamon Cider

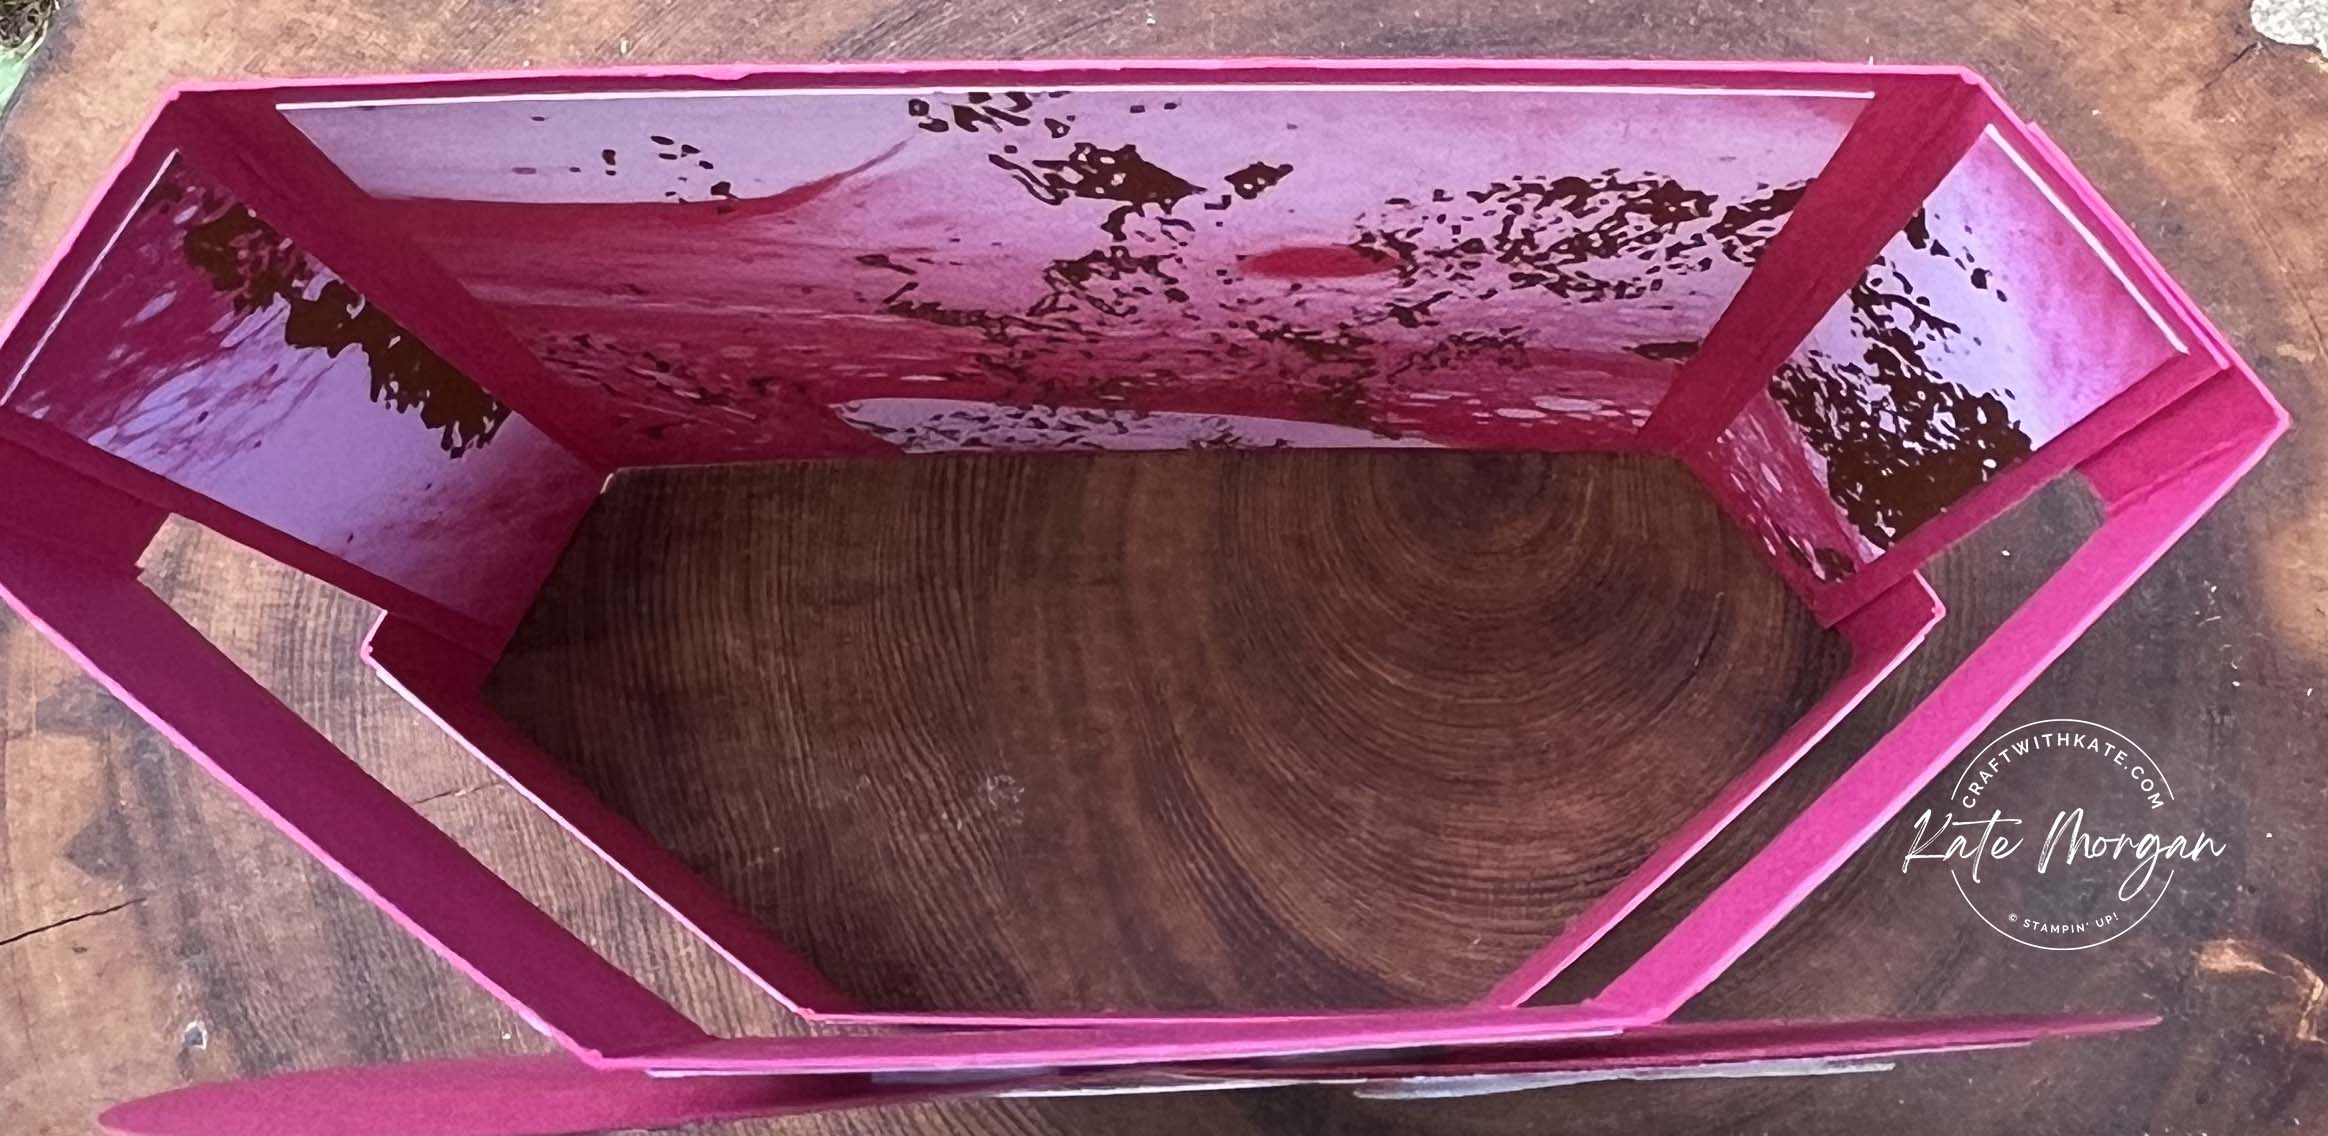
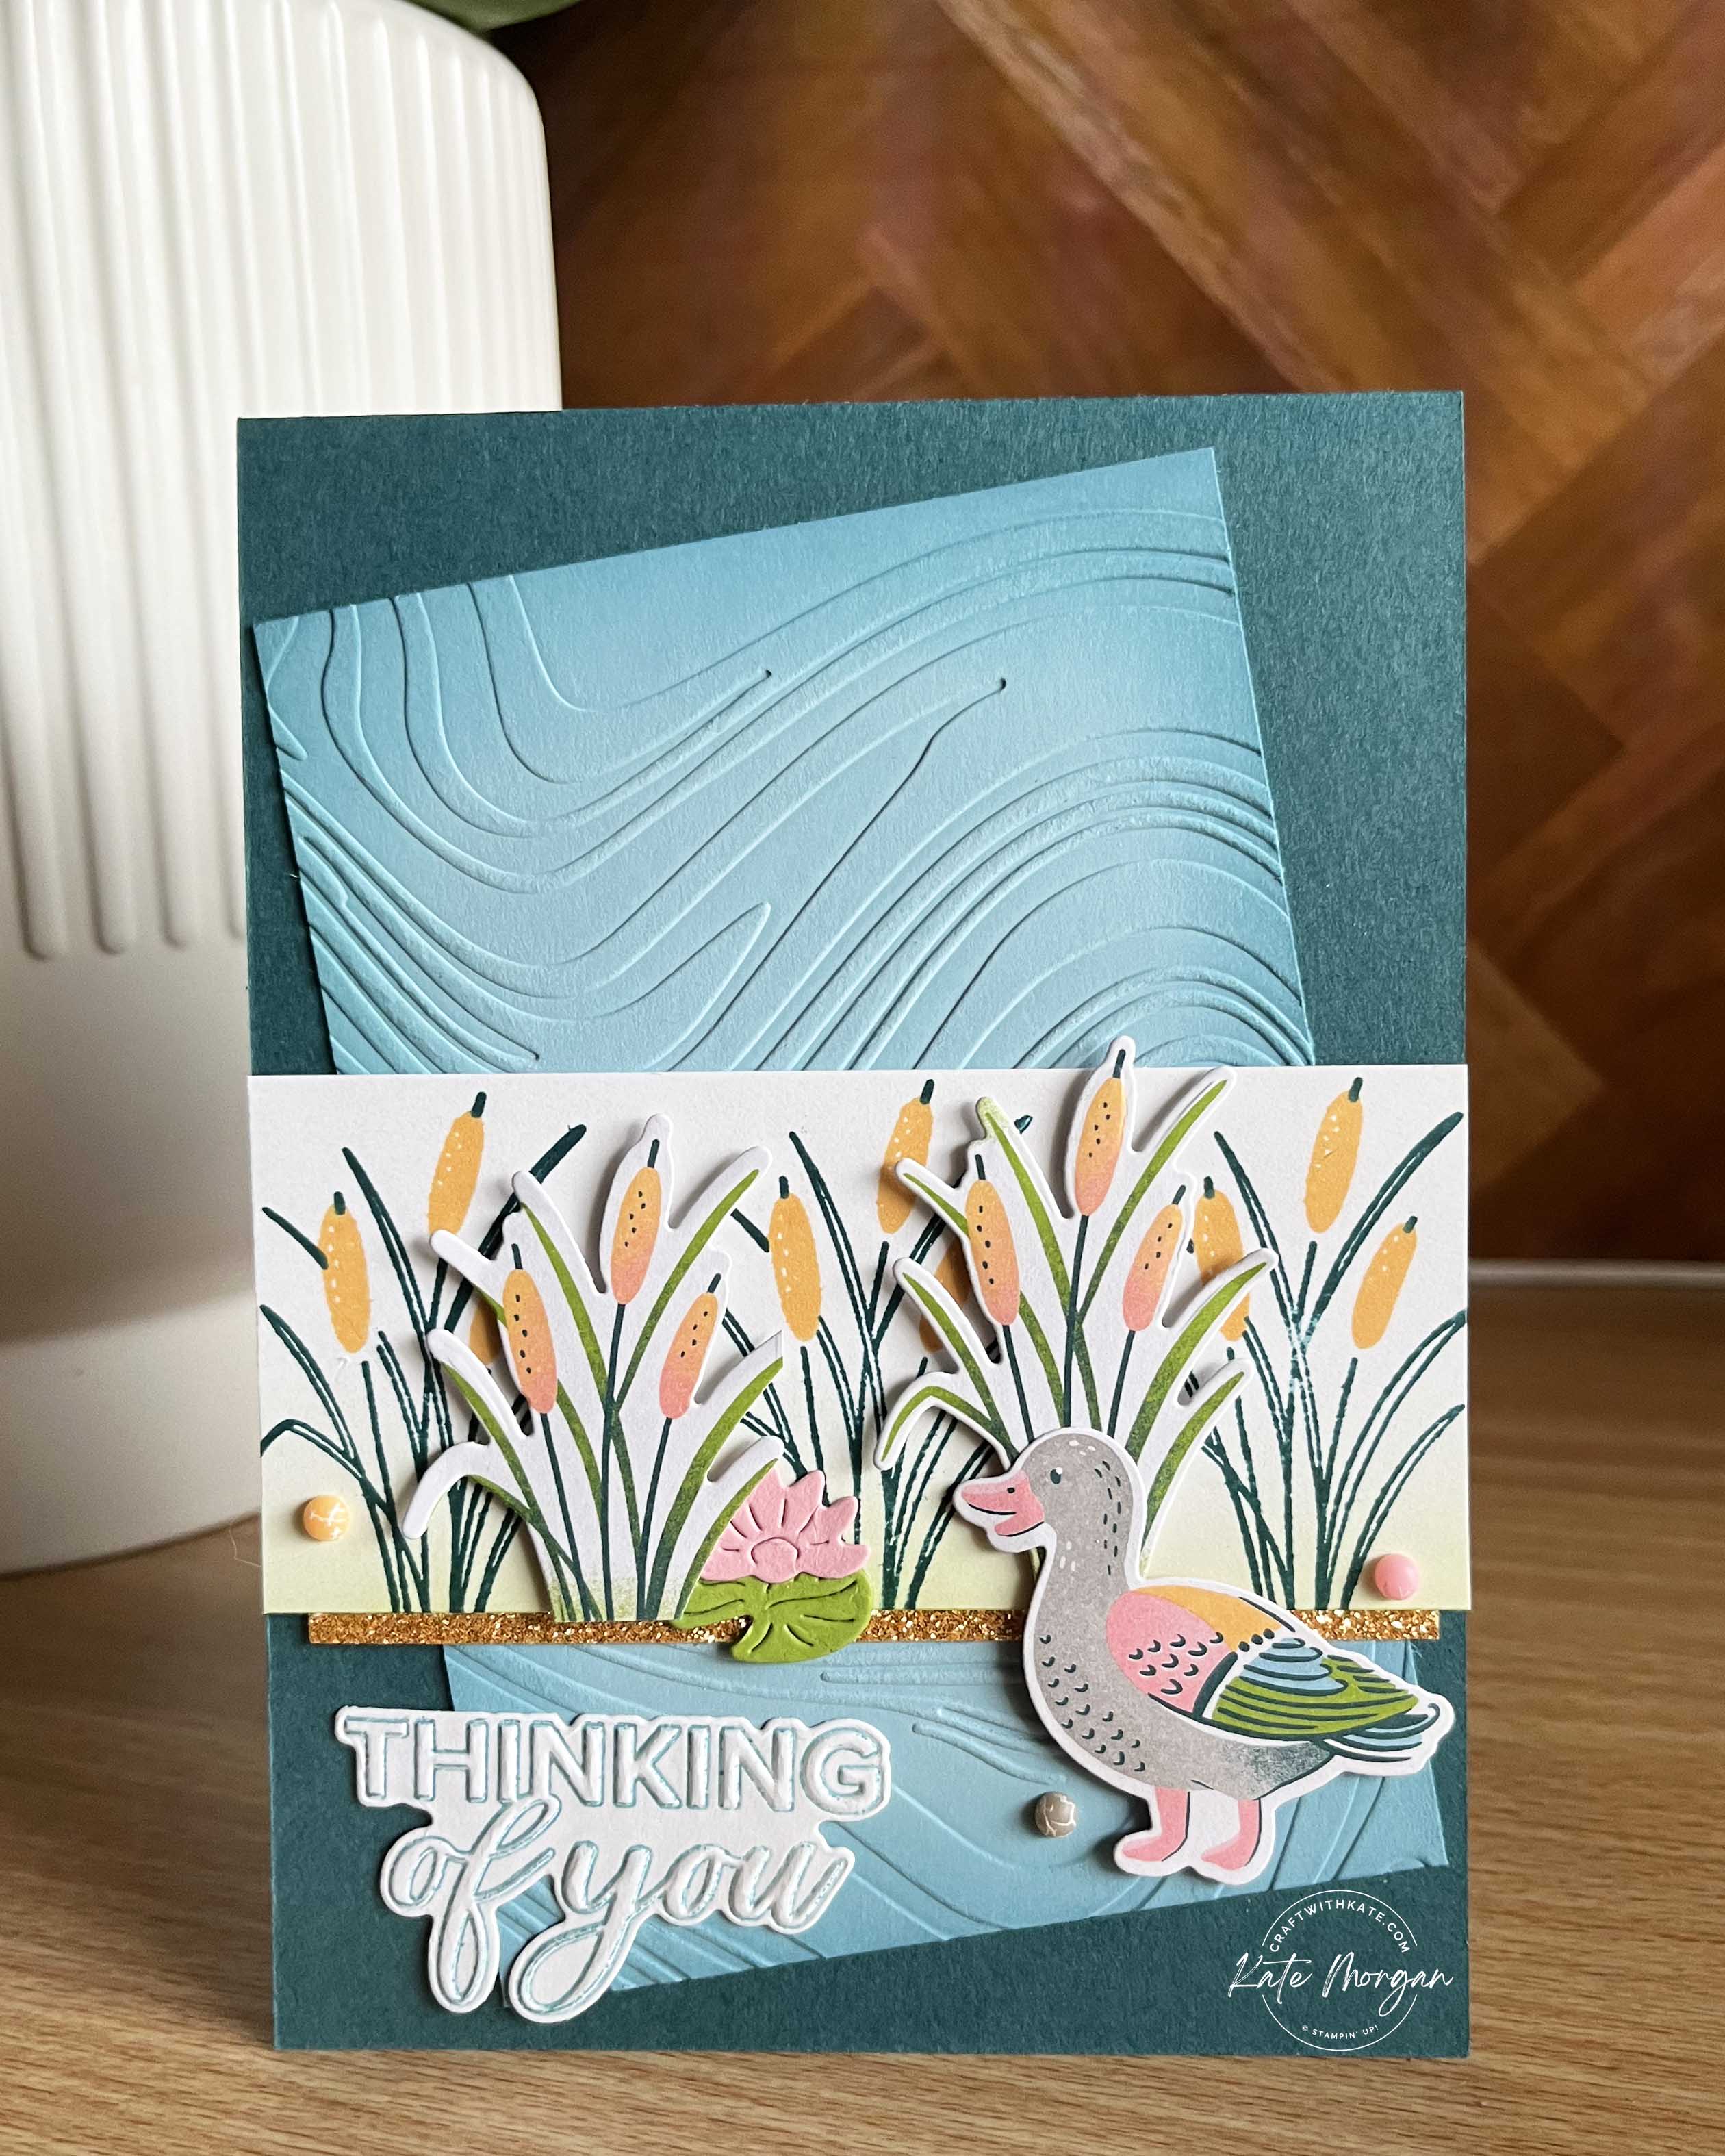
This week I have more Hand-Penned Petals Bundle projects, starting with a Post It Note Holder! These are great little gifts to have on hand to give to family and friends and Cinnamon Cider happens to be one of the colours in the Hand-Penned Designer Series Paper.

Hand-Penned DSP

Post It Note Holder using Hand-Penned Bundle for Cinnamon Cider CCS by Kate Morgan, Stampin Up Australia 2021

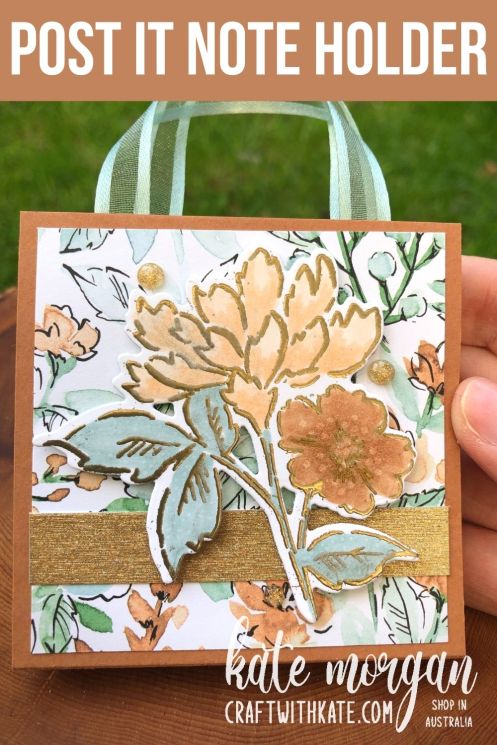
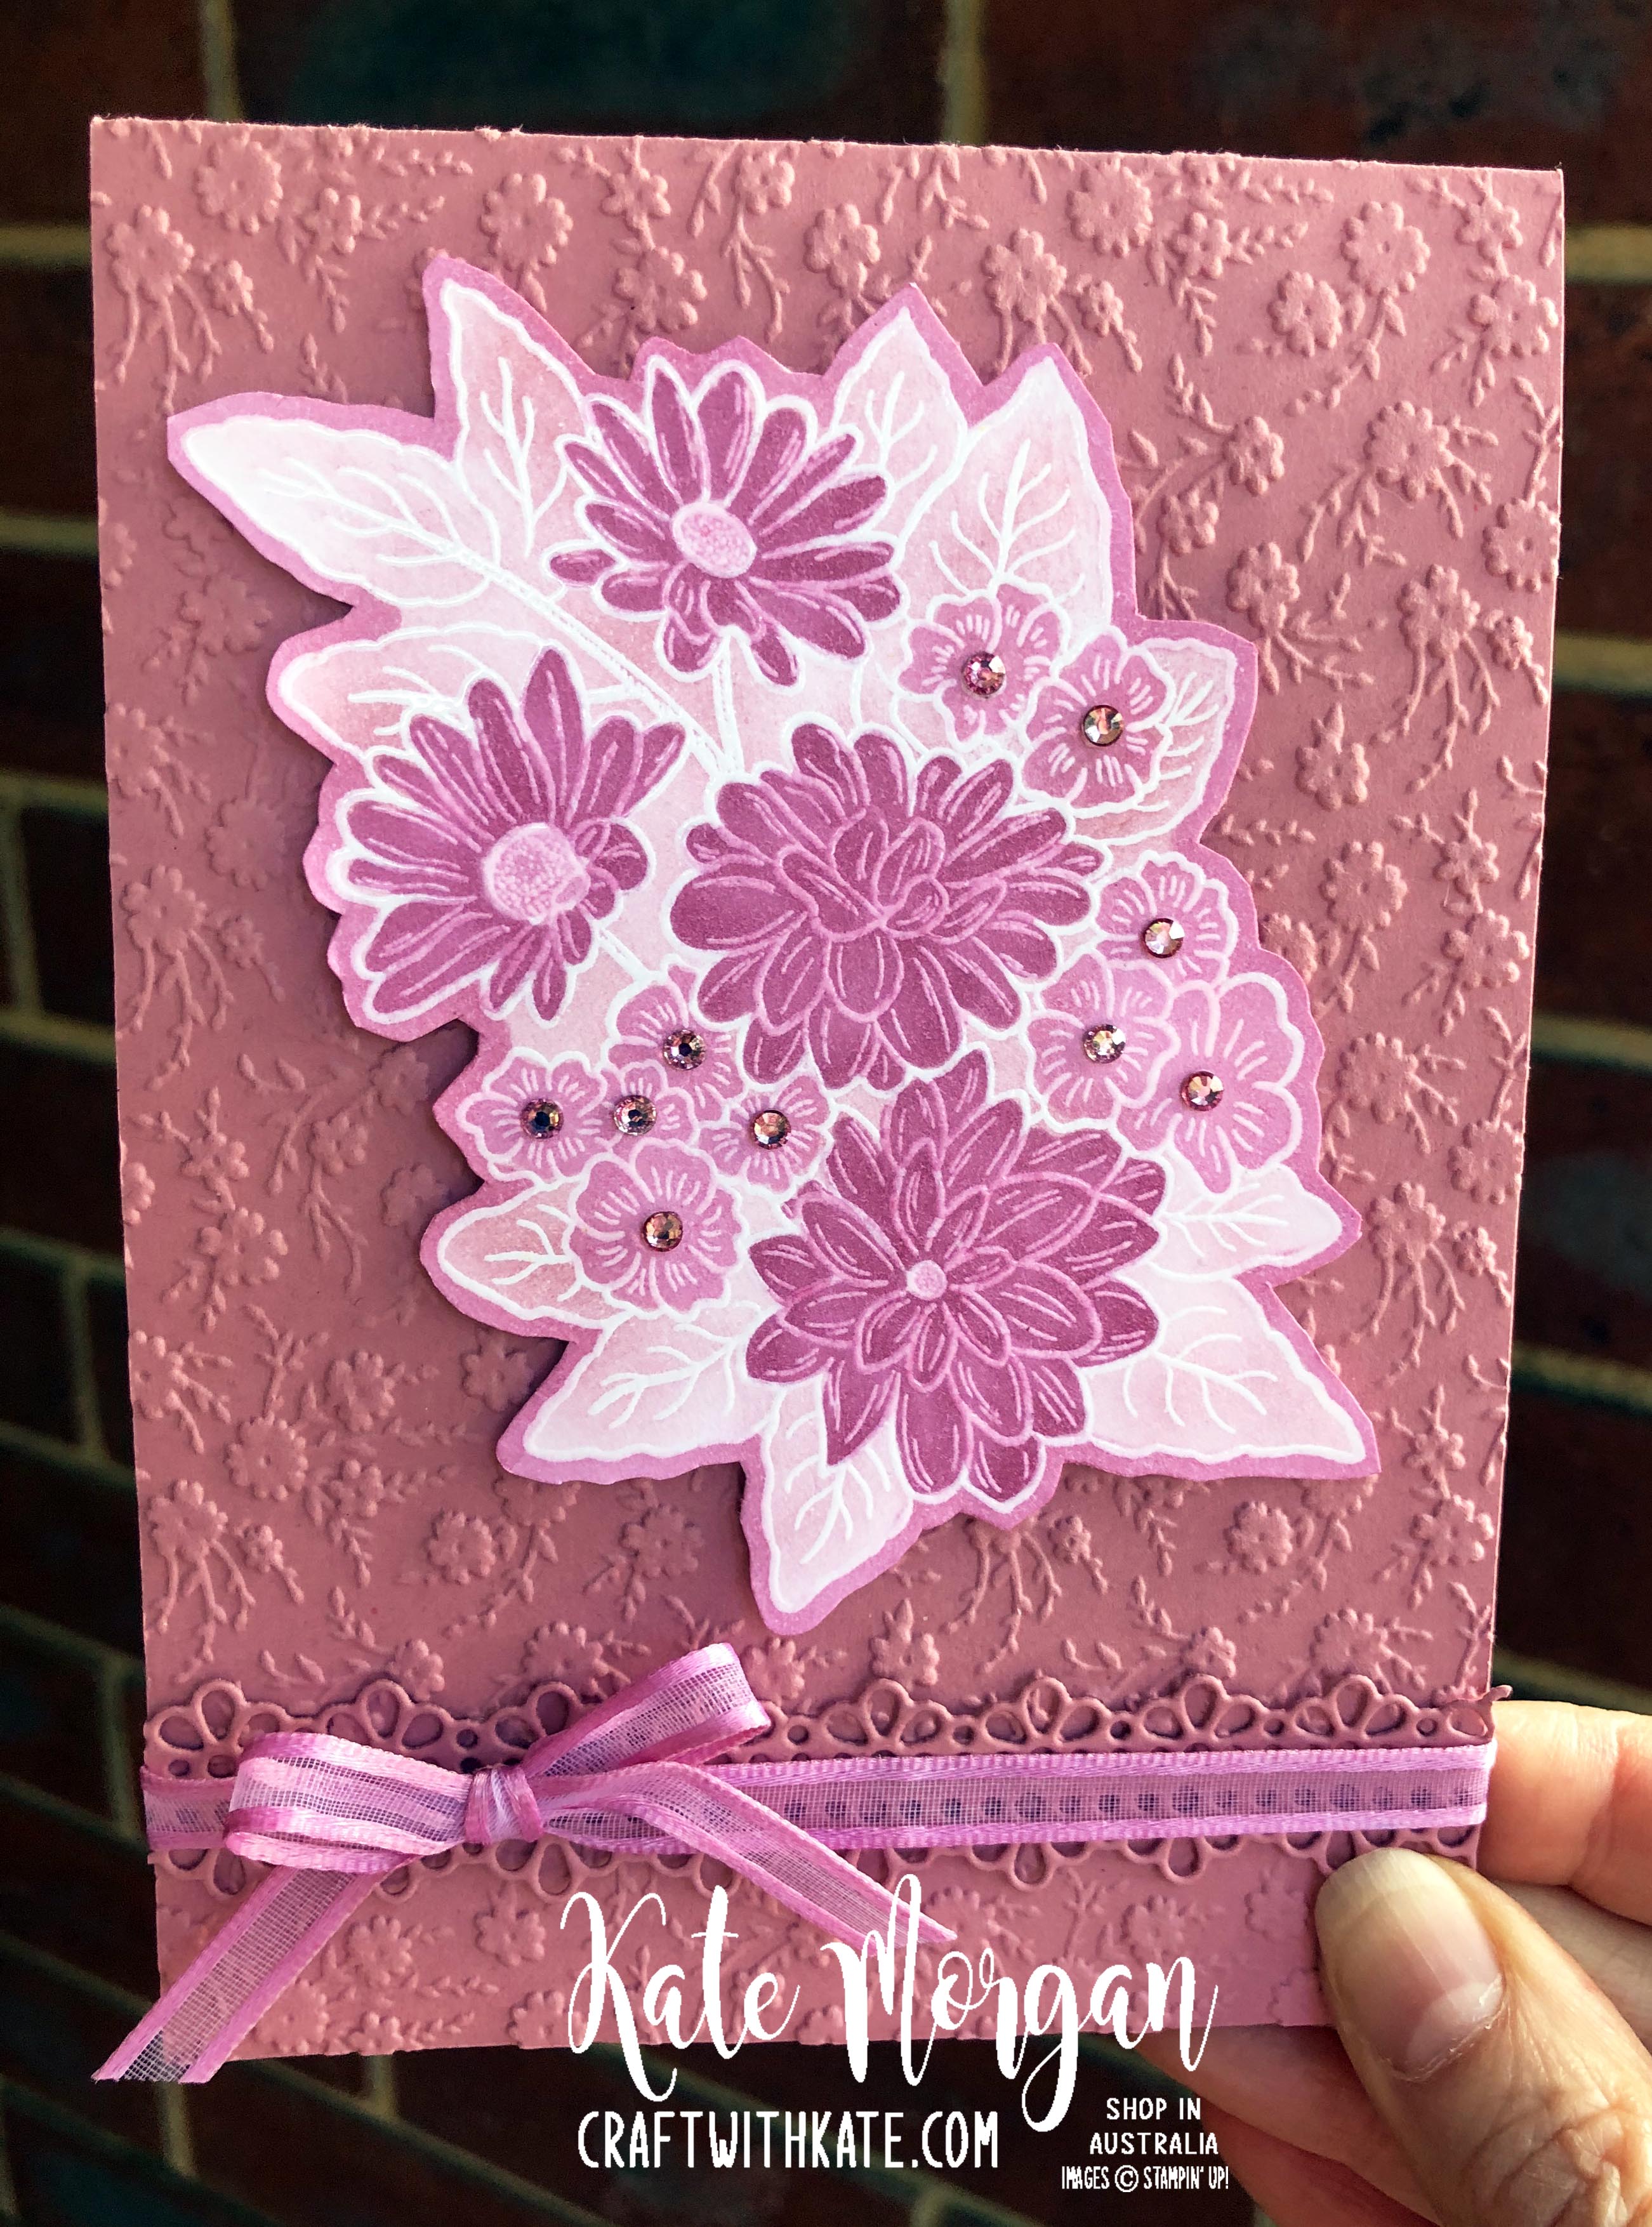
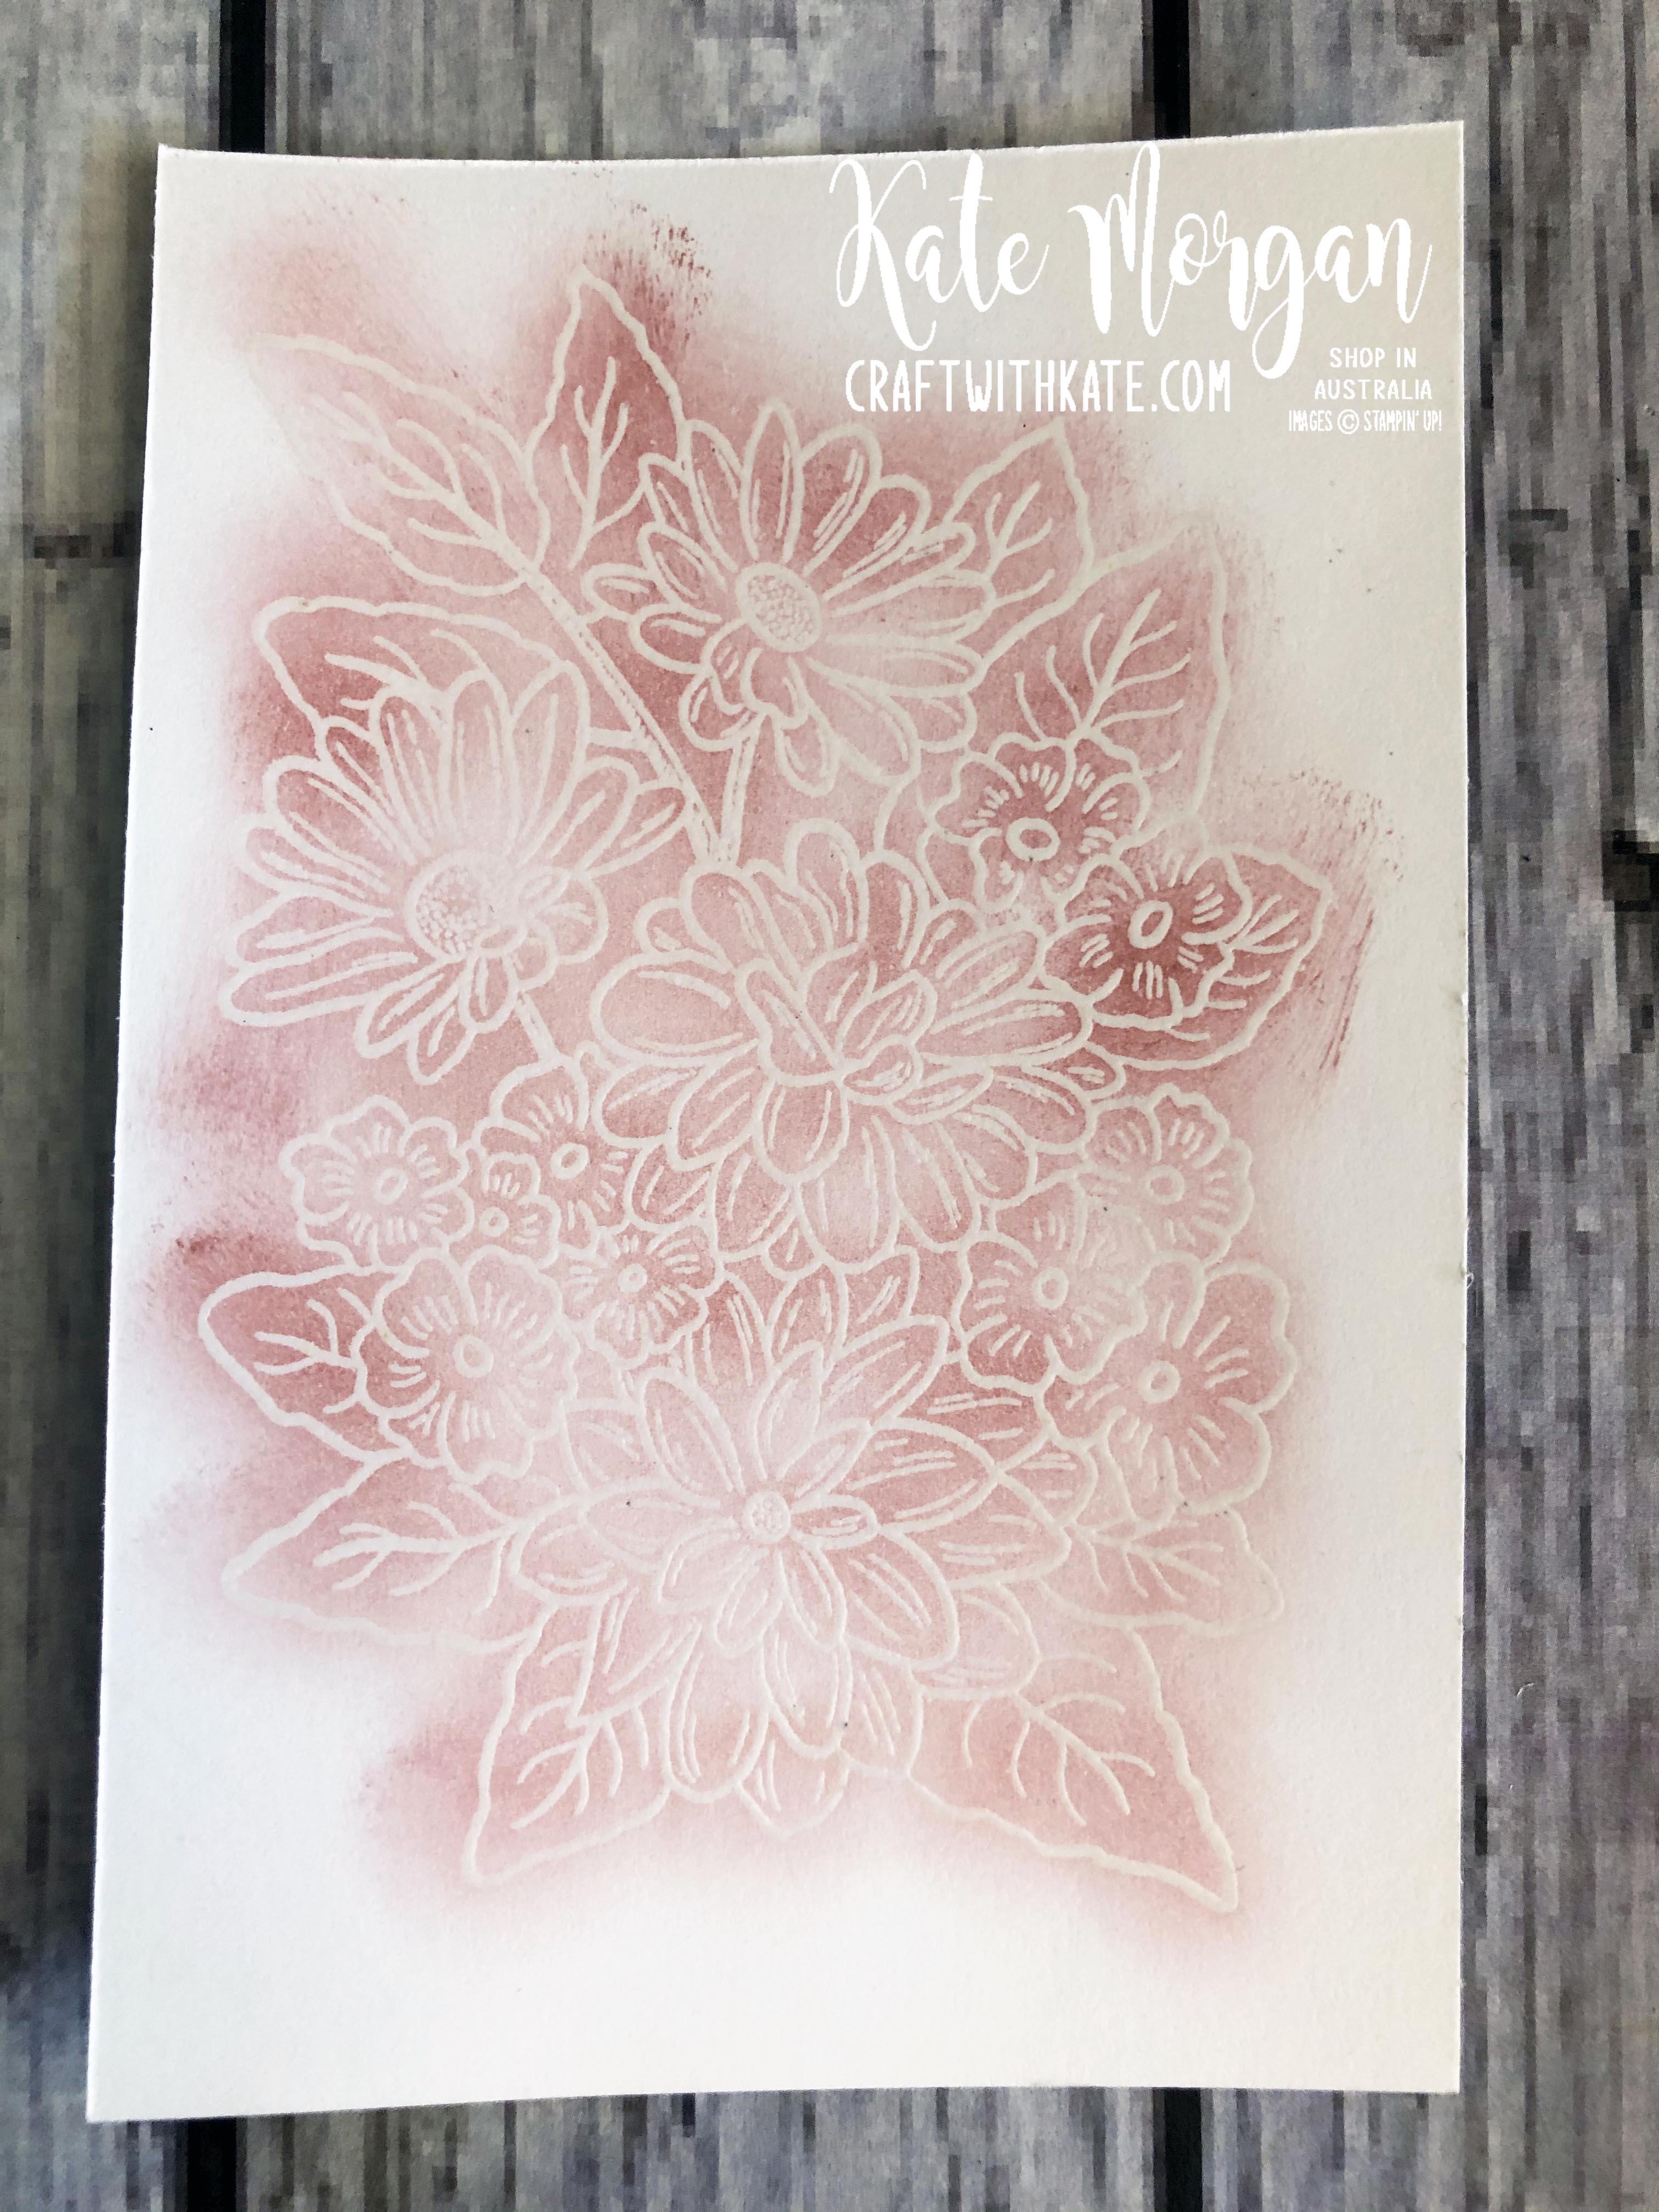
The main image is stamped with Versamark, Gold Emboss Powder added and heat set with a Heat Tool. I coloured it with Stampin’ Blends Combo Markers; Soft Succulent, Pale Papaya & Cinnamon Cider. I also used the Colour Lifter to dot on the Cinnamon Cider bloom to give it a little extra texture. Then I die cut it using the coordinating Penned Flower Dies. Some Genial Gems are added as I always love some gems!

Post It Note Holder using Hand-Penned Bundle for Cinnamon Cider CCS by Kate Morgan, Stampin Up Australia 2021 side

4 pieces of DSP are placed on the front, the back and two on the inside; one under the post it notes and the other you can see below. A strip of Gold Metallic Specialty Paper is added to the front and inside panel.

Post It Note Holder using Hand-Penned Bundle for Cinnamon Cider CCS by Kate Morgan, Stampin Up Australia 2021 open

Basic Instructions
Cardstock – 7″ x 3¼”, score each end at 3¼” & 2 pieces 3¼” x ¾” for reinforcement.
DSP – 3″ x 3″ (4 pieces).
Ribbon – 10″ cut in half for the handles.

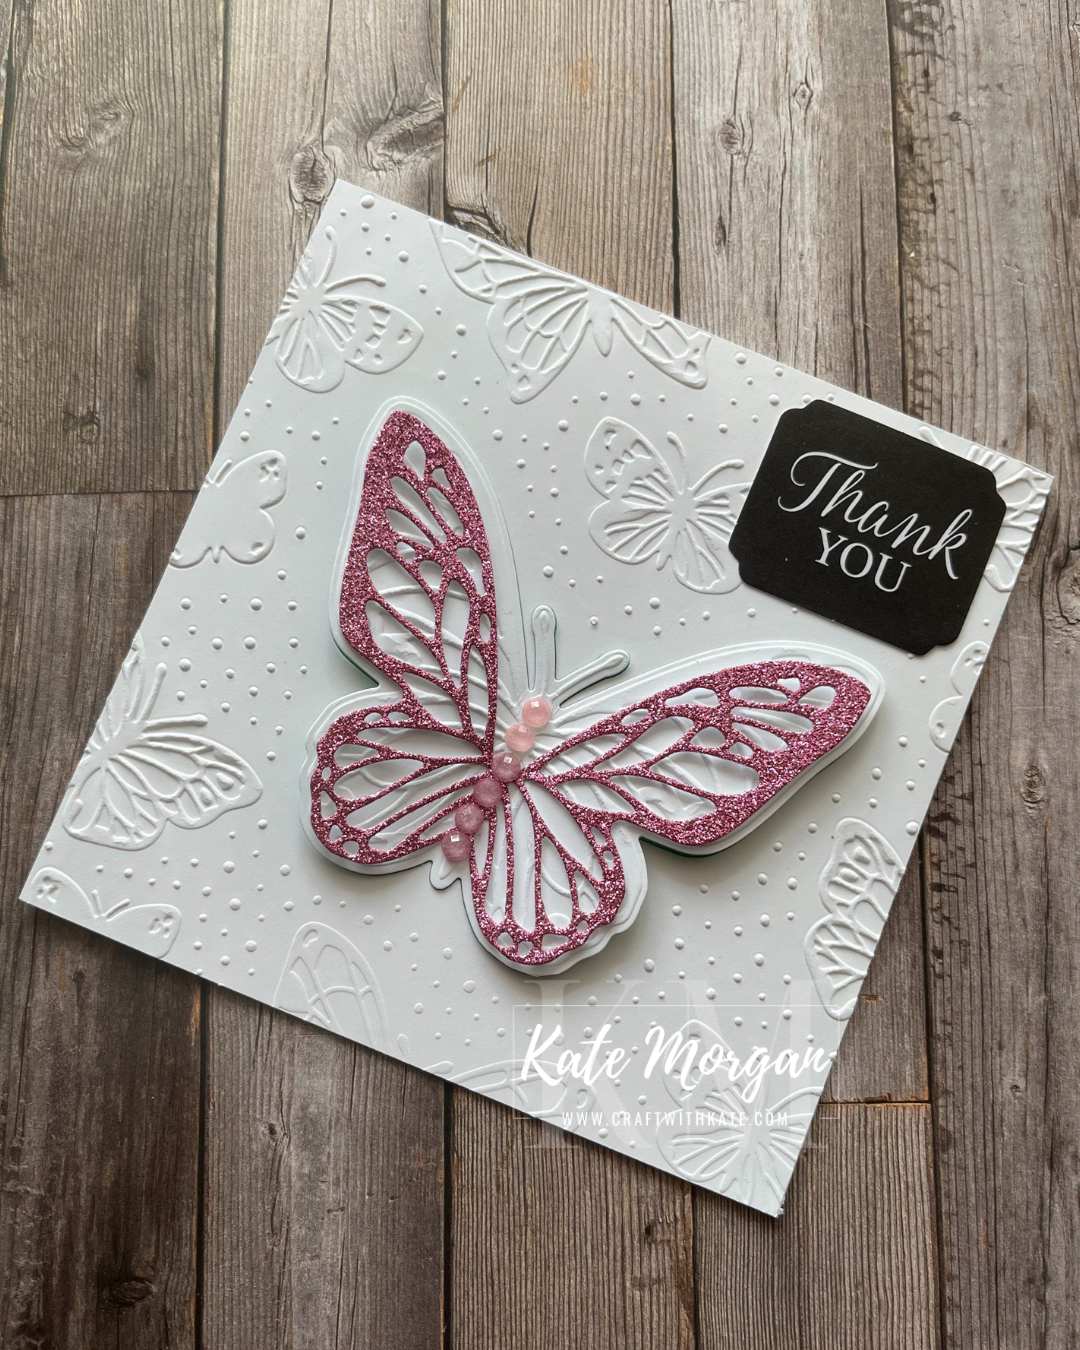
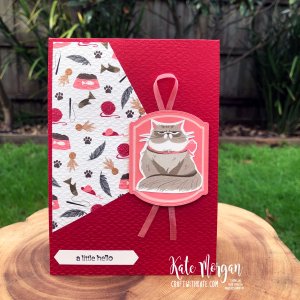
Card & Envelope – I started with a Thick White card base of 28cm x 10.5cm and fold in half at 14cm. The patterned paper layer measures 13.5cm x 10cm and is adhered with Multipurpose Glue.

Hand-Penned Bundle card & envelope for Cinnamon Cider CCS by Kate Morgan, Stampin Up Australia 2021

I die cut the two dies at once with Cinnamon Cider cardstock, as the intricate die fits neatly inside the border one. I also used the border die (usually to die cut the stamped image) with the Gold & Rose Gold 6″ x 6″ Metallic Specialty Paper. I placed some Seal+ on the back and wrapped some Soft Succulent Open Weave Ribbon across. Dimensionals were added and adhered to the cardbase. Glue the Cinnamon Cider border die cut onto the Gold die cut.

Hand-Penned Bundle card & envelope for Cinnamon Cider CCBH by Kate Morgan, Stampin Up Australia 2021

Next I die cut the inticate die in Basic White card and used my Blends markers to colour the leaves and flowers. Glue this inside the border die cut. I also fussy cut some smaller flowers from another sheet of DSP and glued them to the card. I added some Genial Gems to the centres of the fussy cut flowers and on the DSP card base layer.

To finish, I added a strip of DSP inside the card and the Cinnamon Cider intricate die cut.

Hand-Penned Bundle card & envelope for Cinnamon Cider CCBH by Kate Morgan, Stampin Up Australia 2021 inside

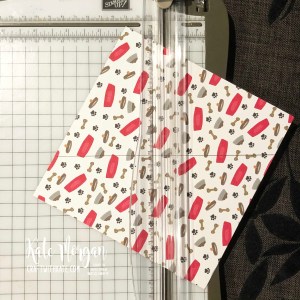
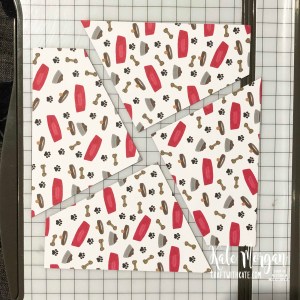
Then I needed to make a coordinating envelope using  single piece of 12″ x 6″ DSP. How cool is it to have coordinating items?!!!

Hand-Penned Bundle matching envelope for Cinnamon Cider CCBH by Kate Morgan, Stampin Up Australia 2021

Thanks for dropping by. All the products used tonight are linked at the end of this post!

Please click on the image below to head across to the next blog on tonight’s hop and see the wonderful inspiration of Ros!

CCS Next Button

If you come across a broken link or have come from a different entry point, a full list of participants can be viewed on Catherine Proctor’s blog.

Shop Now for Items specific to these projects

Shop Online Craft with Kate


Be sure to download a PDF copy of current catalogues from my SU Catalogue Library page.

Don’t forget to Follow My Blog to receive blog updates and join my Newsletter Subscription for all the latest news and specials!

Shop Online Craft with KateWreath - Join my TeamWreath - Newsletter by EmailWreath - Classes

Birthday, Designer/Patterned/Specialty Papers (DSP), Handmade Cards, One Sheet Wonder, Stampin' Up!

Playful Pets 6″ x 6″ one sheet wonder

I have 4 cards for you today that are created from one piece of 6″ x 6″ designer paper (beware of directional designs).

Simply place the designer paper in your trimmer with the top right corner lined up with the 3cm (from the left) and the bottom right corner lined up at the 3cm mark on the right side of the trimmer and cut. Then holding the two pieces of paper together, carefully rotate it and line it up again in the same position and cut (see below).

You should then have 4 pieces like this 

So now that you have your 4 x pieces, you can cut your 4 x card bases in accordance with what orientation best suits. I have done 2  landscape and 2 portrait. I glued the patterned paper to the cards first, then embossed the card fronts with different patterned folders. Next I die cut some of the images from the patterned paper with the coordinating dies and some of the images are stamped and coloured with watercolour pencils and a blender pen.

All the sentiments on these cards are stamped using the Itty Bitty Greetings Stamp Set and cut with the Classic Label Punch.

This black cat is simply punched using the Cat Punch and adhered with dimensionals.

This next one has a die cut Flirty Flamingo piece behind the cat and you can see the white border drawn around it.  This is done by leaving the die on top of the die cut piece and using the White Chalk Marker, trace around the inside of the die twice!

On the inside, I stamped them all the same – using the Stamparatus made this super easy and quick. Once the stamps are setup on the stamparatus all together, ink them all at once and stamp on 4 separate inserts!

A full list of products can be found at the end of this post.


2020 August-December Mini Catalogue ends 4 January 2021

Be sure to download a PDF copy from my SU Catalogue Library page today.


Don’t forget to Follow My Blog to receive blog updates and join my Newsletter Subscription for all the latest news and specials!

Wreath - Happy Stamping Signature
 

Shop Online Craft with KateWreath - Join my TeamWreath - Newsletter by EmailWreath - Classes

Product List

Birthday, Blog Hop/Instagram Hop, feminine, Flowers, Handmade Cards, Markers for Colouring, Mini Catalogue and Sale-a-bration (SAB), Stampin' Up!

Monochrome Creative Showcase

AWHT Creative Showcase

Welcome to the March Creative Showcase with the Art With Heart Team!

This month we are featuring Monochromatic cards, that is cards that only use different shades of the same colour. This is a great opportunity for us to demonstrate the wonderful range of Stampin’ Up! colours across our inks, papers and embellishments that can be combined to produce the amazing monochromatic samples we have to share with you.

Now let’s get started!

My first project is a masculine card predominantly using the Waterfront stamp set and Night of Navy and White. The sentiment is from the Birthday Goodness stamp set.

Waterfront Monochrome card Creative Showcase Stampin Up 2020 by Kate Morgan, Australia

My next card is a sneak peek at some new product coming soon for my feminine Rococo Rose Monochrome card. This is the Ornate Style stamp set, Ornate Border Dies & Ornate Floral 3D Embossing Folder. (All these items will be available in the upcoming Annual catalogue in June, or now if you wish to join and add them to your starter kit).

Monochrome Ornate Style Feminine card Stampin Up 2020 by Kate Morgan, Australia.

Emboss the Rococo Rose card base with the Ornate Floral 3D Embossing Folder. Die cut the border die in the same colour card once, then line it up on the opposite side to achieve the strip of fancy border.

Stamp the floral image in Versamark ink onto whisper white card, added clear emboss powder and heat set it. Then I used a sponge dauber and roughly inked the entire image, before fussy cutting.

Monochrome Ornate Style Feminine card Stampin Up 2020 by Kate Morgan, Australia process

Using the Rococo Rose Light & Dark Stampin’ Blends Markers, colour the image. I also used the Light marker to outline the entire image. I used the dark maker to colour the rhinestones and the Whisper White Ribbon.

Monochrome Ornate Style Feminine card Stampin Up 2020 by Kate Morgan, Australia s

On the inside, I used the Ornate Border die to create that floral die cut down the right side. The rhinestones are the perfect size to sit in the centre of the flower. The sentiment is stamped using the Family Party Stamp set.

Monochrome Ornate Style Feminine card Stampin Up 2020 by Kate Morgan, Australia inside

A list of products can be found at the end of this post.

The next contributor to showcase their creativity with you is the very talented, Sharon Davern.

AWHT Creative Showcase next button

If you find a broken link or have come to this showcase midway, you can view the participants below:

  1. Rebecca Jacovou
  2. Tina Gillespie
  3. Kate Morgan
  4. Sharon Davern
  5. Vicki Boucher
  6. Catherine Proctor
  7. Rachel Woollard
  8. Andrea Sargent
  9. Caroline Manwaring
  10. Claire Daly
  11. Michele Taylor

Reminder about Sale-a-bration finishing on 31 March. Contact any of the team members for more information.

Saleabration 2020

Happy crafting!

Blog Signature

Product List (Card 1)

Product List (Card 2)

Blog Hop/Instagram Hop, feminine, Flowers, Handmade Cards, Memory Keeping/Project Life/Scrapbooking, Stampin' Up!, Techniques & Tutorials

Art With Heart Team Blog Hop: Annual Catalogue Sneak Peeks

art-with-heart-team-blog-hop-logo-currentDear Crafters,

Tonight I am participating in a blog hop along with the super talented ladies in the Art With Heart Team. We thought it  would be fun to share some fabulous ideas to inspire you from our brand new 2017-2018 annual catalogue, which is available 1st June.

Be sure to request your copy of the catalogue today!

Blog Hops are full circles, so you can start hopping here and then at the end of each post is a link to the next one. There is also a list of participants at the end in case of any broken links.

Now let’s get started!

For my projects, I have used the Colorful Seasons suite, Colorful Seasons stamp set and Seasonal Layers thinlits dies (page 147 of new annual catalogue). I love how this bundle has so many items to be able to create a project for any season. There are 24 stamps in this stamp set; sentiments, flowers, leaves, branches, snowflakes and more!

Autumn – I have used Daffodil Delight, Pumpkin Pie, Tangerine Tango and Chocolate Chip. The material of the sun chair was stamped using the kissing technique with the wavy stamp from the set, Work of Art! I stamped the sentiment in Daffodil Delight, but it needed something, so I also stamped in Pumpkin Pie, but slightly offsetting it for a shadow effect.

Autumn - Colourful Season & Seasonal Layers Thinlits by Kate Morgan, Independent Stampin Up demonstrator, Australia

Spring – I have used Powder Pink, Sweet Sugarplum, Chocolate Chip and Whisper White. The blossoms were stamped with Powder Pink and Sweet Sugarplum inks and die cut. The second one is a stamped off version of Sweet Sugarplum! I just love this colour combination and I could certainly see myself sitting on this chair enjoying a drink under the cherry blossoms 🙂

Spring - Colourful Season & Seasonal Layers Thinlits by Kate Morgan, Independent Stampin Up demonstrator, Australia

Winter – I have used Dapper Denim, Soft Sky and Whisper White with some Silver Glimmer of course! The snowflakes are stamped in Dapper Denim and stamped off a 2nd and 3rd time to get the gradient in the colour. I have also used some of the new Glitter Enamel Dots; how stunning are they?!!!!

Don’t forget to email me at craftwithkate@live.com.au to request your copy of any Catalogue or to ask about joining the Art With Heart team.

Now it’s time to follow the blog hop to our next participant, Andrea Roberts.

art-with-heart-team-next-blog-hop-current

If you find a broken link or have come to this blog hop from a different entry point, you can view the participants below:

1. Tina Gillespie
2. Ros Davidson
3. Kathryn Mangelsdorf
4. Kate Morgan
5. Andrea Roberts
6. Rachel Palmieri
7. Alisha Watson
8. Kimberly Hern
9. Monika O’Neill
10. Claire Daly
11. Sharon Davern
12. Rachel Woollard
13. Caroline Manwaring
14. Judy May
15. Catherine Proctor
16. Rebecca Jacovou

Happy Hopping!

Blog Signature