Birthday, Blog Hop/Instagram Hop, Designer/Patterned/Specialty Papers (DSP), Fancy Folds, Handmade Cards, Masculine, Stampin' Up!, Techniques & Tutorials

Cajun Craze: Masculine Fun Fold card for Dad!

Welcome to the Art with Heart team Instagram hop. You can follow us on Instagram starting  @craftwithkate. Each week we will showcase the Stampin’ Up! colours in alphabetical order.

Week 13 – Cajun Craze

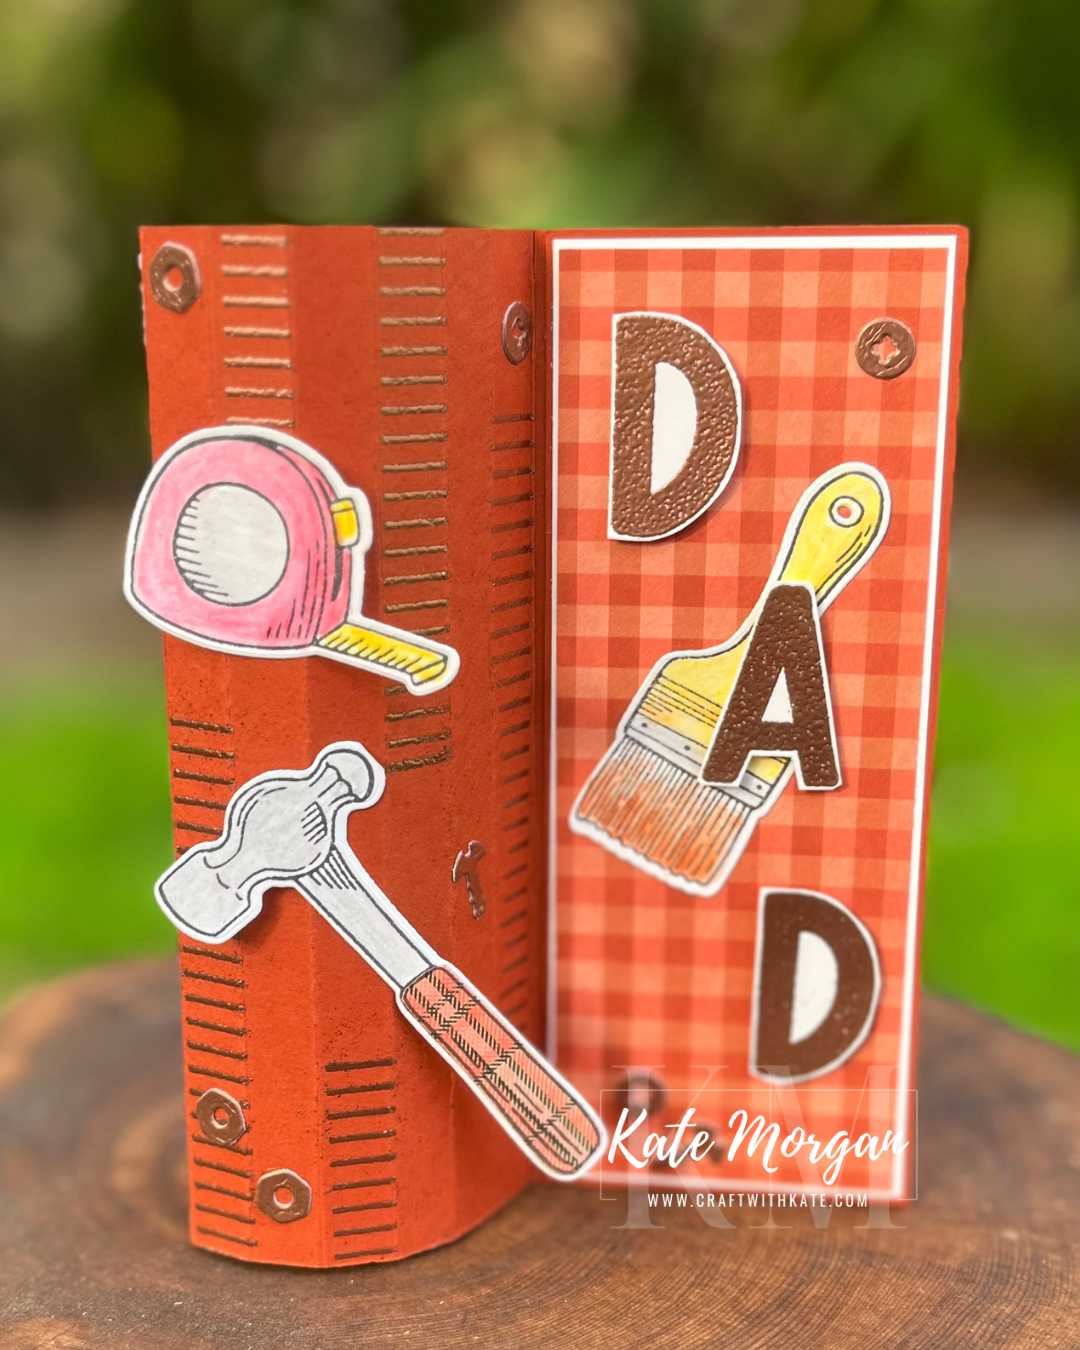
This handmade card features the Trusty Tools stamp set and coordinating dies for a fun masculine card for, you guessed it, my DAD!

The panel on the left acts like a roller door to lock in under that right panel to display standing up. The Timeless Plaid Designer Series Paper (DSP) was perfect for this masculine card.
Here you can see the details I’ve used on each of the narrow panels. I masked off each panel and stamped the lines using the Stripes and Dots stamp set in Versamark ink, added Copper WOW Emboss Powder and melted it with my heat tool. The nuts & bolts were also copper embossed. To do this, I dragged the Versamark ink pad across some Basic White card, added Emboss Powder and melted it, then I could die cut as many nuts & bolts that I needed. Try die cutting first then embossing each one individually and not burning your fingers!!!

This is what it looks like when the card is closed (flat) to put into an envelope.
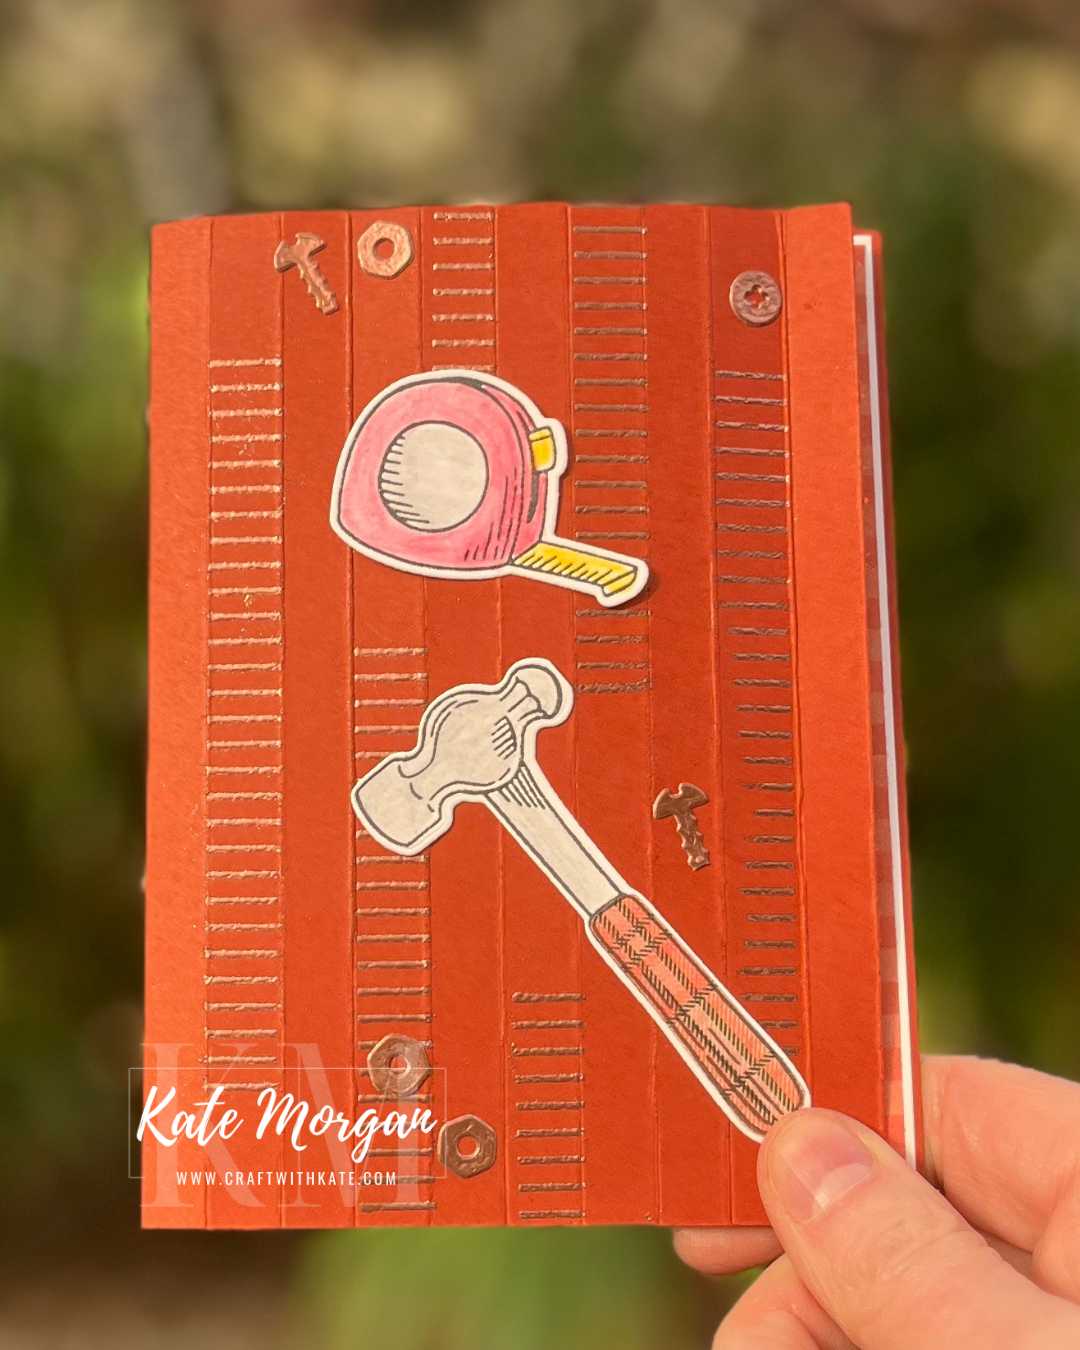
The hammer, paint brush and measuring tape were stamped and coloured using Watercolor Pencils and a Blender Pen to smooth out the colour. The handle of the hammer was stamped directly onto some more DSP and fussy cut to adhere, doesn’t it look cool? This is called paper piecing!

The DAD was copper embossed and fussy cut and added on dimensionals. This entire panel has dimensionals behind it, so the roller door can sit behine to display.

Thanks for dropping by. I hope you join me next Wednesday for Calypso Coral inspiration.

Product List @stampinupofficial
Stamps:
Stripes and Dots, Trusty Tools
Dies: Trusty Tools
Ink: Memento Black, Versamark
Paper: Basic White, Cajun Craze, Basic White C6 Envelopes
Other: Copper WOW Emboss Powder, Watercolor Pencils, Blender Pens, Acrylic Blocks, Paper Snips, Bone Folder, Paper Trimmer, Multipurpose Glue, Mini Stampin’ Dimensionals, Glue Dots, Tear & Tape, Stampin’ Cut & Emboss Machine, Take Your Pick Tool, Simply Shammy, Heat Tool.
*can be purchased together as a bundle to save 10%

Shop with Kate Morgan


Be sure to download a PDF copy of current catalogues from my SU Catalogue Library page.

Don’t forget to Follow My Blog to receive blog updates and all the latest news and specials!

Birthday, Blog Hop/Instagram Hop, Butterflies, Designer/Patterned/Specialty Papers (DSP), Fancy Folds, feminine, Handmade Cards, Stampin' Up!, Techniques & Tutorials

Blackberry Bliss: Beautiful Butterflies Z Fold card with easy step-by-step measurements

Welcome to the Colour Creations Instahop. You can follow us on Instagram starting  @craftwithkate. Each week we will showcase the Stampin’ Up! colours in alphabetical order.

Week 10 – Blackberry Bliss

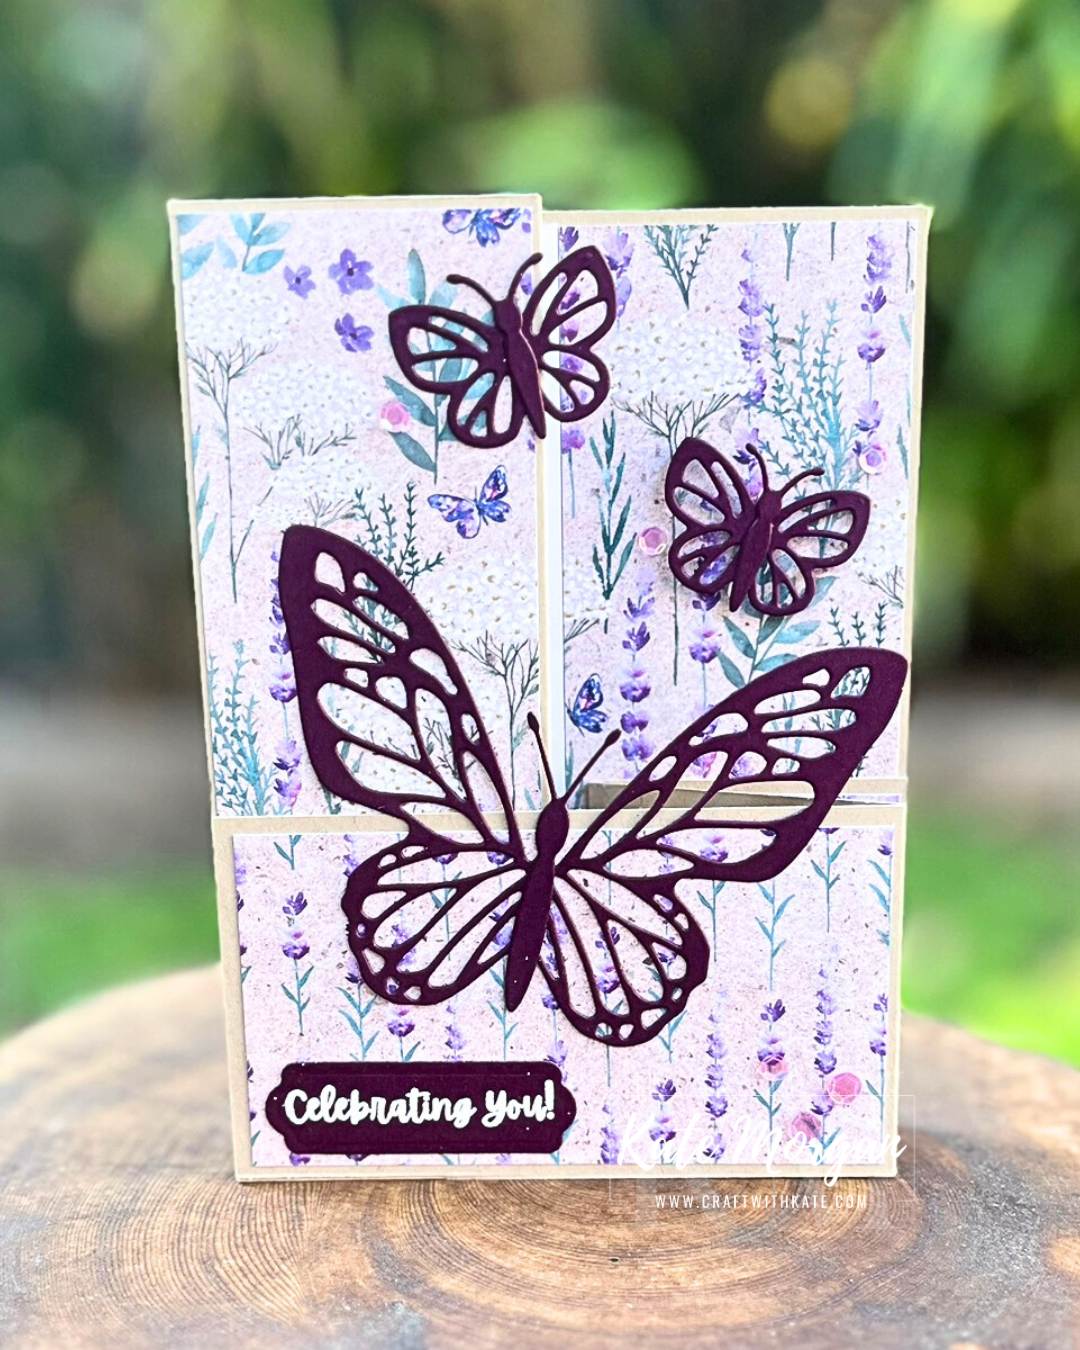
This handmade Z Fold card features the Beautiful Butterflies dies and the Perennial Lavender Designer Series Paper (DSP) and it fits into our C6 envelope.

on the inside

How did I make this?

1. Crumb Cake cardstock 21cm x 21cm, score at 5.25cm & 10.5cm.
2. Fold in half then back on itself to create a Z Fold.
3. Open it out flat, place in the trimmer with scorelines horizontal, and cut at 15cm.
4. Take the smaller section and flip it to create the bottom panel. Before adhering it, add the DSP to each end of the card front and some Basic White on the inside panel to write a message.
5. Add DSP to each end of the panel and a small square if Blackberry Bliss card with a stamped and heat embossed sentiment.
6. Die cut butterflies and adhere to the card, along with another sentiment on the front.

Thanks for dropping by. I hope you join me next Wednesday for Blueberry Bushel inspiration.

Product List @stampinupofficial 
Stamps:
Coneflower Celebrations
Dies: Beautiful Butterflies
Ink: Versamark
Paper: Basic White, Blackberry Bliss, Crumb Cake, Perennial Lavender DSP, Basic White C6 Envelopes
Other: White WOW Emboss Powder, Purple Adhesive-backed Sequins, Acrylic Blocks, Paper Snips, Bone Folder, Paper Trimmer, Multipurpose Glue, Mini Stampin’ Dimensionals, Glue Dots, Tear & Tape, Stampin’ Cut & Emboss Machine, Take Your Pick Tool, Simply Shammy, Heat Tool.
*can be purchased together as a bundle to save 10%

Shop with Kate Morgan


Be sure to download a PDF copy of current catalogues from my SU Catalogue Library page.

Don’t forget to Follow My Blog to receive blog updates and all the latest news and specials!
Designer/Patterned/Specialty Papers (DSP), Easter, Fancy Folds, Handmade Cards, Stampin' Up!, Sympathy, Techniques & Tutorials

Super Simple Cross Card with Free Tutorial

This  super simple Cross card features the beautiful Floral Delight Designer Series Paper (DSP) and my new favourite In Color™, Secret Sea. It just goes with everything and is my new ‘black’!

This is a standard A5 side opening card, but has the cross feature on the front that folds flat to go into a C6 envelope. This could be used for a Sympathy card or an Easter card.

On the inside

Click here for my Written Tutorial.

Thanks for dropping by.

Product List
Stamps:
Simply Said
Dies: Impressions Abloom
Ink: Secret Sea
Paper: Basic White, Secret Sea, Pecan Pie, Peach Pie, Floral Delight DSP, Basic White C6 Envelopes
Other: Acrylic Blocks, Paper Snips, Bone Folder, Paper Trimmer, Multipurpose Glue, Mini Stampin’ Dimensionals, Stampin’ Cut & Emboss Machine, Take Your Pick Tool, Simply Shammy. @stampinupofficial
*can be purchased together as a bundle to save 10%

Shop with Kate Morgan


Be sure to download a PDF copy of current catalogues from my SU Catalogue Library page.

Don’t forget to Follow My Blog to receive blog updates and all the latest news and specials!

Birthday, Blog Hop/Instagram Hop, Designer/Patterned/Specialty Papers (DSP), Fancy Folds, feminine, Handmade Cards, Stampin' Up!, Techniques & Tutorials

Secret Sea: Pop Up Floating Shadow Box card

Welcome to the Colour Creations Instahop. You can follow us on Instagram starting  @craftwithkate. Each week we will showcase the Stampin’ Up! colours. For the first 5 weeks we showcase the new 2025-2027 In Colors and then continue with all the remaining colours in alphabetical order.

Have you browsed the new 2025-2026 Annual Catalogue yet and created your shopping list?

Week 3 – Secret Sea

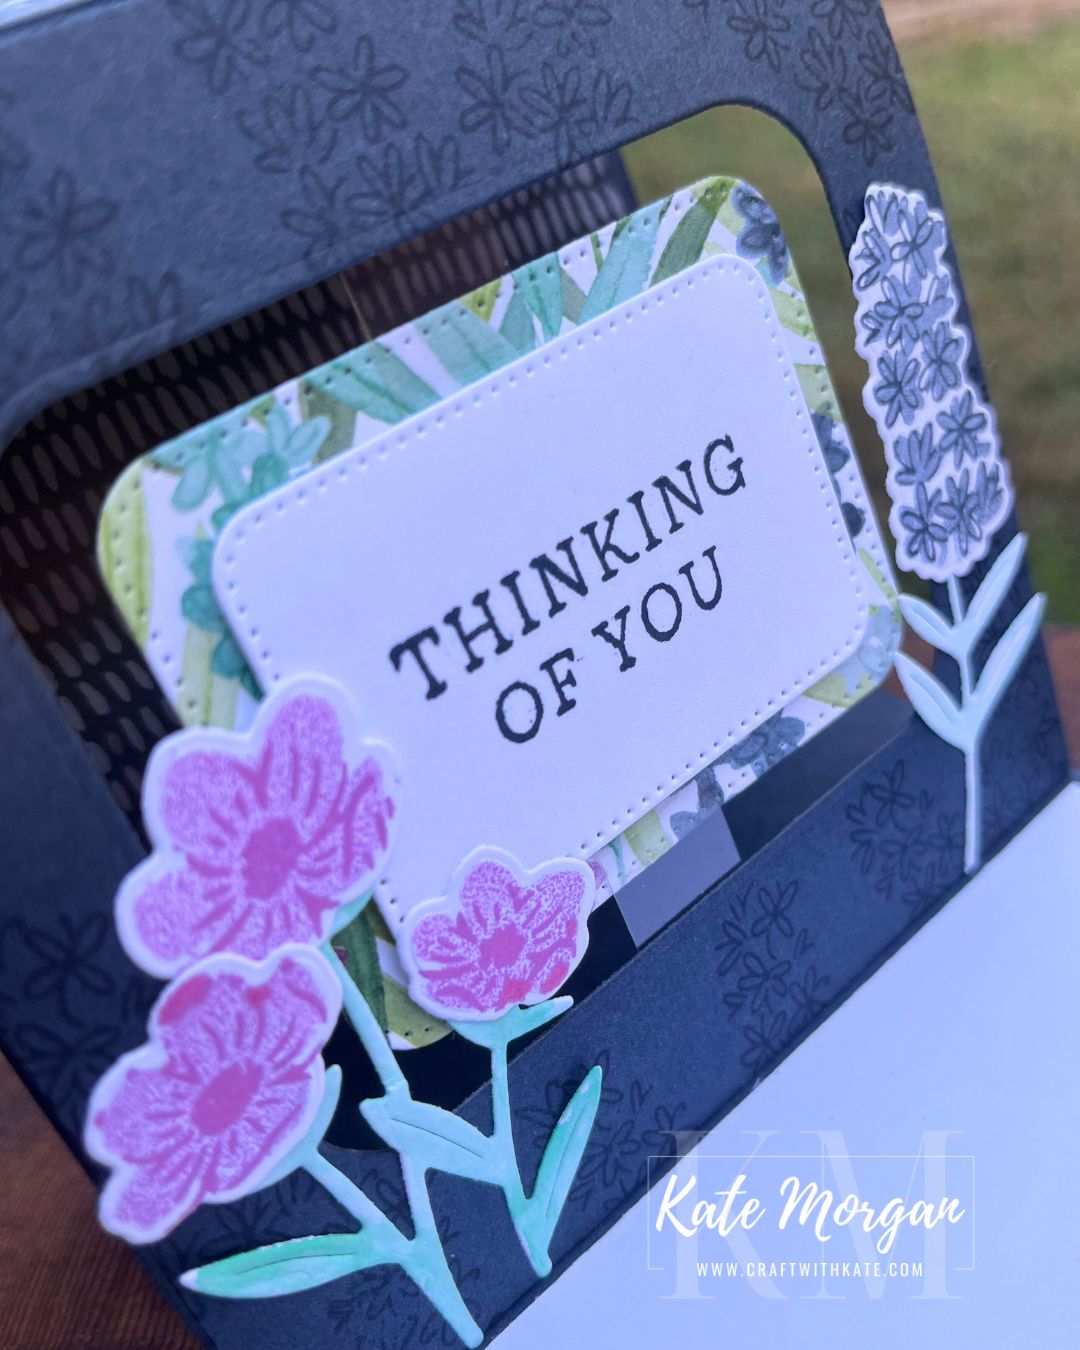
I have to say, I am in love this new colour – such a gorgeous rich deep blue and it is even stunning stamped off for a lighter shade. Anyway, I get side-tracked, this handmade card features @stampinupofficial products; Pretty Florals Bundle and the Florals in Bloom Designer Series Paper (DSP).

This patterned paper is so beautiful, I didn’t know which piece to use first, but I selected this one as it has my favourite colours. The flowerrs are stamped in Secret Sea, Petunia Pop (both 1st & 2nd generation) and the stems are watercoloured with Shy Shamrock to get the lighter shade.

But here’s the wow when you open the card!

Here’s the side view where you can really see why it gets its name. I decided to use a more muted pattern paper on the inside to let the feature of this card shine. I stamped the floral image overr the pop up panel in Secret Sea to add more of a soft design element.

That window is die cut using the Nested Essentials dies, as are the layering elements. A strip of Window Sheet holds the sentiment layers in place. More of the same flowers are added here.

Both of the sentiments are from the Simply Said stamp set. Those gorgeous Flat Pearls finish it off nicely with the little Gingham Ribbon bow.

Lisa Curcio has a YouTube Tutorial for this but I have converted it to suit metric measurements.

What you need
Front:
Secret Sea (card base): 28cm x 10.5cm
DSP: 10cm x 13cm, cut 3.5cm off the bottom for lower section

Inside:
Basic White: 10cm x 9.5cm
DSP (back): 10cm x 9.5cm
DSP (strip): 10cm x 1.5cm

Pop Up Panel:
Secret Sea: 18cm x 10.5cm
DSP: 7cm x 5.5cm to fit inside the Nested Essentials dies
Basic White: 6cm x 4.5cm to fit inside the Nested Essentials dies
Window Sheet: 10cm x 1.5cm

Thanks for dropping by. I hope you join me next Wednesday for Strawberry Slush inspiration.

Shop with Kate Morgan


Be sure to download a PDF copy of current catalogues from my SU Catalogue Library page.

Don’t forget to Follow My Blog to receive blog updates and all the latest news and specials!

Blog Hop/Instagram Hop, Butterflies, Designer/Patterned/Specialty Papers (DSP), Handmade Cards, Stampin' Up!, Techniques & Tutorials, Thank you

Beautiful Butterflies square card

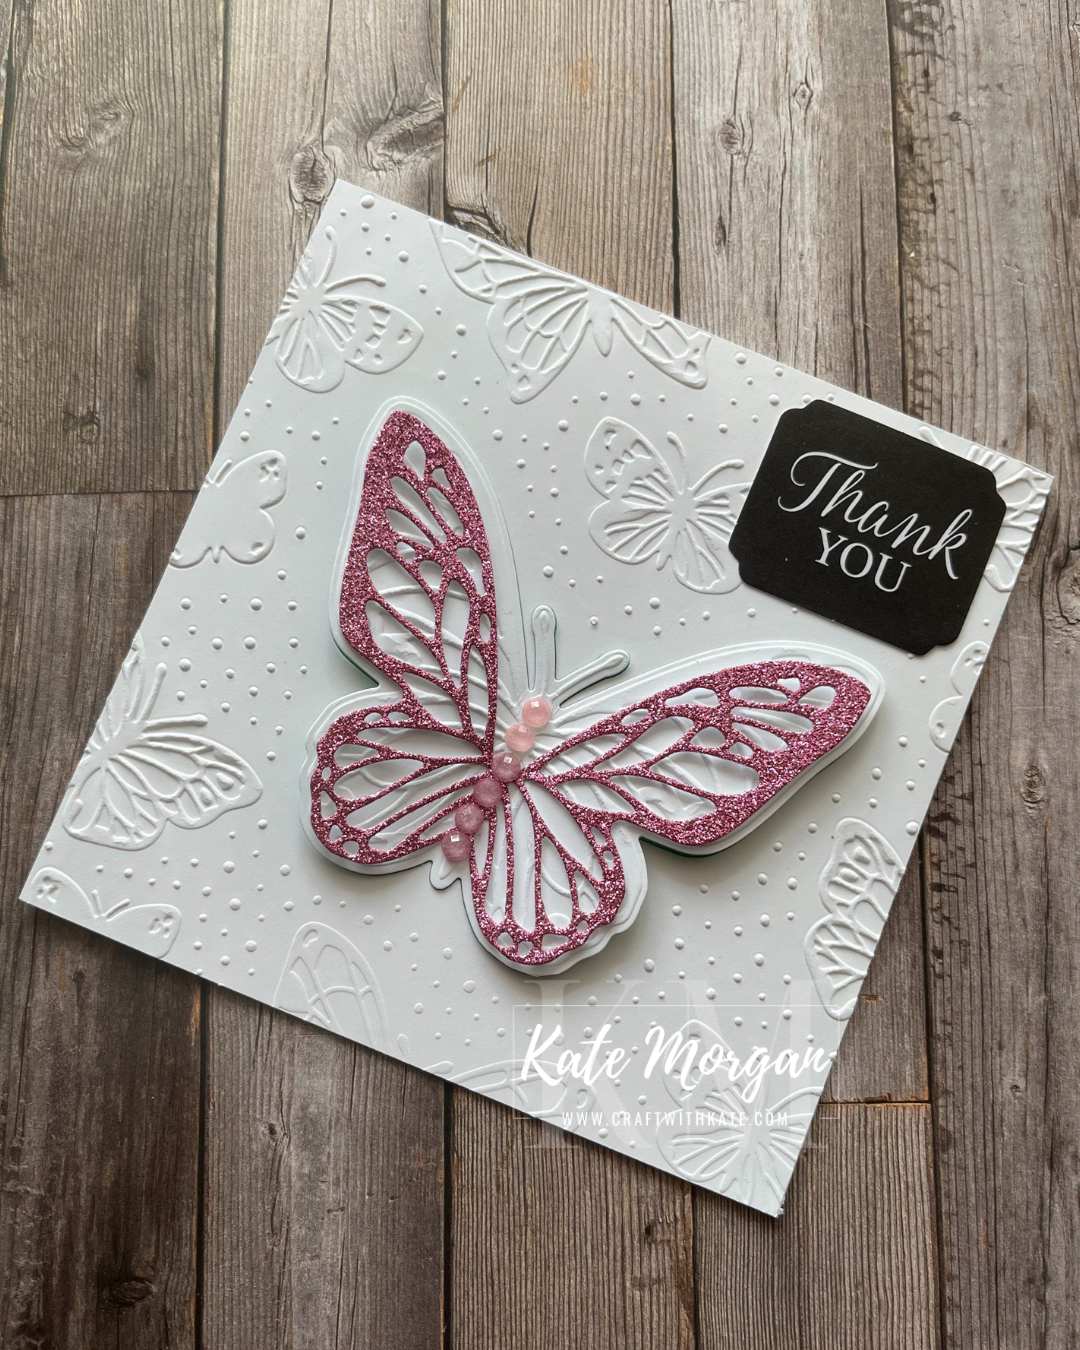
This handmade card features  the Beautiful Butterflies products.

For this card, I began with a Basic White card base, and embossed the front with the Beautiful Butterflies Hybrid Embossing Folder. This not only embosses, but also die cuts the large butterfly at the same time, how cool is that!

I die cut [Beautiful Butterflies dies] the intricate piece from the 2024-2026 In Color™ Glimmer Specialty Paper.  

Before adhering these to the card, I placed another diecut piece in Summer Splash cardstock into the hole where the white butterfly came from (see below). The adding the white and glimmer butterflies on top gluing through the centre so the wings can pop up. Some 2024-2026 In Color™ Shimmer Gems are added down the body. The sentiment is from the Greetings for All Mix & Match Euphemera Pack.

Thanks for dropping by.

Have you browsed the new 2025-2026 Annual Catalogue yet and created your shopping list?

Shop with Kate Morgan


Be sure to download a PDF copy of current catalogues from my SU Catalogue Library page.

Don’t forget to Follow My Blog to receive blog updates and all the latest news and specials!

Birthday, Butterflies, Designer/Patterned/Specialty Papers (DSP), Handmade Cards, Stampin' Up!, Techniques & Tutorials

Faux Camera Shutter card

This handmade card features  the Beautiful Butterflies products.

I shared this Faux Camera Shutter technique the other day, you can see it here and download my free PDF Tutorial to make it yourself.

For this card, I began with a Basic White card base, then a Basic White layer that was dry embossed with the Mini Corrugated Embossing Folder and adhered down the centre of the card front.

The Faux Camera Shutter uses a piece of 6″x6″ 2024-2026 In Color™ Designer Series Paper (DSP). There are lots of YouTube videos on how to create these.

I die cut some of the smaller butterflies using the Beautiful Butterflies dies and some flowers/leaves from the Country Birdhouse dies, currently in the Last Chance section of the online store for $39.20 from $56.  I sure will miss these gorgeous dies.

The sentiment [Greetings for All Mix & Match Euphemera Pack] is added on Dimensionals with the flowers and leaves placed around it. A piece of White Baker’s Twine. is tied in a bow and added on a Glue Dot. Some 2024-2026 In Color™ Shimmer Gems are added.

Thanks for dropping by.

Have you browsed the new 2025-2026 Annual Catalogue yet and created your shopping list?

Shop with Kate Morgan


Be sure to download a PDF copy of current catalogues from my SU Catalogue Library page.

Don’t forget to Follow My Blog to receive blog updates and all the latest news and specials!

Blog Hop/Instagram Hop, Designer/Patterned/Specialty Papers (DSP), feminine, Flowers, Handmade Cards, Markers for Colouring, Mother's Day, Stampin' Up!, Sympathy, Techniques & Tutorials

Free Tutorial for my Faux Camera Shutter card

Welcome to the Colour Creations InstaHop. You can follow us on Instagram starting  @craftwithkate. Each week we will showcase the Stampin’ Up! colours. For the first 5 weeks we showcase the new 2025-2027 In Colors and then continue with all the remaining colours in alphabetical order.

Have you browsed the new 2025-2026 Annual Catalogue yet and created your shopping list?

Week 2 – Darling Duckling

I have two cards today, a Mother’s Day card and a Sympathy card, both using products from the @stampinupofficial Floral Impressions Suite Collection.

Card 1 – Mother’s Day card
This handmade Mother’s Day card features; Impressions Abloom Bundle, Floral Impressions Designer Series Paper (DSP) and two Euphemera Packs, Foiled Frames & Labels and the Greetings for All Mix & Match. These diecut greetings are just brilliant for quick additions to your cards.

The designer papers is from the same pack and the flowers are stamped in Darling Duckling and Timid Tiger with the Secret Sea centres.  The leaves are diecut in White and Garden Green ink blended on using Blending Brushes.

You can see that gorgeous gold foiling on this circle, it’s just so lush!

These 2025-2027 In Color™ Flat Pearls are stunning too and must have if you haven’t already got them! A White Baker’s Twine bow is added on a Glue Dot.

Card 2 – Sympathy Card
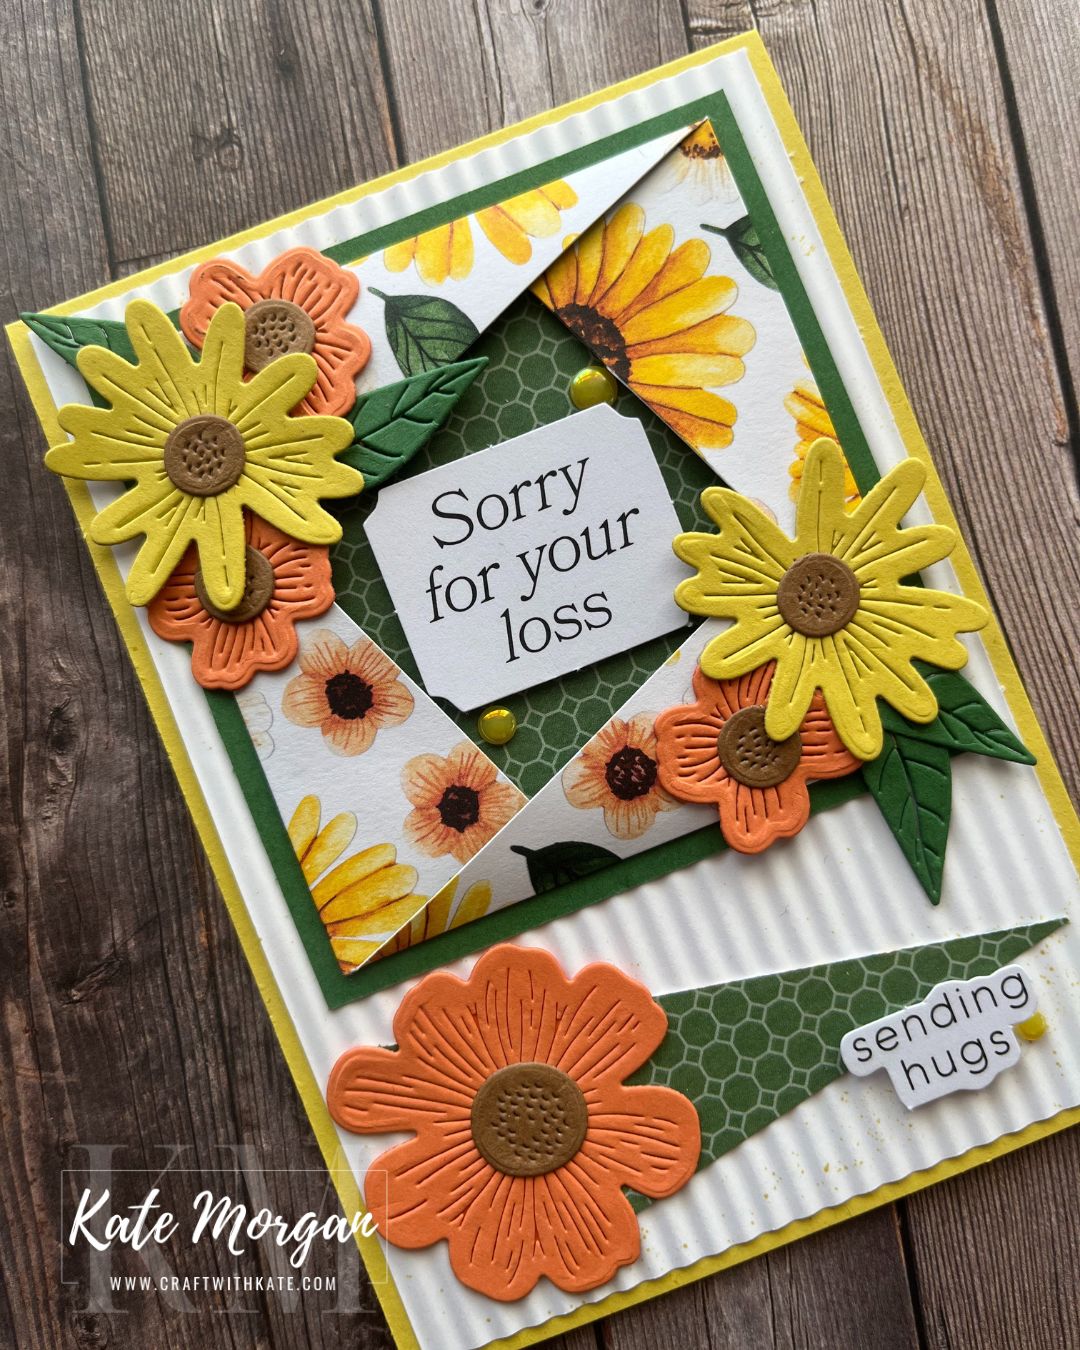
This is known as the Faux Camera Shutter technique made with a piece of 6″ x 6″ DSP (free tutorial here).

I started with a Darling Duckling cardbase with a piece of Basic White which has been dry embossed with the Mini Corrugated EF. I used my Darling Duckling Marker to splatter some fine ink onto the card. The Faux Camera Shutter is matted onto a piece of Garden Green cardstock, then adhered to the card. Some flowers and leaves are die cut in Darling Duckling, Garden Green, Pecan Pie and Timid Tiger cardstock and adhered to the card. The banner at the bottom was an offcut from creating the faux shutter!

Not sure if you can see the ink splatter on the corrugated card? It just adds a little rustic charm.

The sentiment is from the Greetings for All Mix & Match Euphemera Pack and added on Dimensionals. Some of the same flat pearls were used on this card also. 

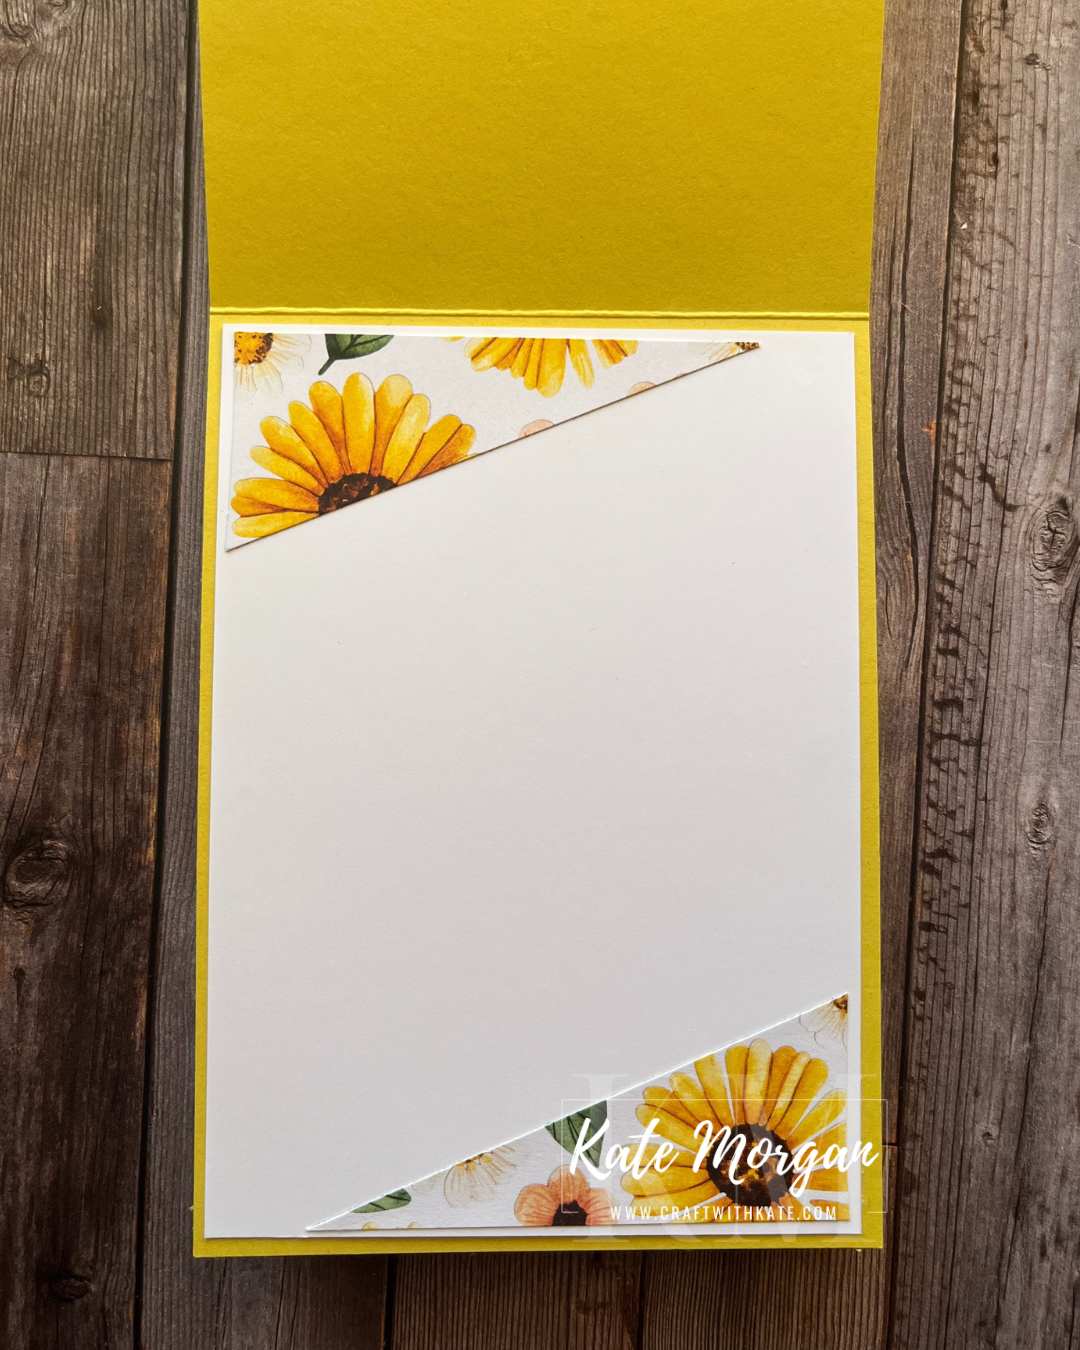
on the inside, I added two more of those offcuts to a Basic White insert.

Thanks for dropping by. I hope you join me next Wednesday for Secret Sea inspiration.

Product List
Stamps:
Impressions Abloom*
Dies: Impressions Abloom*
Ink: Darling Duckling, Garden Green, Timid Tiger
Paper: Basic White, Darling Duckling, Garden Green, Pecan Pie, Secret Sea, Timid Tiger, Floral Impressions DSP, Basic White C6 Envelopes
Other: 2025-2027 In Color™ Flat Pearls, 2025-2027 In Color™ Markers, Mini Corrugated Embossing Folder, White Baker’s Twine, Foiled Frames & Labels Euphema Pack, Greetings For All Mix & Match Euphemera Pack, Blending Brushes, Acrylic Blocks, Paper Snips, Bone Folder, Paper Trimmer, Multipurpose Glue, Mini Stampin’ Dimensionals, Glue Dots, Tear & Tape, Stampin’ Cut & Emboss Machine, Take Your Pick Tool, Simply Shammy.
*can be purchased together as a bundle to save 10%

Shop with Kate Morgan


Be sure to download a PDF copy of current catalogues from my SU Catalogue Library page.

Don’t forget to Follow My Blog to receive blog updates and all the latest news and specials!

Birthday, Blog Hop/Instagram Hop, Butterflies, Designer/Patterned/Specialty Papers (DSP), Fancy Folds, Handmade Cards, Stampin' Up!, Techniques & Tutorials

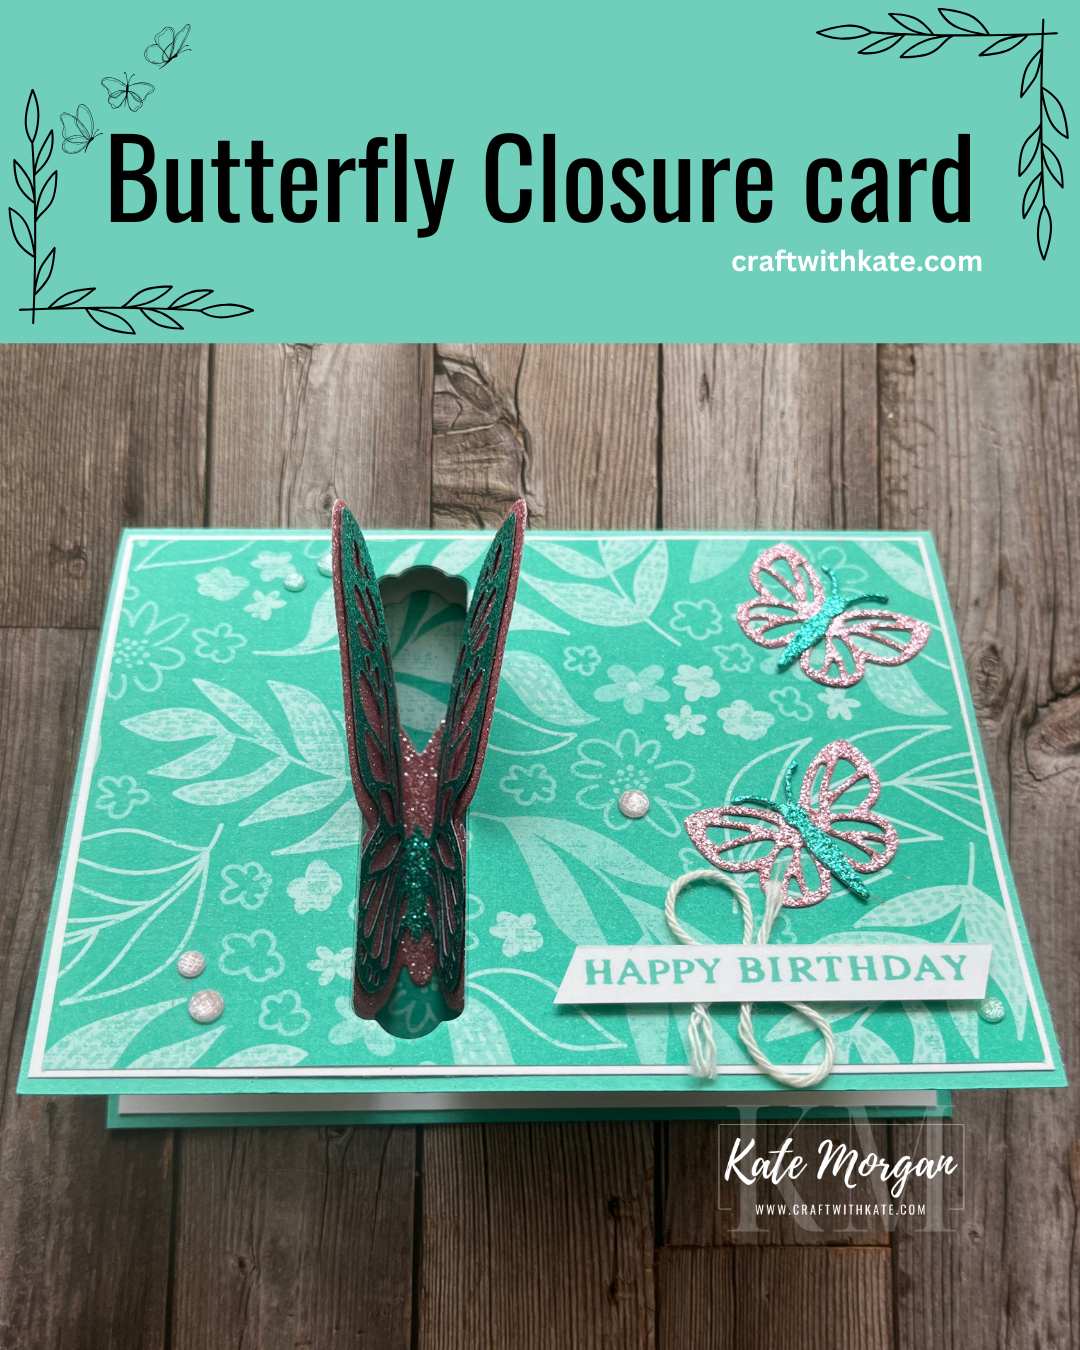
Beautiful Butterflies fun closure card

This handmade card features  the Beautiful Butterflies products.

I made this style of card back in 2018, you can see it here, where I was inspired by Terri Gaines, a US Demonstrator. Her video tutorial is in that link.

For this card, I began with a Summer Splash cardbase, then a Basic White layer before adding the 2024-2026 In Color™ Designer Series Paper ( DSP), making sure to only add glue around the edges. Once these layers were adhered, I die cut the large label die [Beautiful Butterflies dies] through the card front. The DSP piece keep for the inside.

The butterflies were die cut in the 2024-2026 In Color™ Glimmer Specialty Paper.  Adhere the smaller butterflies, add the sentiment [Beautiful Butterflies stamp set] on Dimensionals with a piece of White Baker’s Twine. Some 2024-2026 In Color™ Shimmer Gems are added.

Fold her wings together to open the card…

Here’s the card open with white panel to write your message. This is where that DSP label die cut is adhered. Once the Basic White insert is glued in place, close the card and place that DSP through the gap so it is in the perfect position. Then you can glue the body of the large butterfly in place and fold her wings together to fit through the gap.

Thanks for dropping by.

Have you browsed the new 2025-2026 Annual Catalogue yet and created your shopping list?

Shop with Kate Morgan


Be sure to download a PDF copy of current catalogues from my SU Catalogue Library page.

Don’t forget to Follow My Blog to receive blog updates and all the latest news and specials!

Birthday, Blog Hop/Instagram Hop, Butterflies, Fancy Folds, feminine, Handmade Cards, Markers for Colouring, Mini Catalogue and Sale-a-bration (SAB), Stampin' Up!, Techniques & Tutorials

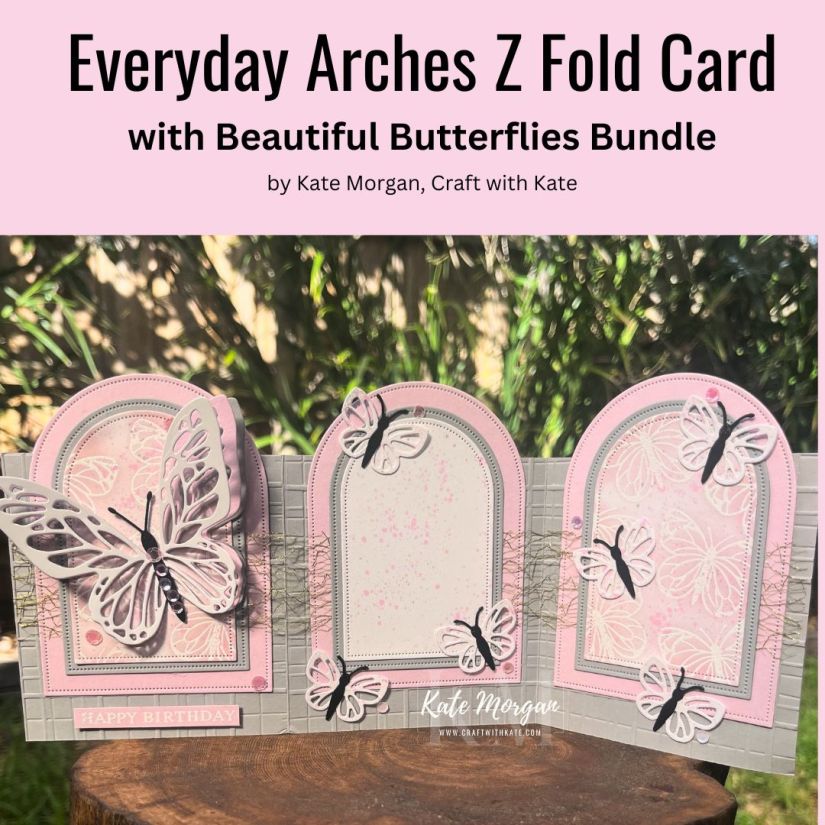
Smoky Slate: Z Fold card with Everyday Arches and Beautiful Butterflies

Week 49 – Smoky Slate

This handmade card features a Smoky Slate card base measuring 29.7cm x 10.5cm, scored at 9.9cm & 19.8cm and folded in three and dry embossed with the Forever Plaid 3D Embossing folder. The Everyday Arches dies are used to die cut 3 x Bubble Bath arches, 3 x Smoky Slate arches and 3 x Basic White arches.

The large butterfly die is cut in the three colours and glued together in the centre. The body is die cut in Basic Black card. Two of the Basic White arches are stamped with Versamark ink, White WOW Emboss Powder added and melted with my Heat Tool. A Blending Brush with Bubble Bath ink is blended over the butterflies to reveal the magic! This is known as the Emboss Resist Technique.

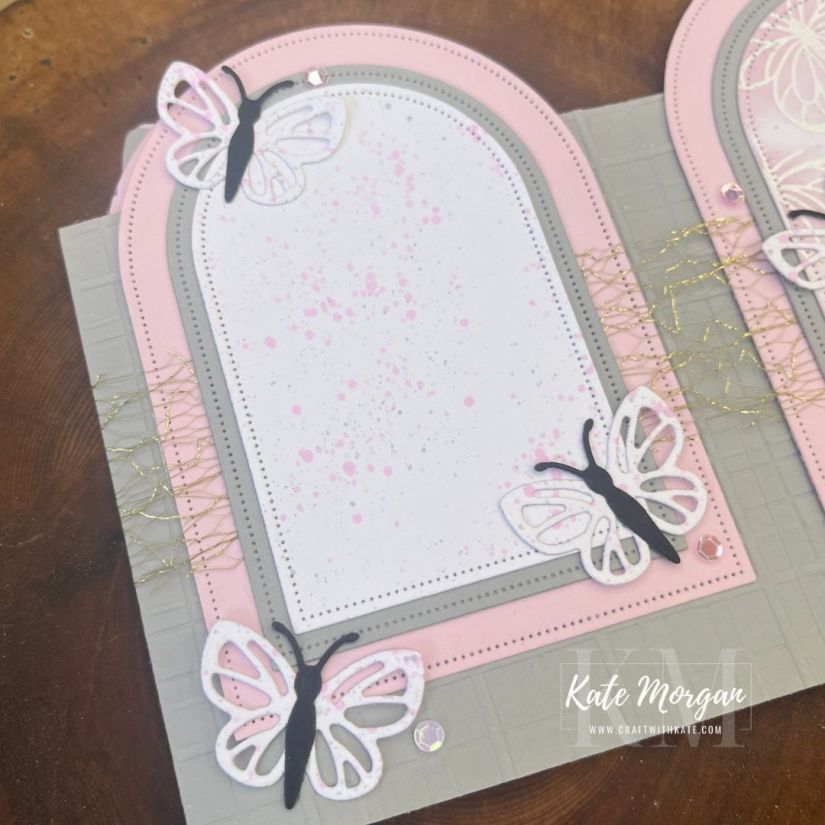
I also took the Smoky Slate and Bubble Bath Stampin’ Blends Combo Markers and gently placed the larger tip inside the lid and carefully flicked ink onto the White arches to get the splatters. 

When assembling the card, the Bubble Bath arches are glued on first to the card base, then a piece of gold Open Weave Trim across the card length. The White and Slate arches are glued together and then onto the card.

The sentiment is also heat embossed with White Wow Emboss Powder and added on Mini Dimensionals. Some sequins were added to the centre of the butterfly and around the card.

The centre panel is splattered with Blends Markers and embellishments around the edges. This is the panel for writing a message. Thes smaller butterflies were die cut from Bsic White card that I splattered with the Blends Markers before die cutting. Then added the body in Basic Black card.

The last panel is the same as the front panel with emboss resist and blending, and some more die cut butterflies and sequins added.

Thanks for dropping by. I hope you join me next Wednesday for inspiration using Soft Sea Foam.

Product List
Stamps:
Beautiful Butterflies*
Dies: Beautiful Butterflies*, Everyday Arches 
Ink: Versamark, Bubble Bath
Paper: Basic White, Bubble Bath, Basic Black, Smoky Slate, Basic White C6 Envelopes
Other: Open Weave Trim, Blending Brushes, Foreever Plaid 3D Embossing Folder, White Wow Emboss Powder, Stampin’ Blends Combo Markers (Bubble Bath, Smoky Slate), Acrylic Blocks, Paper Snips, Bone Folder, Paper Trimmer, Multipurpose Glue, Tear & Tape, Glue Dots, Mini Stampin’ Dimensionals, Stampin’ Cut & Emboss Machine, Take Your Pick Tool, Simply Shammy
*can be purchased together as a bundle to save 10%

Shop with Kate Morgan


Be sure to download a PDF copy of current catalogues from my SU Catalogue Library page.

Don’t forget to Follow My Blog to receive blog updates and all the latest news and specials!

Designer/Patterned/Specialty Papers (DSP), Fancy Folds, feminine, Handmade Cards, Mother's Day, Online Exclusives, Stampin' Up!, Techniques & Tutorials, Wedding

Hearts of Elegance Half Hexagonal card

Today I feature a fun fold card, but do not be dismissive thinking it is too difficult as it is really easy to recreate. Read on and I’ll explain more about it. You will be surprised!

The Hearts of Elegance bundle and the Marbled Elegance Specialty DSP are available in the Online Exclusives section of the online store. This could suit any occasion; Birthday, Wedding Day, Valentine’s Day, Mother’s Day, etc.

Half Hexagonal Fun Fold card using Stampin Up Hearts of Elegance and Marbled Elegance SDSP by Kate Morgan Australia 2024

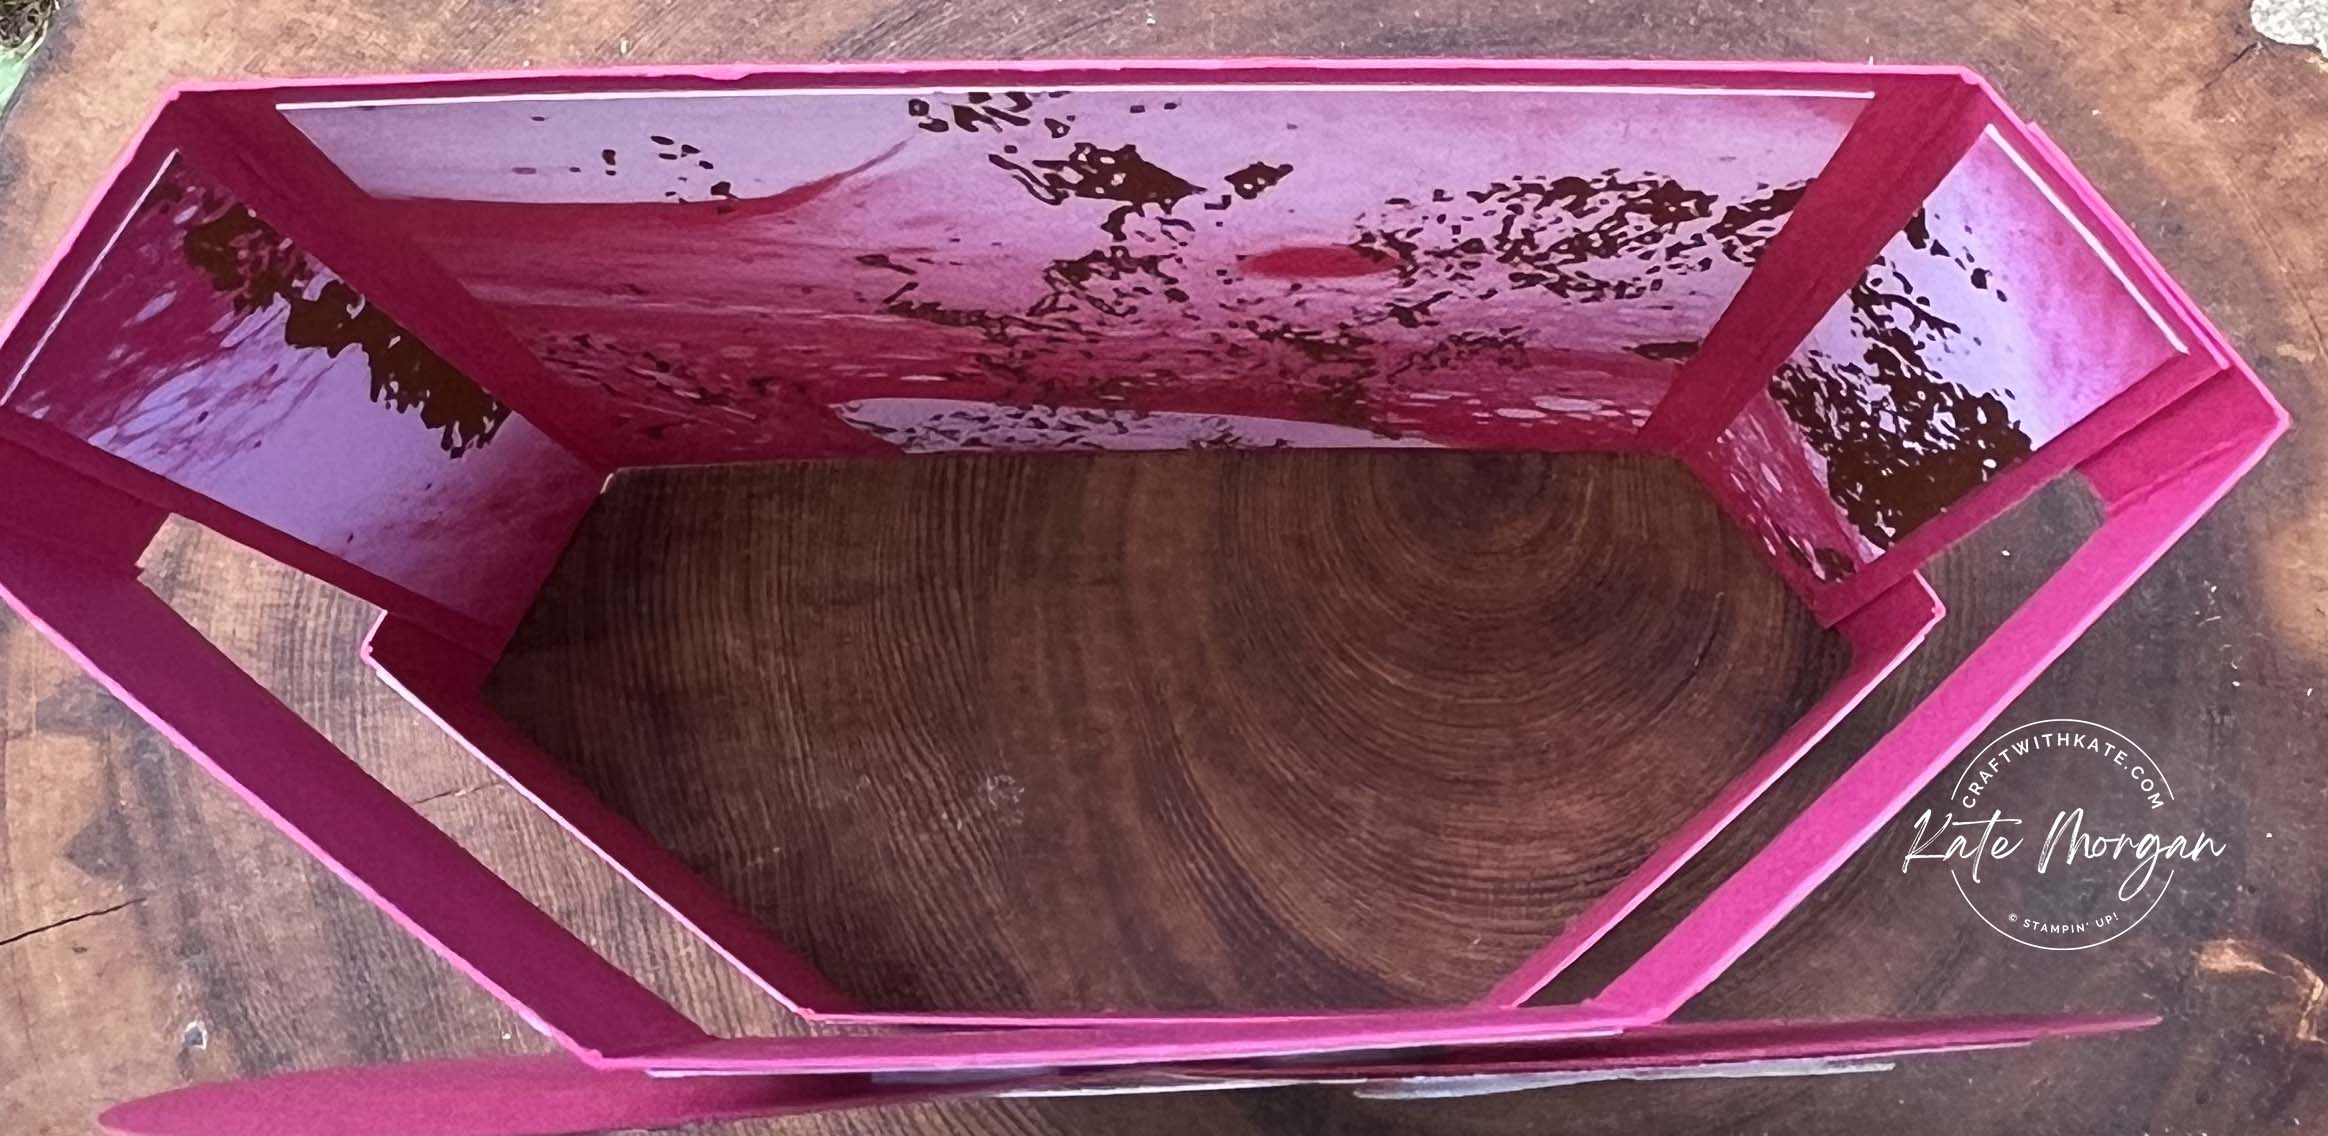
Here is the view from the top of the card where you can see that half hexagon.

Half Hexagonal Fun Fold card using Stampin Up Hearts of Elegance and Marbled Elegance SDSP by Kate Morgan Australia 2024 top view

and it folds flat like this to fit into an envelope for posting!

Half Hexagonal Fun Fold card using Stampin Up Hearts of Elegance and Marbled Elegance SDSP by Kate Morgan Australia 2024 flat to fit in envelope

Step by step details
Card base: 11cm x 14.5cm, score the long edge @ 2cm from each end and fold them to the front (valley folds). Decorate the inside with the following.
DSP (inside): 10.5cm x 2cm and 2 pieces 10.5cm x 1.5cm

Cardstock strips x 2: 18.5cm x 3cm, score @ 2cm & 6.5cm from each end. Fold and burnish all scorelines as mountain folds. Add adhesive of choice to the end tabs and adhere them to the outisde of the two side folds of the cardbase, lining them up along the top of the card. Repeat with the second strip along the base. The card base will fold flat to fit into an envelope for postage. Use the following DSP measurements to decorate.
DSP (decorate the strips): 13cm x 2.5cm, cut so you have 4cm piece, 5cm, 4cm (to keep the continuous pattern) you need two lots of these.

White card:
10.5cm x 10cm (adhere to the back for your message).
Extra: DSP and cardstock to cut your heart features and the sentiment!

Thanks for dropping by. Wishing you all a festive season and a safe New Year. See you again in 2025!

Product List
Stamps: 
Hearts of Elegance*
Dies: Hearts of Elegance*, Stylish Shapes
Card/DSP/Specialty Paper: Basic White, Melon Mambo, Gold Foil, Marbled Elegance Specialty Designer Series Paper, Basic White C6 Envelopes
Inks: Melon Mambo
Embellishments: Purple Adhesive-backed Sequins
Accesories/Adhesives/Tools: H Block, Paper Snips, Bone Folder, Paper Trimmer, Multipurpose Glue, Glue Dots, Stampin’ Dimensionals, Stampin’ Cut & Emboss Machine, Take Your Pick Tool, Simply Shammy.
*can be purchased together as a bundle to save 10%

Shop with Kate Morgan


Be sure to download a PDF copy of current catalogues from my SU Catalogue Library page.

Don’t forget to Follow My Blog to receive blog updates and all the latest news and specials!
Happy Crafting