Today I share some projects using the Trusty Tools Bundle and the Trusty Toolbox 12 x 12 Designer Series Paper, which you can select for free when you purchase the Bundle during Sale-a-abration. Click on these catalogues to see more!
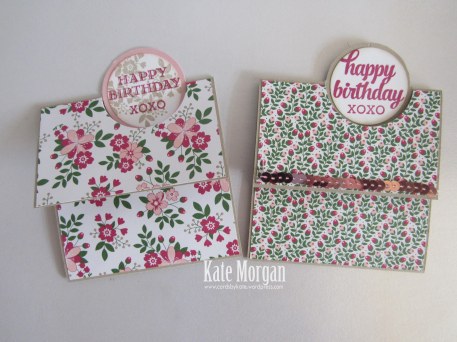
Card 1 – This bench fold card I made for my dad, as his birthday falls on Australia Day, a public holiday. We celebrated at lunchtime with him and he totally loved his card. It uses the TrustyTools dies to cut the images from the amazing patterned DSP. How fun is that?!!!
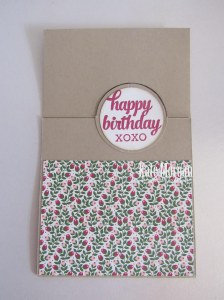
Here it is from the top so you can see the support inside where to benchtop sits.
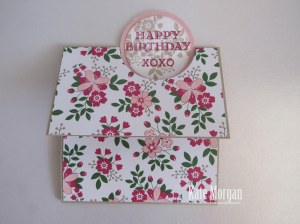
This is how it folds flat to fit into a DL Envelope.
On the back is where you write your message!
Card 2 – this is a very simple card with just some stamping. The brushes are stamped in Smoky Slate ink and the colours are just my Stampin’ Spots dragged across the paper. Isn’t that cool?! I love the big bold sentiment from the Birthday Wishes stamp set.
You can see on the inside I stamped another paint brush.
Card 3 – this is a toolbox on the front with a belly band, so you know what that means… yes, it opens up!
Here you can see the amazing DSP and how it is layered with some diecuts from another sheet of DSP. This is such a cool fun fold design.
and here is the back panel to write your message.
Card 4 – is another card using the DSP. Here I have used some DSP and cut slits on the top of the gray lines ao the fussy cut tools from the DSP, can sit in!
Each week some of the Art With Heart team are joining the Colour Creations Blog Hop to bring you creative inspiration showcasing our range of 50+ gorgeous Stampin’ Up! colours.
Week 35 – Night of Navy
How are you enjoying Saleabration? It is such a generous way for Stampin’ Up! to give free product with qualifying orders to customers and demonstrators. Have you placed an order and what was your favourite SAB item?
Today I feature the Little Dreamers Bundle. I started off with masking the images and adding some blending, but I changed my mind and decided to just add diecuts. The panel with the blending is Crumb Cake card, which helped make the night sky darker. I used Night of Navy at the top and Pretty Peacock below. Then I took some white ink refill and placed it onto my glass mat and using a Water Painter, added some water and tapped it across the card. Some of the larger splats I needed to dab dry with a tissue.
I just love this little calf sitting on some clouds under a night sky. I added this panel to a Basic White card matt then onto a Night of Navy card base. The moon and stars are diecut using the Silver & Gold Adhesive-backed Glimmerpaper.
On the inside, I added some ink around the edges with what was left on my Blending Brushes. A simple sentiment and shooting star were stamped in Night of Navy ink.
My second card is a fancy fold design. I’m not sure what it is called, maybe a Gatefold Pop Out card? I am using the Countryside InnDesigner Series Paper and the Countryside Corners dies.
To open the card, you simply push both sides of the card backwards and they will then pop out from behind the centre diecut feature. To close the card, fold each of the sides in behind the diecut feature. I just love the patterned papers in this pack and I love how this showcases them perfectly. The embossed white panels use the coordinating Countryside Blossoms Textured Impressions Embossing Folder.
The sentiment is from the Throughout the Year stamp set and the foliage diecuts are from the Grove dies. Some Boho Blue 2023-2025 In Color Dots were added around the sentiment. The sentiment diecut panel is added on Dimensionals to the centre panel of the card. I adore this design and can see myself making loads of these with different DSPs.
Thanks for dropping by. I hope you join me next Wednesday for inspiration using Old Olive.
Please hop across to our next participant and enjoy the wonderful inspiration of Rosa Leyden.
If you come across a broken link or have come from a different entry point, a full list of participants can be viewed on Cathy’s blog.
Product List
Stamps: Little Dreamers*, Throughout the Year Dies: Little Dreamers*, Countryside Corners, Grove dies Paper: Basic White, Crumb Cake, Night of Navy, Silver & Gold Adhesive-backed Glimmer, Countryside Inn DSP Inks: Crumb Cake, Night of Navy, Pretty Peacock, White Craft Ink Refill Other: 2023-2025 In Color Dots, Foam Adhesive Sheets, Countryside Blossoms TIEF, Water Painters, Clear Block D, Paper Snips, Multipurpose Glue, Stampin’ Dimensionals, Stampin’ Cut & Emboss Machine, Paper Trimmer, Simply Shammy, Bone Folder
* can be purchased together as a bundle to save 10%
Be sure to download a PDF copy of current catalogues from my SU Catalogue Library page.
Don’t forget to Follow My Blog to receive blog updates and join my Newsletter Subscriptionfor all the latest news and specials!
Introducing the 2024 January to April Mini Catalogue and Sale-a-bration Brochure.
Shop from any current catalogues and receive your choice of FREE Sale-a-bration items with every $90 or $180 purchase.
Do you have a wish list over $169? Have you considered joining for all the extra benefits? There is no obligation to sell products if you don’t want to, but you can join the amazing community of Stampin’ Up! demonstrators!
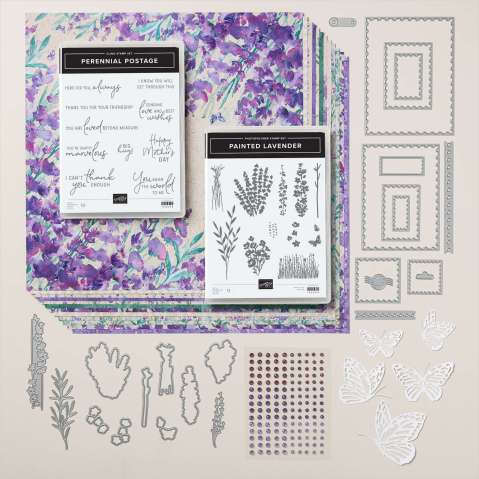
Today I feature the Perennial Lavender Suite Collection, the very first item to drop into my shopping cart. You can find all the details on pages 22-25 in the catalogue. Plus, with every $90+ product order, you can select items in the Saleabration brochure.
These papers are to die for, well not literally, but they are so gorgeous. The Perennial Lavender 12″ X 12″ Designer Series Paper features on all my cards today. Also in this collection are two bundles; the Painted Lavender Bundle and the Perennial Postaged Bundle. Also some Paper Butterefly Accents and Purple Fine Shimmer Gems. These can be ordered using 1 item number: 162613.
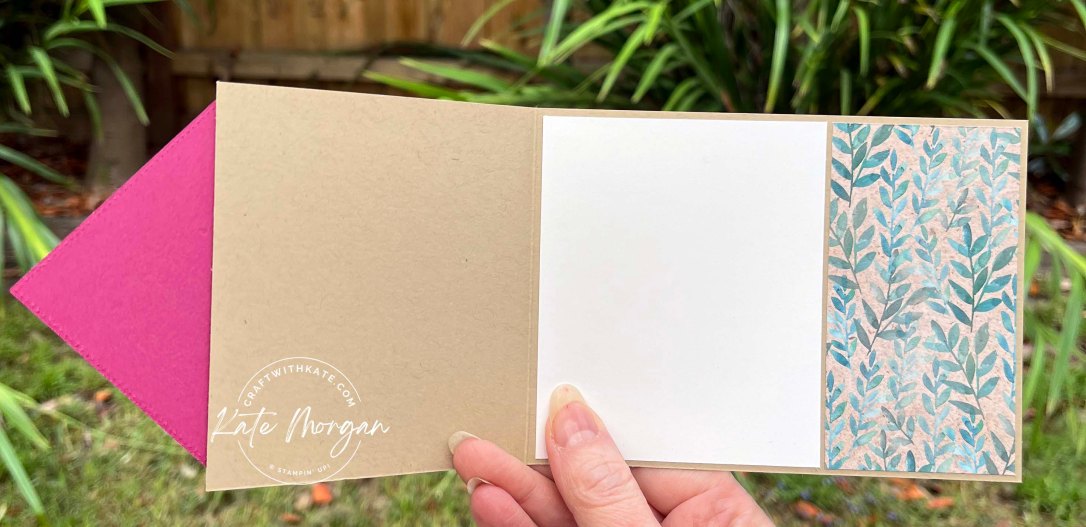
Here is card 1 featuring the lovely patterned papers and a little stamping on the feature section.
Here it is open with a white panel hidden inside to write your message
Card 2 features my favourite DSP piece in the pack. I didn’t want to cover it up, so I created three 3cm wide panels and glued them to some Gorgeous Grape card. Ribbon was added to the bottom with a ribbon knot. The Paper Butterfly Accent was added at the top.
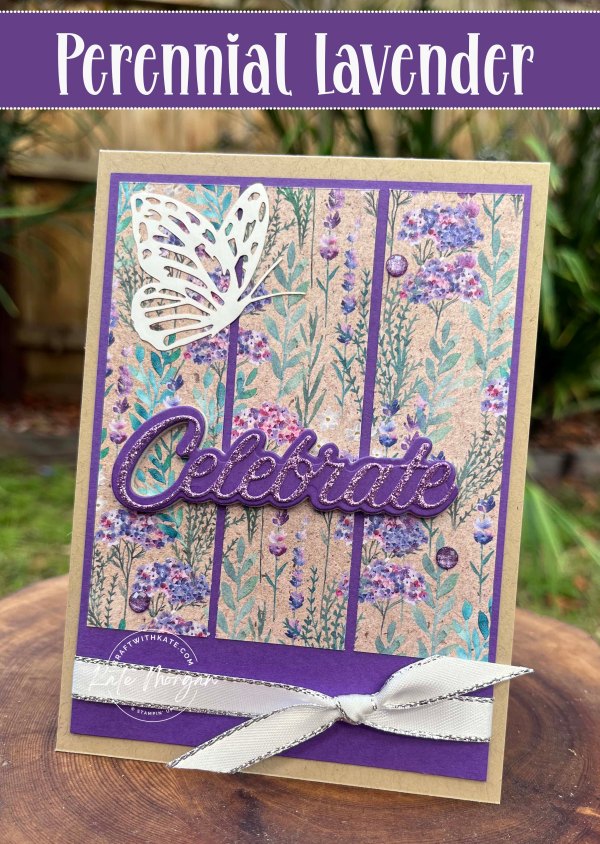
The ‘celebrate’ is from the Wanted to Say dies and I added some Foam Adhesive Sheet behind some Gorgeous Grape card before die cutting that layer. The Highland Heather Gliiter piece is from the Three Color Glimmer pack. I added some Adhesive Sheet on the back before die cutting. Once cut, remove the paper backing and place it on top of the larger piece. You can really see the height it gives below.
Card 3 – possibly my favourite, a slimline card. This features the DSP, the Perennial Postage Bundle, the Painted Lavender Bundle and the Purple Fine Shimmer Gems.
Here you can see the feature panel and how it is layered
Thanks for dropping by.

Be sure to download a PDF copy of current catalogues from my SU Catalogue Library page.
Don’t forget to Follow My Blog to receive blog updates and join my Newsletter Subscriptionfor all the latest news and specials!

Each week some of the Art With Heart team are joining the Colour Creations Blog Hop to bring you creative inspiration showcasing our range of 50+ gorgeous Stampin’ Up! colours.
Week 34 – Mossy Meadow
Tomorrow is a very exciting day as Saleabration begins and products in the new Mini catalogue become available! Do you have your wish list ready?
Today I feature the Meandering Meadows DSP in the Online Exclusives section of the shop.
Decorate each of the panels with a matt layer & DSP layer.
Open it up again to reveal the full landscape!
Thank you to Terri Gaines for the inspiration and who I CASE’d this card from. She has done her card in Imperial measurements. Here are my Metric measurements for my card.
Measurements
Card base: 28.5cm x 14.5cm score @ 2.5cm, 5cm, 13cm, 21cm
Decorative Front Embossed Panel: 14cm x 2cm
Decorative Front DSP layer: 7.5cm x 14cm
Decorative Inside DSP layer 1: 13.5cm x 7cm
Decorative Inside matt layer 1: 14cm x 7.5cm
Decorative Inside DSP layer 2: 13.5cm x 7cm
Decorative Inside matt layer 2: 14cm x 7.5cm
Decorative Inside DSP layer 3: 13.5cm x 6.5cm
Decorative Inside matt layer 3: 14cm x 7cm
Decorative Inside White card layer 4: 13.5cm x 6.5cm (for written message)
Decorative Inside matt layer 4: 14cm x 7cm
Sentiment matt layer: 6.5cm x 2.5cm popped up on 2 layers of Dimensionals
Sentiment layer: 6cm x 2cm (max 12cm x 6cm)
Thanks for dropping by. I hope you join me next Wednesday for inspiration using Night of Navy.
Please hop across to our next participant and enjoy the wonderful inspiration of Di Furniss.
If you come across a broken link or have come from a different entry point, a full list of participants can be viewed on Cathy’s blog.
Product List
Stamps: Very Best Occasion Dies: Nested Essentials Paper: Basic White, Mossy Meadow, Fresh Freesia, Meandering Meadow DSP Inks: Mossy Meadow Other: Distressed Tile 3D TIEF, Adhesive-backed Dragonflies & Birds, Paper Snips, Multipurpose Glue, Stampin’ Dimensionals, Stampin’ Cut & Emboss Machine, Paper Trimmer, Simply Shammy, Bone Folder
Be sure to download a PDF copy of current catalogues from my SU Catalogue Library page.
Don’t forget to Follow My Blog to receive blog updates and join my Newsletter Subscriptionfor all the latest news and specials!
Each Monday, some of the Art With Heart team are joining the Heart of Christmas Blog Hop to bring you creative inspiration showcasing our September-December Mini catalogue and Annual catalogue Christmas products.
Heart of Christmas Week 12
Today’s card design is thanks to Susan Campfield in the US. I love interactive cards, and this one with the feature image swinging on the card, is beautiful. I also love all the white of this card, and adding extra texture using the Distressed Tile 3D Embossing Folder.
The feature image from the Joy of Noel stamp set and coordinating dies is first stamped with Versamark ink, then Lost Lagoon ink directly on top. Add Clear Emboss Powder and melt it with the Heat Tool. This then makes it easier to colour using my Water Painters and ink. The berries are Poppy Parade Iridescent Adhesive-backed Discs, and don’t they give a glorious shine! The sentiment ‘Tis the season’ (Brightest Glow stamp set) is die cut and added with dimensionals onto a Silver Foil diecut.
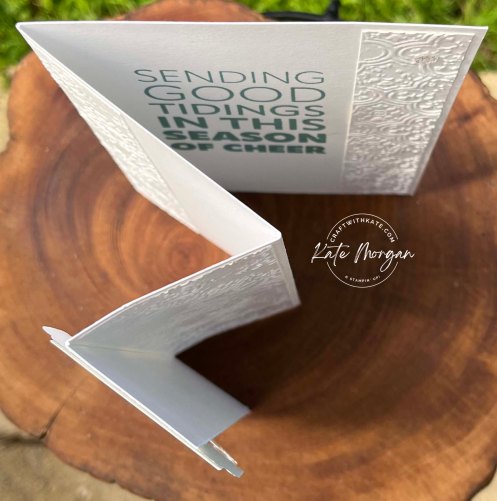
view from the top
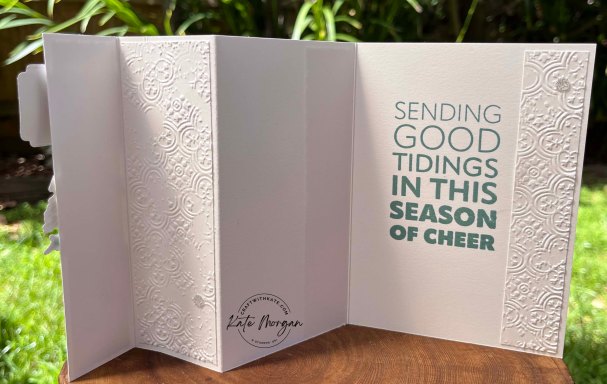
On the inside I have stamped the large sentiment from the Joy to You stamp set.
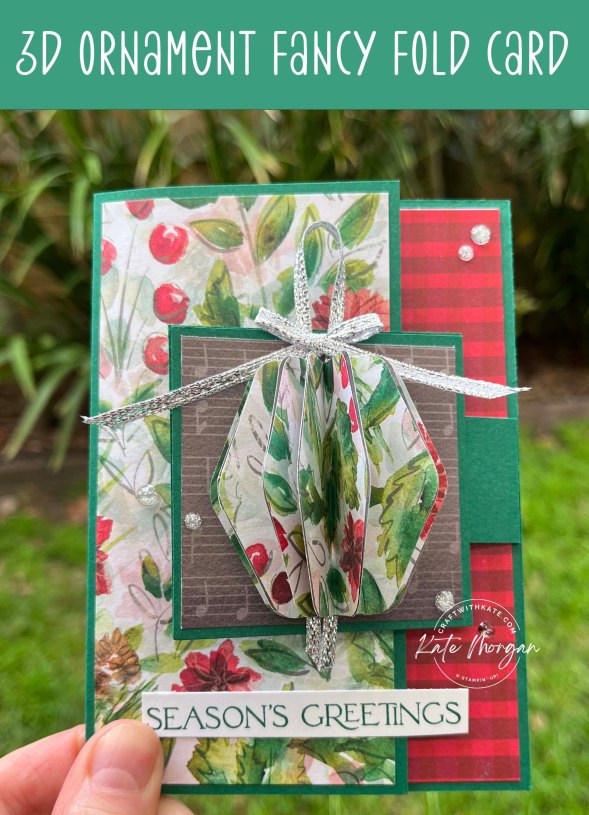
My next card is a fun fold with a special 3D ornament on the front. After Cathy Proctor shared her idea of using the Heartfelt Hexagon Punch as a bauble last week, I immediately knew what I was going to make this week (thanks Cathy ♥). The Joy of Christmas DSP was the perfect choice for this festive bauble.
There are 8 punched pieces, scored down the centre and put together with Seal+. Before adding it to the card, I placed some Silver Trim down the centre and tied a bow to add with a glue dot, after the 3D element was added.
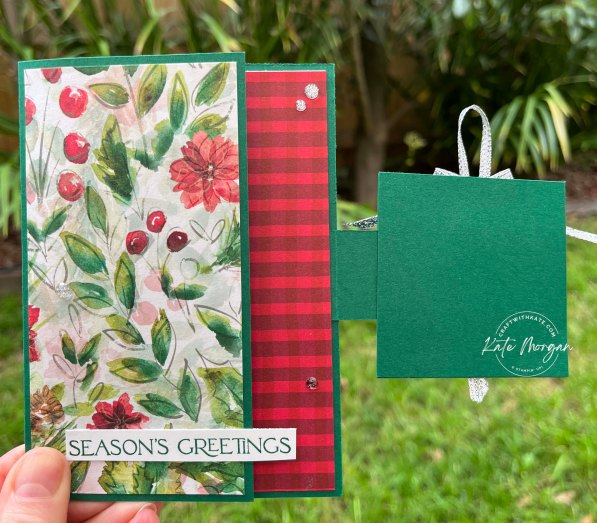
Initially I was going to put it on the inside at the fold, but I think it’s better on the front to really pack a punch!
The DSP pattern on the front is the same as what I used for the 3D element. The music pattern under the 3D element is on the reverse side of one of the papers. The same goes for the tartan strip on the inside white panel. The sentiments are from the Brightest Glow stamp set.
Some Adhesive-backed Sparkle Gems were added for my signature sparkle!
You couldn’t get two ‘more different’ cards this week. Do you love lots of colour or lots of white space on your cards?
You can find the full list of products below.
Thanks for dropping by. I hope you can join me next Monday for more festive inspiration!
Please hop across to our next participant and enjoy the creative talent of Christine Blain.
If you come across a broken link or have come from a different entry point, a full list of participants can be viewed on Sharon’s blog.
Click on this image to find all the details of this amazing joining offer!
Product List
Stamps: Joy of Noel*, Joy to You, Brightest Glow Dies: Joy of Noel*, Tailor Made Tags, Something Fancy, Give it a Whirl Cardstock: Thick Basic White, Basic White, Silver Foil, Shaded Spruce Designer Series Paper: Joy of Christmas Inks: Lost Lagoon, Versamark Other: Clear Emboss Powder, Heat Tool, Water Painters, Iridescent Adhesive-backed Discs, Adhesive-backed Glitter Sequins, Adhesive-backed Sparkle Gems, Distressed Tile 3D TIEF, Silver Trim, Trimmer, Stampin’ Seal+, Multipurpose Glue, Glue Dots, Mini Stampin’ Dimensionals, Cut & Emboss Machine, Bone Folder, Take Your Pick Tool
* purchase items as a bundle to save 10%
Be sure to download a PDF copy of current catalogues from my SU Catalogue Library page.
Don’t forget to Follow My Blog to receive blog updates and join my Newsletter Subscriptionfor all the latest news and specials!
Each week some of the Art With Heart team are joining the Colour Creations Blog Hop to bring you creative inspiration showcasing our range of 50+ gorgeous Stampin’ Up! colours in alphabetical order.
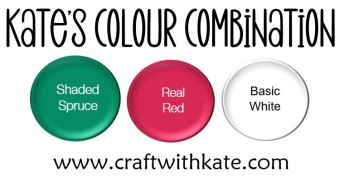
Week 42 – Real Red
Today’s Corner Tuck card uses the Cottage Rose Bundle with the Regency Park DSP & Gingham Cottage DSP (retired). Although there isn’t any Real Red in the Regency Park DSP, it is Sweet Sorbet, but it looks like Real Red to me!
The top right corner is some DSP cut into a triangle and glued along the top and right edges only. When the feature panel closes, pop it under this triangle to keep it closed. Isn’t that nifty?!!!
I stamped and die cut the Cottage Rose image and coloured it using my Wink of Stella with ink from the ink pads (Real Red, Shaded Spruce & Mango Melody). This is like water colouring, but with extra sparkle! This is added to the feature panel with Dimensionals.
You can see the Wink of Stella in this image – it is so sparkly!
On the inside, I added a simple sentiment and a die cut flower.
Measurements:
Card base: 29cm x 10.5cm, score @ 14.5cm (cut 7cm off one end to use as feature matt on card front)
DSP: 9.5cm x 6.5cm and 9.5cm x 13cm
White card: 10cm x 6.5cm (2)
DSP: 5.5cm x 5.5cm, cut on diagonal (glue one to upper right corner)
Thanks for dropping by. I hope you can join me next Wednesday for inspiration usingRich Razzleberry.
Please hop across to our next participant and enjoy the wonderful inspiration of Tina Gillespie.
If you come across a broken link or have come from a different entry point, a full list of participants can be viewed on Cathy Proctor’s blog.
♥ Click here to see the full list of products used in this project ♥
Be sure to download a PDF copy of current catalogues from my SU Catalogue Library page.
Don’t forget to Follow My Blog to receive blog updates and join my Newsletter Subscriptionfor all the latest news and specials!
Each Monday, join me for the Heart of Christmas Blog Hop brought to you by the Art With Heart team. We will be showcasing our July-December Mini catalogue and Annual catalogue Christmas products.
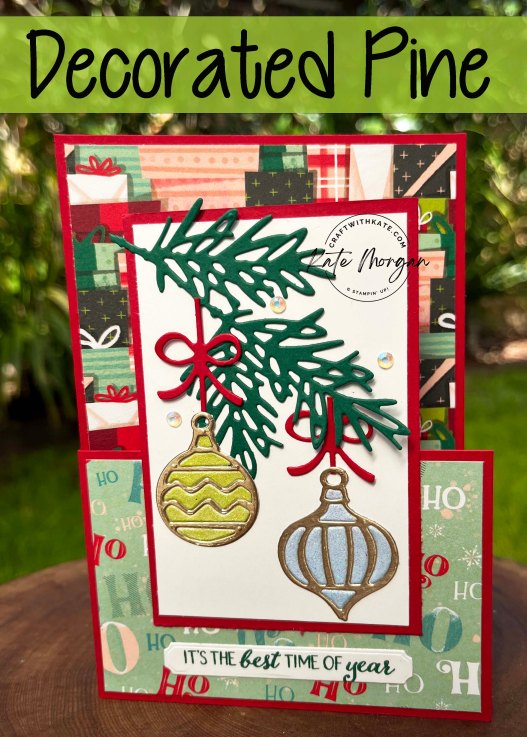
My card features the Santa Express Designer Series Paper, using three different patterns in this fun fold design.
The Decorated Pine dies were used to create the feature panel. The branch is Shaded Spruce and the baubles are Brushed Metallic Gold cardstock with the 2022-2024 InColor Glimmer paper to fill them in. The bows are Real Red. Using Adhesive Sheets on all these pieces makes it a lot easier than trying to use Multipurpose adhesive glue for such intricate work.
The sentiment is from the Peaceful Deer stamp setand cut out using the Sending dies.
Here is the card when open with the white panel for your message.
Thanks for dropping by. I hope you can join me next week for more Christmas inspiration!
Please continue to hop and enjoy the wonderful inspiration of Cathy Proctor.
If you come across a broken link or have come from a different entry point, a full list of participants can be viewed on Sharon’s blog.
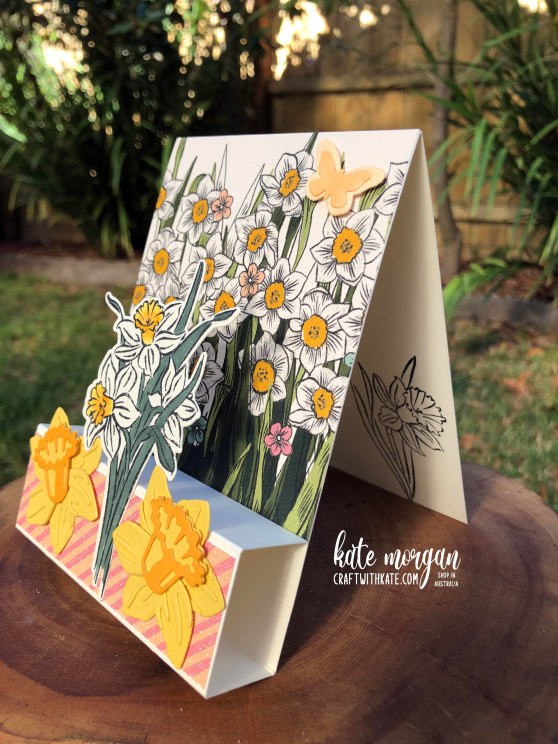
This is a fun pop up box style card to create to showcase the lovely patterned papers of the Daffodil Afternoon DSP which is one of the Saleabration offerings. You can select this pack of 12×12 papers with any $90+ product order.
My card base measures 29.7cm x 10.5cm, scored in half. The box portion on the bottom measures ¾”, 1¾”, 3¼”, 4¼” and is folded into a box shape and glued to the bottom of the card front!
On the inside, I simply stamped another daffodil image in the bottom corner. The envelope was stamped the same! To see the Daffodil Afternoon papers and all other SAB offerings click here
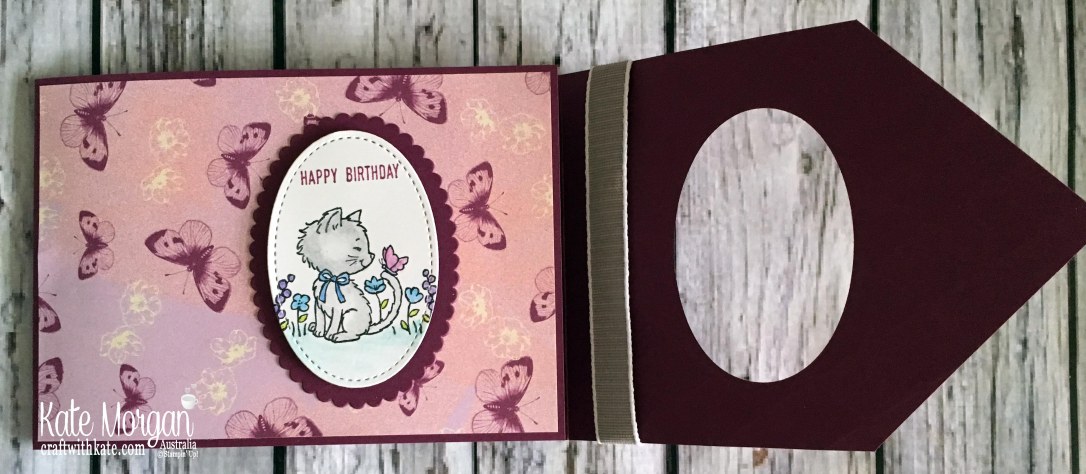
Today I share a fancy fold card using the Pretty Kittystamp set, Tea Room Specialty Designer paper and Watercolour Pencils!
From 1 August, a new 10 pack of Watercolour Pencils will be available in the following colours: Balmy Blue, Cajun Craze, Cherry Cobbler, Coastal Cabana, Crushed Curry, Flirty Flamingo, Garden Green, Gorgeous Grape, Granny Apple Green, Night of Navy. These can be used by themselves or with our Blender Pens or Aqua Painter.
I made this card for my eldest daughter who turns 12 today. She loves cats (we have 2) and she loves butterflies, so this was perfect for her.
The front piece of cardstock is embossed with the new TuftedDynamic Textured Embossing Folder.
This card opens up so you can see the gorgeous Tea Room Specialty Designer paper with the kitty image. This is coloured with the Watercolour Pencils and then I used a Blender Pen to add some shading. This image is die cut with the Stitched Shapes Framelits and added with dimensionals to a piece of Rich Razzleberry Layering OvalsScallop die which is glued down to the DSP. Open this flap to reveal another layer for your message.
When fully open, you have this Whisper White piece with the sentiment stamped (Happy Birthday Gorgeous) in the centre where you can write your message.
A full list of products can be found at the end of this post!
You only have 1 more day to join my team and get the additional 10 ink pad family assortment for FREE with the Starter Kit. It is only $169 to join and you choose any products to the value or $235 to get started and FREE delivery. There are no contracts or strings attached to this offer. Click here to join (Australian residents only).
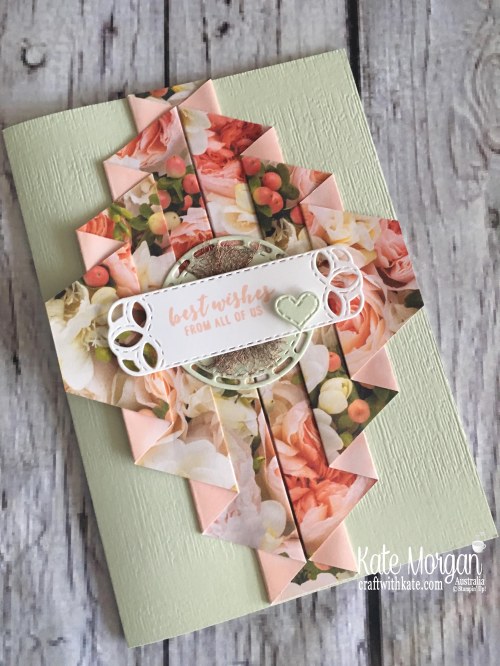
Today I have a double pleat fold card using the Petal Promenade DSP, but look at that Soft Sea Foam card with the texture… it is created with the new Subtle Dynamic Textured Embossing Folder!
I began with a piece of DSP measuring 10″ x 5-7/8″
Score long edge at 1″, 1½”, 2½”, 3″, 4, 4½”, 5½”, 6″, 7″, 7½”, 8½”, 9″
Measure on both of the short sides, mark with a pencil 2½” in from each end, so you have 4 marks in total (See diagram)
From these marks cut off each of the corner triangles as shown to the centre scorelines
Fold the scorelines as shown in the card sample
I also love the Stitched Label Framelits dies! The sentiment is from the new Itty Bitty Greetings stamp set and stamped in Petal Pink ink on whisper white card. The heart and circle are die cut in Soft Sea Foam and added with dimensionals. A small piece of copper trim has been frayed at either end and adhered with snail.
A list of products can be found at the end of this post!
July is the month to join my team with an additional 10 ink pad family assortment for FREE with the Starter Kit. It is only $169 to join and you choose any products to the value or $235 to get started and FREE delivery. There are no contracts or strings attached to this offer. Click here to join (Australian residents only).