Designer/Patterned/Specialty Papers (DSP), feminine, Flowers, Stampin' Up!, Techniques & Tutorials

Sunburst Corner

Dear Crafters,

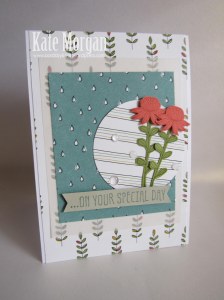
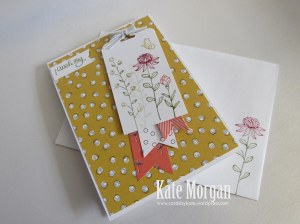
Today I shane another of the projects that we did last week during my Techniques class, the Sunburst Technique.

IMG_4657

I once again focused on using the Wildflower Fields DSP and the coordinating Flowering Fields stamp set.

The Wink of Stella pen was also used on the stamped flower, although it is very hard to see in the photo, but it is so shiny with a bit of sparkle!

I also did some paper piercing along the edges of sun rays for some added detail.

IMG_4659

I love this technique, it just shows off our gorgeous Designer Series Papers so well!

Here’s another variation using the very pretty, Love Blossoms DSP!

IMG_4669

All Catalogues, Clearance Rack & Weekly Deals are available online here! They are full of amazing new products and wonderful full colour picture inspiration. It is a must have for anyone interested in Ink, Paper and Stamps!

Shop Online 24/7 for products

Don’t forget to Follow My Blog to receive blog updates and join my Newsletter Subscription for all the latest news and specials!

Enjoy the many perks of being a Demonstrator (even just for yourself as a Hobby Demonstrator) by joining my friendly team, click HERE for details.

Happy Stamping!

Blog Signature-001

Birthday, feminine, Handmade Cards, Stampin' Up!, Techniques & Tutorials

Pleat Fold Card

Dear Crafters,

“A party without cakebis just a meeting”, I love that sentiment and I’m sure it will get loads of use.

So today, I’ve tried a new technique which I found on Song of My Heart Stampers website. Although we use slightly different card stock sizes to the USA, I have just altered my design slightly.

I love how bright and cheery this is using Melon Mambo, Daffodil Delight and that stunning It’s My Party Designer Series Paper.

Its My Party DSP, Party Wishes, Party Punch Pack, Pleat Fold Card, Stampin Up, Occasions 2016

I stamped the cake image onto white card stock and fussy cut it out, then added it to the card with dimensionals. The candle is stamped and then punched out, using the candle from the Party Punch Pack. How cute is it?!!!

Its My Party DSP, Party Wishes, Party Punch Pack, Pleat Fold Card, #StampinUp, Occasions 2016

What do you think of this technique?


All Catalogues, Clearance Rack & Weekly Deals are available online here! They are full of amazing new products and wonderful full colour picture inspiration. It is a must have for anyone interested in Ink, Paper and Stamps!

Shop Online 24/7 for products

Don’t forget to Follow My Blog to receive blog updates and join my Newsletter Subscription for all the latest news and specials!

Enjoy the many perks of being a Demonstrator (even just for yourself as a Hobby Demonstrator) by joining my friendly team, click HERE for details.

Happy Stamping!

Blog Signature-001

feminine, Flowers, Gift Ideas, Techniques & Tutorials

Card Box using Diagonal Plate

Dear Crafters,

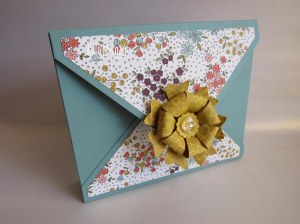
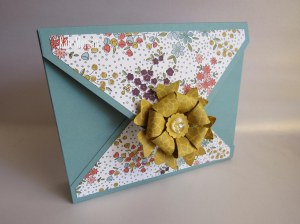
Back on the 18th January, I shared a card box/envelope and today I share another one that is slightly bigger but uses a full 12″ x 12″ sheet of card stock.

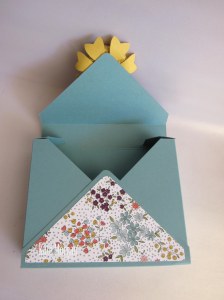
This envelope holds at least 6 A5 cards and 6 C6 envelopes. It is really just a thicker envelope that I made using the diagonal plate with the Simply Scored.

Card Box Wildflower Fields DSP #stampinup

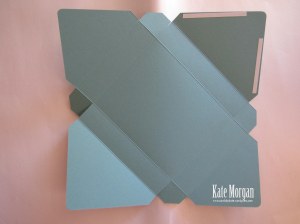
I started with an 12″ x 12″piece of card stock and scored on the diagonal plate at 4″ and 6″. Tip: Score from the ruler along the top and the sides so you don’t have to turn your card stock.

Turn the card stock 90 degrees and score both sides diagonally at 5″ and 7″.

Cut out the small triangles as shown below

Card Box Wildflower Fields DSP #stampinup

Cut up the scorelines as shown below

Card Box Wildflower Fields DSP #stampinup

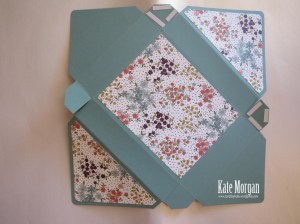
Now add your Designer Series Paper (Wildflower Fields DSP) and your Tear and Tape adhesive as shown

Card Box Wildflower Fields DSP #stampinup  Card Box Wildflower Fields DSP #stampinup

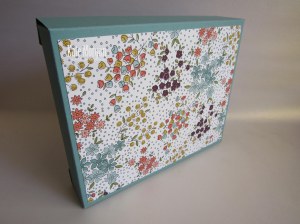
Also add another piece of DSP to the back of the box

Card Box Wildflower Fields DSP #stampinup

I have decorated the front using a flower I made with the Bow Builder Punch

Card Box Wildflower Fields DSP #stampinup

I adhered the flower to the top flap of the envelope/box as the weight will hold it closed.

Card Box Wildflower Fields DSP #stampinup

What do you think of my gift idea?

It is such a beautiful way to package up your handmade cards as a gift for your loved ones.


All Catalogues, Clearance Rack & Weekly Deals are available online here! They are full of amazing new products and wonderful full colour picture inspiration. It is a must have for anyone interested in Ink, Paper and Stamps!

Shop Online 24/7 for products

Don’t forget to Follow My Blog to receive blog updates and join my Newsletter Subscription for all the latest news and specials!

Enjoy the many perks of being a Demonstrator (even just for yourself as a Hobby Demonstrator) by joining my friendly team, click HERE for details.

Happy Stamping!

Blog Signature-001

Gift Ideas, Handmade Cards, Techniques & Tutorials

Wildflower Fields Card Box

Dear Crafters,

Today I share a gift idea in the way of a large envelope/card box to place some cards and envelopes in to give as a lovely gift to someone.

I have used Blackberry Bliss, this stunning rich colour coordinates with the Wildflower Fields Designer Series Paper that you can choose for free with any $90 order during Saleabration.

Card Envelope Project Wildflower Fields DSP #stampinup

This envelope can hold 6 A5 cards and C6 envelopes. It is really just a thicker envelope that I made using the diagonal plate with the Simply Scored.

I started with an 11″ x 11″piece of cardstock and scored on the diagonal plate at 3-1/2″ and 5-1/2″. Tip: Score from the ruler along the top and the sides so you don’t have to turn your card stock.

Turn the card stock 90 degrees and score both sides diagonally at 4-1/2″ an 6-1/2″.

Card Envelope Project Wildflower Fields DSP #stampinup

I have used a retired brad as the closer on this one, the flap folds down and underneath it to hold it closed.

I have even put a piece of DSP on the back to dress it up and show off this gorgeous DSP!

Card Envelope Project Wildflower Fields DSP #stampinup

Isn’t it a lovely way to give some cards to someone as a gift?!!!

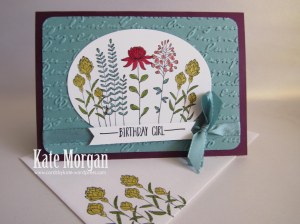
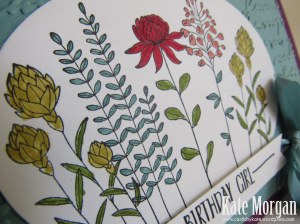
And here are the matching cards I made to go inside with the Flowering Fields stamp set

IMG_4348 IMG_4350

IMG_4351 IMG_4353

IMG_4420 IMG_4422

IMG_4430 IMG_4432

IMG_4425 IMG_4429

All Catalogues, Clearance Rack & Weekly Deals are available online here! They are full of amazing new products and wonderful full colour picture inspiration. It is a must have for anyone interested in Ink, Paper and Stamps!

Shop Online 24/7 for products

Don’t forget to Follow My Blog to receive blog updates and join my Newsletter Subscription for all the latest news and specials!

Enjoy the many perks of being a Demonstrator (even just for yourself as a Hobby Demonstrator) by joining my friendly team, click HERE for details.

Happy Stamping!

Name Banner

Birthday, Handmade Cards, Techniques & Tutorials

Balloons with Wink of Stella

Dear Crafters,

You have to check out the brand new Wink of Stella Brush. They are a glitter pen with a brush for accenting stamped images. They come in clear and gold.


Add sparkle to your projects without the mess. The Wink of Stella Glitter Brush is perfect for writing and adding subtle controlled glitter to stamped images. The brush tip produces thick and thin lines, allowing artistic freedom.
* Clear
* 1-7/8″ x 7″ | 4.8 x 17.8 cm
* Archival quality
* Acid free
* Xylene free

$14.00 (141897)

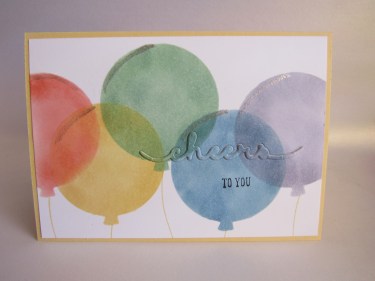
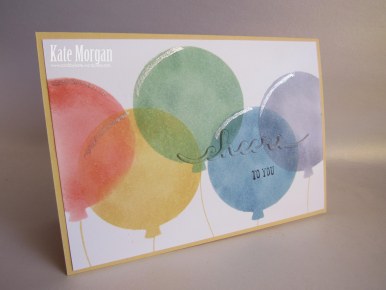
Today I have used the clear one!

Balloon Framelits, Wink of Stella, Greetings Thinlits #stampinup Occasions 2016 @cardsbykate

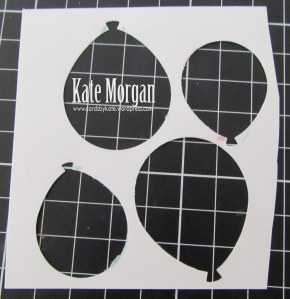
I have used the Balloon Framelits and die cut one in some acetate to create a stencil/mask.

I placed it over the white card and sponged the Calypso Coral balloon first, then moved it down and sponged the So Saffron balloon. The next ones were Mint Macaron, Marina Mist & Wisteria Wonder.

Balloon Framelits, Wink of Stella, Greetings Thinlits #stampinup Occasions 2016 @cardsbykate

Next I used the Greetings Thinlits and die cut the “cheers” sentiment across the balloons. I then die cut another 2 of the same sentiment from scrap white card.

I glued the card base and the stamped balloon sheet together and then glued the 3 layers of the cheers sentiment on top of each other, making sure I placed the coloured one on top! This gives that inlay look.

Last of all, I added the Wink of Stella to the top of each balloon to highlight them.

Balloon Framelits, Wink of Stella, Greetings Thinlits #stampinup Occasions 2016 @cardsbykate

Click here to watch the YouTube video on the Wink of Stella brush. It has some really cool tips!


All Catalogues, Clearance Rack & Weekly Deals are available online here! They are full of amazing new products and wonderful full colour picture inspiration. It is a must have for anyone interested in Ink, Paper and Stamps!

Shop Online 24/7 for products

Don’t forget to Follow My Blog to receive blog updates and join my Newsletter Subscription for all the latest news and specials!

Enjoy the many perks of being a Demonstrator (even just for yourself as a Hobby Demonstrator) by joining my friendly team, click HERE for details.

Happy Stamping!
Name Banner

Sympathy, Techniques & Tutorials, Washi Tape

Sponging & Reflection technique

Dear Crafters,

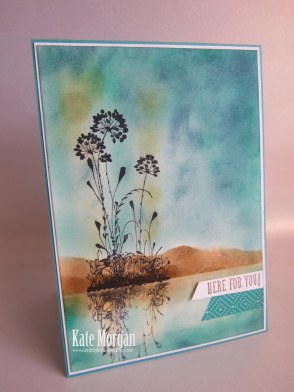
Today I share a card made using the sponging & reflection technique.

Now I have to say, I am a HUGE fan of artists who are great with using sponges, but I have to say, I am not.  I have a go and that is the point of this card. You need to try new things and maybe one day, you too will accomplish new highs.

Serene Silhouettes Sponging Reflection Technique #stampinup Sympathy card @cardsbykate

The very first thing I did, was to stamp the image in basic black ink. Then I stamped that same image onto some acetate and quickly applied the acetate to the card to create the reflection.

Then I placed a large post it note across the bottom of the main image to create the horizon first. I used sponge daubers to keep adding colour until I was happy with it. Be careful not to add too much, as you can always add more, not take it away!!!

Then I removed the post it note and did the lower section of the card. I added some washi tape and the sentiment overlay with a stapler.

Serene Silhouettes Sponging Reflection Technique #stampinup Sympathy card @cardsbykate

Inks: Marina Mist, Soft Suede, So Saffron, Basic Black, Island Indigo

Stamp sets: Serene Silhouettes

Serene Silhouettes Sponging Reflection Technique #stampinup Sympathy card @cardsbykate

How do you think I did with the sponging? Yeah, needs improvement, but that will come with more practice!


All Catalogues, Clearance Rack & Weekly Deals are available online here! They are full of amazing new products and wonderful full colour picture inspiration. It is a must have for anyone interested in Ink, Paper and Stamps!

Shop Online 24/7 for products

Don’t forget to Follow My Blog to receive blog updates and join my Newsletter Subscription for all the latest news and specials!

Enjoy the many perks of being a Demonstrator (even just for yourself as a Hobby Demonstrator) by joining my friendly team, click HERE for details.

Happy Stamping!

Name Banner

Birthday, Handy Tips, Mini Catalogue and Sale-a-bration (SAB), Techniques & Tutorials

Balloon Bouquet Punch Tips & Tricks

Dear Crafters,

You know how I have been sharing many projects lately with the new Balloon Bouquet Punch and Balloon Celebration stamp set? Well I have some tips & tricks for you when using them to make life easier! Do you want to see?

Step 1 – Begin by punching the balloons in some scrap card stock

How to line up the Balloon Bouquet Punch #stampinup

Step 2 – Sit the 2 balloon stamps inside the punch out pieces (stamp side down)

How to line up the Balloon Bouquet Punch #stampinup

Step 3 – Place your acrylic block on top

How to line up the Balloon Bouquet Punch #stampinup

Step 4 – Now stamp in the colours you require

How to line up the Balloon Bouquet Punch #stampinup

Step 5 – Your punch will now line up perfectly to punch both balloons together without all that wasted card stock

How to line up the Balloon Bouquet Punch #stampinup

Voila – how cool is that?!!!!

How to line up the Balloon Bouquet Punch #stampinup

From tomorrow you will be able to purchase these products. and let me tell you, you won’t be disappointed!!!!

The Occasions catalogue and Sale-a-bration brochure goes live on 5th January 2016!


All Catalogues, Clearance Rack & Weekly Deals are available online here! They are full of amazing new products and wonderful inspiration. It is a must have for anyone interested in Ink, Paper and Stamps!

Shop Online 24/7 for products

Don’t forget to Follow My Blog to receive blog updates and join my Newsletter Subscription for all the latest news and specials!

Enjoy the many perks of being a Demonstrator (even just for yourself as a Hobby Demonstrator) by joining my friendly team, click HERE for details.

Let the excitement begin and Happy Stamping!

Name Banner

Birthday, Celebrate, Free Product, Handmade Cards, Mini Catalogue and Sale-a-bration (SAB), Techniques & Tutorials

Pop up Slider Card

Dear Crafters,

Happy New Year to you all, I hope that your celebrations were safe and wonderful and your year ahead is full of love, laughter, happiness & of course loads of crafting!

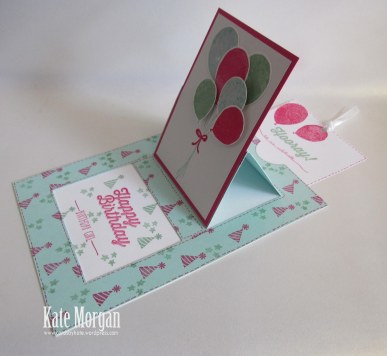
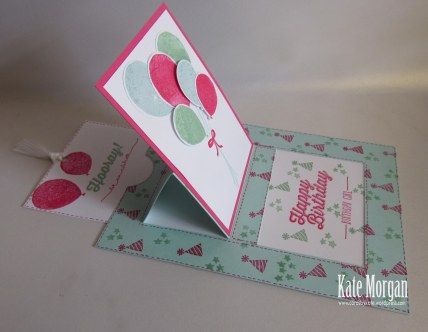
Today I share with you, a new technique that has been around for many years, but I have not made until now. It’s the pop up slider card.

Slider Card Balloon Celebration Bouquet #stampinup

I love new products and today I have used a few of them lol. These are from the Occasions catalogue and a couple of the FREE sets from the Sale-a-bration brochure which goes live on 5th January 2016!

I used the Balloon Celebration stamp set and the coordinating Balloon Bouquet Punch. This punch has 2 size balloons on it, so it is fantastic value!  I also used the Hello stamp set and Perfect Pairings stamp set, both of which can be earned FREE during Sale-a-bration. All you have to do is spend $90 and choose 1 FREE item, spend $180 and choose 2 FREE items and so on.

Here’s how it works. As you pull the ribbon tab at the top, the middle section of the card opens up to reveal hidden messages.

Slider Card Balloon Celebration Bouquet #stampinup

Slider Card Balloon Celebration Bouquet #stampinup  Slider Card Balloon Celebration Bouquet #stampinup

Push the tab back in and the card closes up.

Colours I’ve used are: Mint Macaron, Pool Party, Melon Mambo & Whisper White.

How cute is this technique??!!! I don’t know why it took me so long to give it a go, but I can see myself making many more of these fun cards.

Slider Card Balloon Celebration Bouquet #stampinup


I cased this idea from Helen Allen on YouTube. Click here to view her video tutorial.


All Catalogues, Clearance Rack & Weekly Deals are available online here! They are full of amazing new products and wonderful inspiration. It is a must have for anyone interested in Ink, Paper and Stamps!

Shop Online 24/7 for products

Don’t forget to Follow My Blog to receive blog updates and join my Newsletter Subscription for all the latest news and specials!

Enjoy the many perks of being a Demonstrator (even just for yourself as a Hobby Demonstrator) by joining my friendly team, click HERE for details.

Let the excitement begin and Happy Stamping!
Name Banner

Christmas, Techniques & Tutorials

Holly Jolly Greetings

Dear Crafters,

Today I share some more gorgeousness for Christmas with the masking technique!

I love this stamp set, Holly Jolly Greetings. I think it is so versatile and you can create so many different designs with it.

I am not usually a snowflake girl for Christmas, but I do particularly love these wooden snowflake embellishments and the Iced Rhinestone Embellishments are stunning and sparkly!

Holly Jolly Greetings #stampinup    Holly Jolly Greetings #stampinup

The card base is Marina Mist.

I have used Marina Mist and Soft Sky ink in the sponging, with a Night of Navy snowflake stamped over the top. I used two large post it notes to mask the card leaving space between for the sponging.

Super duper pretty if you ask me!

Holly Jolly Greetings #stampinup


All Catalogues, Clearance Rack & Weekly Deals are available online here! They are full of amazing new products and wonderful inspiration. It is a must have for anyone interested in Ink, Paper and Stamps!

Shop Online 24/7 for products

Don’t forget to Follow My Blog to receive blog updates and join my Newsletter Subscription for all the latest news and specials!

Enjoy the many perks of being a Demonstrator (even just for yourself as a Hobby Demonstrator) by joining my friendly team, click HERE for details.

Let the excitement begin and Happy Stamping!
Name Banner

Baby, Techniques & Tutorials

Welcome Baby Jackson Side Step Card

Something for Baby Side Step Card #stampinup

Dear Crafters,

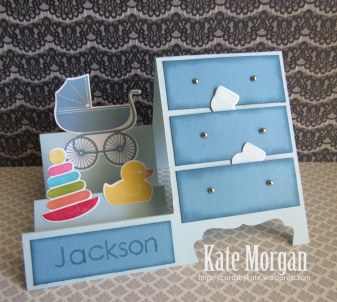
Today I used the Something for Baby stamp set with the coordinating Baby’s First Framelits to create a card for a new baby boy, Jackson!
The base card is Soft Sky and the drawers are Marina Mist, and I sponged the edges with Marina Mist ink. The knobs of th drawers are the 1/8″ Mini Silver Brads.

This is a side step card which folds flat to fit into a standard C6 envelope. I saw a similar card on Queen B Creations website, although I changed up my dimensions to use an A5 card, so I can make 2 cards from 1 sheet of A4 paper without wastage!

The Decorative Label punch was used to create the bottom of the dresser.

The pram and the duck were stamped with stampin’ inkpads then die cut with the coordinating framelits. I coloured the third image using Stampin Write Markers from the Brights Pack. The name was stamped using the Back to Basics Alphabet stamp set, which is Photopolymer so I could see exactly where I was stamping each letter to line them up!

Something for Baby Side Step Card #stampinup

How cute are these little booties sticking out of the drawers?!

Please leave a comment below if you like my card today.


All Catalogues, Clearance Rack & Weekly Deals are available online here! They are full of amazing new products and wonderful inspiration. It is a must have for anyone interested in Ink, Paper and Stamps!

Shop Online 24/7 for products

Don’t forget to Follow My Blog to receive blog updates and join my Newsletter Subscription for all the latest news and specials!

Happy Stamping,
Name Banner