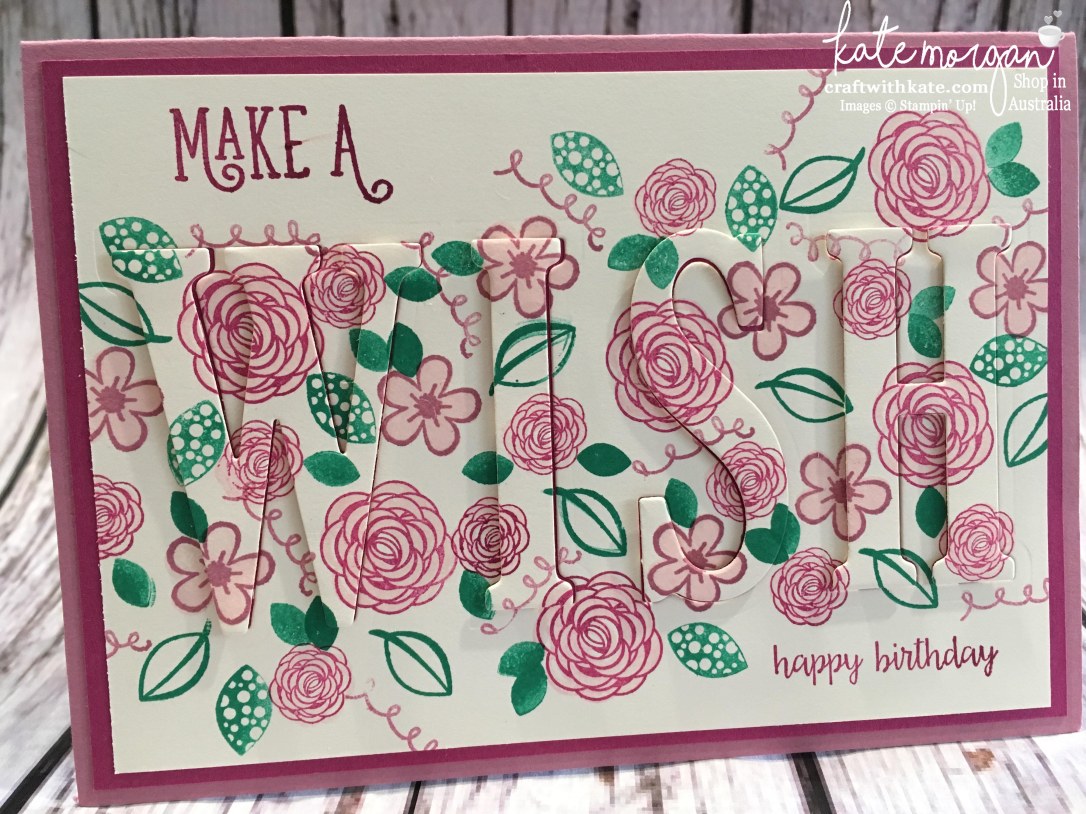
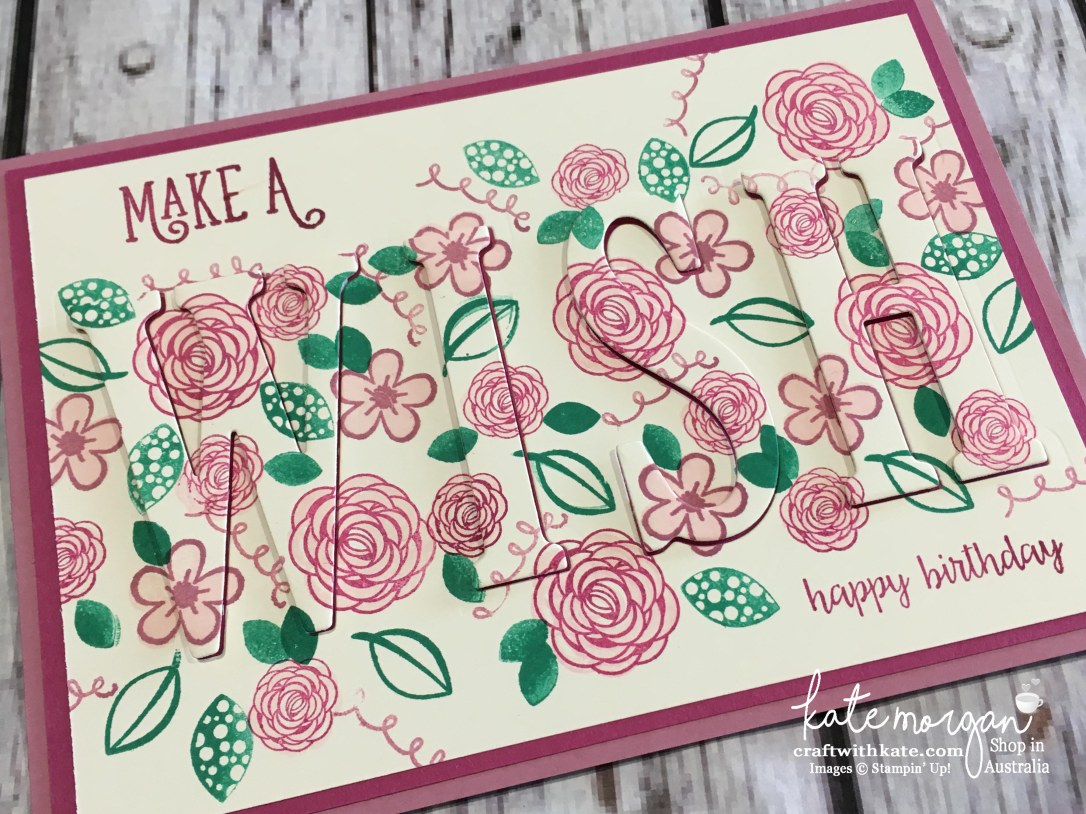
My project today is a another Eclipse card using the Happy Birthday Gorgeous stamp set!
I love to personalise these cards, but sometimes it is also great to have some birthday cards on hand to use at the last minute, so I made this one for that occasion.
I love this colour combination of Berry Burst, Powder Pink, Sweet Sugarplum and Emerald Envy!
The easiest way I found to get the letters lined up without them moving, was by putting some washi tape across the letters to hold them in place before die cutting. This also made it easier in the class setting to save time!
A full list of product can be found at the end of this post!
Don’t forget to Follow My Blog to receive blog updates and join my Newsletter Subscriptionfor all the latest news and specials!
My Eclipse card today uses the Painted Harvest stamp set and Large Letters Framelits dies, with the following colour combination.
I made this card for one of my favourite teachers from my school days, whom I also ended up working with until her Retirement, Patsy. She is such an amazing person who has so much to deal with but gets on with life, without any fuss. She was such an inspiration to me back in the 80s when she taught me Home Economics; cooking and sewing in Tasmania!
I still keep in touch with Patsy and every year I send her a card for her Birthday and Christmas. So here is her card for this year. I wish you all the best health and love today and always, Patsy. Happy Birthday!
The Eclipse card is a very popular technique at the moment and it works beautifully with this stamp set. The ribbon is retired but it was the perfect 1/4″ cotton ribbon in Pumpkin Pie to coordinate perfectly!
A full list of product can be found at the end of this post!
Don’t forget to Follow My Blog to receive blog updates and join my Newsletter Subscriptionfor all the latest news and specials!
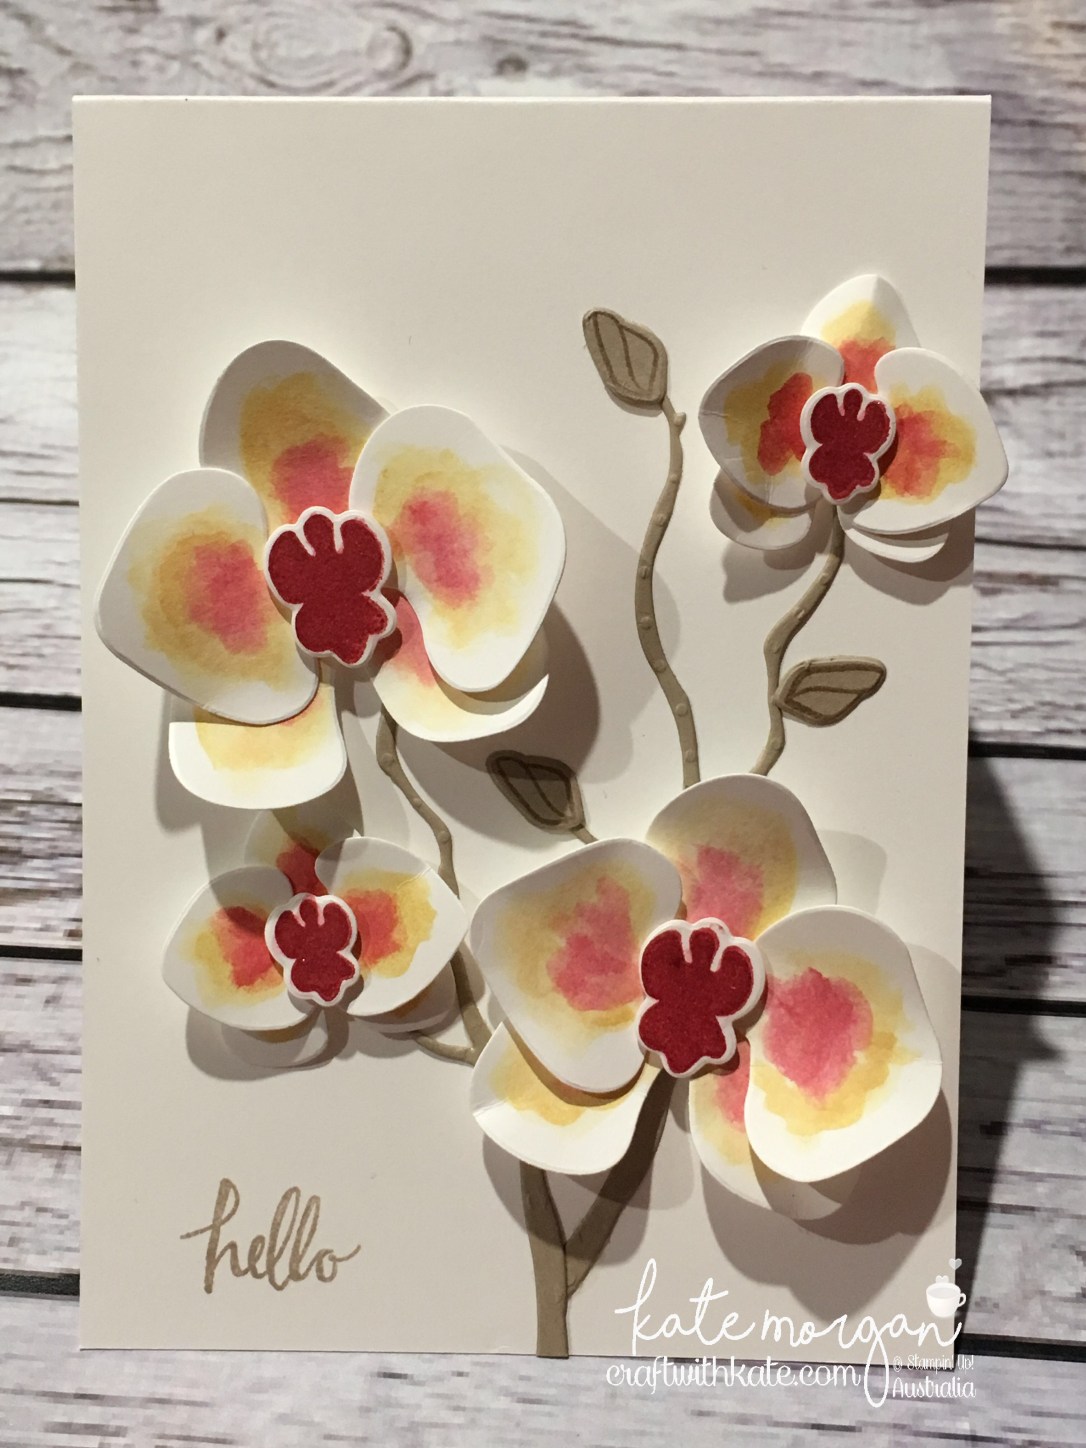
Today I share another card using the amazing, Climbing Orchid Bundle on page 21 of the Annual Catalogue, and by purchasing the stamp set and framelits together, you save an extra 10%.
This card, I did something a bit backwards…. I die cut all the pieces first before colouring or stamping! Yes, I know it sounds a little weird but you will see why in a minute.
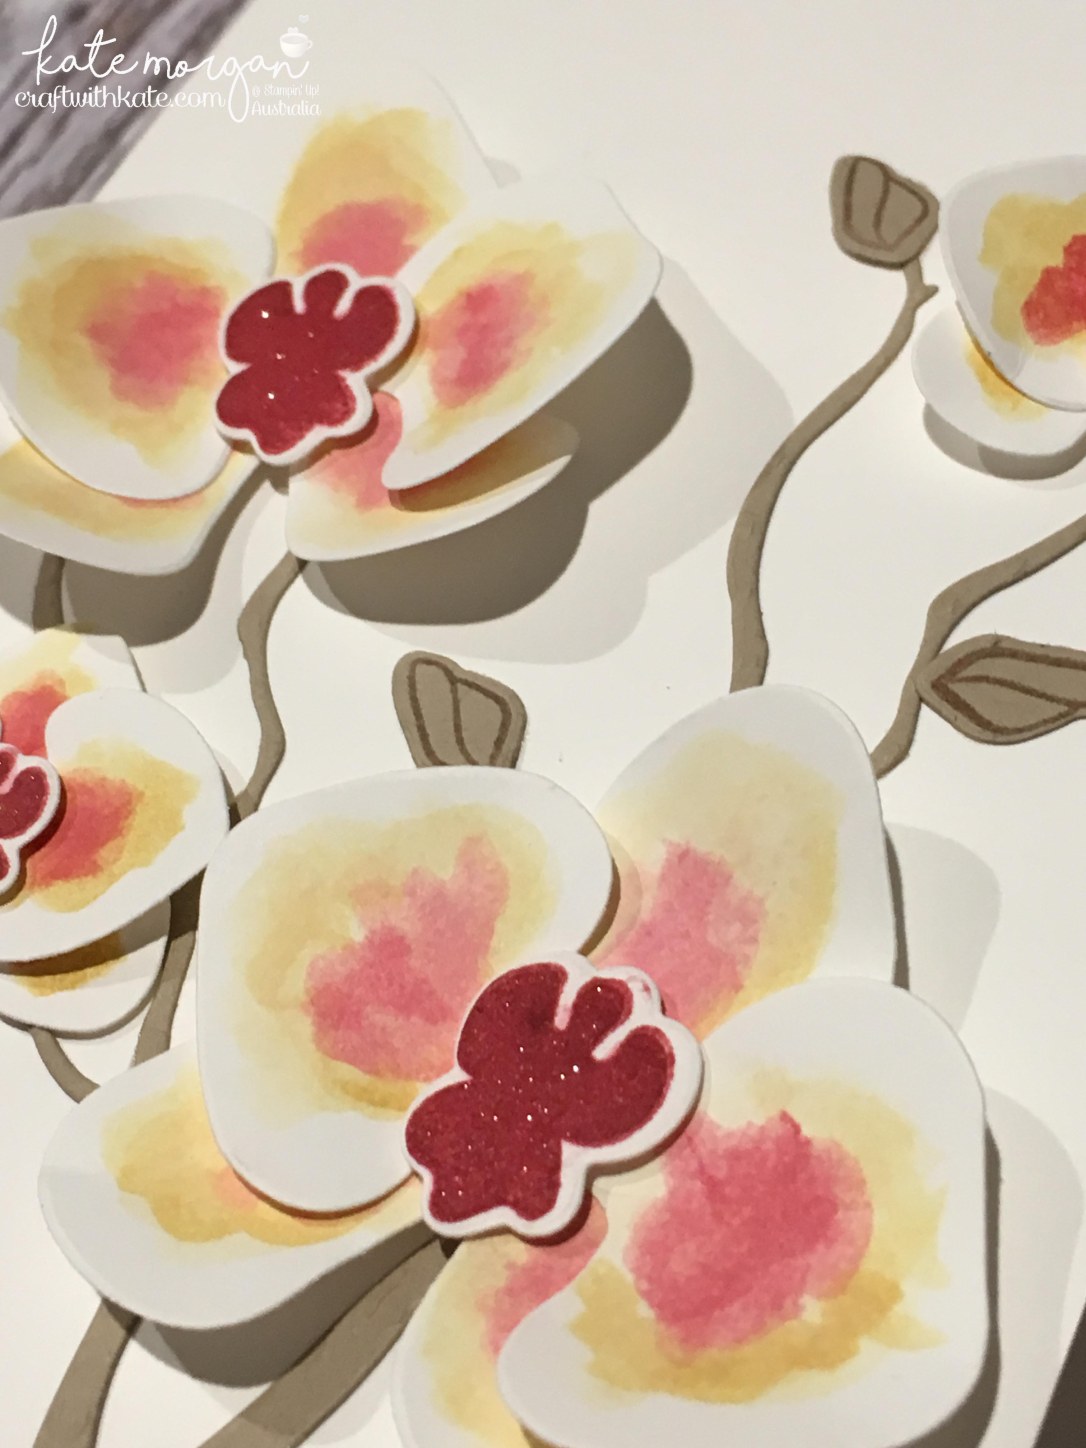
I love the softness of the watercolouring of these flowers. I used an Aquapainter to apply ink to each of the petals allowing each colour to dry before adding the next. The stem is die cut using the branch from the Seasonal Layers Thinlits!
The centre is a little dark so I added some Wink of Stella to glimmer it up!
I wasn’t sure about adding a sentiment to the front of the card, but I think “hello” can be used for so many occasions, I went with that!
What do you think of this watercolour look? Will you give it a try???
A full list of product can be found at the end of this post!
Don’t forget to Follow My Blog to receive blog updates and join my Newsletter Subscriptionfor all the latest news and specials!
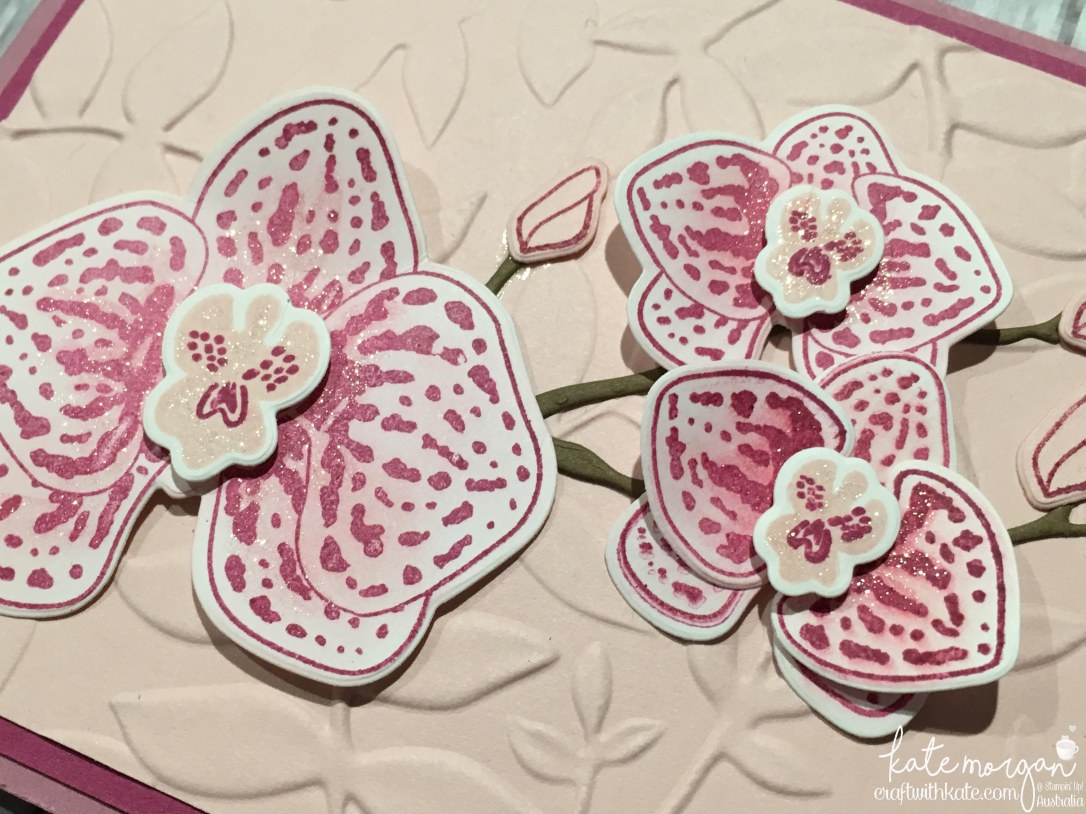
It’s less than a week until my sisters birthday, and I know she loves orchids as she has been successfully growing them for many years. When I saw the Climbing Orchid Bundle on page 21 of the Annual Catalogue, I knew I had to purchase it! By purchasing the stamp set and framelits together, you save an extra 10%.
I’m not sure if I will give this card to her or make some more, but this is my first play and it certainly won’t be my last ♥
I love the softness of the colouring on these flowers. I used a sponge dauber to lightly colour the petals with Powder Pink, then Berry Burst ink before applying some Wink of Stella. The stem is die cut using the branch from the Seasonal Layers Thinlits!
The top photo is a little dark and the one below, is a little bright, but I was trying to show you the Wink of Stella glimmer on the flowers!
Check out that embossing on the Powder Pink background, isn’t it gorgeous?!! This is the new Dynamic Textured Embossing Folder, Layered Leaves.
I wasn’t sure about adding a sentiment to the front of the card, so I decorated the inside and added the “enjoy today” sentiment with another small orchid!
A full list of product can be found at the end of this post!
Don’t forget to Follow My Blog to receive blog updates and join my Newsletter Subscriptionfor all the latest news and specials!
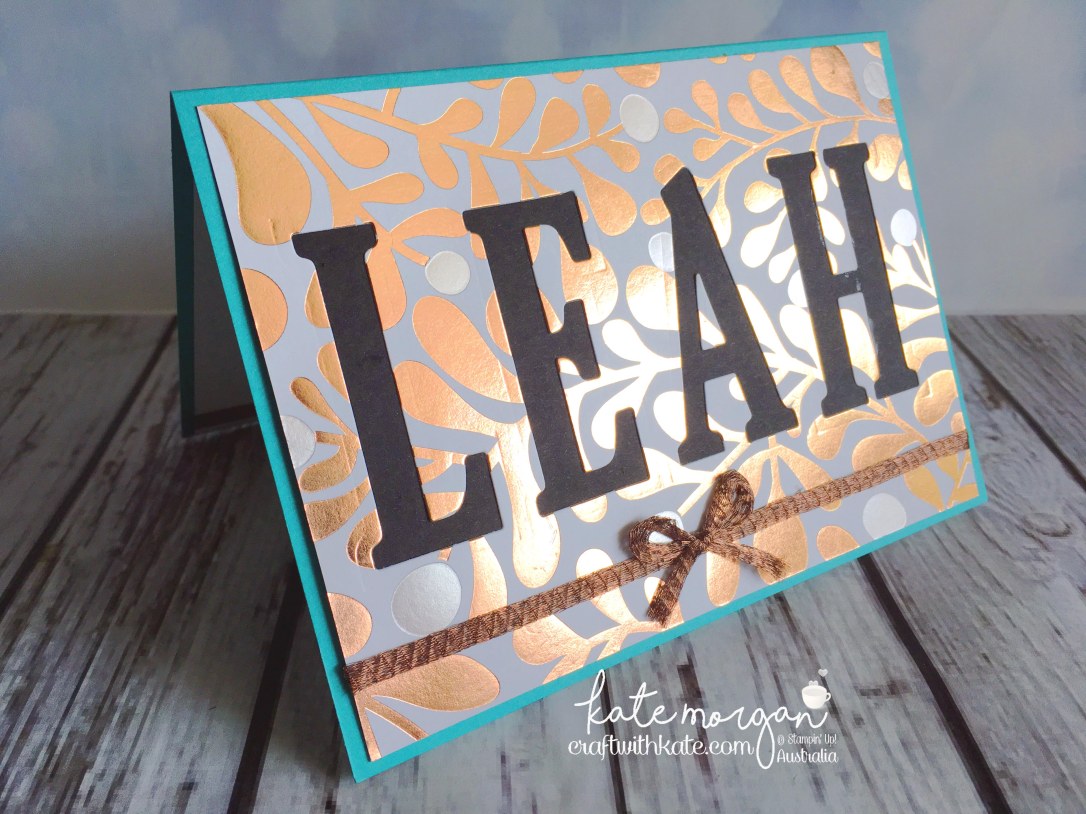
My project today has no stamping, can you believe that?!!! When you see it, you will see why!
I am using the Large Letters Framelits dies, and the Year of Cheer Specialty Designer Series Paper & Washi Tape. #cutitnothoardit
With this DSP, you don’t need to do a lot, as it is simply stunning with its metallic patterns. It is my niece’s birthdays coming up next month, so I was needing to make some cards for their special day. Here is one I was going to make using the Eclipse technique, but I loved how the letters stood out so much with some black cardstock behind the DSP, I didn’t want to put the letters back on top!
Just check out that metallic shine!!!! And the copper trim is just the perfect match and finishing touch with the bow.
The inside of the card is finished with some strips of Washi Tape.
Check out this video to see more on the Year of Cheer Suite!
A full list of product can be found at the end of this post!
Don’t forget to Follow My Blog to receive blog updates and join my Newsletter Subscriptionfor all the latest news and specials!
My project today uses the Painted Harvest & Beautiful Bouquet stamp sets and coordinating Leaf punch. Purchase the Painted Harvest stamp set and the punch together as a bundle, and you save 10%.
I had a crafting day at a friends house with 4 of us making all different types of cards. Some were concentrating on Christmas, while I needed some Thank you cards and wasn’t sure what to take, so decided on the Painted Harvest bundle!
I have used: Berry Burst, Sweet Sugarplum, Crushed Curry, Old Olive
Here is another one in blues – I just love the country feel that the gingham ribbon gives to this card, but then again, I do love blue, so maybe I am bias!
I have used: Night of Navy, Marina Mist, Soft Sky, Crushed Curry, Old Olive
and if you are more of a traditionalist and like to see these sunflower images in yellows and oranges, I have this one so you are not disappointed!!!
I have used: Tangerine Tango, Daffodil Delight, Sahara Sand, Old Olive
A full list of product can be found at the end of this post!
Don’t forget to Follow My Blog to receive blog updates and join my Newsletter Subscriptionfor all the latest news and specials!
Welcome to another Art with Heart Team blog hop where we are focusing on fancy folds. You will find loads of creative inspiration tonight, showcasing different folding techniques and projects. Don’t be afraid of trying some Fancy Fold cards; they may look intimidating, but in fact, they are not that difficult to create.
If you’re already hopping, then you just came to me from the talented, Tina Gillespie. If you’re just joining, great! Use the “next” button at the end of my post to hop all the way around. Blog Hops are full circles, so you can start hopping here and then at the end of each post there is a link to the next one. There is also a list of participants at the end in case of any broken links.
Now let’s get started!
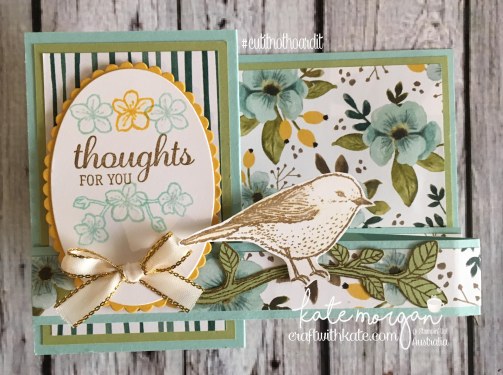
For my projects today I am using the Best Birds stamp set with the Whole Lot of Lovely Designer Series Paper. I love how striking this Designer Paper is too and I knew it had to be a focal point. #cutitnothhoardit
Fancy Fold Card #1
For my first card today, I am sharing a fairly simple fancy fold card, a Double Z Fold.
The card base is Pool Party card = 11⅜” x 5⅛” and score at 2¾” & 5½”. Trim off a 1″ strip from the bottom of the card which will create the double z fold. You just flip that strip over, so the shorter end is on the right as shown. Then you decorate as you like. Here is my colour combination using the coordinating colours in the Designer Paper!
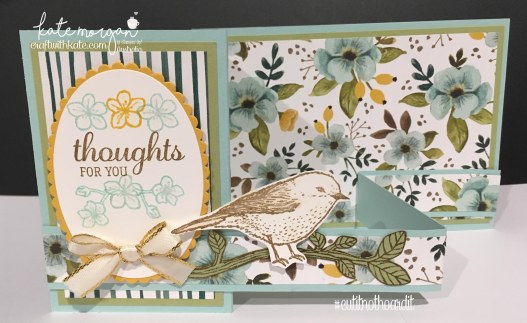
Back panel of the card
Products used
Stamps:Best Birds Inks: Crushed Curry, Pool Party, Soft Suede Card/Paper: Crushed Curry, Pear Pizzazz, Pool Party, Whisper White, Whole Lot of Lovely DSP Accessories: Big Shot, Layering Ovals Framelits dies, Magnetic Platform, Stampin’ Trimmer, Paper Snips, Stampin’ Scrub, Stampin’ Mist, Tombo Multipurpose Glue, Simply Scored, Clear Block Bundle, Dimensionals, Fast Fuse, Tombo Glue, Wink of Stella, Blender Pen, ⅜” Gold Metallic-Edge Ribbon
Fancy Fold Card #2
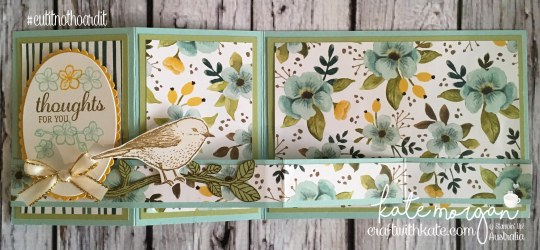
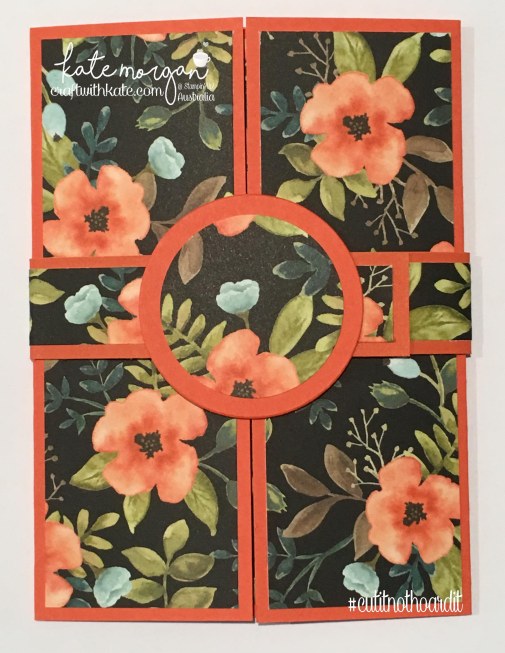
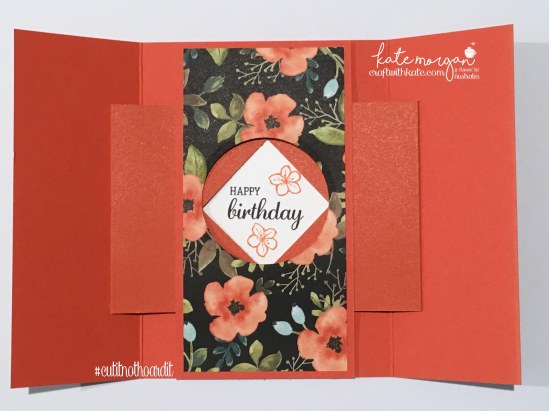
For my second one, I have a more advanced fancy fold card. I am sharing a style that I think is amazing, but I’ve never found it in Australian cardstock sizes, so I created my own A5 Gatefold Shutter card. It took quite a bit of time to figure out all the correct measurements, but I am super happy with the outcome. Now I have mastered it, I can whip them up in no time at all!
When you take off the belly band, the centre diamond opens to reveal a secret message inside!
Kids love this style of card, they think it’s like magic when it opens up. They look difficult to make, but if you follow the instructions, they are actually quite easy.
If you would like a copy of my FREE tutorial how I made these cards, head over to my ‘Free Tutorials’ page to download your PDF copy, but make sure you continue the blog hop first to see what all the other talented ladies have created!
Products used
Stamps:Best Birds Inks:Basic Black & Tangerine Tango Card/Paper: Tangerine Tango, Whisper White, Whole Lot of Lovely DSP Accessories: Big Shot, Layering Circles Framelits dies, Magnetic Platform, Stampin’ Trimmer, Paper Snips, Stampin’ Scrub, Stampin’ Mist, Tombo Multipurpose Glue, Simply Scored, Clear Block Bundle, Dimensionals, Fast Fuse, Tear & Tape, Bone Folder, Ruler, Pencil, 1¾” circle punch, 2¼” circle punch
Thanks for visiting today.
Don’t forget to email me at craftwithkate@live.com.au to request your copy of any Catalogue or to ask about joining the Art With Heart team.
Now it’s time to follow the blog hop to our next participant, Andrea Roberts.
If you find a broken link or have come to this blog hop from a different entry point, you can view the participants below:
Did you know that Stampin’ Up! is not all about cardmaking and scrapbooking, but we can make many other crafty projects too? Well today’s project features the Delightful DaisyDesigner Series Paper. #cutitnothoardit
I don’t know about you, but here in Australia it has been very cold and we are welcoming any sort of warmer weather now that it is the beginning of Spring, and what better way to celebrate, than with this stunning Designer Paper.
How pretty are these?!!!
What a great gift idea these would make for Mother’s Day, Birthday’s or even as a special Thank You or Happy Retirement gift. They are very easy to make if you have the right tools and a little creativity.
How cool is it that you can create a coordinating jewellery set made with your favourite Designer Series Paper to go with that special handmade card!
The jewellery parts were purchased on eBay.
Don’t forget to Follow My Blog to receive blog updates and join my Newsletter Subscriptionfor all the latest news and specials!
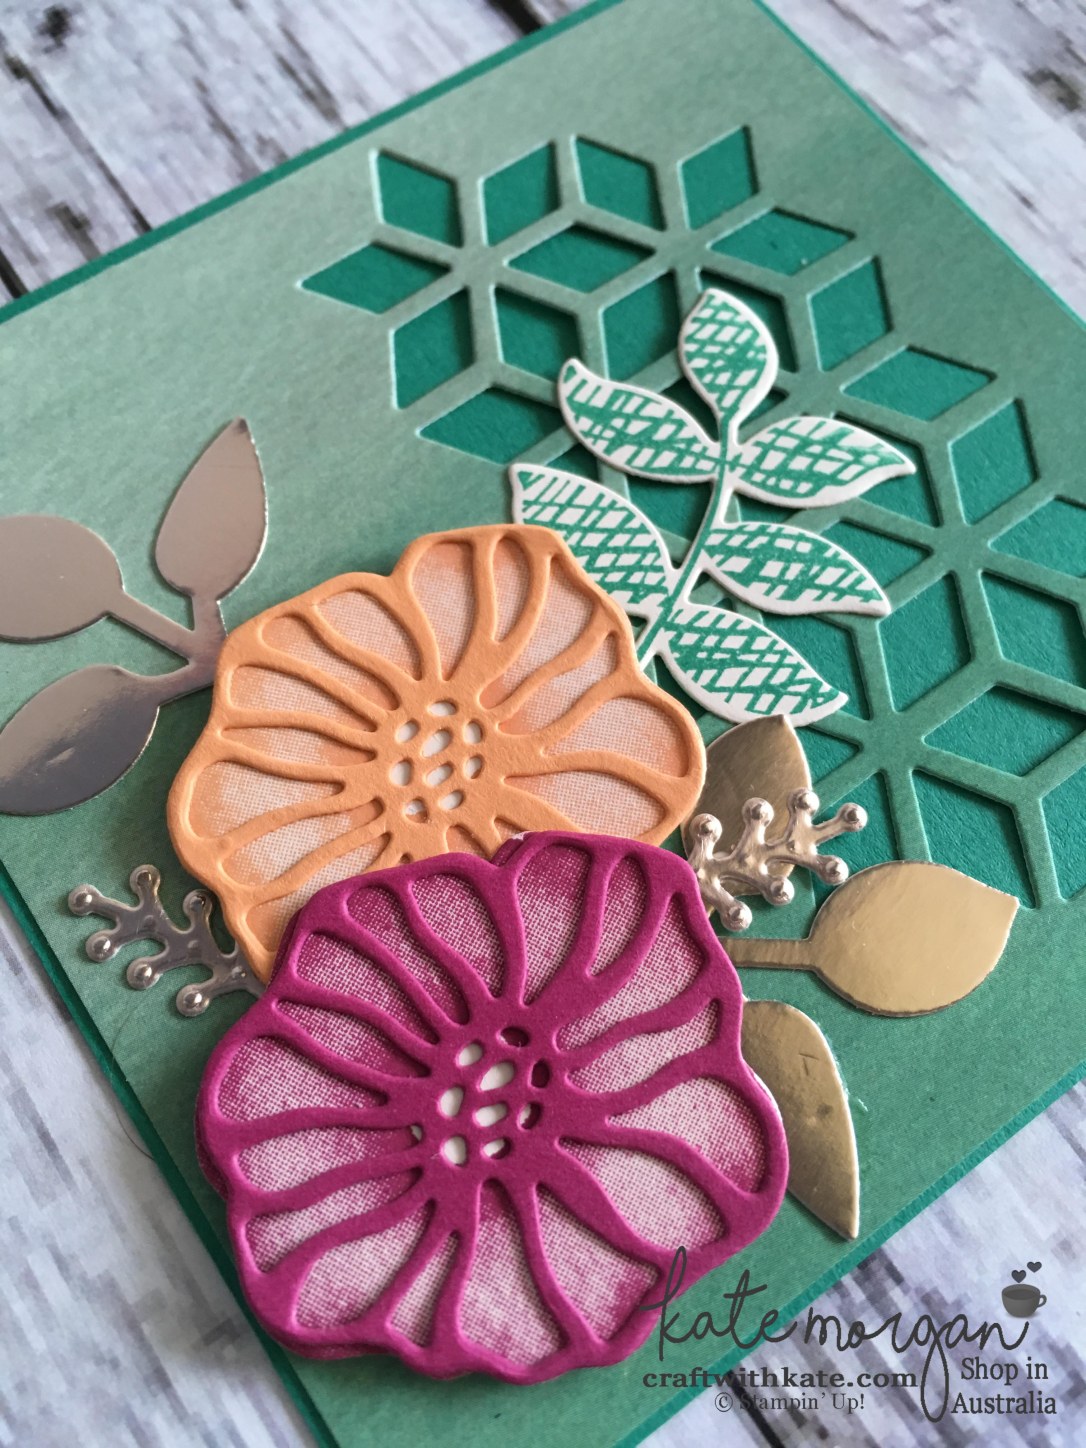
My project today is a 4″ x 4″ card, using the Oh So Eclectic stamp set and coordinating Eclectic Layers thinlits dies, with the pretty, Naturally EclecticDesigner Series Paper. #cutitnothoardit
My colour combination for this card is Berry Burst, Emerald Envy and Peekaboo Peach!
How gorgeous is that background die cut with the Eclectic Layers thinlits?!! I just adore this.
Look at those leaves shining on this card. This is the new Champagne Foil that is now available from the Holiday catalogue. I love it even more than any of the other foil colours we have, and I sure hope they keep it and add it into the next annual catalogue.
A full list of product can be found at the end of this post!
Don’t forget to Follow My Blog to receive blog updates and join my Newsletter Subscriptionfor all the latest news and specials!
My project today uses the Oh So Eclectic stamp set and coordinating Eclectic Layers thinlits dies, with the pretty, Naturally EclecticDesigner Series Paper. #cutitnothoardit
As you can see in the image above, the pretty colour combination for this card!
I have to thank my lovely friend, Kimberly Hern who came to stamp with me last weekend and she let me borrow this bundle to play with. I am trying to resist buying it, but it is just such a gorgeous artistic set and so different to lots of the usual Stampin’ Up! style. Thanks Kim for inspiring me!
Look at that silver glimmer shining on this card, who wouldn’t want to open an envelope to see this diamond inside?!!!!
A full list of product can be found at the end of this post!
Don’t forget to Follow My Blog to receive blog updates and join my Newsletter Subscriptionfor all the latest news and specials!


 I made this card for one of my favourite teachers from my school days, whom I also ended up working with until her Retirement, Patsy. She is such an amazing person who has so much to deal with but gets on with life, without any fuss. She was such an inspiration to me back in the 80s when she taught me Home Economics; cooking and sewing in Tasmania!


 Metallic-Edge Ribbon")