The Flowers for Every Season designer paper is just amazing, from the vibrant colours to the more subdue colours in this sheet. I think Misty Moonlight is my favourite of the NEW In Colors, and I love this particular patterned paper in the pack.
This card is very simple, but I feel that the paper does all the talking and I didn’t want to cover it up too much. Hence the vellum layer behind the sentiment.
A full list of products can be found at the end of this post.
2020-2021 Annual Catalogue ends 3 May 2021 2020 August-December Mini Catalogue coming soon on 4 August 2020
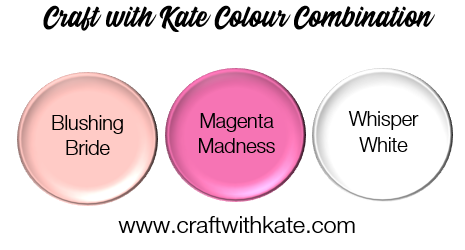
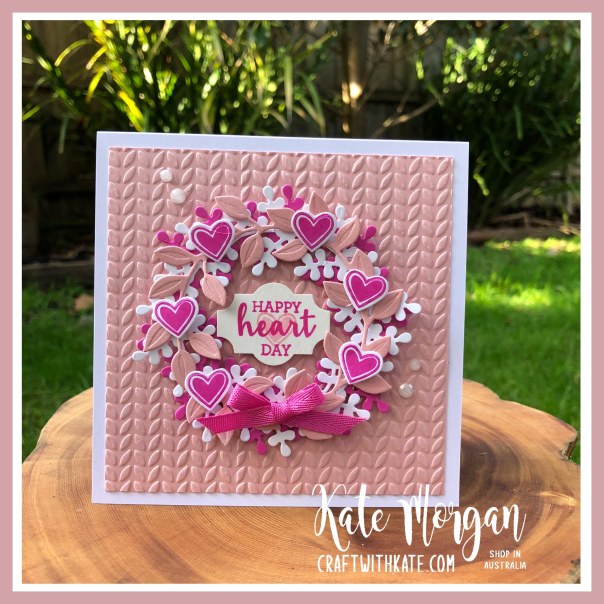
Oh how I love this Arrange a Wreath Bundle 🤍 and especially with this colour combination of Blushing Bride, Magenta Madness and Whisper White.
White card base: 12.5cm x 25cm, scored at 12.5cm
Blushing Bride Layer: 11.5cm x 11.5cm, embossed with the Greenery Embossing folder
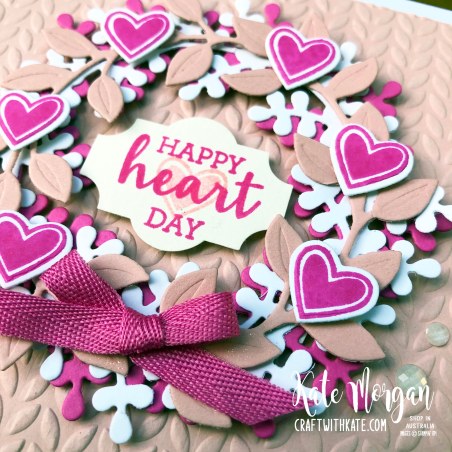
The 3 x wreaths are die cut in each of the coloured cardstock. The Magenta Madness and White wreaths are glued together and the Blushing Bride wreath is added on top with mini dimensionals. Add some Wink of Stella to the Blushing Bridge wreath.
Stamp 8 x hearts in Magenta Madness ink and die cut them out. These are added with mini dimensionals and a ribbon bow added with Multipurpose glue.
The sentiment is stamped onto white card and cut using the Everyday Label Punch and added to the centre with dimensionals. Are you wondering why the punched piece doesn’t look like the punch shape? Well, I needed a smaller shape but I liked the shape of the side of this punch, so when placing the sentiment into the punch, I punched it closer to the top of the sentiment, then turned it around and put it back into the punch from the inside and slid it in until I was happy with the position and punch!!! Tada!!!
Check out those pretty Elegant Faceted Gems, they are so sparkly.
Please head over to Cathy’s blog to see all the other participants in this week’s Colour Creations Showcase!
A full list of products can be found at the end of this post.
Oh my, this Prized Peony Stamp set and coordinating dies are amazing!
When I opened the pack of dies, I thought “how on earth do these work” as I was so overwhelmed with the amount of dies in there.
But once you know how they go together, it’s easy right?!!! And yes, it is really easy to put the flower together. It is 4 dies to create the bloom, each one sliding into the other from smallest to largest, then the stamen last. I have kept this one white as my first attempt, but it really is glorious just like that.
I stamped one of the images in Magenta Madness ink onto the same colour card base. The vellum layer is die cut and added with a couple of strips of Designer Paper over the top before adding the bloom on dimensionals. This made it easy to add some green leaves underneath where you want them.
Both sentiments are from the Peaceful Moments stamp set, stamped in Magenta Madness ink. The 60 is die cut from the retired Little Numbers dies, but there are some new ones in the annual catalogue, which I don’t have just yet.
Do you love this bundle too? Well as a special offer this month only, when you join my team, you can add this bundle for FREE to your already awesome valued starter kit. That’s $235 worth of product of your choice, plus this bundle valued at $100.75, and free delivery and all you pay is $169! I have a lovely team of ladies who joined for the discount and are hobby demonstrators. We would love to have you as part of our team too.
A full list of products can be found at the end of this post.
Tonight’s Stampin’ Up! colour is Blackberry Bliss!
My card tonight was inspired by Jennifer Frost who shared this background technique, although I need lots more practice at it!!!! 😉
It was a fun way of creating a more abstract background to my card.
I started with some Purple Posy card stock and began swiping the Highland Heather inkpad across the card, top to bottom, mainly around the edges. Then to build up the colour, I went over it with Rich Razzleberry then Blackberry Bliss ink. It creates such a fun texture and I’m sure it will look different every time.
Then I stamped the parfum and flowers in Memento ink onto Purple Posy card, die cut them out and coloured them with Stampin’ Blends and Wink of Stella.
The larger leaves are die cut with the new Forever Flourishing dies, but I stamped the floral image across the leaves in coordinating colour to give it some interest. This same floral image has been stamped in the top left and bottom right corners of the background card in Blackberry Bliss ink for a subtle impact.
I stamped the dots in Versamark ink, added White Emboss Powder and heat set them. I tie in the white, I also added two smaller leaf dies and a white bow. The perfum and roses are popped up on dimensionals.
Please head over to Cathy’s blog to see all the other participants in this week’s Colour Creations Showcase!
A full list of products can be found at the end of this post.
Welcome to the Art With Heart Team Creative Showcase. This month the team are featuring projects using their favourite products from the new Stampin’ Up! 2020-21 Catalogue. The new catalogue is full of amazing new stamp sets, some bundled with dies or punches. The range of kits, papers and accessories complete the range of products you will see featured in this Showcase.
Now let’s get started!
Have you seen this glorious new Designer paper, Flowers for Every Season? Every pattern in the pack is stunning and it has all the new In Colors in it plus Poppy Parade and White!
Flowers for Every Season DSP #152486
For my card tonight, I am using the lovely new In Color, Just Jade along with a couple of other colours from the patterned paper I have selected.
I started with a white square card base and layered some Just Jade card & patterned paper before stamping on the white card using the Stamp in the Round (SITR) technique.
The centre circle features can be cut from the centre of the two larger layers before gluing them down to the base card to get the most out of your products. The sentiment can also be stamped on the larger Jade card and fussy cut. This was stamped in Versamark ink, White Stampin’ Emboss Powder added and heat set before fussy cutting. This circle feature in the centre is popped up on dimensionals and a couple of 2020-22 In Color Enamel Dots scatted across the card to finish it off.
Card layer sizes
White card base: 12.5cm x 12.5cm
Just Jade Layers: 12cm x 12cm and 9.3cm x 9.3cm
Patterned Paper: 11.5cm x 11.5cm
Whisper White card: 9cm x 9cm
This is all I can share with you at the moment, until lots of my other favourite products arrive (they are still in transit through the post). Make sure you follow my blog and you can see those new projects very soon!
A list full of products can be found at the end of this post.
The next contributor to showcase their creativity with you is the very talented, Michele Taylor.
If you find a broken link or have come to this showcase midway, you can view the participants below:
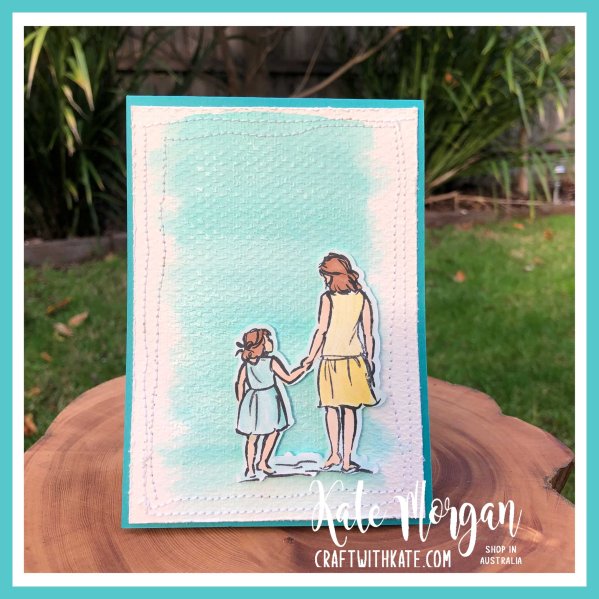
Tonight’s Stampin’ Up! colour is the gorgeous, Bermuda Bay!
I just love this stunning colour and I was very happy with how my card turned out. This Beautiful Moments stamp set is so sweet and I am super happy that it carried over into the new Annual catalogue.
I did a water colour wash on some Water colour paper with Bermuda Bay ink mixed with some Frost White Shimmer White Paint and applied it with an AquaPainter. After it dried, I ran it through my embossing machine in the Tasteful Textile 3D Embossing Folder. I cut the paper down to size and used my sewing machine to add some crazy stitching around the edges as a border. I roughed up the edges with my scissors and then glued it to my card front.
The image is stamped and coloured, also with Shimmer Paint added. Cut out the image and I used my Light Pool Party Stampin’ Blends Marker around the edges so it blended into the background better. This is popped up on dimensionals.
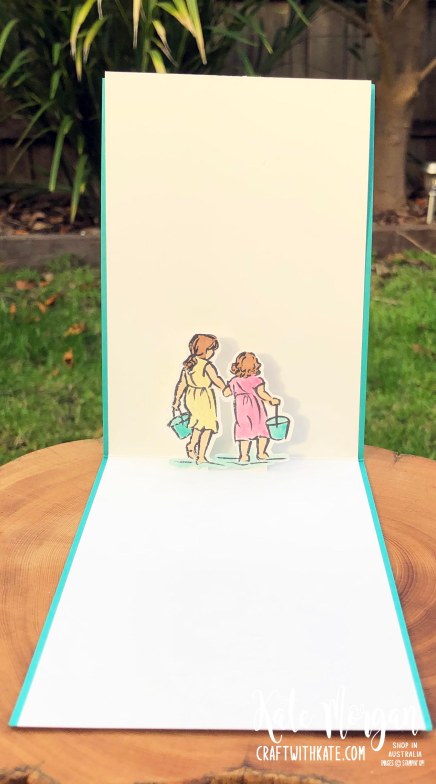
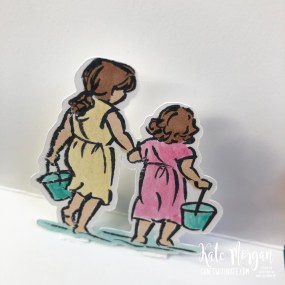
On the inside I wanted to create a pop up card with the stamped image of the two girls. I coloured them the same way.
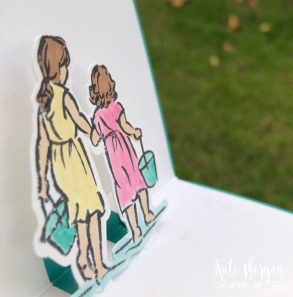
This photo shows them a little closer, popped up (especially with the shadow)!
It is very easy to create – simply cut the insert and score it in half. Here is a template:
When you fold this insert in half (valley fold), the two small sections need to pop into the card (mountain fold) to create the small sections. I think you can see it better on this angle. I just measured exactly where these cut lines needed to be and how wide, to sit behind the image of the girls.
Please head over to Cathy’s blog to see all the other participants in this week’s Colour Creations Showcase!
A full list of products can be found at the end of this post.
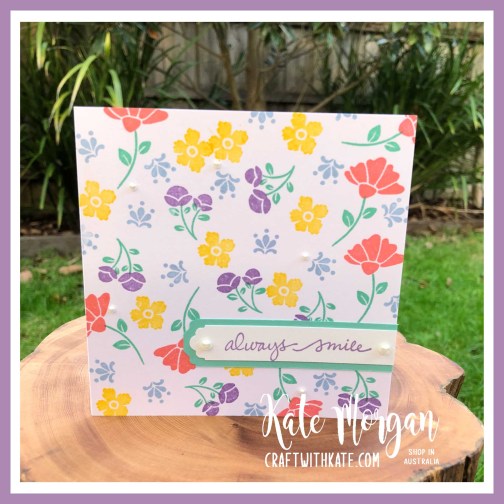
Oh how I love a quick and easy card and this one is just that using Stamps, Ink & Paper (SIP)!
Some simple stamping to create the background and then a punch to create the sentiment.
The Lovely You Bundle is awesome – I love these smaller floral images.
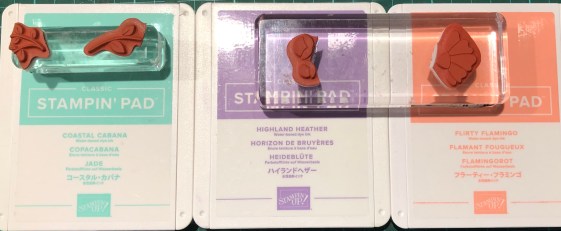
I cut my stamps in half between the stem and the bloom so that I can stamp even faster. By spacing the stamps on the blocks you can have two ink pads open and ink the stamps in different colours at the same time!
A full list of products can be found at the end of this post.
This Lovely You Bundle was also added to my shopping cart as soon as I was able to order it during our demonstrator pre-order period. I just love the smaller floral images, especially because they are perfect for creating the Stamp in the Round style of card (SITR).
By creating a template to use in your Stamparatus, you can stamp an image, rotate the cardstock 90o and stamp again. Continue this process and you end up with a stunning design all in perfect position.
My colour combination
I used the retired wood grain papers on this card, but I have some of the new In Good Taste papers arriving very soon, which are out of this world, amazing! I cannot wait to share some projects with you using those new papers.
A list of products can be found at the end of this post.
That may sound like an odd question. But, stop and think about it.
Where do you get ideas from? What sparks the creative thoughts flowing? Have you been feeling in a slump lately?
With everything going on right now, I am sure that many are not feeling like their peppy selves or are maybe finding a hard time feeling “creative”.
Keep looking for that creative spark!
The good news is there is only 1 more sleep until the new 2020-2021 Annual catalogue goes live and you can look at all those gorgeous pages of amazing and inspirational photos of new projects!
What are you most looking forward to seeing? I cannot wait to get the new In Color Inkpads!!!!
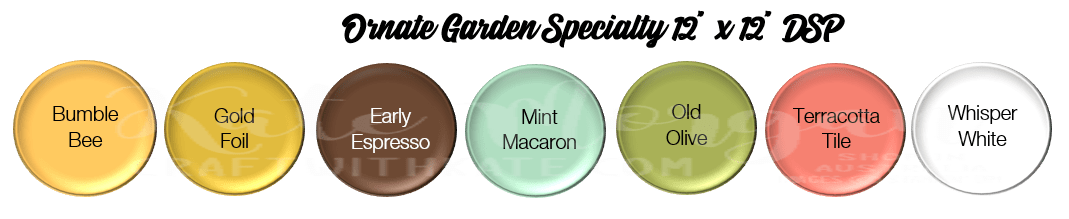
Tonight’s card features the Ornate Garden Suite of products. I stamped the large image on black card with Versamark ink and heat set it with White Emboss Powder.
Then I coloured the entire image with the White Chalk Marker and let it dry before colouring with Stampin’ Blends Markers.
Doesn’t it give a cool effect?!!!
The Designer Paper is so colourful, I actually cut it about a third of the way down, flipped it over to reveal the other side and glued them to the card base. The white ribbon is wrapped around to cover the join! The image was then added with dimensionals.
On the inside, I placed another image in the bottom corner to carry the theme over.
A full list of products can be found at the bottom of this post.
Tonight’s card is a triple fronted fancy fold card using the Peaceful Poppies Suite of products.
These elements and the Designer Paper are retiring, so be quick to add them to your shopping basket before they are gone!
On the inside it opens up like this:
Details
Card base: 27cm x 14.5cm (score at 3cm, 13.5cm, 23cm)
DSP: left front panel, 14.5cm x 2.5cm
DSP: middle front panel, 14.5cm x 4cm
DSP: right front panel, 14.5cm x 8.5cm
DSP: inside centre panel, 14.5cm x 10cm
DSP: inside right panel, 14.5cm x 8.5cm
Belly Band card: 25cm x 3cm
Belly Band DSP: 25cm x 2.5cm
This was CASE’d from Di Furniss, thank you for your inspiration!
A full list of products can be found at the end of this post.


")
")


")
")


 2020–2022 In Color Ribbon")


")
")


")


 Crinkled Seam Binding Ribbon")


")
")


")


