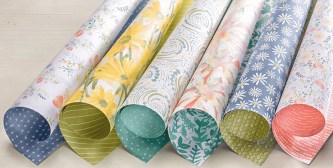
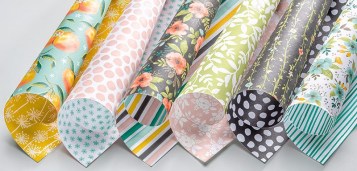
Just a quick reminder about the Buy 3 Get 1 Free offer on selected Designer Series Papers. This is offer is from 1 – 31 October only.
Why not get together with a friend and share the packs and save on postage at the same time! Links to my online store can be found at the bottom of this post.
My top picks are the Petal Garden, Wood Textures and Daisy Delight, but it really depends on what your favourite colours are.
There is also the Be Merry Christmas papers ideal for this time of year with Christmas not too far away!
Don’t forget to Follow My Blog to receive blog updates and join my Newsletter Subscriptionfor all the latest news and specials!
Tonight the Art with Heart team girls are sharing some wonderful ideas to inspire you with our Designer Series Papers. This month is the start of the new Stampin’ Up! year and we have a special promotion on our Designer Series Paper, buy 3 get 1 FREE for the month of October and there is no limit!
If you’re already hopping, then you just came to me from the talented, Ros Davidson. If you’re just joining, great! Use the “next” button at the end of my post to hop all the way around. Blog Hops are full circles, so you can start hopping here and then at the end of each post there is a link to the next one. There is also a list of participants at the end in case of any broken links.
Now let’s get started!
Project #1
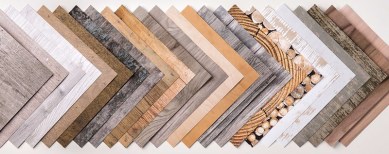
The Wood Textures DSPis awesome, especially for masculine cards and projects. Here is an example where I have used it as a feature at the bottom of the card. To me, it acts a bit like a fence with the hot air balloons travelling above!
Wood Textures DSP
Project #2
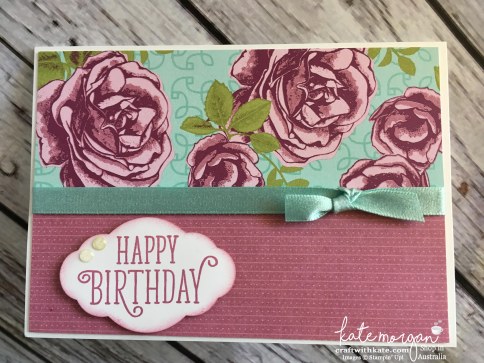
This is the Petal Garden DSP, isn’t it stunning?!!! I just love this one. You can do so much with these papers and both sides of every double sided page is worthy of use. Here I have created two very simple cards showcasing the gorgeous floral patterns with the shimmer ribbon, Pretty Label punch and the sentiment is from the Happy Birthday Gorgeous stamp set.
Petal Garden DSP
Project #3
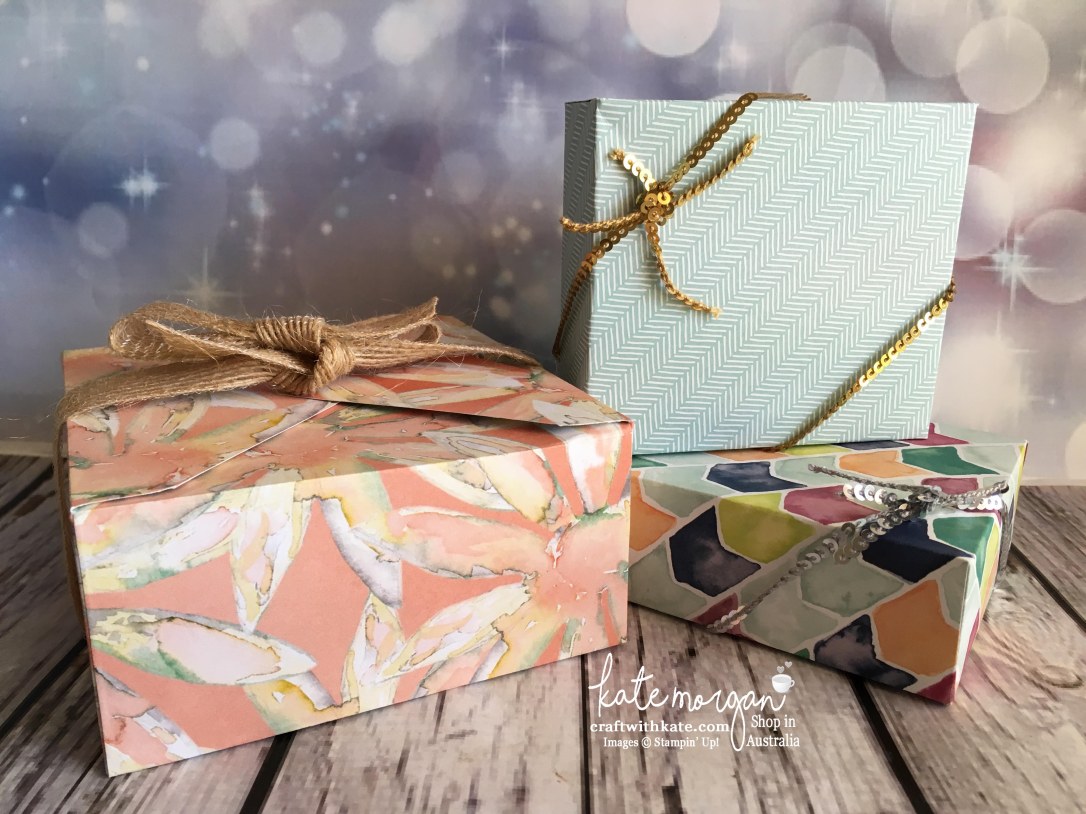
I have created some 3D boxes as gift wrapping for some very special birthdays coming up this week. These boxes are very easy to create using the Envelope Punch Board and some of our stunning DSPs. The one on the left uses a pattern from the Delightful Daisy DSP. The top one is from the Coffee Break DSP and one underneath, is from the Naturally Eclectic DSP. I have decorated them with the new mini sequin trim and the burlap ribbon.
Project #4
Here is a 12″ x 12″ Scrapbooking page using the gorgeous Whole Lot of Lovely DSP. This was a gorgeous day trip during our recent driving holiday up to Sydney. One of our favourite places to visit, is the Licorice and Chocolate Factory in Junee. As you can see, we did stock up just a little at the shop on our way out!!! I also used some gold foil with the Decorative Ribbon Border punch and the Birthday Blossoms & Brushwork Alphabet stamp sets.
Whole Lot of Lovely DSP
Thanks for visiting today.
Don’t forget to email me at craftwithkate@live.com.au to request your copy of any Catalogue or to ask about joining the Art With Heart team.
Now it’s time to follow the blog hop to our next participant, Rachel Palmieri.
If you find a broken link or have come to this blog hop from a different entry point, you can view the participants below:
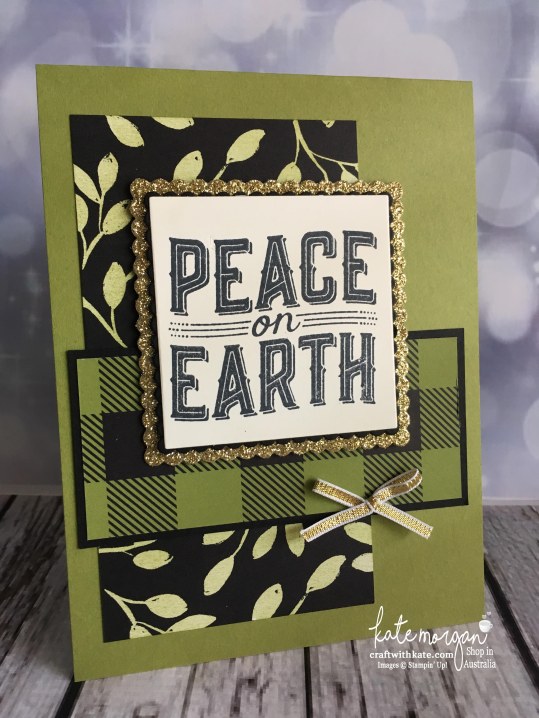
My project today uses the Carols of Christmas stamp set and the Merry little Christmas Designer Series Paper. #cutitnothoardit
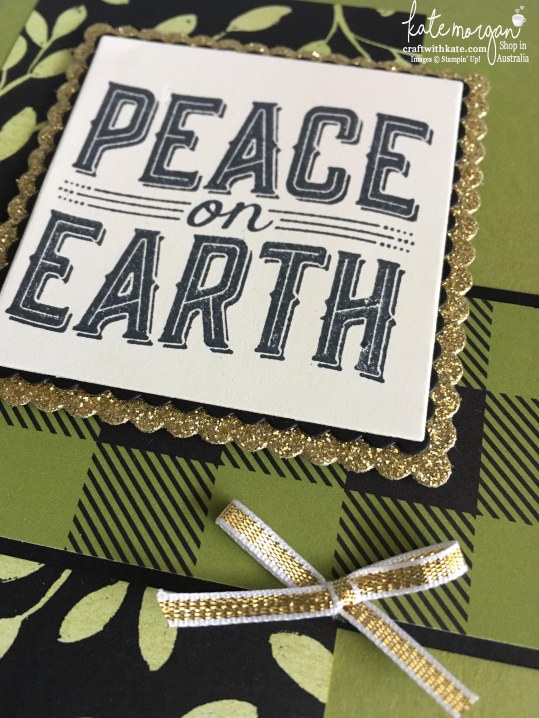
When I opened the pack of Designer papers and saw this piece (that I’ve used as the back layer with the leaves), it was so “in your face” stark, black and white. I needed to soften it to use and so I got out my sponge brayer and added some Old Olive ink to take away that bright white! Sometimes we get so put off by the contrast of black and white and wonder how we will use it, but if you colour the white areas softly, it can totally change the look!
Adding the layer of gold glimmer and the gold bow adds a touch of class!
Click on the image below to view the YouTube video to see more you can create with the Carols of Christmas bundle.
A full list of product can be found at the end of this post!
I hope you have enjoyed my Heart of Christmas post and I look forward to sharing more Christmas inspiration with you next Wednesday! If you would like to see what others in our team have created, you can view the participant list over on the blog of Tina Gillespie.
Don’t forget to Follow My Blog to receive blog updates and join my Newsletter Subscriptionfor all the latest news and specials!
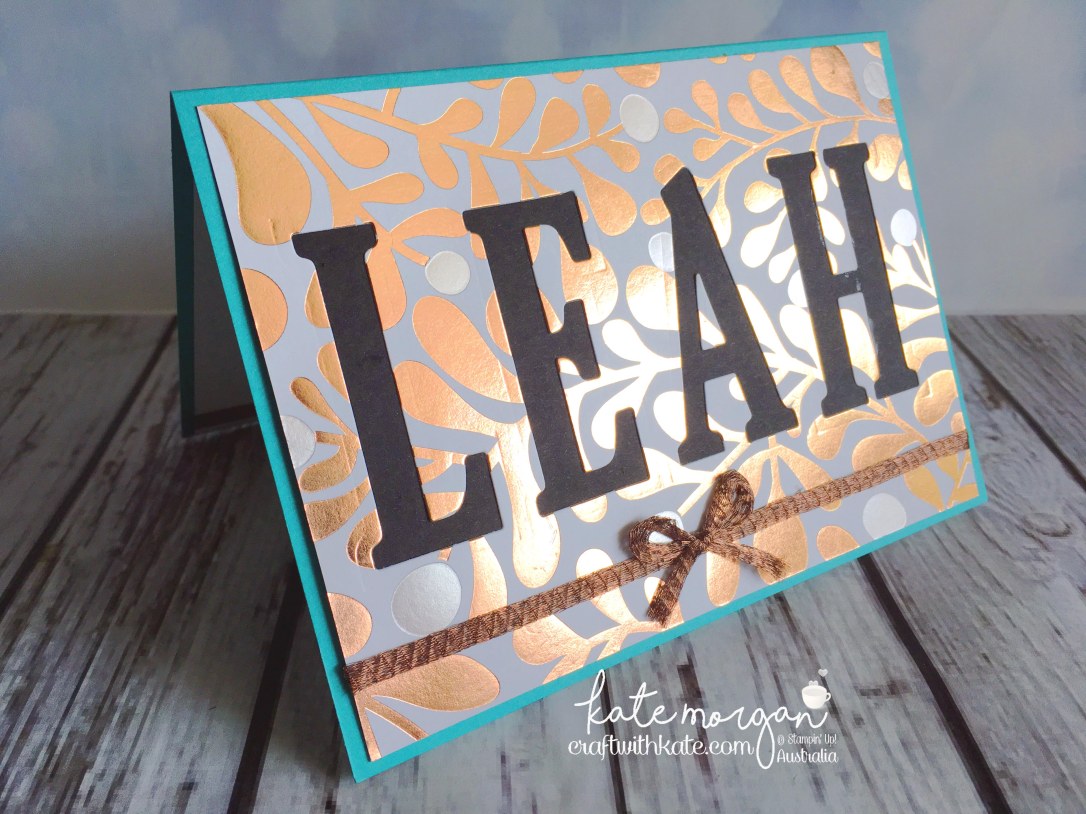
My project today has no stamping, can you believe that?!!! When you see it, you will see why!
I am using the Large Letters Framelits dies, and the Year of Cheer Specialty Designer Series Paper & Washi Tape. #cutitnothoardit
With this DSP, you don’t need to do a lot, as it is simply stunning with its metallic patterns. It is my niece’s birthdays coming up next month, so I was needing to make some cards for their special day. Here is one I was going to make using the Eclipse technique, but I loved how the letters stood out so much with some black cardstock behind the DSP, I didn’t want to put the letters back on top!
Just check out that metallic shine!!!! And the copper trim is just the perfect match and finishing touch with the bow.
The inside of the card is finished with some strips of Washi Tape.
Check out this video to see more on the Year of Cheer Suite!
A full list of product can be found at the end of this post!
Don’t forget to Follow My Blog to receive blog updates and join my Newsletter Subscriptionfor all the latest news and specials!
Welcome to Week 18 of The Heart of Christmas: Handmade Inspiration from the Art with Heart team!
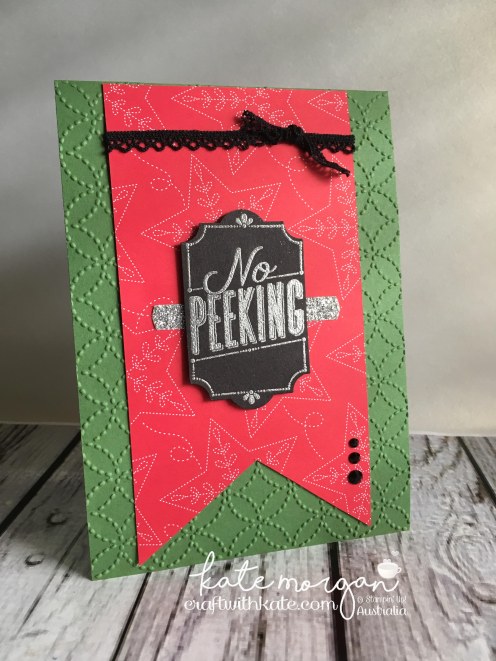
My project today uses the Merry Little Labels stamp set and the coordinating Everyday Label punch to create this Christmas card!
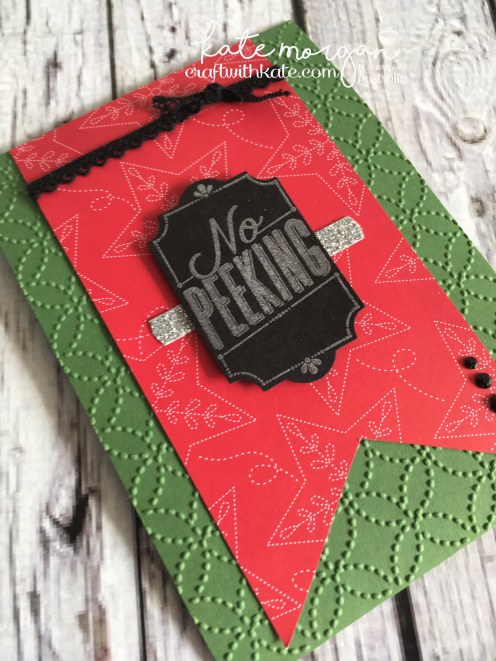
Here I have embossed the background card using the Quilt Top Textured Impressions Embossing Folder, before adding a large banner of the Quilted Christmas Designer paper with a piece of the black lace trim tied around it.
The sentiment, No Peeking is stamped with Versamark ink and silver embossed on the black card. The new Everyday Label punch is the perfect match to punch it out and adhere with dimensionals.
The sentiment inside the card, is exactly what we do on Christmas day; eat, drink and be merry! lol
A small piece of silver glimmer and the 3 little rhinestones just finish it off, don’t you agree?
The full product list is provided at the end of the post!
I hope you have enjoyed my Heart of Christmas post and I look forward to sharing more Christmas inspiration with you next Wednesday! If you would like to see what others in our team have created, you can view the participant list over on the blog of our leader, Claire Daly.
Don’t forget to Follow My Blog to receive blog updates and join my Newsletter Subscriptionfor all the latest news and specials!
Welcome to another Art with Heart Team blog hop where we are focusing on fancy folds. You will find loads of creative inspiration tonight, showcasing different folding techniques and projects. Don’t be afraid of trying some Fancy Fold cards; they may look intimidating, but in fact, they are not that difficult to create.
If you’re already hopping, then you just came to me from the talented, Tina Gillespie. If you’re just joining, great! Use the “next” button at the end of my post to hop all the way around. Blog Hops are full circles, so you can start hopping here and then at the end of each post there is a link to the next one. There is also a list of participants at the end in case of any broken links.
Now let’s get started!
For my projects today I am using the Best Birds stamp set with the Whole Lot of Lovely Designer Series Paper. I love how striking this Designer Paper is too and I knew it had to be a focal point. #cutitnothhoardit
Fancy Fold Card #1
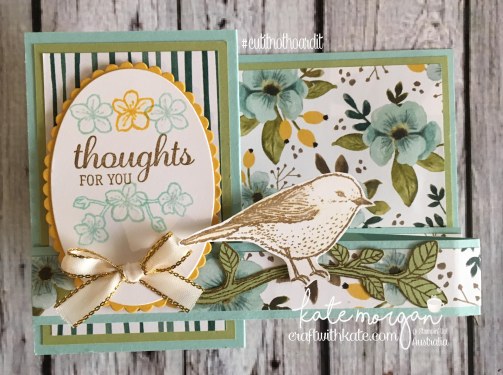
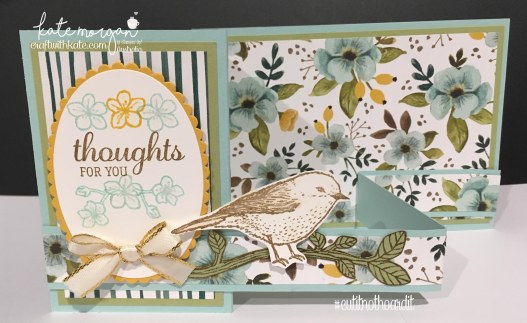
For my first card today, I am sharing a fairly simple fancy fold card, a Double Z Fold.
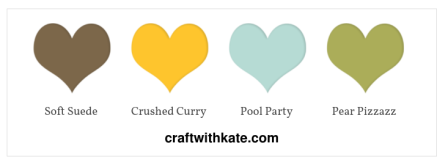
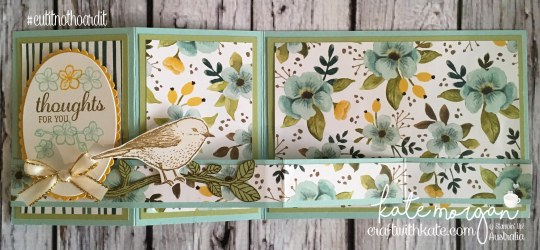
The card base is Pool Party card = 11⅜” x 5⅛” and score at 2¾” & 5½”. Trim off a 1″ strip from the bottom of the card which will create the double z fold. You just flip that strip over, so the shorter end is on the right as shown. Then you decorate as you like. Here is my colour combination using the coordinating colours in the Designer Paper!
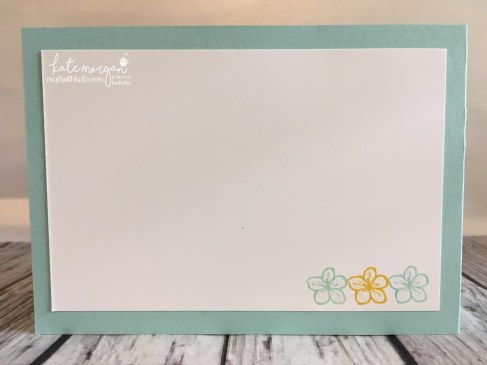
Back panel of the card
Products used
Stamps:Best Birds Inks: Crushed Curry, Pool Party, Soft Suede Card/Paper: Crushed Curry, Pear Pizzazz, Pool Party, Whisper White, Whole Lot of Lovely DSP Accessories: Big Shot, Layering Ovals Framelits dies, Magnetic Platform, Stampin’ Trimmer, Paper Snips, Stampin’ Scrub, Stampin’ Mist, Tombo Multipurpose Glue, Simply Scored, Clear Block Bundle, Dimensionals, Fast Fuse, Tombo Glue, Wink of Stella, Blender Pen, ⅜” Gold Metallic-Edge Ribbon
Fancy Fold Card #2
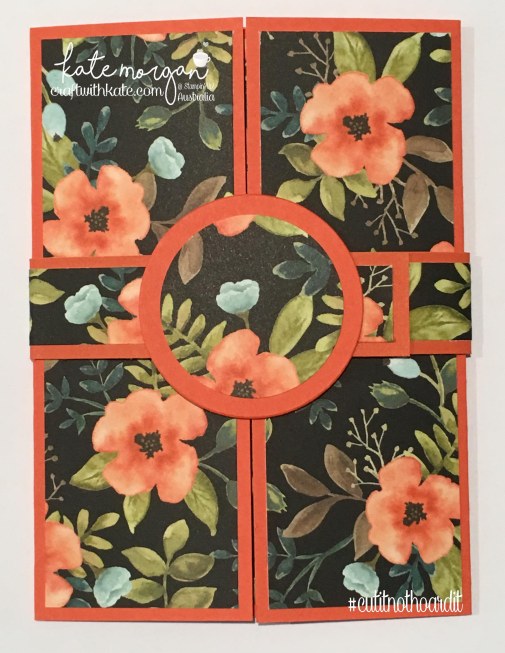
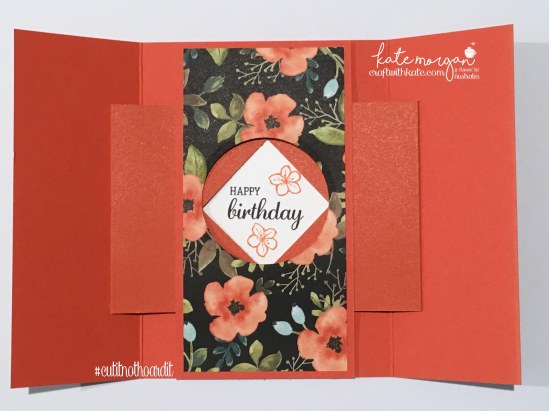
For my second one, I have a more advanced fancy fold card. I am sharing a style that I think is amazing, but I’ve never found it in Australian cardstock sizes, so I created my own A5 Gatefold Shutter card. It took quite a bit of time to figure out all the correct measurements, but I am super happy with the outcome. Now I have mastered it, I can whip them up in no time at all!
When you take off the belly band, the centre diamond opens to reveal a secret message inside!
Kids love this style of card, they think it’s like magic when it opens up. They look difficult to make, but if you follow the instructions, they are actually quite easy.
If you would like a copy of my FREE tutorial how I made these cards, head over to my ‘Free Tutorials’ page to download your PDF copy, but make sure you continue the blog hop first to see what all the other talented ladies have created!
Products used
Stamps:Best Birds Inks:Basic Black & Tangerine Tango Card/Paper: Tangerine Tango, Whisper White, Whole Lot of Lovely DSP Accessories: Big Shot, Layering Circles Framelits dies, Magnetic Platform, Stampin’ Trimmer, Paper Snips, Stampin’ Scrub, Stampin’ Mist, Tombo Multipurpose Glue, Simply Scored, Clear Block Bundle, Dimensionals, Fast Fuse, Tear & Tape, Bone Folder, Ruler, Pencil, 1¾” circle punch, 2¼” circle punch
Thanks for visiting today.
Don’t forget to email me at craftwithkate@live.com.au to request your copy of any Catalogue or to ask about joining the Art With Heart team.
Now it’s time to follow the blog hop to our next participant, Andrea Roberts.
If you find a broken link or have come to this blog hop from a different entry point, you can view the participants below:
Welcome to Week 17 of The Heart of Christmas: Handmade Inspiration from the Art with Heart team!
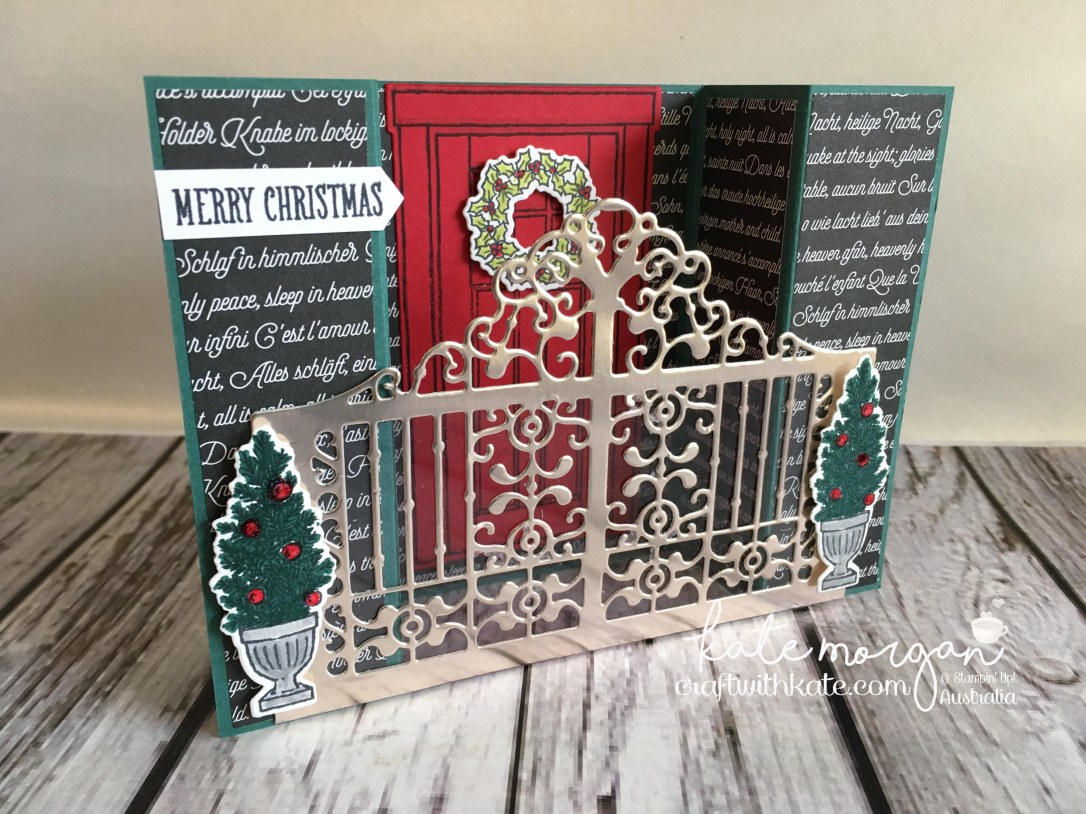
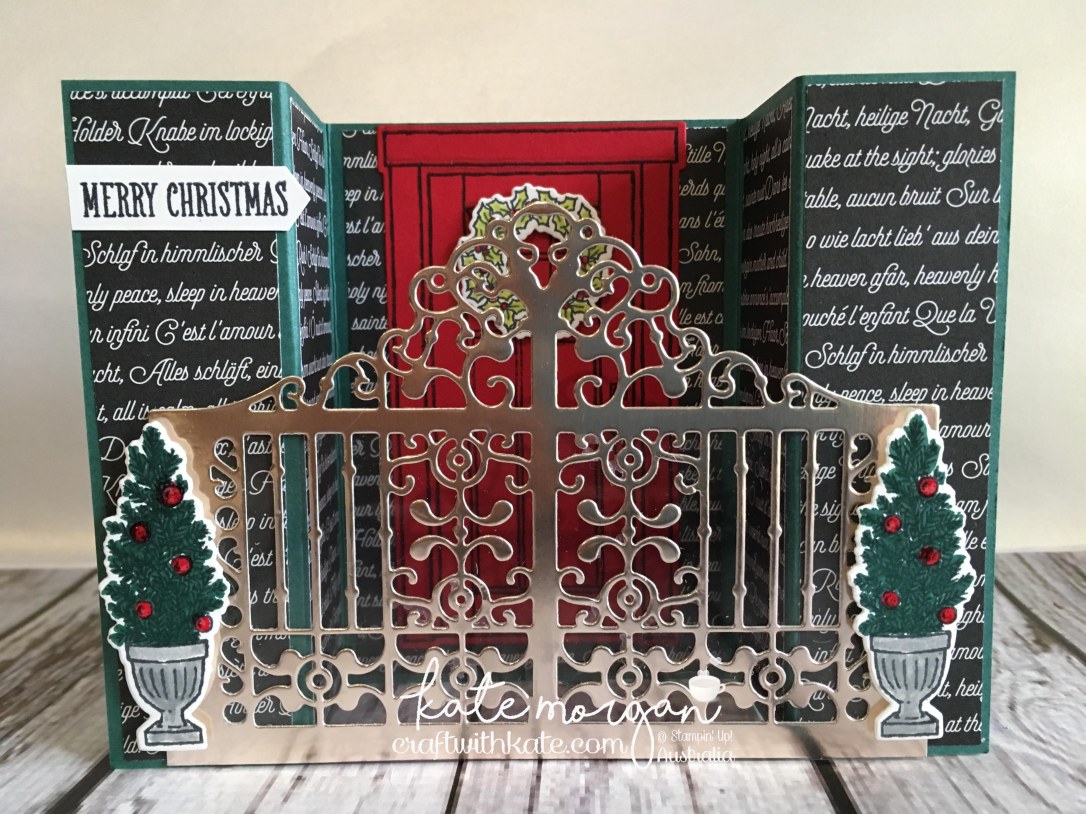
My project today uses the At Home with You stamp set, the coordinating At Home Framelit dies and the Detailed Gate Thinlits die to create this Bridge FoldChristmas card!
I started by die cutting the gate in the new Champagne Foil sheet and I was surprised how gorgeous it was. Then I had to come up with a card to use it on… and because it is quite wide, I thought it was perfect for using on a bridge fold card, but I had to come up with a solution to make it sturdy and solid, so I added some Window Sheet behind the detailed gate and because it is clear, you don’t see it! Winner!!!
I love the red front door with the Christmas wreath on it, I think it really pops behind the front gate! I’ve really tried to set the theme here with the gorgeous front gate and looking through to the front door of the house!
Click here to access my FREE Bridge Fold Card Tutorial (in Australia measurements).
The full product list is provided at the end of the post!
I hope you have enjoyed my Heart of Christmas post and I look forward to sharing more Christmas inspiration with you next Wednesday! If you would like to see what others in our team have created, you can view the participant list over on the blog of our leader, Claire Daly.
Don’t forget to Follow My Blog to receive blog updates and join my Newsletter Subscriptionfor all the latest news and specials!
Did you know that Stampin’ Up! is not all about cardmaking and scrapbooking, but we can make many other crafty projects too? Well today’s project features the Delightful DaisyDesigner Series Paper. #cutitnothoardit
I don’t know about you, but here in Australia it has been very cold and we are welcoming any sort of warmer weather now that it is the beginning of Spring, and what better way to celebrate, than with this stunning Designer Paper.
How pretty are these?!!!
What a great gift idea these would make for Mother’s Day, Birthday’s or even as a special Thank You or Happy Retirement gift. They are very easy to make if you have the right tools and a little creativity.
How cool is it that you can create a coordinating jewellery set made with your favourite Designer Series Paper to go with that special handmade card!
The jewellery parts were purchased on eBay.
Don’t forget to Follow My Blog to receive blog updates and join my Newsletter Subscriptionfor all the latest news and specials!
Welcome to Week 16 of The Heart of Christmas: Handmade Inspiration from the Art with Heart team!
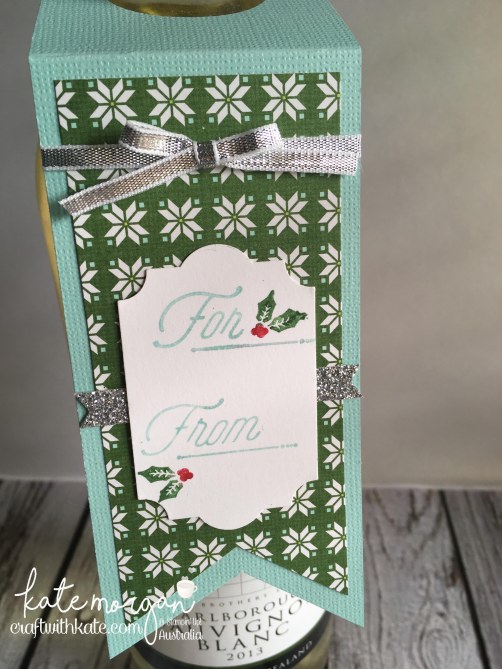
My project today uses the Merry Little Labels stamp set and the coordinating Everyday Label punch to create a wine bottle tag! I find that giving a bottle of wine or champagne as a Christmas gift so much easier, and what a perfect way to dress it up with a beautiful handmade tag.
I used some retired Core’dinations card for the tag, but you can just switch it out for Pool Party cardstock. The Designer Paper is the Quilted Christmas 6″ x 6″ pack in the Holiday catalogue. The stamping of the images are done using Stampin’ Write Markers. This is a great way of using markers directly on the stamp to get different colours in the one impression!
The Banner Triple punch is awesome for creating those perfect banners!
A full product list is provided at the end of the post!
I hope you have enjoyed my Heart of Christmas post and I look forward to sharing more Christmas inspiration with you next Wednesday! If you would like to see what others in our team have created, you can view the participant list over on the blog of Tina Gillespie.
Don’t forget to Follow My Blog to receive blog updates and join my Newsletter Subscriptionfor all the latest news and specials!
My project today uses the Coffee Cafe stamp set and coordinating Coffee Cups Framelits dies, and the Coffee BreakDesigner Series Paper. #cutitnothoardit
I love this coordinating Designer paper and the new Year of Cheer Specialty Washi Tape, which you can see two thin strips of the copper across either side of the heart paper. The Garden Trellis embossing folder was used on the coffee cup wrap which adds some lovely texture. The lid of the cup is some retired paper from a few years ago, but it was a little off cut that worked perfectly for this project!
The Copper Trim ties in nicely with the washi tape too!
How cool is it that the images on the Designer Series Paper can also be die cut with the coordinating dies!!! I love this new feature of Stampin’ Up!
A full list of product can be found at the end of this post!
Don’t forget to Follow My Blog to receive blog updates and join my Newsletter Subscriptionfor all the latest news and specials!





























 Independent Stampin Up!® Demonstrator, Victoria, Australia