Each week some of the Art With Heart team are joining the Colour Creations Blog Hop to bring you creative inspiration to showcase our range of 50+ gorgeous Stampin’ Up! colours.
Week 37 – Poppy Parade
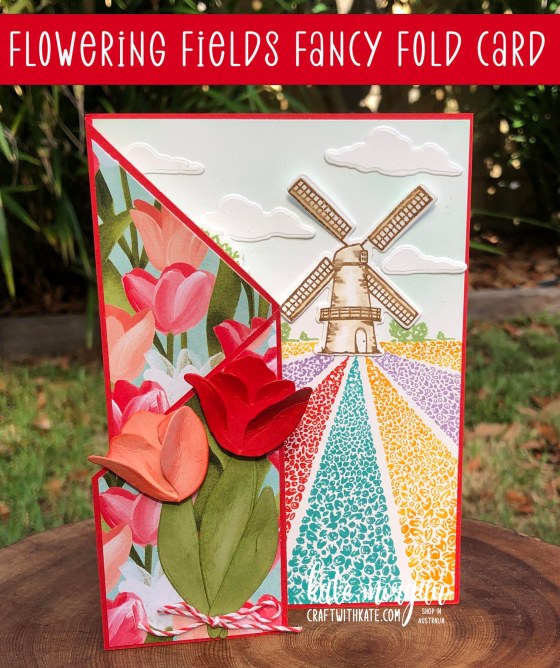
Tonight I have a fancy fold card using the Tulip Fields and Flowering TulipsBundles. This tapering Trifold design gave me the idea to stamp the field on the inside as though in the distance, and then die cut the gorgeous tulips in the foreground.
The card base is 21cm x 14.8cm, scored in half. One side is scored in half again and folded back on itself. I measured 5cm from the bottom and marked with a pencil. Then cut from the mark up to the centre fold at the top! This gave my design an extra layer to show off this gorgeous DSP!
The Ink colours I’ve used are: Poppy Parade, Mango Melody, Highland Heather, Bermuda Bay, Soft Suede, Pear Pizzazz and Pool Party.
Here is the card fully open to show the white panel on the inside for your written message. What a cute scene, hey?!!!
Thanks for dropping by. All the products used tonight are linked at the end of this post!
Please click on the image below to head across to the next blog on tonight’s hop and see the wonderful inspiration of Tina Gillespie!
If you come across a broken link or have come from a different entry point, a full list of participants can be viewed on Cathy Proctor’s blog.
Each week some of the Art With Heart team are joining the Colour Creations Blog Hop to bring you creative inspiration to showcase our range of 50+ gorgeous Stampin’ Up! colours.
Week 36 – Pool Party
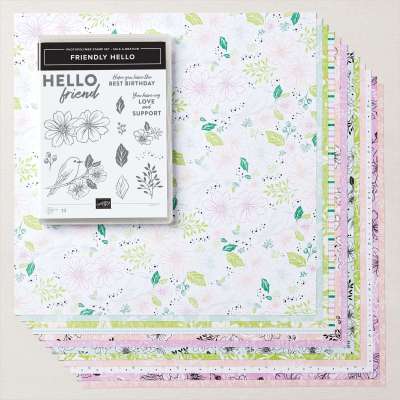
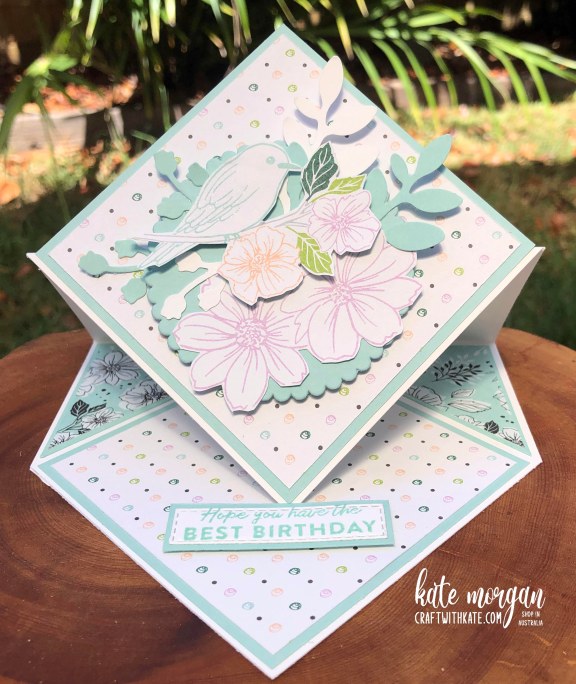
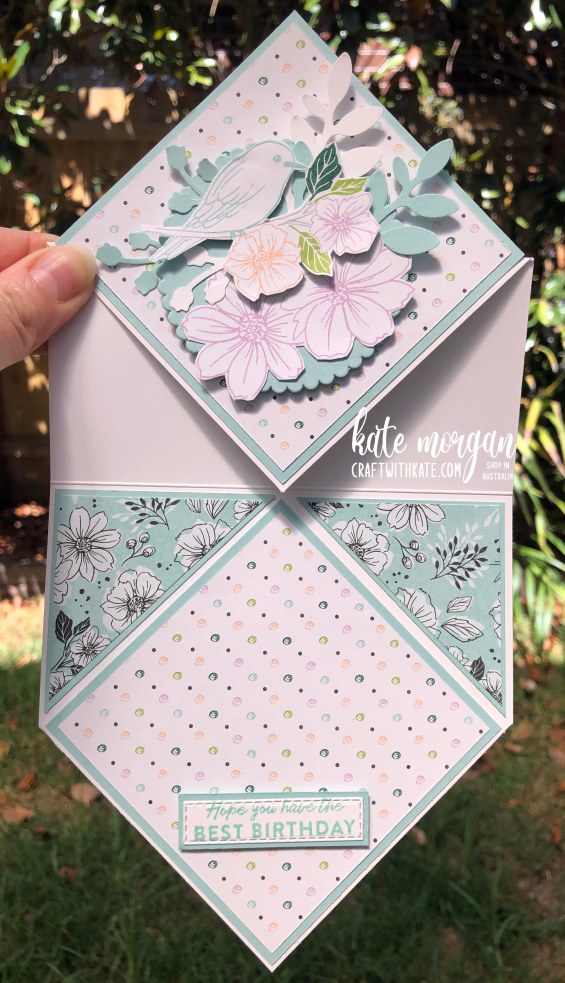
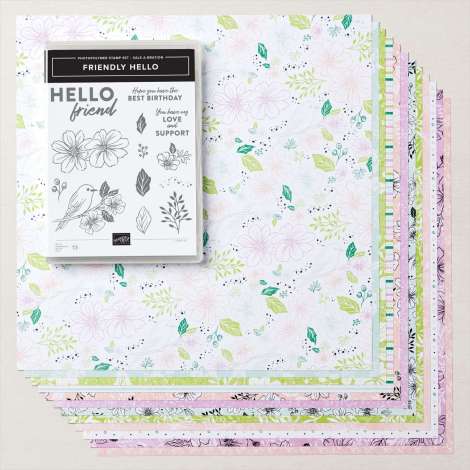
Tonight I have a Diamond Easel Fold card for you using the Friendly Hello papers and stamp set bundle available during Saleabration with a qualifying order. It’s such an amazing offer being able to redeem a stamp set and pretty papers as one SAB item code!
from the side
Here it is closed ready to pop into a 15cm² envelope
and fully open. Behind this top section is where you can write your message!
Thanks for dropping by. All the products used tonight are linked at the end of this post!
Please click on the image below to head across to the next blog on tonight’s hop and see the wonderful inspiration of Andrea Sargent!
If you come across a broken link or have come from a different entry point, a full list of participants can be viewed on Cathy Proctor’s blog.
Each week some of the Art With Heart team are joining the Colour Creations Blog Hop to bring you creative inspiration to showcase our range of 50+ gorgeous Stampin’ Up! colours.
Week 35 – Petal Pink
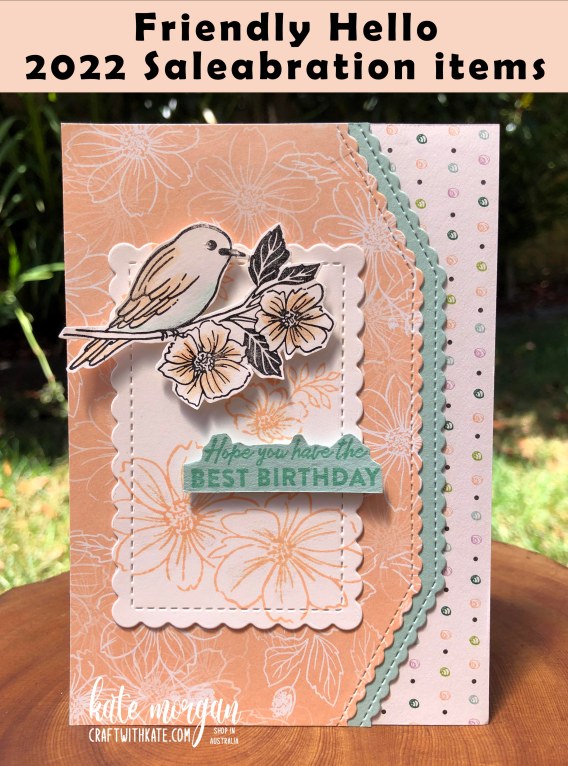
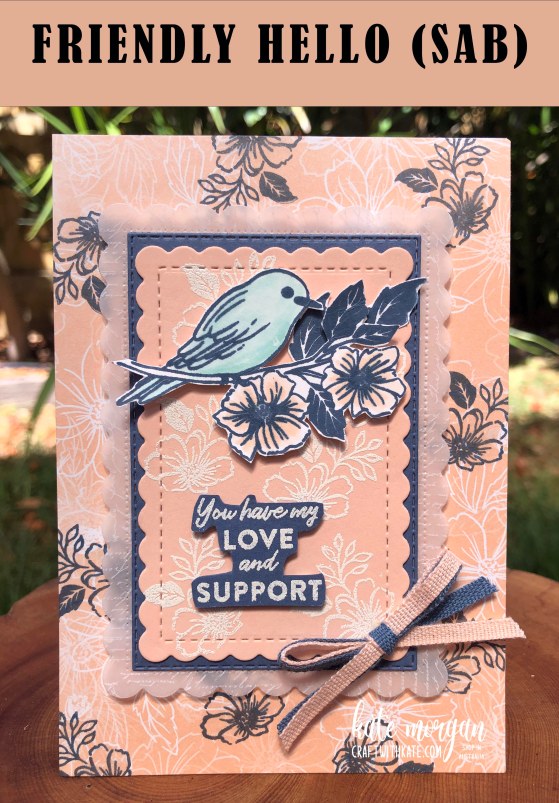
Tonight’s card focuses on the Saleabration double item, Friendly Hellostamp set and 12″ x 12″ Designer Papers. Both of these items can be selected free with a $180 product order!
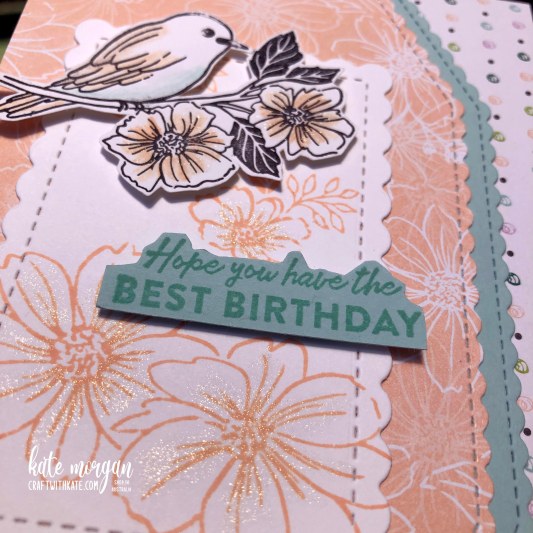
Card 1 – I have used the Basic Borders dies to cut the lovely scalloped edging and the Scalloped Contours dies for the white centre panel. The stamping is done in Black Stazon, Petal Pink and Pool Party with the same inks used to colour the bird using Blender Pens.
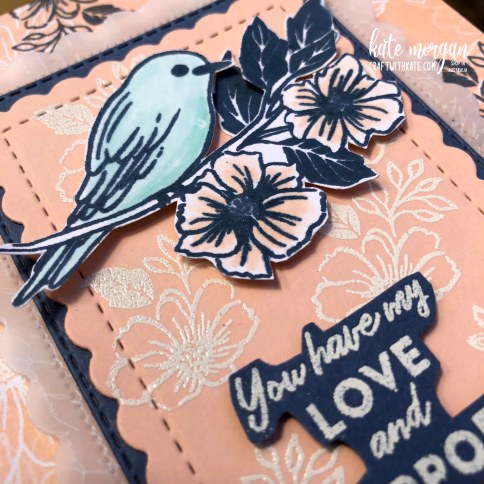
I added Wink of Stella to all the flowers for extra shine. The sentiment and the bird image were fussy cut using paper snips before adding with mini dimensionals.
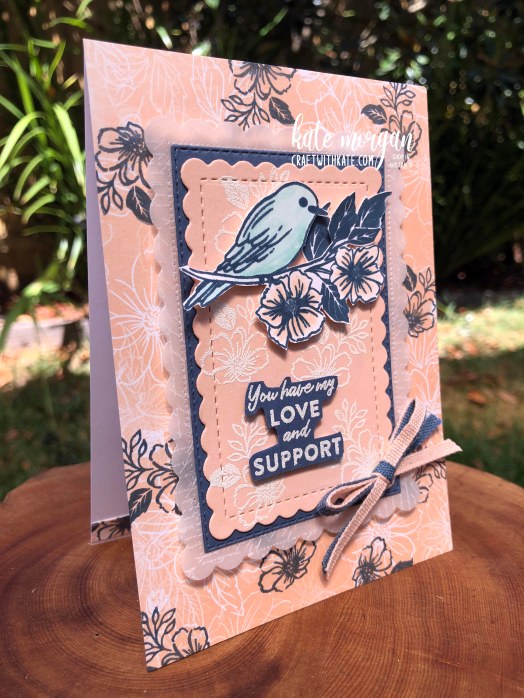
Card 2 – pretty much uses the same products, but I have stamped directly onto the DSP background in Misty Moonlight ink. The new Vellum Layering Designs adds a softness to the background and I have die cut it with the Scalloped Contour dies. The Misty Moonight layer is cut using the Stitched Rectangle dies and then the smaller of the Scalloped Contour dies in Petal Pinkcard. This is stamped in Versamarkink with the same stamp as the background. White Emboss powderadded and heat set with the Heat Tool.
The bird image is stamped in Misty Moonlight, fussy cut and colour using Stampin’ Blends Combo Markers(Petal Pink & Pool Party). A few extra leaves were stamped and glued behind the main image, added with dimensionals. This gave some extra depth.
The sentiment is also White Heat Embossed onto Misty Moonlight card and fussy cut with Paper Snips. Two pieces of the new 1/8″ Cotton Ribbon Combo pack were tied in a bow and added with a Glue Dot.
Thanks for dropping by. All the products used tonight are linked at the end of this post!
Please click on the image below to head across to the next blog on tonight’s hop and see the wonderful inspiration of Claire Daly!
If you come across a broken link or have come from a different entry point, a full list of participants can be viewed on Catherine Proctor’s blog.
Each week some of the Art With Heart team are joining the Colour Creations Blog Hop to bring you creative inspiration to showcase our range of 50+ gorgeous Stampin’ Up! colours.
Week 34 – Pear Pizzazz
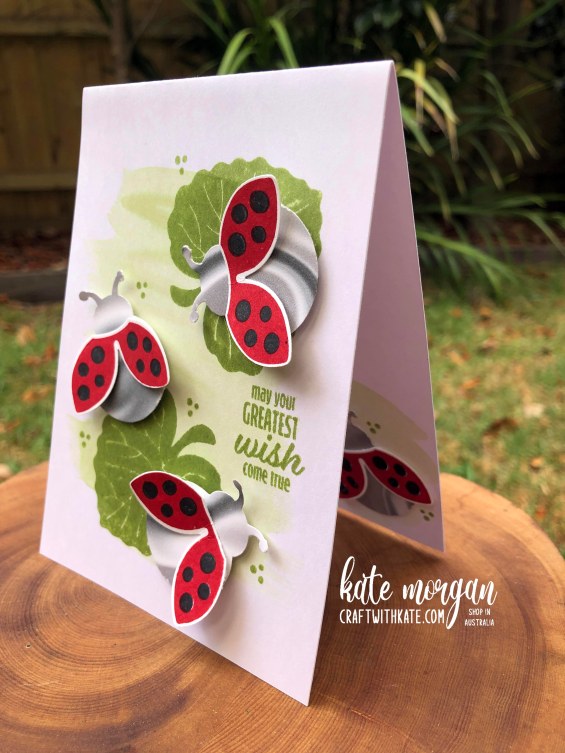
I have to say, I am in love with this bundle! The Hello Ladybug stamp set and Ladybug builder Punch are a fantastic buy and I have had so much fun creating with it (one I will definitely be keeping).
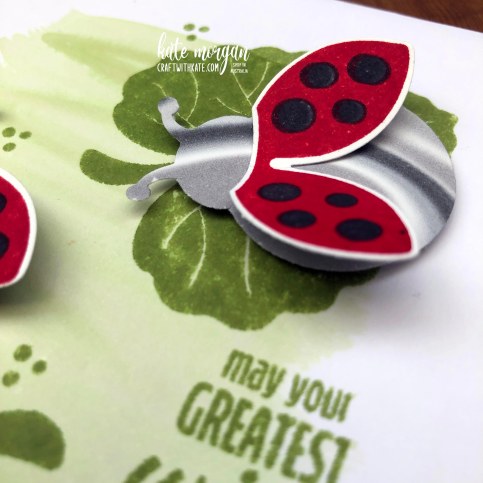
I began my card with a Pear Pizzazz Watercolour wash using the inkpad and the largest of the Water Painters. I wanted a fairly light tone, so used plenty of water. Once it was dry, I stamped the two large leaves and the sentiment.
The ladybug wings were stamped in Real Red and Memento Black ink and punched out. The main body was punched from a piece of the Simply Marbleous DSP(free Saleabration item with $90 product order). I added glue to the wings just in the centre, so I could lift them up so they look like they are about to fly! These were then added to the card with dimensionals.
Finally I added the three small dots stamp for extra interest. I repeated this process on the inside too!
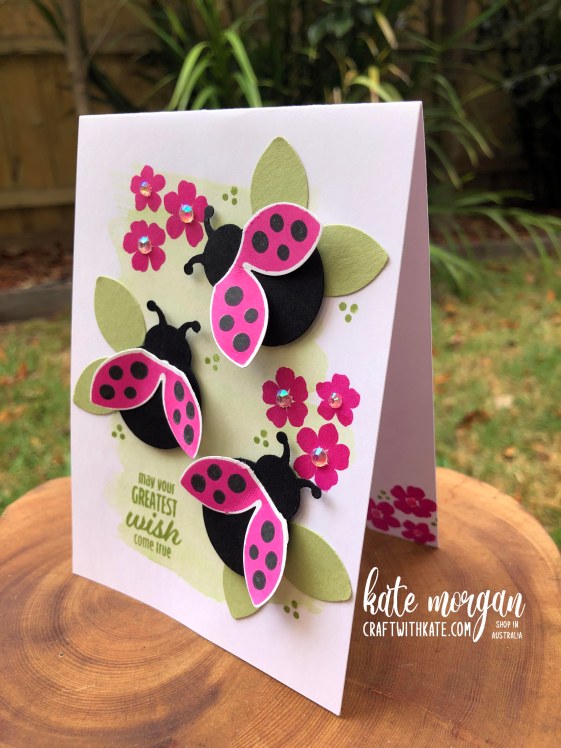
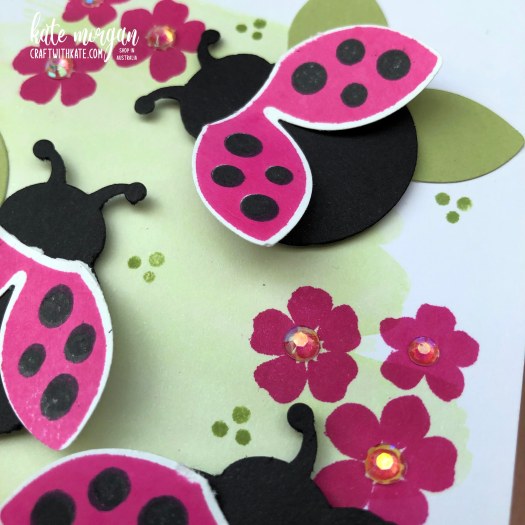
Then I did another one with Magenta Madness! How cute is this?!!! Instead of stamping the large leaves, I used the wings on the punch to create some Pear Pizzazz leaves. I stamped some Magenta Madness flowers and added the Iridescent Gems to the centres.
For these ladybugs, I punched the body in Basic Black cardstock for a lovely dark look which really pops against the Pear Pizzazz.
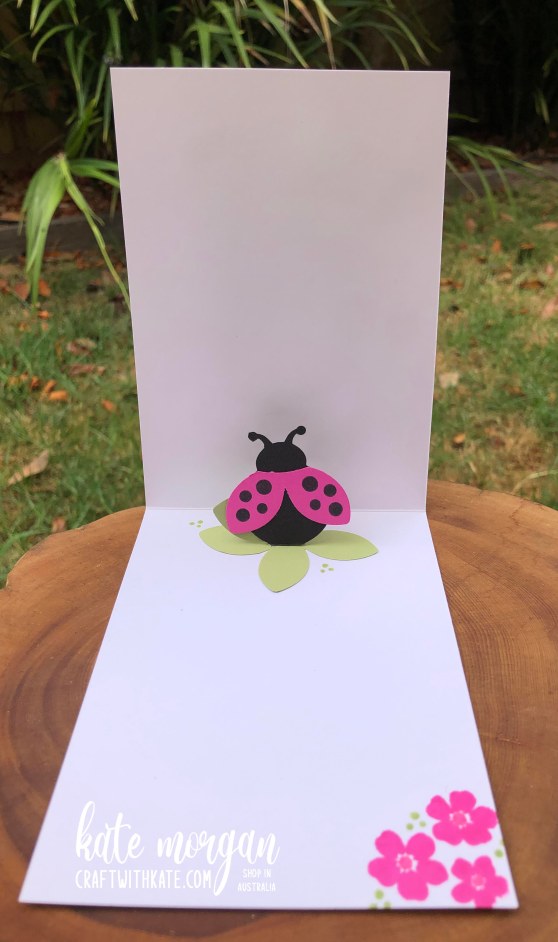
Open the card and find a surprise ladybug inside!
Here’s how I mounted the ladybug inside, folding up a strip of card. I just folded it equally 4 times to create a square and then glue it to the inside. Then the leaves and the ladybug were glued into place!
Thanks for dropping by. All the products used tonight are linked at the end of this post!
Please click on the image below to head across to the next blog on tonight’s hop and see the wonderful inspiration of Christine Blain!
If you come across a broken link or have come from a different entry point, a full list of participants can be viewed on Catherine Proctor’s blog.
Each week some of the Art With Heart team are joining the Colour Creations Blog Hop to bring you creative inspiration to showcase our range of 50+ gorgeous Stampin’ Up! colours.
Week 33 – Pacific Point
Firstly I acknowledge the traditional owners of Australia and the sadness that today brings. We need to come together as a nation and in doing so we can not forget the past, but be reminded that we are now the lucky ones to live in and share this great land.
Australia Day is an important day in my families calendar and I give a big shout out to my dear dad who happens to also celebrate his birthday every year on this public holiday!
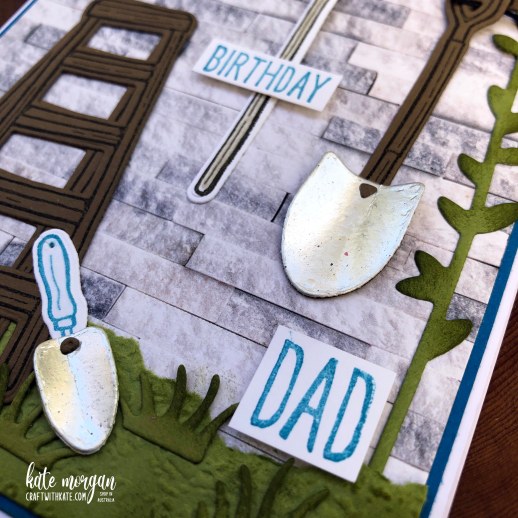
Card 1 – I am using the Home & Garden Bundle (Home & Garden stamp set & Garden dies). I began with a Thick Basic White card base, then a layer of Pacific Point card before adhering a layer of the brick design from the In Good Taste DSP.
I used Soft Suede card to stamp the shovel and two ladders with Early Espresso ink and I die cut the wood shelf which also embosses! The broom is stamped in the same ink but onto Basic White card and before the ink dried, I used the Wink of Stella to lightly colour it. The spades were diecut in silver foil and I gave them a bit of a curve using my fingers to bend the foil.
The sentiment was stamped in Pacific Point ink and cut into idividual words. Old Olive is used for the grass and vine. The grass is embossed with the Timeworn Type 3Dembossing folder and some ink gently applied with a sponge dauber. I also did this with the vine. Basic Black card was used for the hooks.
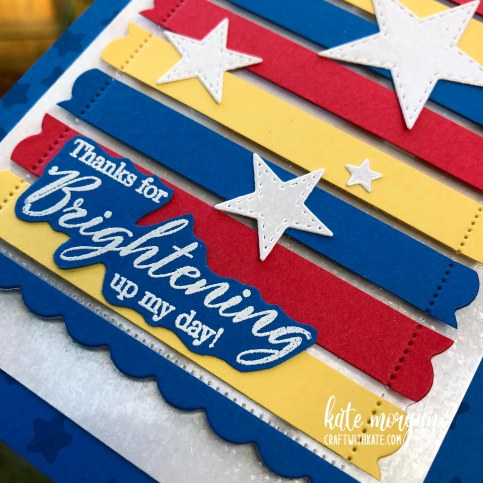
Card 2 – I have wanted to try the floating strip technique for a while and so while I had plenty of time over the past to weeks while in isolation (my youngest daughter tested positive to Covid), I had fun trying this out. I have gone for the primary colours for my strips; Pacific Point, Daffodil Delight & Poppy Parade. I cut my strips to 1cm wide and glued them to a piece of Window Sheet before die cutting with the Scalloped Contours die.
My card base is randomly stamped in Pacific Point ink with the small star from the All For Babystamp set. The next layer is the new Mother of Pearl Specialty paper. It looks so amazing in real life 😉
I used the Detailed Trio Punchto round two corners to mimic the scallop edging before adhering to the card base. The Stitched Stars are die cut from the Mother of Pearl paper.
The sentiment* (Special Moments stamp set) is stamped in Versamark ink, White Emboss Powder was added and heat set with my Heat Tool before bring fussy cut with Paper Snips. All these are added to the strips with Multipurpose Glue.
* Special Moments stamp set (SAB) earn free with qualifying order
Placing dimensionals on the back of the window sheet, behind the strips so you cannot see them through the front of the card. Remove the backings and place to the cente of the card.
On the inside I added a Basic White panel and placed three stips to the bottom with another small Stitched Star to the centre of the blue one! Doesn’t it look so cute?!!!
Thanks for dropping by. All the products used tonight are linked at the end of this post!
Please click on the image below to head across to the next blog on tonight’s hop and see the wonderful inspiration of Catherine Proctor!
If you come across a broken link or have come from a different entry point, a full list of participants can be viewed on Catherine Proctor’s blog.
Each week some of the Art With Heart team are joining the Colour Creations Blog Hop to bring you creative inspiration to showcase our range of 50+ gorgeous Stampin’ Up! colours.
Week 32 – Old Olive
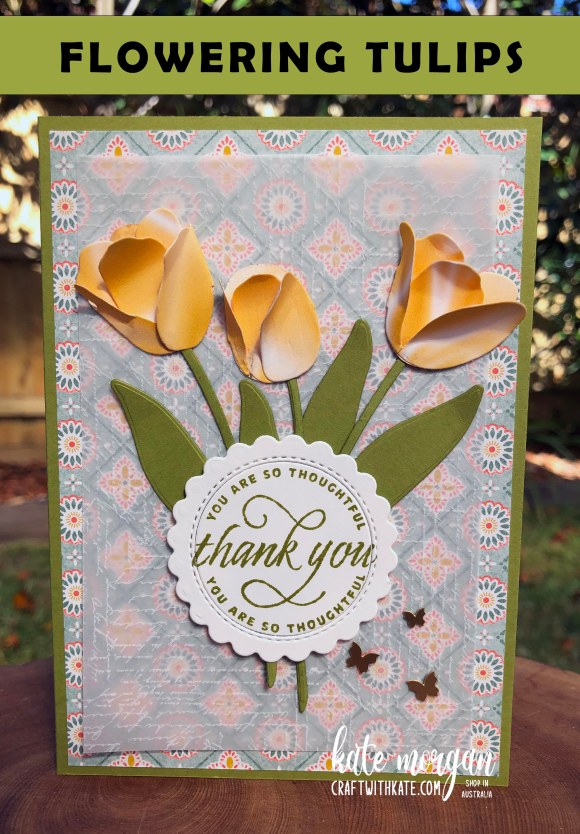
Tonight’s card features the Flowering Tulips Bundle [Flowering Tulips stamp set & Tulips dies].
My card base is Old Olive with a layer of Harvest Meadow DSP (oops it’s retired), but you could use any patterned paper. The next layer is some of the new Vellum Layering Designs but I didn’t glue this down until I had the tulips etc adhered on top of it, so I knew where to add my adhesive so it doesn’t show through.
The tulips are die cut with the Simply Marbleous DSP (free item during Saleabration with qualifying order), and the leaves with Old Olive card.
The sentiment is stamped in Old Olive ink onto Basic White card and die cut using the Give It a Whirl dies, and popped up on dimensionals.
Again, I have added my favourite Brushed Brass Butterflies, as they are the perfect embellishment, especially for a garden scene!
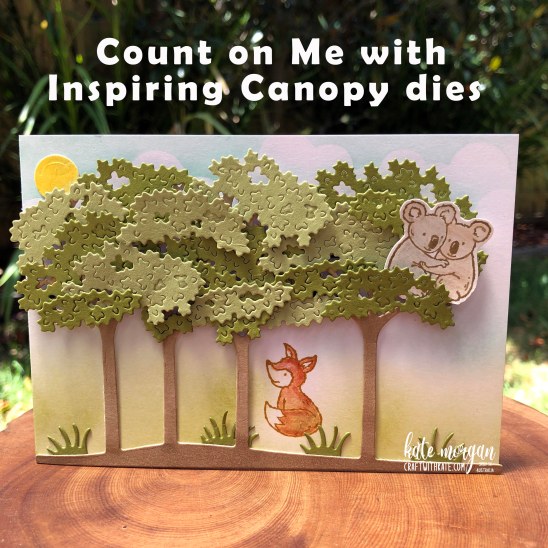
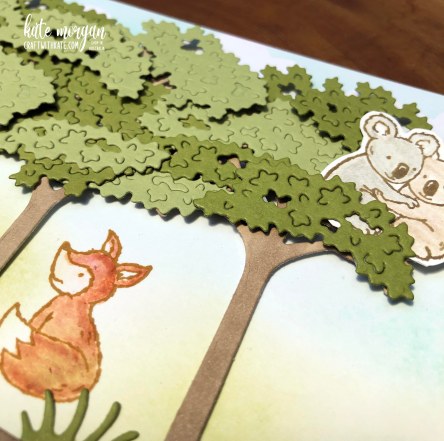
I also made a second card using the Count on Me stamp set and the Inspiring Canopy dies to create this pretty scene. The Thick Basic White card base is coloured using Blending Brushes with Old Olive at the base. I die cut the clouds using the Basic Borders dies and used it to create the clouds at the top with Pool Party ink.
The trees were initially die cut in Thick Basic White card, so I had to colour the trunks with the Crumb Cake BlendsCombo Pack. The leaves were die cut in Pear Pizzazzand Old Olive and adhered with glue and black dimensionals. The Sun is coloured with Daffodil Delight ink and a Blending Brush before die cutting and adhering with glue.
The koalas are stamped and fussy cut with Paper Snipsand coloured using the Watercolour Pencilsand Blender Pens. The fox is stamped and coloured using Blender Pens with Cajun Craze ink (a colour I hardly ever used, but is perfect for my fox!).
Thanks for dropping by. All the products used tonight are linked at the end of this post!
Please click on the image below to head across to the next blog on tonight’s hop and see the wonderful inspiration of Cathy Proctor!
If you come across a broken link or have come from a different entry point, a full list of participants can be viewed on Catherine Proctor’s blog.
Each week some of the Art With Heart team are joining the Colour Creations Blog Hop to bring you creative inspiration to showcase our range of 50+ gorgeous Stampin’ Up! colours.
Week 31 – Night of Navy
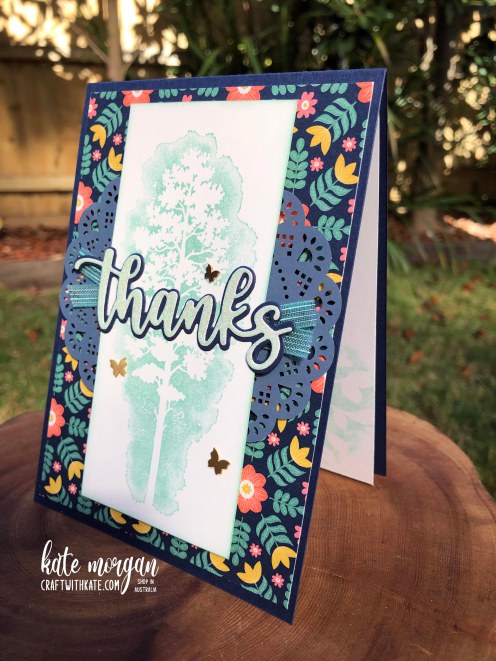
Tonight I am using the new Amazing Silhouettes Bundle [Amazing Silhouettes stamp set & Amazing Thanks dies].
My card base is Night of Navy with a layer of the Sweet Symmetry DSP from the Annual catalogue. Using the Stamparatus, I inked up the stamp with Pool Party ink and stamped onto Basic White card. I repeated the inking and stamping process to get a slightly darker image. I used a sponge dauber with the same ink around the edges of the white panel.
I took one of the Heart & Home Doilies and cut it in half and placed them either side so they met the edge of the card base with glue, before adding some ribbon and adhering the white panel with dimensionals.
I took the Amazing Thanks dieand cut the background in Night of Navy card and the top layer in the Iridescent Pool Party piece of Supple Shimmer Specialty DSP. Glue them together with Multipurpose Glue or use the Adhesive Sheets before die cutting to turn them into a sticker. I like to use glue to allow me a little wriggle room in getting it into place. Doesn’t it look gorgeous and sparkly?!!! Finally, I added some of the Brushed Brass Butterflies, because I adore them and I am using them on so many project, my favourite embellishments and you get 80 in a pack!
On the inside I stamped one of the smaller images from the set in the bottom right corner.
Thanks for dropping by.
Please click on the image below to head across to the next blog on tonight’s hop and see the wonderful inspiration of Tina Gillespie!
If you come across a broken link or have come from a different entry point, a full list of participants can be viewed on Catherine Proctor’s blog.
Each week some of the Art With Heart team are joining the Colour Creations Blog Hop to bring you creative inspiration to showcase our range of 50+ gorgeous Stampin’ Up! colours.
Week 30 – Mossy Meadow
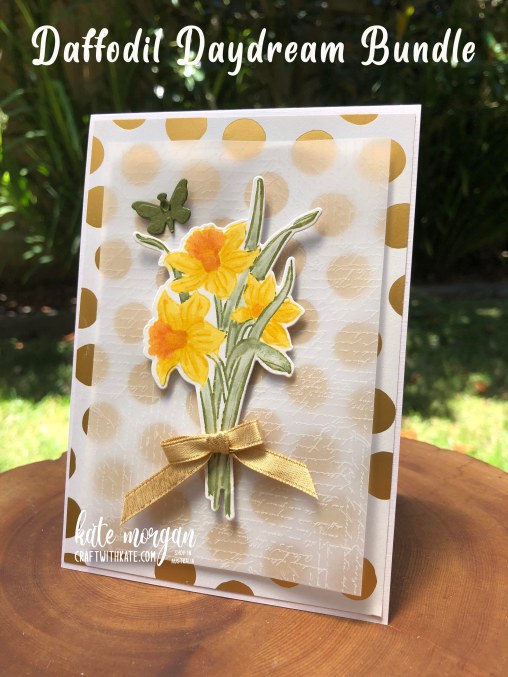
Tonight as we enter the new 2022 year, we are returning to continue our Stampin’ Up! colours with Mossy Meadow. As the new January – June Mini Catalogue and Sale-a-bration began yesterday, this Daffodil Daydream Bundle is one that will surely be popular!
My card base is Basic White with a layer of the Abstract Beauty 4″ x 6″ DSP, then a layer of the Vellum Layering Designs that come in 12″ x 12″ sheets. The daffodil image is placed in the Stamparatusand I used my Stampin’ Write Markers(Daffodil Delight & Mossy Meadow) direct to the red rubber image. You can repeat this process to get the desired colour and if you have missed any section of the image. To colour the centre of the image, I used the Wink of Stella with Mossy Meadow ink for the leaves and Daffodil Delight and Pumpkin Pie Blends Combo packs for the flowers.
The image is die cut using the coordinating dies and popped up on Dimensionals. I die cut a smal butterfly in Mossy Meadow card and lifted the wings with my fingers so it looks as though it is fluttering. A Gold Shimmer Ribbon bow is added with Tombo Multipurpose glue.
On the inside, I simply added the small offcut of DSP from the front layer. I just love how this Abstract Beauty 4″ x 6″ DSP is almost the perfect size for our card layers!
Thanks for dropping by. All the products used tonight are linked at the end of this post!
Please click on the image below to head across to the next blog on tonight’s hop and see the wonderful inspiration of Rachel Palmieri!
If you come across a broken link or have come from a different entry point, a full list of participants can be viewed on Catherine Proctor’s blog.
Each week some of the Art With Heart team are joining the Colour Creations Blog Hop to bring you creative inspiration to showcase our range of 50+ gorgeous Stampin’ Up! colours.
Week 29 – Misty Moonlight
This would have to be my all time favourite blue in the history of Stampin’ Up! colours. It goes with everything and it happens to be my dad’s favourite colour, so this card will be for him!
The Deer Builder Punch is so easy to use with the Silver Foil. I added one of the Wonderful Snowflakes behind it on two strips of the Whimsy and Wonder Specialty DSP (unfortunately this has sold out, but you could use any patterned paper really).
The sentiment is stamped on an offcut piece of Basic White cardstockand and snip the ends to reflect a banner.
A Basic White card insert on the inside is decorated with some Misty Moonlight cardstock and a narrow strip of the holigraphic striped DSP.
Tonight is our last Colour Creations blog hop for 2021, but please be assured, we are continuing in the New Year on 5 January with Mossy Meadow. See you then!
All the products used tonight are linked at the end of this post!
Please click on the image below to head across to the next blog on tonight’s hop and see the wonderful inspiration of Andrea Sargent!
If you come across a broken link or have come from a different entry point, a full list of participants can be viewed on Catherine Proctor’s blog.
Each week some of the Art With Heart team are joining the Colour Creations Blog Hop to bring you creative inspiration to showcase our range of 50+ gorgeous Stampin’ Up! colours.
Week 28 – Mint Macaron
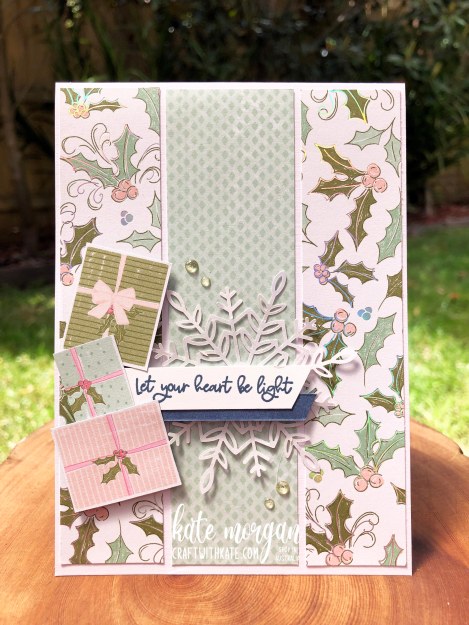
I just adore this gorgeous Whimsy & WonderDesigner Paper with it’s shiny accents and I have used it in different ways on this card. A strip matted on some Polished Pink cardstock down the centre then a die cut piece behind the sentiment. Both of these are cut using the Tasteful Labels dies.
The presents are cut from the patterned paper too!
The word Joy was stamped multiple times and I just eyeballed it. You could probably use the Stamparatus to line them up properly if you wanted to.
Here are a few more designs using this same suite of products; the first few are the same design with various patterned papers from the same pack. Very easy for making multiples of and just add different embellisments.
This final one uses the Picture This dies to create a the windows!
Thanks for dropping by. All the products used tonight are linked at the end of this post!
Please click on the image below to head across to the next blog on tonight’s hop and see the wonderful inspiration of Tina Gillespie!
If you come across a broken link or have come from a different entry point, a full list of participants can be viewed on Christine Blain’s blog.