feminine, Gift Ideas

Gift box for Chocolates

Hello Crafters,

Today I share with you a cute gift box which will fit inside 6 Ferrero Rocher chocolates inside (who doesn’t love receiving chocolates!) and of course I don’t have any chocolates left to put inside my box to show you!!!!

Gift Box

To make this box, you need 2 pieces of 8″ x 8″ cardstock and the Envelope Punch Board (EPB).

For the Base:

Take the 1st piece of card, place it in the EPB at 2 5/8″ punch and score.

Rotate 90 degrees, place at 2 5/8″ punch and score.

Rotate 90 degrees, place at 2 5/8″ punch and score.

Rotate 90 degrees, place at 2 5/8″ punch and score.

Rotate 90 degrees so you are back at the start. Now line up the scoreline with the score guide on the EPB and punch and score. Rotate 90 degrees and repeat on all 4 sides.

Gift Box

For the Lid:

Take the 2nd piece of card, place it in the EPB at 2 3/4″ punch and score.

Rotate 90 degrees, place at 3 1/2″ punch and score.

Rotate 90 degrees, place at 2 3/4″ punch and score.

Rotate 90 degrees, place at 3 1/2″ punch and score.

Rotate 90 degrees so you are back at the start. Now line up the scoreline with the score guide on the EPB and punch and score. Rotate 90 degrees and repeat on all 4 sides.

Fold all the scorelines. Holding each longways, cut up on each end to the first scoreline. This will fold in to the form the corners of the box.

Glue the box Base together and then line it with a piece of 4 2/8″ x 3 1/8″ piece of Designer Series Paper.

Glue the box Lid together, but before lining it, add a piece of 3 1/8″ x 4 1/8″ piece of Designer Series Paper to the top.

Gift Box

Adding the ribbon: starting on the inside centre of the lid, add some glue or fast fuse, and also up the inside of the lid. Then place the ribbon on top of this and up and over the top of the lid to the other side and adhere the same way. Do the same on the other end. Cut and extra small piece to tie in the centre in the knot and trim the ends.

To finish it off,  line the lid with a piece of 4 1/4″ x 3 1/4″ piece of Designer Series Paper.

And you have a magnificent gift box of chocolates for that special someone in your life!


The new 2014-2015 Annual Catalogue goes live tomorrow, so make sure you return to my blog to view it online. This catalogue is full of amazing new products and wonderful coloured pictures for ideas. It is a must have for anyone interested in Ink, Paper and Stamps!

Don’t forget to check the retired stamps and accessories lists, there are sure to be products to please, but hurry, only available while stocks last and ends today!

Shop Online 24/7 for products

Don’t forget to Follow My Blog to receive blog updates and join my Newsletter Subscription for all the latest news and specials!

Happy Stamping,

Name Banner

Challenges, JAI, Kids Cards

JAI#220 Sketch Challenge

Hello Crafters,

Today I finally get back into some crafting after a week or two on the sidelines so to speak!

I thought the best way to start, was with a challenge at Just Add Ink. So, the challenge this week is a Sketch Challenge JAI#220.

I am also using 2 of the new 2014-2015 In Colours; Blackberry Bliss, Lost Lagoon, Mossy Meadow, Hello Honey & Tangelo Twist.

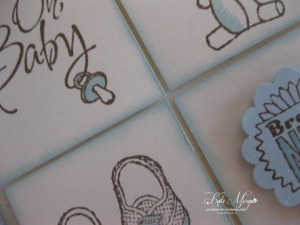
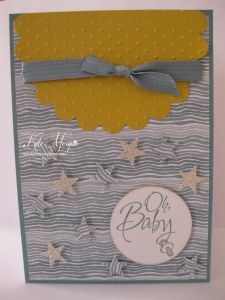
My dear sister is pregnant with her 3rd child and already has two girls, so when they found out she was having a boy, I almost went in to melt down! This will be the 5th grandchild, but the first boy, on my side of the family.

Baby We've Grown

So I need loads of practice with masculine/boy cards and what better way than to start with a Oh Baby Boy card.

I have left the very top of the card above the ribbon with a bit of space, so once the baby is born (and I get my new alphabet framelits from the new annual catalogue, available 1 July!), I will be able to add his name!

Baby We've Grown

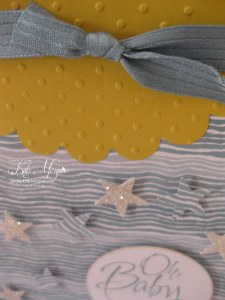
I stamped the Oh Baby image from the Baby We’ve Grown Stamp set in the new In Colour, Lost Lagoon. The base card is also Lost Lagoon and the Designer Series paper is from the new stack, Moonlight.

The scallop circle is die cut from Hello Honey cardstock… do you think it looks a bit like a bib?!!! I hope so, because that was the intention!

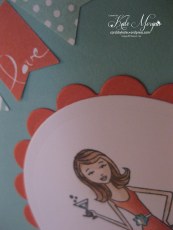
I find that these two colours coordinate so well and the ribbon is to die for! Below is another picture showing this divine ribbon!

IMG_4875

You may also notice the punched stars, part of a new punch pack of 3 (which also includes a flower and a heart), all of which I couldn’t wait to get my hands on.

Why don’t you give a challenge a go, they are so much fun. Head across to the Just Add Ink page for more inspiration and see how the designers interpreted this challenge.


The new 2014-2015 Annual Catalogue goes live on 1 July, so make sure you return to my blog to view it online. This catalogue is full of amazing new products and wonderful coloured pictures for ideas. It is a must have for anyone interested in Ink, Paper and Stamps!

Don’t forget to check the retired stamps and accessories lists, there are sure to be products to please, but hurry, only available while stocks last and ends 30 June!

Shop Online 24/7 for products

Don’t forget to Follow My Blog to receive blog updates and join my Newsletter Subscription for all the latest news and specials!

Happy Stamping,

Name Banner

feminine, Markers for Colouring

Sneak Peek ~ Blendabilities & In This Together stamp set

Hello Crafters,

Today I share with you some cards using the new Stampin’ Up! alcohol markers, Blendabilities and a new stamp set in the upcoming annual catalogue, In This Together.

I am just loving this stamp set, which has 3 stamps, but so far I have only used one of them!

I have stamped each of the images in Memento Black Ink which is also new to the Stampin’ Up! range, for specific use with the Blendabilities. Stazon will not work with these alcohol marker, as it will bleed.

The colour scheme used on this card is: Old Olive, Daffodil Delight & Black!

Blendabilities     IMG_4857

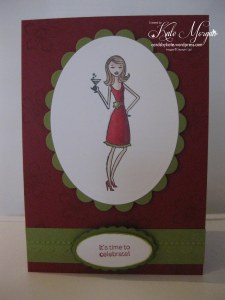
I embossed the Old Olive cardstock with the Beautifully Baroque TIEF. I coloured the feminine figure with the Blendabilities; her hair and skin with the skin tones set and her dress with the Old Olive set & Daffodil Delight set.

The Blendabilities come in sets of 3, being a Stampin’ Up! colour and 2 tones of it. So these coordinate with all of our other products, awesome!

Here is another sample using the Cherry Cobbler Blendabilities!

IMG_4853     IMG_4855

I then decided to make another with the Calypso Coral set, combined with the Coastal Cabana ones!

IMG_4852     IMG_4856

Can you tell I just love using these alcohol markers?!!! I can’t wait for 1st July so I can order some more colours!!!!!


The new 2014-2015 Annual Catalogue goes live on 1 July, but if you would like to receive a copy before then, please Contact Me. This catalogue is full of amazing new products and wonderful colour pictures for ideas. It is a must have for anyone interested in Ink, Paper and Stamps!

Don’t forget to check the retired stamps and accessories lists, there are sure to be products to please, but hurry, only available while stocks last!

Shop Online 24/7 for products

Don’t forget to Follow My Blog to receive blog updates and join my Newsletter Subscription for all the latest news and specials!

Happy Stamping,
Name Banner
MDS, Stampin' Up! Events

Convention Mini Swaps

Hello Crafters,

Today I share with you something that our Stampin’ Up! Art With Heart Team did for Convention 2014 held here in Melbourne this year.

Those who wanted to join this challenge, made a 2″ x 2″ swap using the colour combinations: Bermuda Bay, Crushed Curry, Old Olive, Rose Red or Strawberry Slush & Silver.

The idea was to pick a theme, which our up-line Claire chose, Flowers and Friends. I think this was the perfect theme for our lovely team of ladies.

At the end of our first day at Convention, we all met up for a drink and swapped our squares. It was such a lovely idea, getting us all together to chat about Convention, which for many of us, was our first one ever!

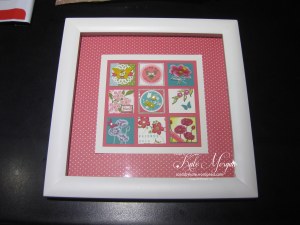
So here it is all framed!

IMG_4846

I got a 12″ x 12″ white shadow box frame and layered my background with a piece of Strawberry Slush DSP ~ Whisper White cardstock ~ Strawberry Slush cardstock and then the tricky part of adhering those gorgeous 2″ x 2″ squares evenly!!! I think I did okay?!

The top middle square, I created in My Digital Studio (MDS) and then printed it so we can look back on this for many years to come and remember when and why we made it!  For your free 30 day trial of MDS click here. It is awesome to use in conjunction with the new Project Life products which all coordinate with the Stampin’ Up! range.

Here is a close up of the swaps!

IMG_4847    IMG_4850

Aren’t they just gorgeous? We have such a talented team of ladies and we love to share our ideas with each other.


The new 2014-2015 Annual Catalogue goes live on 1 July, but if you would like to receive a copy before then, please Contact Me. This catalogue is full of amazing new products and wonderful colour pictures for ideas. It is a must have for anyone interested in Ink, Paper and Stamps!

Don’t forget to check the retired stamps and accessories lists, there are sure to be products to please, but hurry, only available while stocks last!

Shop Online 24/7 for products

Don’t forget to Follow My Blog to receive blog updates and join my Newsletter Subscription for all the latest news and specials!
Happy Stamping,
Name Banner
Masculine, Techniques & Tutorials

Baby Wipe Technique (Masculine)

Hello Crafters,

Today I share with you another baby wipe technique but this time a masculine one.

I am just loving this fun and very easy technique!

The colours this time are: Midnight Muse, Baked Brown Sugar & Bermuda Bay!

IMG_4810

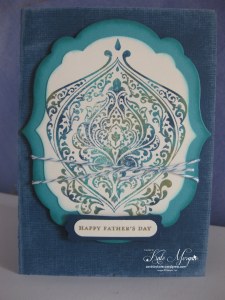
The card base is Midnight Muse Core’dinations cardstock which I sanded to give it a more rustic look.

The technique is exactly the same process as I showed you last week with the Engagement card, you can view this here.

This time I stamped the Beautifully Baroque image onto very vanilla card stock. Isn’t it just stunning?!!!

IMG_4812

I added some bakers twine around the image giving it a more masculine look.

And I added the sentiment “happy father’s day”. Yes I am getting in early this year!!!!


The new 2014-2015 Annual Catalogue goes live on 1 July, but if you would like to receive a copy before then, please Contact Me. This catalogue is full of amazing new products and wonderful colour pictures for ideas. It is a must have for anyone interested in Ink, Paper and Stamps!

Don’t forget to check the retired stamps and accessories lists, there are sure to be products to please, but hurry, only available while stocks last!

Shop Online 24/7 for products

Don’t forget to Follow My Blog to receive blog updates and join my Newsletter Subscription for all the latest news and specials!

Happy Stamping,
Name Banner
Baby, feminine, Masculine

Baby Cards (boy & girl)

Hello Crafters,

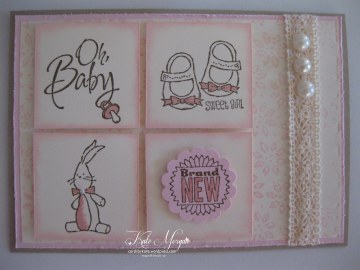
Today I share with you some quick and easy baby cards using the Baby We’ve Grown stamp set.

I am just loving this set of stamps with 6 images, only 4 I have used!

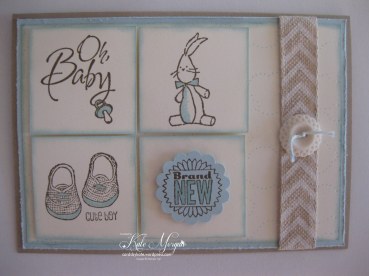
The colour scheme is: Pink Pirouette, Soft Suede & Crumb Cake!

IMG_4813

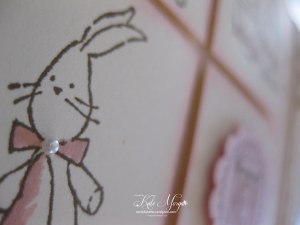
The card base is Crumb Cake.  I stamped each of the images onto Very Vanilla cardstock using a Soft Suede inkpad. I coloured parts of the images with the Pink Pirouette Stampin’ Write Marker and sponged all the edges.

IMG_4814     IMG_4809

The background was created by inking the inside of Petals a Plenty Textured Impressions Embossing Folder and placing the cardstock over the top being careful not to move it. Rub it gently then remove it slowly, so you don’t smudge the image. It is another fantastic technique for using your TIEFs!!!

I added some Vintage ribbon and some pearls to finish it off.

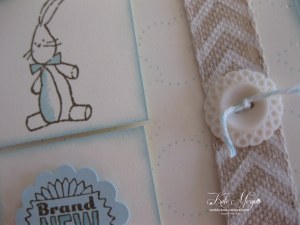
I then decided to make one for a baby boy using the same colours but exchanging the Pink Pirouette for Soft Sky and here it is!

IMG_4815

IMG_4817  IMG_4816


The new 2014-2015 Annual Catalogue goes live on 1 July, but if you would like to receive a copy before then, please Contact Me. This catalogue is full of amazing new products and wonderful colour pictures for ideas. It is a must have for anyone interested in Ink, Paper and Stamps!

Don’t forget to check the retired stamps and accessories lists, there are sure to be products to please, but hurry, only available while stocks last!

Shop Online 24/7 for products

Don’t forget to Follow My Blog to receive blog updates and join my Newsletter Subscription for all the latest news and specials!
Happy Stamping,
Name Banner
feminine, Techniques & Tutorials

Baby Wipe Technique (Engagement)

Hello Crafters,

Today I share with you another technique which I haven’t ever tried until now, but it has been on my to-do-list for some time.

I wish I had of tried it earlier as I absolutely love it and the results of this card!

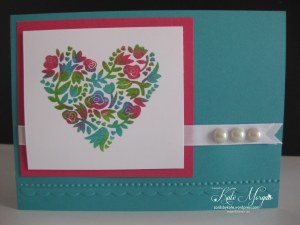
And check out the colours ~ I have used Melon Mambo, Bermuda Bay & Wild Wasabi!

Flowerfull Heart

The card base is Bermuda Bay. Now to explain how I created that gorgeous colourful flowerfull heart.

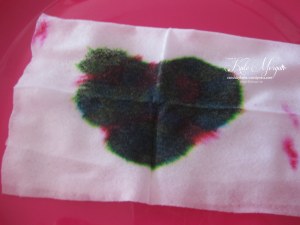
First of all you need some baby wipes ~ who doesn’t have baby wipes?? Even though my kids are out of nappies, baby wipes are still a very handy thing to have around or in the handbag for those messy snacks!

You will also need some reinkers in your favourite colours, I find that 3 works best. Drop some ink onto the baby wipes randomly to cover an area big enough for your stamp.

Babywipe Technique

Once you have put enough ink on, place your stamp on top and use it the same way you would an ink pad.

IMG_4797

Then stamp the image onto whisper white card stock. Isn’t it just gorgeous?!!!

IMG_4798

I used the Flowerfull Heart stamp  and I was able to get about 18-20 crisp images from this one use of the baby wipes. Great value and would make an easy set of cards to give someone as a gift, or if you were making cards for a particular event!

IMG_4805

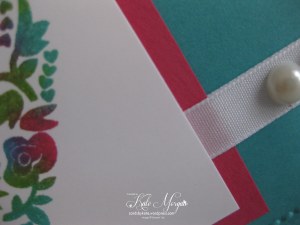
I added some white ribbon and pearls to finish it off, as it is for an engagement!

Here is another image showing the inside of the card. I love adding some touches to the inside, I find it just finishes the cards off nicely.

IMG_4804

I just love this technique and will certainly try some more, maybe a masculine one next time!!!


The new 2014-2015 Annual Catalogue goes live on 1 July, but if you would like to receive a copy before then, please Contact Me. This catalogue is full of amazing new products and wonderful colour pictures for ideas. It is a must have for anyone interested in Ink, Paper and Stamps!

Don’t forget to check the retired stamps and accessories lists, there are sure to be products to please, but hurry, only available while stocks last!

Shop Online 24/7 for products

Don’t forget to Follow My Blog to receive blog updates and join my Newsletter Subscription for all the latest news and specials!

Happy Stamping,
Name Banner
Challenges, feminine, JAI, Kids Cards

Cupcake anyone?

Hello Crafters,

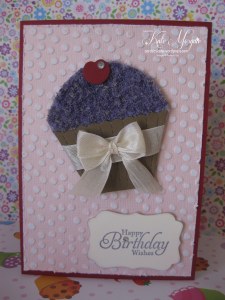
I am so excited to have a long weekend right now, after such a busy few weeks. So I must say Happy Queen’s Birthday Long Weekend to everyone in Melbourne and what better way to celebrate than with cupcakes! Not only did I bake some Baci cupcakes but also made this card for the Just Add Ink #217 Challenge, “JUST ADD CUPCAKES/CAKE/DESSERT“.

And check out the colours ~ I have used Wisteria Wonder, Pink Pirouette & Cherry Cobbler, oh and Soft Suede for the cupcake wrapper!

Just Add Ink #217

The card base is Cherry Cobbler along with the cherry on top of the cupcake. The background is Pink Pirouette Core’dinations cardstock embossed with the Decorative Dots TIEF and sanded. I also distressed the edges with the distressing tool!

I used Flowersoft for the top of the cupcake to give it a bit of texture.

Just Add Ink #217

The double bow is made with the SU Seam Binding in Very Vanilla and adhered with a glue dot.

The sentiment is from the Hostess Stamp Set Simply Sketched and then cut out with the Decorative Label punch and sponged edges in Wisteria Wonder ink.

Oh and here is a picture of my Baci cupcakes, I knew you were wondering about them!!! Yummy!!!!

Baci Cupcakes

Why don’t you have a go at entering a challenge? They are so much fun, so check out what the design team at Just Add Ink created this week!


The new 2014-2015 Annual Catalogue goes live on 1 July, but if you would like to receive a copy before then, please Contact Me. This catalogue is full of amazing new products and wonderful colour pictures for ideas. It is a must have for anyone interested in Ink, Paper and Stamps!

Don’t forget to check the retired stamps and accessories lists, there are sure to be products to please, but hurry, only available while stocks last!

Shop Online 24/7 for products

Don’t forget to Follow My Blog to receive blog updates and join my Newsletter Subscription for all the latest news and specials!

Happy Stamping,
Name Banner
feminine, Techniques & Tutorials

Water Colour Background

Hello Crafters,

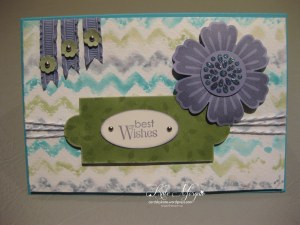
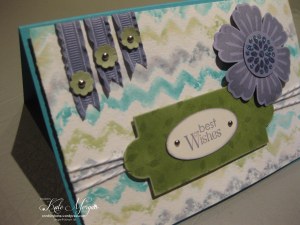
Today I am sharing a card I made using the water colour technique for the background of my card. Can you believe, I have never used the watercolour paper until now?

And check out the colours ~ I have used Wisteria Wonder, Pear Pizzazz & Bermuda Bay!

IMG_4794

The card base is Bermuda Bay. Now to explain how I created that gorgeous water colour background.

I used the Chevron Textured Impressions Embossing Folder and the Stampin’ Write Markers in each of the colours alternating the colours on each of the lines on one side of the TIEF. You may notice that the ink drys, but do not worry until you have finished adding the inks. Once finished, I sprayed the embossing folder with Stampin’ Mist (you know the stuff we use with our Stampin’ Cleaner!!!) and then put a piece of water colour paper on top and closed the folder gently and rub. Open the folder and tada, you have a gorgeous water colour background. Put this aside to dry.

IMG_4795

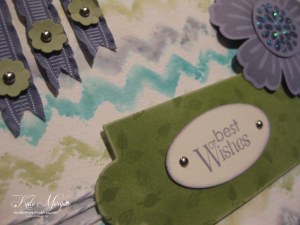
The flower from the Mixed Bunch stamp set and punched out with the Blossom punch and the 1″ circle punch. I curled the petals using my thumb and joined the pieces with dimensionals.

Here is another close up of the image.

IMG_4793

I just love this background and will certainly try some more water colouring!!!


The new 2014-2015 Annual Catalogue goes live on 1 July, but if you would like to receive a copy before then, please Contact Me. This catalogue is full of amazing new products and wonderful colour pictures for ideas. It is a must have for anyone interested in Ink, Paper and Stamps!

Don’t forget to check the retired stamps and accessories lists, there are sure to be products to please, but hurry, only available while stocks last!

Shop Online 24/7 for products

Don’t forget to Follow My Blog to receive blog updates and join my Newsletter Subscription for all the latest news and specials!

Happy Stamping,
Name Banner
Masculine

Say Cheese

Hello Crafters,

Are you getting inspired about the new annual catalogue coming out soon? If not, well here is another set that is sure to please!

Not only will it be great for cardmaking, but also with Scrapbooking and the new Project Life range. I cannot wait to get my hands on the Project Life products, I am so excited!!!

Say Cheese Flashback

The card base is Crushed Curry Core’dinations cardstock. The stamp set is called Say Cheese and I used Cherry Cobbler, Early Espresso and Bermuda Bay inks.  The scallop border punch was used to add a bit more detail, along with the Apothecary Accents Framelits used behind the Say Cheese Sentiment!

Say Cheese Flashback

The Designer Series Paper is the new Flashback DSP. Don’t you just love how everything coordinates, the Stamps, Inks & Papers?!!!! This is why I love Stampin’ Up!

I fussy cut most of the images and layered them  to the card with dimensionals.

Here is another close up of the image.

Say Cheese Flashback

The ribbon is Bermuda Bay, one of my favourite Stampin’ Up! colours.


The new 2014-2015 Annual Catalogue goes live on 1 July, but if you would like to receive a copy before then, please Contact Me. This catalogue is full of amazing new products and wonderful colour pictures for ideas. It is a must have for anyone interested in Ink, Paper and Stamps!


Shop Online 24/7 for products

Don’t forget to Follow My Blog to receive blog updates and join my Newsletter Subscription for all the latest news and specials!

Happy Stamping,
Name Banner