Blog Hop/Creative Showcase, Designer/Patterned/Specialty Papers (DSP), feminine, Flowers, Handmade Cards, Jan-Jun Mini Catalogue and Sale-a-bration, Stampin' Up!

Occasions catalogue Blog Hop featuring the Petal Passion Suite

AWHT Blog Hop - Jan 2018 - Occasions catalogue.jpg

Dear Crafters,

Tonight the Art with Heart team are sharing creative projects using product from the occasions catalogue. The occasions catalogue is current now until 31st May. Be sure to request your copy of the catalogue today (along with the sale-a-bration brochure).
Sale-a-bration is also a great time to join our fabulous team. Ask any of the girls on the hop!

If you’re already hopping, then you just came to me from the lovely, Leanne Mitchell. If you’re just joining, great! Use the “next” button at the end of my post to hop all the way around. Blog Hops are full circles, so you can start hopping here and then at the end of each post there is a link to the next one. There is also a list of participants at the end in case of any broken links.

Now let’s get started!

Today I share my favourite suite in the new Occasions catalogue as I have previously mentioned and I just love how many items are in this Petal Passion Suite.

Petal Passion Suite

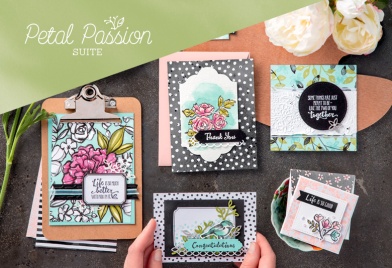
I am using Pool Party as my base card with a layer of the Petal Passion DSP. Yes, these papers are black and white and can look quite harsh at first, but wait until you see them with some colour!

Petal Passion DSP
Petal Passion DSP

Petal Palette Suite Stampin Up Occasions 2018 Blog Hop by Kate Morgan, Independent Demonstrator Australia. Feminine card

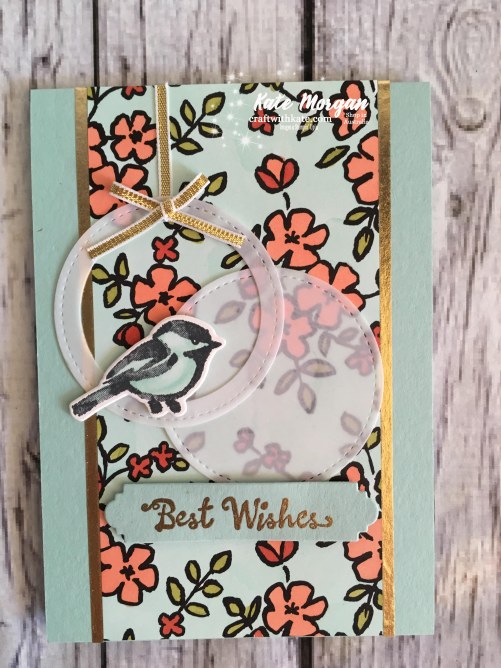
I coloured the DSP with my Stampin’ Blends; Calypso Coral Combo, Old Olive Combo and Pool Party Light for the background. What a difference it makes!!!

Petal Palette Suite Stampin Up Occasions 2018 Blog Hop by Kate Morgan, Independent Demonstrator Australia. Feminine card DIY

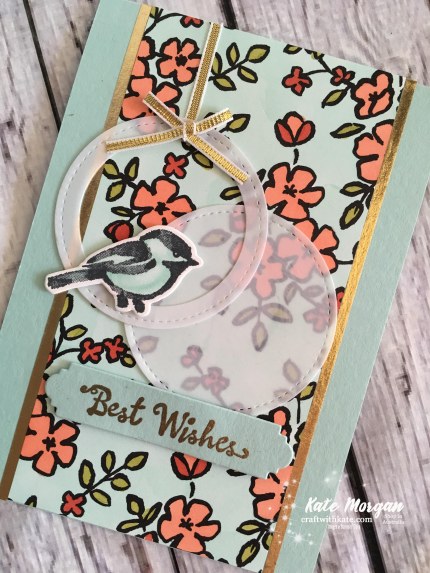
I also coloured the bird with the Pool Party Combo blends pack and the Colour Lifter.  I die cut some vellum circles using the Stitched Shapes Framelits dies and glued them down by lightly sponging on some Tombo Multipurpose glue, so you can’t see it. I then added some of the gold metallic ⅛” ribbon and tied another piece in a bow and added it with a glue dot.

Petal Palette Suite Stampin Up Occasions 2018 Blog Hop by Kate Morgan, Independent Demonstrator Australia. Feminine card. DIY

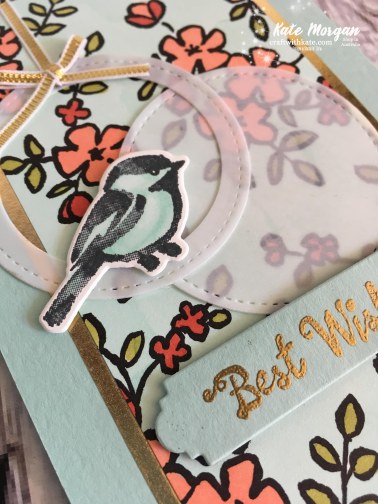
The sentiment is heat embossed with gold embossing powder and it looks stunning on that framelit.

Petal Palette Suite Stampin Up Occasions 2018 Blog Hop by Kate Morgan, Independent Demonstrator Australia. Feminine card.

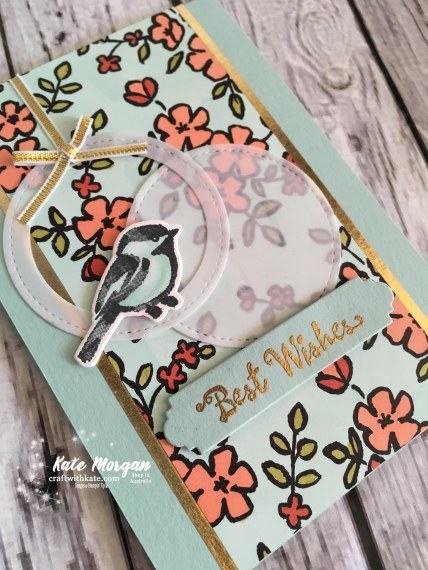
The gold strips down each side of the DSP is some Washi tape.

Thanks for visiting today.


Don’t forget to email me at craftwithkate@live.com.au to request your copy of any Catalogue or to ask about joining the Art With Heart team.

Now it’s time to follow the blog hop to our next participant, Monika O’Neill.

AWHT Blog Hop Next blog button

If you find a broken link or have come to this blog hop from a different entry point, you can view the participants below:

  1. Ros Davidson 
  2. Caroline Manwaring
  3. Tina Gillespie
  4. Kathryn Mangelsdorf
  5. Rachel Palmieri 
  6. Alisha Watson
  7. Claire Daly
  8. Rebecca Jacovou
  9. Leanne Mitchell
  10. Kate Morgan
  11. Monika O’Neill
  12. Sharon Davern

Happy Hopping!

Blog Signature

feminine, Flowers, Stampin' Up!, Techniques & Tutorials

Rock N Roll with Beautiful Bouquet

Hello Friends,

Today I am sharing my June ATC Swap that I made as part of our wider Art With Heart Team monthly ATC swaps. I have used Stampin’ Up!s Beautiful Bouquet Bundle which as you know is my favourite bundle in the Annual catalogue and this challenge was to use the Rock N Roll technique. The Rock and Roll technique is a great way to add a variation of colour to your stamped images!

Rock N Roll Technique using Stampin Ups Beautiful Bouquet by Kate Morgan, Independent Demonstrator Australia @craftwithkate.JPG

ATC Swaps are 2½” x 3½” cards. Each month a different technique is chosen and for every participant, you make that number of cards, exactly the same. We send them all to the organiser with a stamped self addressed envelope and once she has them all from each participant, she sends one of each back in our envelope! It’s a wonderful way of learning new techniques without having to create full size cards.

Click here to watch a video tutorial on this technique.

What do you think of this technique? Would you give it a try?!

Happy stamping!

Blog Signature

Product List – click the product to add it to your shopping cart!

Don’t forget to Follow My Blog to receive blog updates and join my Newsletter Subscription for all the latest news and specials!

Blog Button - Catalogue  Blog Button - Shop   Blog Button - Classes  Blog Button - Join my Team  Blog Button - Watermark

Birthday, feminine, Flowers, Stampin' Up!

Succulent Garden Suite

Dear Crafters,

Today I have created a card using the Succulent Garden Suite. I have to say, I was very happy with how this turned out, as it was reasonably quick to create and I can see myself making loads more in this simple, but effective layout. The flower was what took the time, but once you have made one, you can put them together quite fast.

Succulent Garden Suite by Kate Morgan, Independent Stampin' Up! Demonstrator Australia. #occasions2017 DIY 3D Glimmer 1

The succulent is made of 2 of each of the 3 largest petals and 2 of the smaller daisy type dies. I sponged the edges with Rich Razzleberry ink using a sponge dauber. A bone folder was used to curl the edges under before joining the flowers together. I found by putting the flowers together in pairs first and then each of the 4 pairs together to make the one giant flower was the easiest!

Succulent Garden Suite by Kate Morgan, Independent Stampin' Up! Demonstrator Australia. #occasions2017 DIY 3D Glimmer sponged

The Designer Series Paper is double sided, so I cut one piece to be 14.5cm x 10cm, then I cut it through the centre at about 8cm, turned one piece over and joined them together on the card! This is a very quick and effective way to decorate the background. Then I added a strip of glimmer paper over the join.

Succulent Garden Suite by Kate Morgan, Independent Stampin' Up! Demonstrator Australia. #occasions2017 DIY 3D Glimmer 2

What do you think of this card?

Products Used:

Cardstock: Old Olive, Tip Top Taupe, Succulent Garden DSP, Glimmer Assortment Pack
Stamp Sets: Oh So Succulent
Inks: Old Olive, Rich Razzleberry
Other: Big Shot, Succulent framelits, Tombo Multipurpose Glue, Trimmer, Stampin Scrub, Paper Snips, Sponge Dauber, Clear Block, White Accent Embellishments, Bone Folder

Sale-a-bration time!!! (2nd release items added)

With any $90 order you can choose 1 item for FREE
with a $180 order you can choose 2 items for FREE
with a $270 order you can choose 3 items for FREE
ETC
Here are all the FREE items you can choose from!

saleabration-2017

2017-saleabration-images

shop-online-copyget-a-catalogue-free-copy  classes-in-rowville-copy  join-my-team-copy  watermark-purchase

Don’t forget to Follow My Blog to receive blog updates and join my Newsletter Subscription for all the latest news and specials!

Happy Stamping!

Blog Signature-001

Birthday, Challenges, Flowers, Stampin' Up!

Balloon Celebration as flowers

Dear Crafters,

Today I enter a challenge at Pals Paper Arts. The challenge this week is an Colour Challenge PPA#283.

ppa-283-jan14

As soon as I saw this colour challenge, I knew I had to give it a go! This is one of my favourite colour combinations.

I started with a Mint Macaron card base and added some coordinating dsp which I sponged the edges.

#BalloonCelebration #occasions2016 #stampinup #flowers

Next I stamped the images onto Whisper White card stock using the Memento Black Inkpad. The stems are from the Flower Patch stamp set, as is the sentiment, but those flowers are actually from the Balloon Celebration stamp set. Yes, it is that “wheel” looking stamp that we all looked at and wondered what on earth it goes with in the theme of the balloon celebration stamps. It had me stumped for days, but I was determined to have a play and work out exactly what I could create.

#BalloonCelebration #occasions2016 #stampinup #flowers #stampinupaustralia

The flowers are coloured with the Stampin’ Write Markers, Melon Mambo and Mint Macaron. I stamped the dotty circle image onto vellum and punched it out with the 3/4″ circle punch.

I added each vellum circle with a glue dot and then added a large pearl to the centre of each flower.

Check out that gorgeous white jute ribbon behind, adding the perfect amount of texture!!!

#BalloonCelebration #occasions2016 #stampinup #flowers #PPA

Don’t forget to decorate the inside panel with a coordinating flower!

Please leave a comment below, if you think my card met this challenge.

Why don’t you give a challenge a go, they are so much fun. Head across to the Pals Paper Arts page for more inspiration and see how the designers interpreted this challenge.


All Catalogues, Clearance Rack & Weekly Deals are available online here! They are full of amazing new products and wonderful full colour picture inspiration. It is a must have for anyone interested in Ink, Paper and Stamps!

Shop Online 24/7 for products

Don’t forget to Follow My Blog to receive blog updates and join my Newsletter Subscription for all the latest news and specials!


Enjoy the many perks of being a Demonstrator (even just for yourself as a Hobby Demonstrator) by joining my friendly team, click HERE for details.

Happy Stamping!

Name Banner


MDS, Stampin' Up! Events

Convention Mini Swaps

Hello Crafters,

Today I share with you something that our Stampin’ Up! Art With Heart Team did for Convention 2014 held here in Melbourne this year.

Those who wanted to join this challenge, made a 2″ x 2″ swap using the colour combinations: Bermuda Bay, Crushed Curry, Old Olive, Rose Red or Strawberry Slush & Silver.

The idea was to pick a theme, which our up-line Claire chose, Flowers and Friends. I think this was the perfect theme for our lovely team of ladies.

At the end of our first day at Convention, we all met up for a drink and swapped our squares. It was such a lovely idea, getting us all together to chat about Convention, which for many of us, was our first one ever!

So here it is all framed!

IMG_4846

I got a 12″ x 12″ white shadow box frame and layered my background with a piece of Strawberry Slush DSP ~ Whisper White cardstock ~ Strawberry Slush cardstock and then the tricky part of adhering those gorgeous 2″ x 2″ squares evenly!!! I think I did okay?!

The top middle square, I created in My Digital Studio (MDS) and then printed it so we can look back on this for many years to come and remember when and why we made it!  For your free 30 day trial of MDS click here. It is awesome to use in conjunction with the new Project Life products which all coordinate with the Stampin’ Up! range.

Here is a close up of the swaps!

IMG_4847    IMG_4850

Aren’t they just gorgeous? We have such a talented team of ladies and we love to share our ideas with each other.


The new 2014-2015 Annual Catalogue goes live on 1 July, but if you would like to receive a copy before then, please Contact Me. This catalogue is full of amazing new products and wonderful colour pictures for ideas. It is a must have for anyone interested in Ink, Paper and Stamps!

Don’t forget to check the retired stamps and accessories lists, there are sure to be products to please, but hurry, only available while stocks last!

Shop Online 24/7 for products

Don’t forget to Follow My Blog to receive blog updates and join my Newsletter Subscription for all the latest news and specials!

Happy Stamping,
Name Banner