Gift Ideas, Owl Punch

Flower Patch with a twist!

Hello Crafters,

First of all today, I want to wish my gorgeous girl, Annika a very happy 8th birthday. I can’t believe we are so blessed to have had you for 2920 days in our lives already!

To commemorate this special day, I wanted to share with you some of her favourite colours and they can be found on one very beautiful bird that I grew up with in our neighbourhood living so close to the Cataract Gorge in Launceston, Tasmania.

No, I don’t live in Tassie anymore, but I still have the most vivid memories as a child growing up in such a gorgeous environment and these stunning birds wandering around.

Yes, it is the peacock!

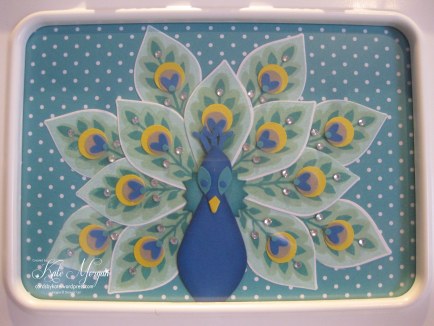
Flower Patch Peacock

I have created this using the Flower Patch Stamp Set and the Flower Fair framelits dies which can be purchased as bundle saving you a huge 15%.

I also used the Owl punch.

I should have photographed him before I put it into the frame to stop the glare off the glass, but I think you can see him clearly enough.
Flower Patch Peacock

I used Pool Party as the base of the feathers, then Pistachio Pudding then Bermuda Bay. The body of the peacock is Pacific Point cardstock and I sponged the edges with the same colour ink and a sponge dauber. The circles are punched from Daffodil Delight, Crumb Cake and a Pacific Point heart with a tiny Bermuda Bay dot.

c

Rhinestones were added to the feathers for a bit of bling as these birds are such a showy animal!

Please leave a message to let me know what you think of my design.


The Annual Catalogue is full of amazing new products and wonderful coloured pictures for inspiration. It is a must have for anyone interested in Ink, Paper and Stamps!

Shop Online 24/7 for products

Don’t forget to Follow My Blog to receive blog updates and join my Newsletter Subscription for all the latest news and specials!

Happy Stamping,

Name Banner

Masculine

Traveler (part 2)

Hello Crafters,

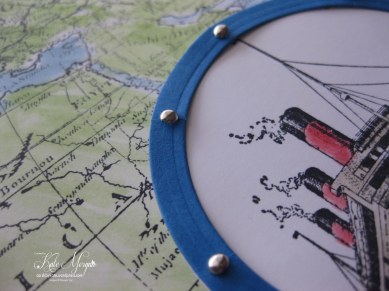
Here is part 2 using the Traveler Stamp Set and another great background stamp, World Map.

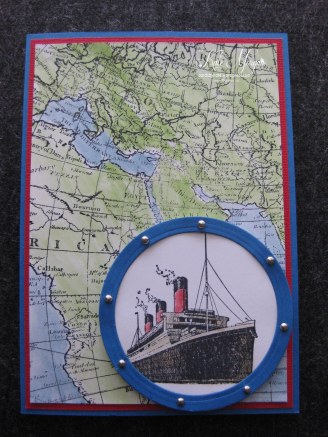
I began by stamping the images onto white cardstock with Stazon Black Ink.

Traveler

The colours are Real Red & Pacific Point. I coloured the World Map image using the Aquapainter and ink pads.

Traveler

I love the mini Silver Brads around the ship image to give it a port hole look!


The new 2014-2015 Annual Catalogue is now live on my blog. This catalogue is full of amazing new products and wonderful coloured pictures for ideas. It is a must have for anyone interested in Ink, Paper and Stamps!

Shop Online 24/7 for products

Don’t forget to Follow My Blog to receive blog updates and join my Newsletter Subscription for all the latest news and specials!

Happy Stamping,

Name Banner

feminine

Everything Eleanor

Hello Crafters,

A few days ago I shared a card with you that I fell in love with and today I share with you another card using the background stamp, I Love Lace and Everything Eleanor, but in different colour tones.

I think this one is probably even more girly than the last one!

I Love Lace & Everything Eleanor

I have stamped the I Love Lace with Versamark ink and clear embossed it on Pink Pirouette cardstock. This is mounted onto white card and then Pink Pirouette card.

The blooms are from Everything Eleanor, and they are inked with Pink Pirouette on white card and fussy cut and sponged with ink.

I Love Lace & Everything Eleanor

I also sponged some ink of the same tones to the centre of each bloom.

I Love Lace & Everything Eleanor

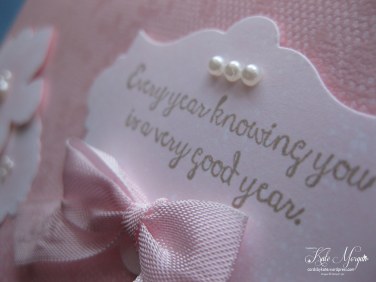
The sentiment is from the Bloom with Hope Hostess Stamp Set. The ribbon is the new Seam Binding Ribbon available now from the new catalogue!

The pearls just finish it off perfectly!

But check out that background lace stamp, it is just so pretty and feminine!!!


The new 2014-2015 Annual Catalogue is now live on my blog. This catalogue is full of amazing new products and wonderful coloured pictures for ideas. It is a must have for anyone interested in Ink, Paper and Stamps!

Shop Online 24/7 for products

Don’t forget to Follow My Blog to receive blog updates and join my Newsletter Subscription for all the latest news and specials!
Happy Stamping,

Name Banner

Masculine

Traveler (part 1)

Hello Crafters,

Another new stamp set in the Annual Catalogue which I am excited to share with you, is the Traveler Stamp Set. Over the next few weeks, I will share with you some of my creations using this set.

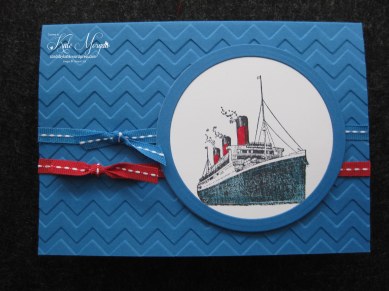
I began with the ship image, as my in-laws are currently cruising the Mediterranean for 44 days on something probably similar. Yes I am rather jealous, so I thought I would be creative and make a card instead.

Traveler

This is a very simple card, as I think the Chevron embossing and the image say it all really.

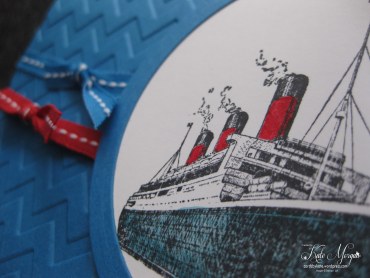
I only wanted to colour part of the image to create a focal point with the coordinating ribbons.

Traveler

Be sure to check back next week to see more images from this wonderful Traveler Stamp set!


The new 2014-2015 Annual Catalogue is now live on my blog. This catalogue is full of amazing new products and wonderful coloured pictures for ideas. It is a must have for anyone interested in Ink, Paper and Stamps!

Shop Online 24/7 for products

Don’t forget to Follow My Blog to receive blog updates and join my Newsletter Subscription for all the latest news and specials!
Happy Stamping,

Name Banner

feminine

I Love Lace

Hello Crafters,

Today I share with you a new stamp in the annual catalogue and it is a background stamp called I Love Lace.

I love that is gives a really girly, old worldy feel to the card, and it can be used for so many things. Check it out!

I Love Lace & Everything Eleanor

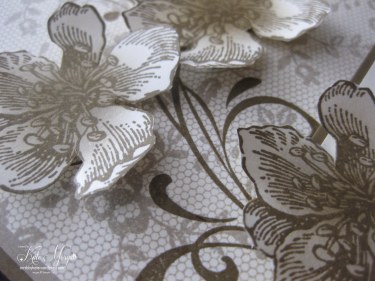
I have stamped the I Love Lace using Crumb Cake ink onto Very Vanilla cardstock and it is mounted onto Crumb Cake card and then Soft Suede card.

The blooms are from a stamp set called Everything Eleanor, and it has been around for a little while now, but I have only just got my hands on it. I really can’t answer why I have got it now, as it is just stunning!

The flourish and blooms are stamped in Soft Suede ink and the flowers are fussy cut and adhered with a dimensional.

I Love Lace & Everything Eleanor

I also sponged some ink of the same tones to the centre of each bloom.

I Love Lace & Everything Eleanor

The sentiment is from Petite Pairs Stamp Set.

But look at that background lace stamp, I just love it!!!


The new 2014-2015 Annual Catalogue is now live on my blog. This catalogue is full of amazing new products and wonderful coloured pictures for ideas. It is a must have for anyone interested in Ink, Paper and Stamps!

Shop Online 24/7 for products

Don’t forget to Follow My Blog to receive blog updates and join my Newsletter Subscription for all the latest news and specials!

Happy Stamping,

Name Banner

Challenges, feminine, JAI

Bloom with Hope

Hello Crafters,

Today I have found myself needing to craft after two weeks off work and it being school holidays, where I have spent loads of time with my gorgeous girls!

But now they are back to school, I needed a kick start, so I begin with a challenge at Just Add Ink. The challenge this week is a Sketch Challenge JAI#223.

I am also using 2 of the new 2014-2016 In Colours; Blackberry Bliss & Tangelo Twist. I wasn’t sure if they would work together, but I was surprised and I think they actually work well.

Loads of new product is used in this card, from the ribbon, stamp set, DSP and cardstock. I think the only things that are not new are the circle framelits and the Honeycomb Embossing Folder!

Bloom with Hope

The Bloom with Hope Stamp Set is one of the many Hostess Sets available in this new annual catalogue and it is just beautiful.

I used the Shaving Cream technique to create the background colours of the flowers, then stamped the images and fussy cut.

Bloom with Hope

If you have realised by now, I love dimension on my cards, so I used dimensionals to add the blooms to my card!

Bloom with Hope

Why don’t you give a challenge a go, they are so much fun. Head across to the Just Add Ink page for more inspiration and see how the designers interpreted this challenge.


The new 2014-2015 Annual Catalogue is now available ~ you can view it online here. This catalogue is full of amazing new products and wonderful coloured pictures foll of ideas. It is a must have for anyone interested in Ink, Paper and Stamps!

Shop Online 24/7 for products

Don’t forget to Follow My Blog to receive blog updates and join my Newsletter Subscription for all the latest news and specials!

Happy Stamping,

Name Banner

feminine, Kids Cards

Never Ending Card

Hello Crafters,

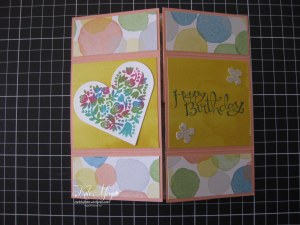
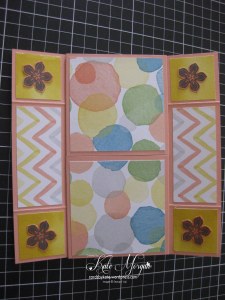
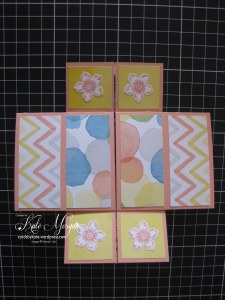
I have made my first ever 30 second video and it is terrible but thought I would share it anyway, as I found it very hard to show you in pictures how this card works!

It is the never ending folding card, so as you open it, it just keeps on opening. Watch the video and you will see it in action.

I have used the gorgeous, but now retired, Sweet Sorbet DSP with Crisp Cantaloupe cardstock. I haven’t yet finished decorating and embellishing it yet, but you get the gist of what is going on here!

Here is the front of the card

Never Ending Card

First opening

Never Ending Card

Second opening

Never Ending Card

Third opening

Never Ending Card

then the last time you open, you end up at the front of the card again!

Never Ending Card

Don’t you agree that kids (and adults alike) would find this fascinating?!!!! My girls loved it!


The new 2014-2015 Annual Catalogue is now live on my blog. This catalogue is full of amazing new products and wonderful coloured pictures for ideas. It is a must have for anyone interested in Ink, Paper and Stamps!

Shop Online 24/7 for products

Don’t forget to Follow My Blog to receive blog updates and join my Newsletter Subscription for all the latest news and specials!

Happy Stamping,

Name Banner

Kids Cards

Napkin Fold Origami Card

Hello Crafters,

Today I share with you a funky oragami style card that is something totally different!

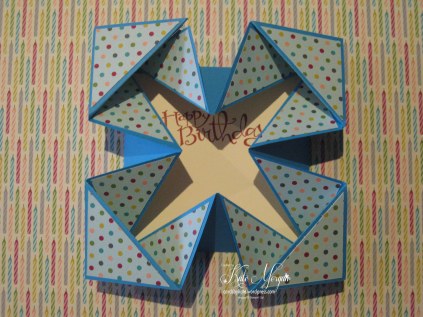
Napkin Fold Origami Handmade Card

To make this card I started with an 8″ x 8″ piece of cardstock. Score at 2″ & 6″ rotate 90 degrees and score the same.

Using the diagonal plate on your Scoreboard, score at 4″ & 6″ on each side.

The folding is hard to explain, but you may be able to follow from the diagrams below.

Napkin Fold Origami Handmade Card

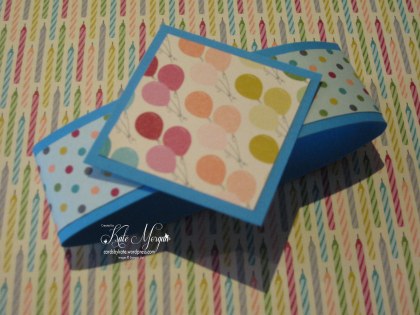
Here is the belly band that goes around the card to keep it closed which is 9″ x 1 1/4″ and the DSP is 9″ x 1″.

The diamond is 2″ x 2″ and the DSP is 1 3/4″ x 1 3/4″

Napkin Fold Origami Handmade Card

And here it is opened up!

Napkin Fold Origami Handmade Card

The Birthday Basics Designer Series Paper to decorate this card is:

8 squares of DSP 1 3/4″ cut in half diagonally to form triangles

2 squares of DSP 2 1/2″ cut in half diagonally to form triangles

1 square of 3 3/4″ for the middle of the card to write your message


This was such a fun card to make and not as difficult as it appears. I am sure I will be making plenty more of these in the months to come as both my girls and their friends have multiple parties!!!!


The new 2014-2015 Annual Catalogue is now live on my blog. This catalogue is full of amazing new products and wonderful coloured pictures for ideas. It is a must have for anyone interested in Ink, Paper and Stamps!

Shop Online 24/7 for products

Don’t forget to Follow My Blog to receive blog updates and join my Newsletter Subscription for all the latest news and specials!
Happy Stamping,

Name Banner

feminine, Kids Cards

Flower Heart Pinwheel Card

Hello Crafters,

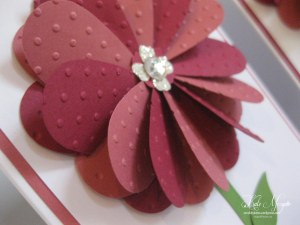
Today I share with you a cute idea using the large heart punch, yes that’s right, the petals are made from hearts!

Flower Heart Pinwheel

To make this card I punched a 2 1/2″ circle out of scrap card to use as the base to stick the petals on to. Fold this circle in half and then half again then lay it flat.

I punched 6 Hearts out of Primrose Petals cardstock and 6 hearts out of Raspberry Ripple cardstock.

Each heart is folded in half.

Glue each petal onto the centre of the circle so the tip of the heart is in the centre and the next petal, slightly overlays the previous one. When you get to the last petal, lift up the first petal slightly so the last one fits underneath it.

Flower Heart Pinwheel

Layer the card base with some coordinating cardstock and then another layer of white.

I cut by hand the stem from Gumball Green cardstock and punched the 2 leaves from the Bird Builder punch and added them with glue dots.

Glue the flower to the top of the stem. I also added 2 small flowers (from the new Itty Bitty Accents Punch Set) to the centre and added a rhinestone basic jewel.

Flower Heart Pinwheel

You can see here I embossed the hearts of this flower with the Polka Dots TIEF after I punched them out. It just gives it a bit more of a WOW!

I haven’t added a sentiment yet, but I will once I know who I am going to give the card to, whether its a birthday, thinking of you, or thank you!


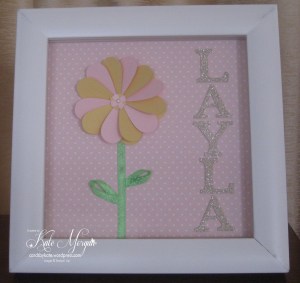
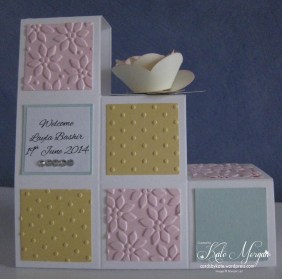
I loved this Flower so much I made this pretty Shadowbox Frame for a friends baby and a special Stair Step card in coordinating colours!

Shadowbox frame     Stair Step Card


The new 2014-2015 Annual Catalogue is now live on my blog. This catalogue is full of amazing new products and wonderful coloured pictures for ideas. It is a must have for anyone interested in Ink, Paper and Stamps!

Shop Online 24/7 for products

Don’t forget to Follow My Blog to receive blog updates and join my Newsletter Subscription for all the latest news and specials!

Happy Stamping,

Name Banner