Blog Hop/Creative Showcase, Christmas, Designer/Patterned/Specialty Papers (DSP), Fancy Folds, Stampin' Up!, Techniques & Tutorials

Colour Creations: Gray Granite Pocket Card with a hidden surprise inside!

9bdc0-34343751_10157403755198098_7101250458500464640_o

Welcome to another Art With Heart Team Colour Creations weekly Blog Hop. Tonight we are featuring Gray Granite!!!

I have made a Pocket card, but it’s no ordinary Pocket card as it has a hidden surprise inside. Read on to find out more!

The Festive Farmhouse Designer Series Paper is the feature, along with the Dashing Deer bundle. You may recognise that deer from a recent card I made. I had stamped a few extra and it was perfect for this card too.

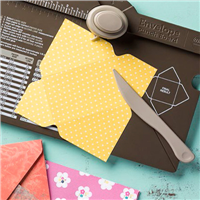
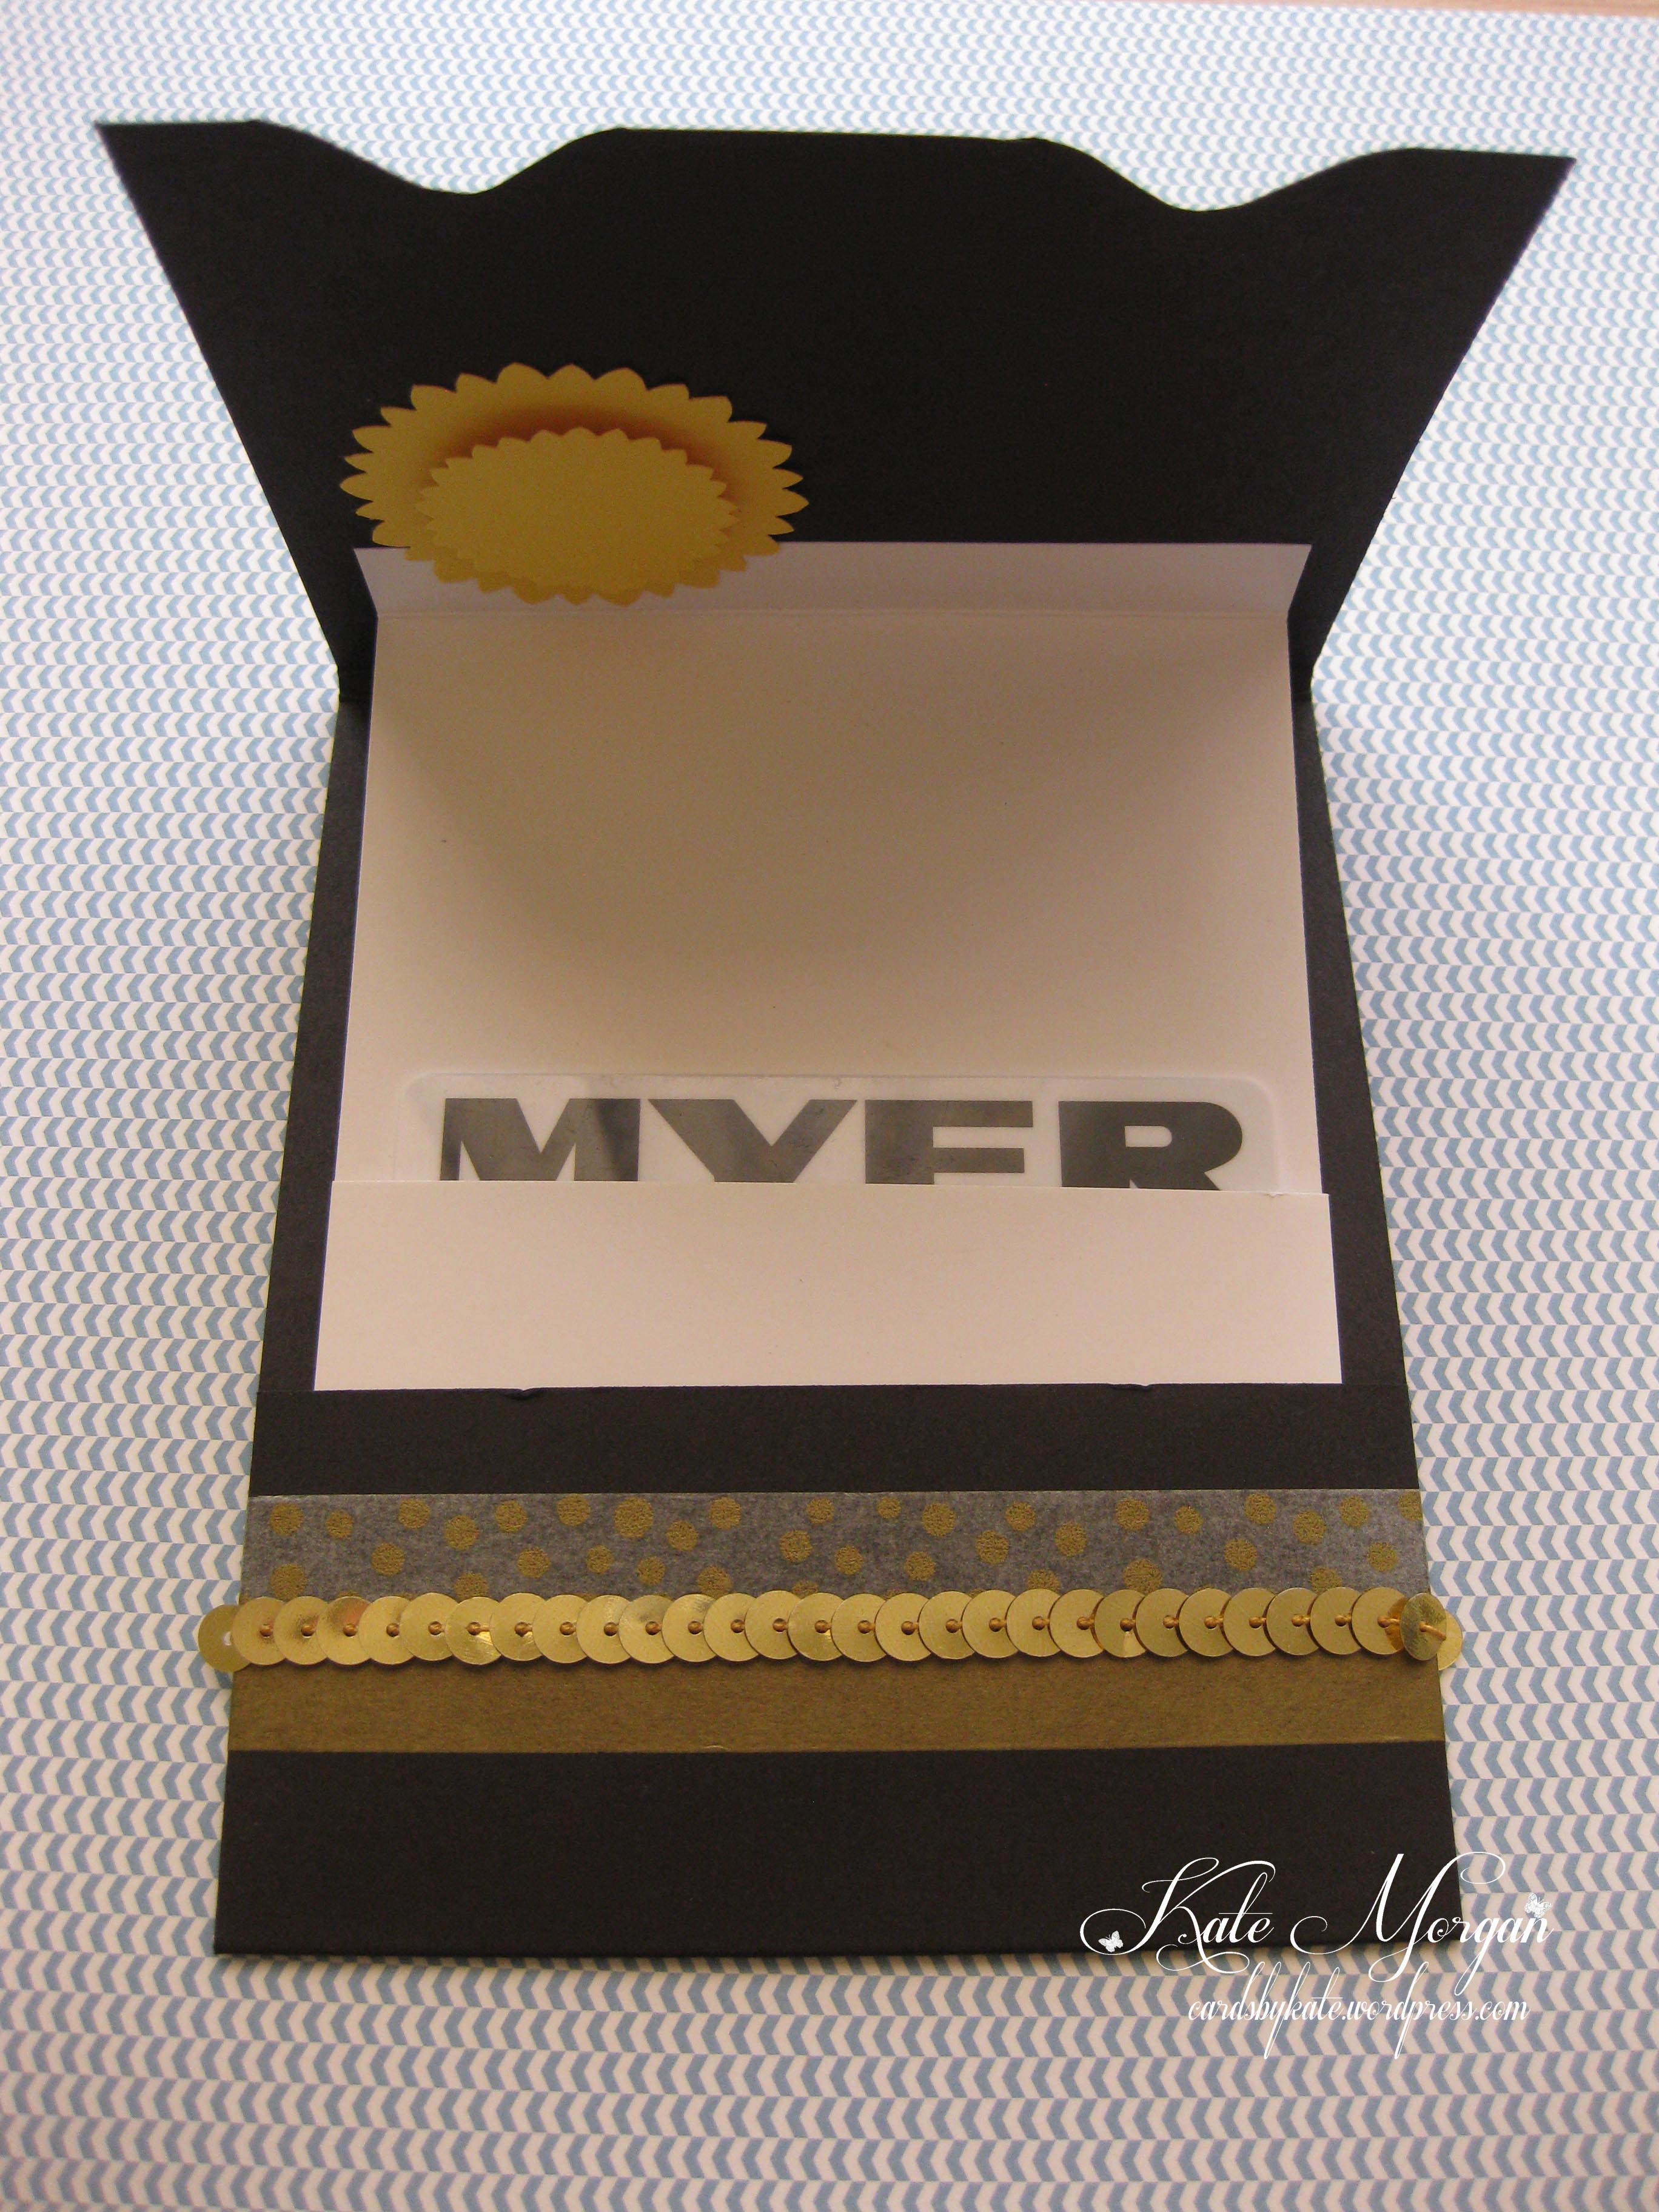
The full instructions are written below, but I used the Envelope Punch Board to make this and added the Circle Tab Punch pull tab to the card inside.

Pocket Gift Card for Christmas 2018 using Stampin Up Dashing Deer, Festive Farmhouse DSP by Kate Morgan, Australia.JPG

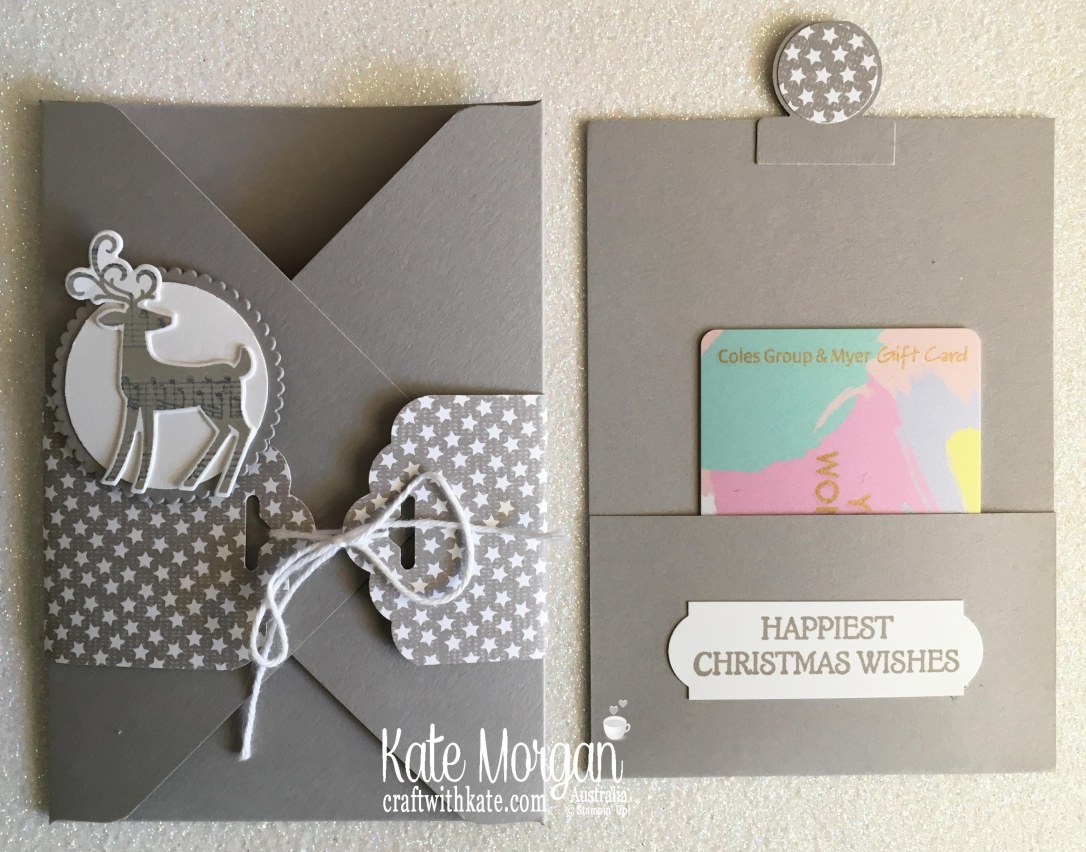
Can you see what may be inside?!! Yes a gift card.

Pocket Gift Card for Christmas 2018 using Stampin Up Dashing Deer, Festive Farmhouse DSP by Kate Morgan Australia.JPG

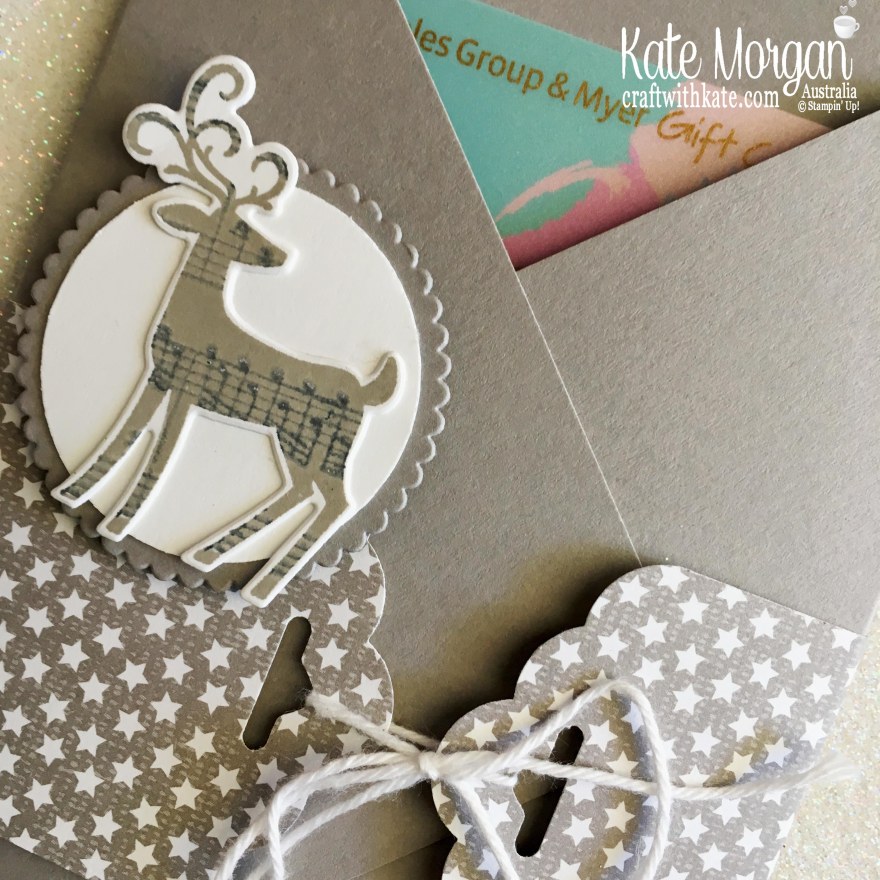
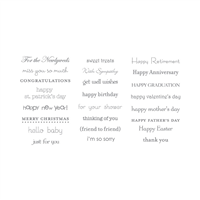
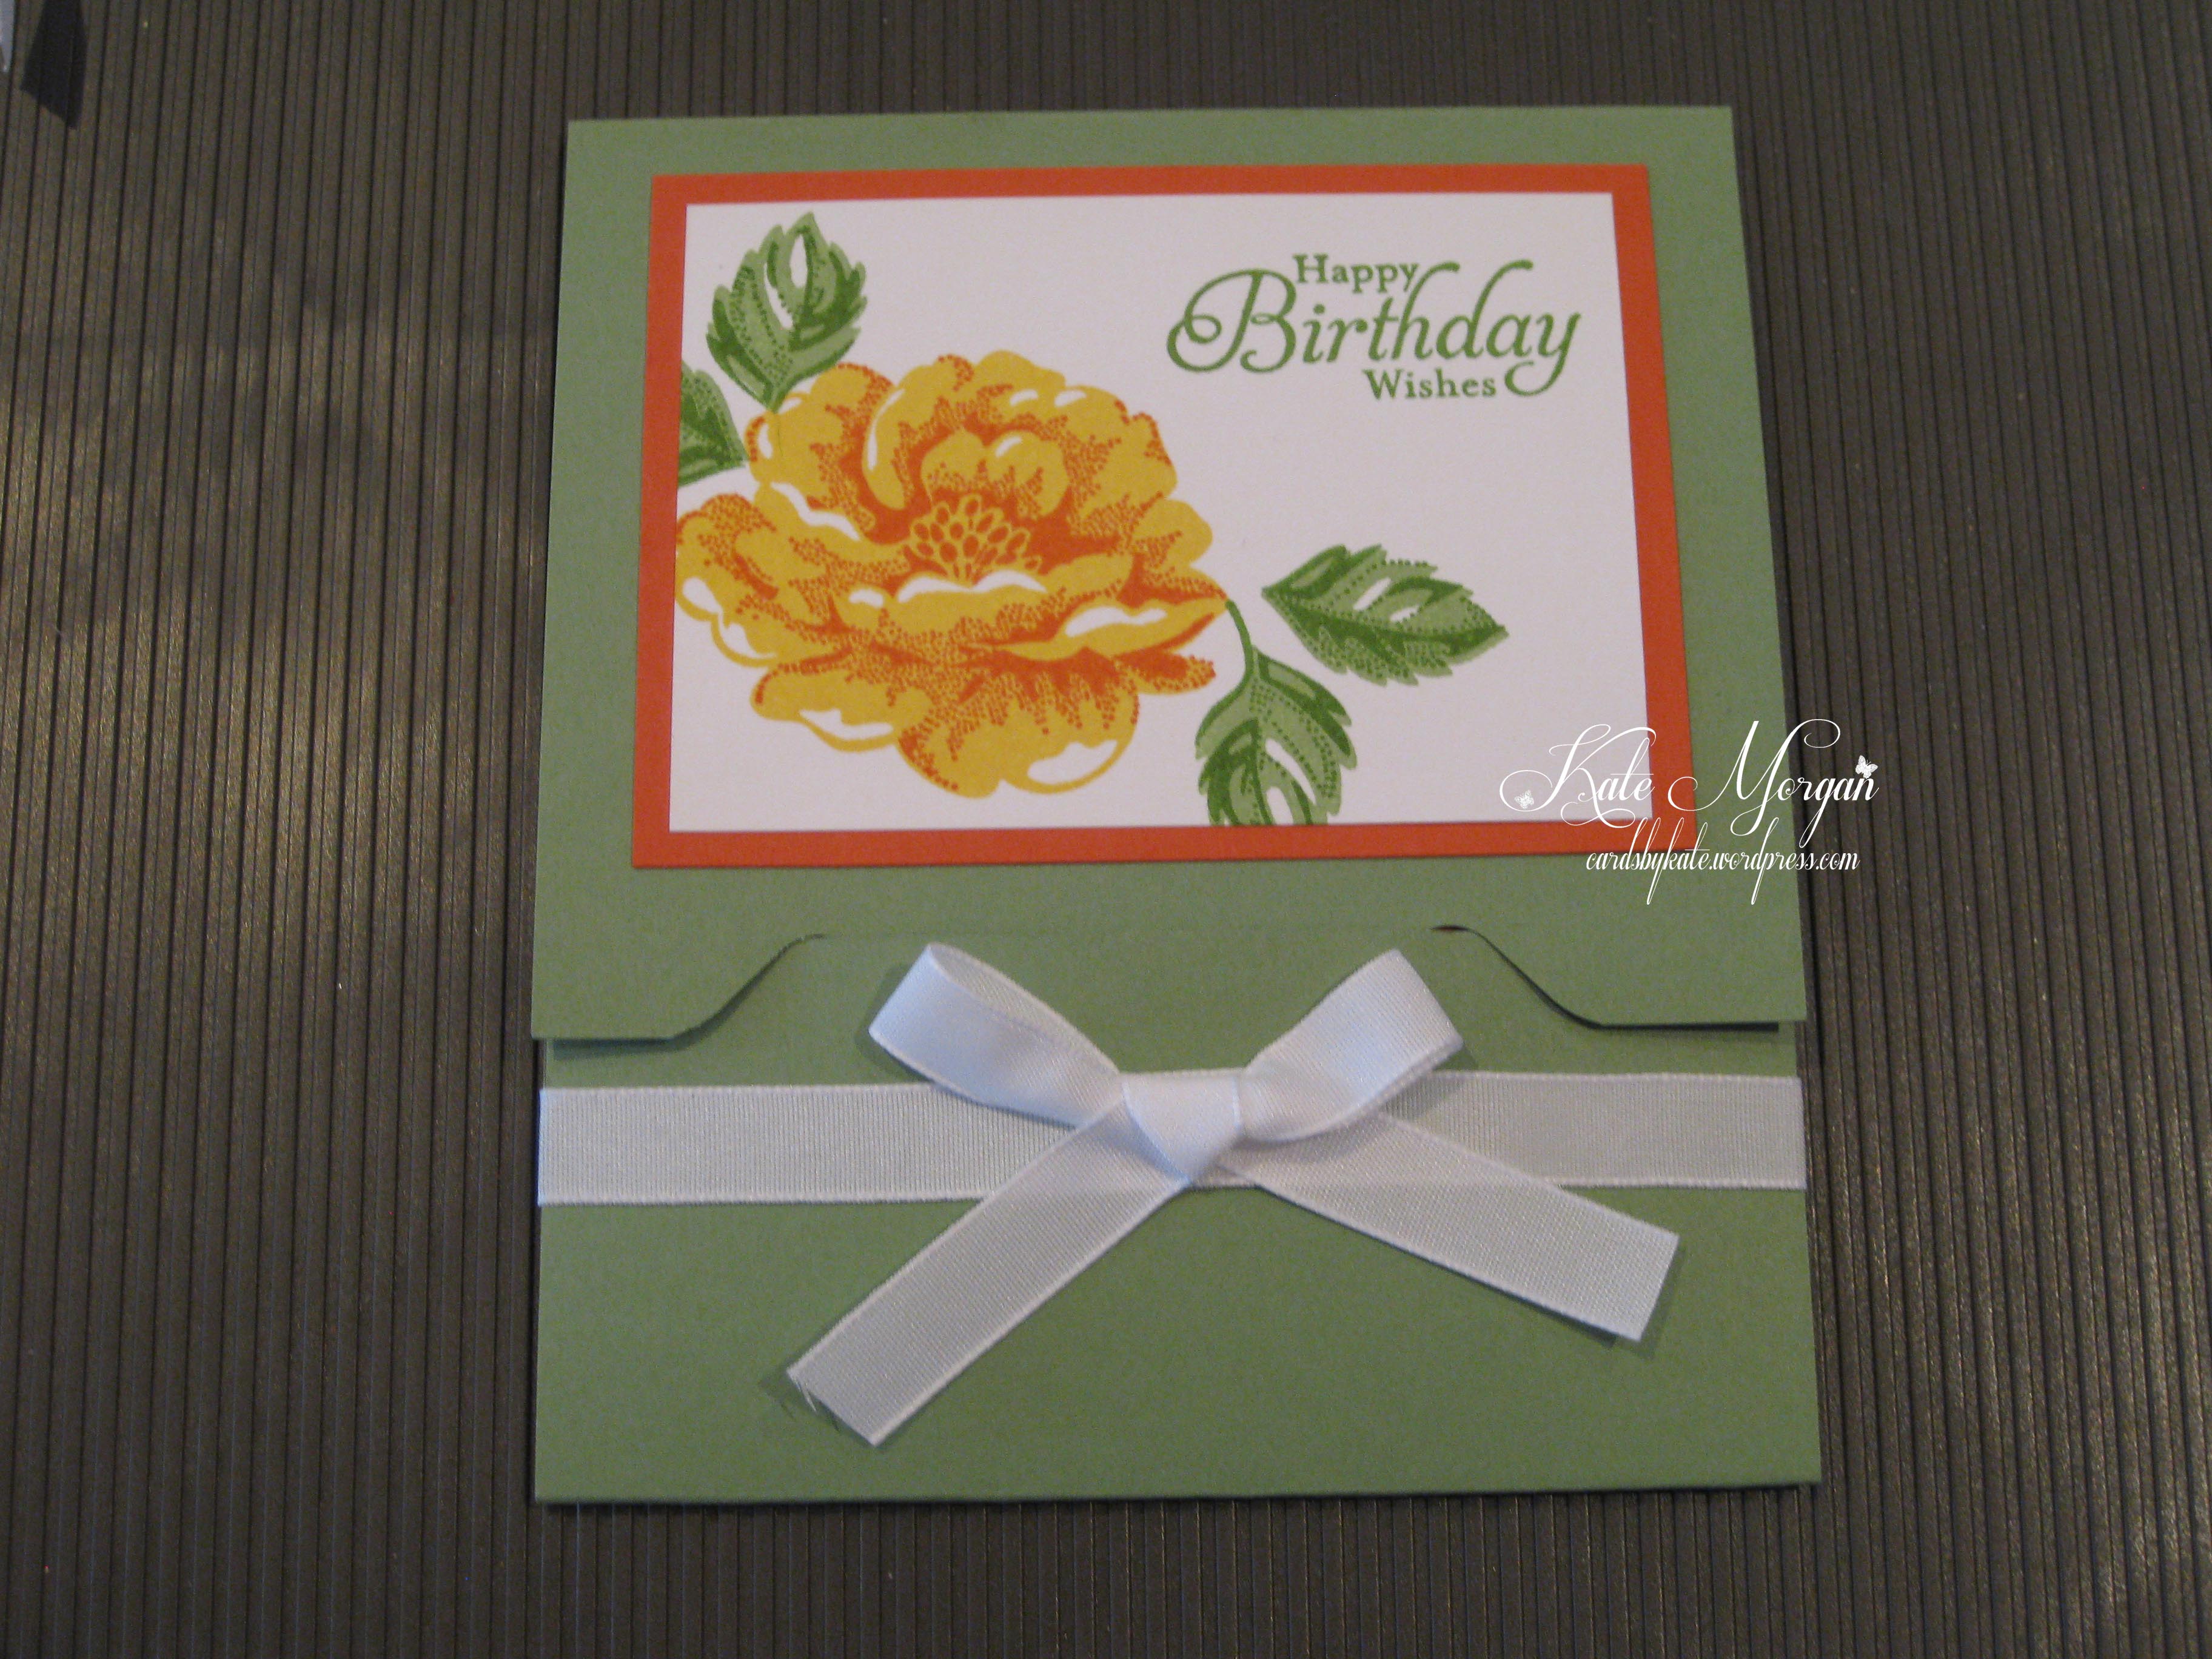
The belly band is created with the Scallop Tag Topper punch and held together with White Baker’s Twine. I stamped the sentiment in Gray Granite on white card and used the Everyday Label Punch to cut it out, but it was too big, so I cut it down at the top and bottom! A piece of Whisper White card is added to the back of the insert to add your message.

Pocket Gift Card for Christmas 2018 using Stampin Up Dashing Deer, Festive Farmhouse DSP by Kate Morgan Australia..JPG

I can see I will make quite a few of these for Christmas gifts this year!

Instructions on how to make your own Pocket card:
To make your own pocket card with secret gift card inside, use the envelope punch board and make an envelope using 7½” x 7½” card, scored at 3” on EPB.
Cut off the top flap. Do not glue it together until the card insert is made and inserted.
Card insert: 3½” x 7” score a 2”.
Place Tear & Tape along the side edges of the flap only and fold up to create the pocket for the gift card.
Using the Circle Tab Punch cut x 1 in the same cardstock colour.
Using the ¾” circle punch, cut 2 x DSP. Glue these to the circle tab punch piece.
Fold in half and glue it to the top, centre of the card insert.
Now that the card insert is inside the envelope, you can glue the flap to hold it together.
Cut a piece of DSP 7½” x 2” and punch both ends with the scallop tag topper punch.
Wrap it around the card and tie together with a piece of 11” baker’s twine.
Decorate as desired.
You can leave it loose like a belly band or glue it to the envelope to hold it in place!

Head on over to Catherine’s blog where you’ll find the links to other participants.

To purchase these products click on the images below in the product list to take you directly to my online store!


2018-2019 Annual Catalogue ends 3 June 2019
2018 Holiday Catalogue ends 2 January 2019
Be sure to download a PDF copy from my SU Catalogue Library page today.


Don’t forget to Follow My Blog to receive blog updates and join my Newsletter Subscription for all the latest news and specials!

 Happy Stamping,

Blog Signature

Blog Button - Catalogue  Blog Button - Shop   Blog Button - Classes  Blog Button - Join my Team  Blog Button - Watermark

Product List

Designer/Patterned/Specialty Papers (DSP), Gift Ideas, Jan-Jun Mini Catalogue and Sale-a-bration, Stampin' Up!

Petal Passion Embellishment Earrings for a Silver Advancement

Dear Crafters,

Today I share a gift I made for one of my team members, Amie, who promoted to Silver last month! I am so proud of her and all of her achievements.

Petal Passion Embellishment earrings for Silver promotion Stampin Up by Kate Morgan, Craft with Kate, Australia.

I made these Silver earrings using the Petal Passion Embellishments. Then I was thinking, how am I going to send them across to the other side of the country safely. So I made this gift holder using the Envelope punch board and put the earrings inside. When you open it up, the earrings slide up. The silver ribbon is retired, but it was perfect for my project.

Petal Passion Embellishment earrings for Silver promotion Stampin Up by Kate Morgan, Craft with Kate, Australia

A full list of products can be found at the end of this post!


2018 Occasions catalogue ends 31st May 2018
2017-2018 Annual Catalogue ends 31st May 2018
Be sure to download a PDF copy from my SU Catalogue Library page today.


Don’t forget to Follow My Blog to receive blog updates and join my Newsletter Subscription for all the latest news and specials!

Happy Stamping,

Blog Signature

Blog Button - Catalogue  Blog Button - Shop   Blog Button - Classes  Blog Button - Join my Team  Blog Button - Watermark

Product List

feminine, Gift Ideas

Gift Card Holder with EPB

Dear Crafters,

Today I share with you some gift ideas created using the Envelope Punch Board (EPB)!

I am using Crisp Cantaloupe and Strawberry Slush cardstock as they are my favourite 2013-2015 In Colours and I will be so disappointed when they retire shortly.

Gift Card Holder EPB Mini Post It Note Holder

The base card is Crisp Cantaloupe with a layer of Strawberry Slush then some Designer Series Paper Stack called All Abloom.

Here is the Gift Card Holder in the closed position.

Gift Card Holder with EPB

Open it up and you get this!

EPB Gift Card Holder  EPB Gift Card Holder

I love the All Abloom DSP Stack and the little sentiment on the punched labels and the flower with the rhinestone finishes it off!

Gift Card Holder with EPB

I also made a Mini Post It Note Holder in the same colours!!!

EPB Mini Post It Note Holder

I would love you to comment below with your thoughts on these projects.

All Catalogues, Clearance Rack & Weekly Deals are available online here! They are full of amazing new products and wonderful inspiration. It is a must have for anyone interested in Ink, Paper and Stamps!

Shop Online 24/7 for products

Don’t forget to Follow My Blog to receive blog updates and join my Newsletter Subscription for all the latest news and specials!

Happy Stamping,

Name Banner

Christmas, Gift Ideas

Baby Bon Bons

Dear Crafters,

We Christmas is only days away and I have my in-laws arriving later today, so thought I would quickly share with you a little treat I have made for their arrival!

What better way to celebrate Christmas, than with some Bon Bons right? Well check out these little beauties inspired by Linda Parker!!!!

Christmas Bon Bons

I even made the box for them to go in!

Christmas Bon Bons

I have used Cherry Cobbler and Garden Green card stock for the box lid and base, and the Trim the Tree DSP Stack to make the baby bon bons with the Envelope Punch Board (EPB).

Each bon bon fits one chocolate Lindt ball…. well who doesn’t love a little chocolate at this time of year?!

Christmas Bon Bons

I finished off the top of the box with the Spiral Flower Original die in coordinating card stock and glued it to the top!

Spiral Flower Bigz die

Another one I have made with Pool Party, Smoky Slate and the brand new bow punch which will be available from 6th January during Sale-a-bration, and I just had to share it with you!

Bow Punch  Bow Punch

Bon Bon  Bow Punch

Don’t forget that Sale-a-bration starts on 6 January 2015. If you would like to see the catalogue before then, I can happily mail it to you!

Please only request a copy of the Sale-a-bration & Occasions Catalogue if you are within Australia and are happy to purchase Stampin’ Up! products from me. If you currently have a demonstrator you already order from, please request a copy from them to be fair to me and the other demonstrator. Delivery will be towards the end of December.

Clearance rack saving you up to 80% off!

Weekly Deals for this week.

The 2014-2015 Annual Catalogue is available online here.

The Holiday Catalogue is available online here.
The Extra Special Christmas Supplement is available here.
These catalogue’s are full of amazing new products and wonderful coloured pictures full of ideas. It is a must have for anyone interested in Ink, Paper and Stamps!

Shop Online 24/7 for products

Don’t forget to Follow My Blog to receive blog updates and join my Newsletter Subscription for all the latest news and specials!

Happy Stamping,

Name Banner

feminine, Gift Ideas

Gift box for Chocolates

Hello Crafters,

Today I share with you a cute gift box which will fit inside 6 Ferrero Rocher chocolates inside (who doesn’t love receiving chocolates!) and of course I don’t have any chocolates left to put inside my box to show you!!!!

Gift Box

To make this box, you need 2 pieces of 8″ x 8″ cardstock and the Envelope Punch Board (EPB).

For the Base:

Take the 1st piece of card, place it in the EPB at 2 5/8″ punch and score.

Rotate 90 degrees, place at 2 5/8″ punch and score.

Rotate 90 degrees, place at 2 5/8″ punch and score.

Rotate 90 degrees, place at 2 5/8″ punch and score.

Rotate 90 degrees so you are back at the start. Now line up the scoreline with the score guide on the EPB and punch and score. Rotate 90 degrees and repeat on all 4 sides.

Gift Box

For the Lid:

Take the 2nd piece of card, place it in the EPB at 2 3/4″ punch and score.

Rotate 90 degrees, place at 3 1/2″ punch and score.

Rotate 90 degrees, place at 2 3/4″ punch and score.

Rotate 90 degrees, place at 3 1/2″ punch and score.

Rotate 90 degrees so you are back at the start. Now line up the scoreline with the score guide on the EPB and punch and score. Rotate 90 degrees and repeat on all 4 sides.

Fold all the scorelines. Holding each longways, cut up on each end to the first scoreline. This will fold in to the form the corners of the box.

Glue the box Base together and then line it with a piece of 4 2/8″ x 3 1/8″ piece of Designer Series Paper.

Glue the box Lid together, but before lining it, add a piece of 3 1/8″ x 4 1/8″ piece of Designer Series Paper to the top.

Gift Box

Adding the ribbon: starting on the inside centre of the lid, add some glue or fast fuse, and also up the inside of the lid. Then place the ribbon on top of this and up and over the top of the lid to the other side and adhere the same way. Do the same on the other end. Cut and extra small piece to tie in the centre in the knot and trim the ends.

To finish it off,  line the lid with a piece of 4 1/4″ x 3 1/4″ piece of Designer Series Paper.

And you have a magnificent gift box of chocolates for that special someone in your life!


The new 2014-2015 Annual Catalogue goes live tomorrow, so make sure you return to my blog to view it online. This catalogue is full of amazing new products and wonderful coloured pictures for ideas. It is a must have for anyone interested in Ink, Paper and Stamps!

Don’t forget to check the retired stamps and accessories lists, there are sure to be products to please, but hurry, only available while stocks last and ends today!

Shop Online 24/7 for products

Don’t forget to Follow My Blog to receive blog updates and join my Newsletter Subscription for all the latest news and specials!

Happy Stamping,

Name Banner

Gift Ideas

Gift Card Holder

Hello Crafters,

Anyone out there who never knows what to buy friends and family for gifts? Me too!

So here is my new gift idea ~ a gift card, so the recipient can choose exactly what they want.

I used the Envelope Punch Board to create the tabs for closing this gift card holder.

Gift Card holder Gift Card holder Gift Card holder

Here is another one!

Gift Card Holder

How gorgeous are these? I am loving them and I am in the process of making a few in different colours, so when a special birthday comes around, all I need to get is the gift card.

Shop Online 24/7 for products

Happy Crafting,

Name Banner

Masculine

Happy Australia Day

Hello Crafters,

Happy Australia Day to everyone plus I would like to wish my dad a very happy birthday on this wonderful sunny Melbourne day!

My girls and I will be heading over to dad’s shortly to help him celebrate his birthday with a yummy lunch, but first I had to share with you the box envelope I made to put his card in and the tickets we got him for his birthday. The Envelope Punch Board (EPB) has become a much loved tool in my house since it became available through Stampin’ Up! in October.

EPB

Seeing as my dad loves the ocean, almost as much as he loves his golf (I made a golf card!) I thought I would use some of the High Tide Designer Series Paper from the new Occasions catalogue which is available for purchase in only 2 more days!

I also used the By the Tide Stamp Set for the images.

and here is a close up of the detail

EPB

I hope you are all having a wonderful Australia Day and long weekend, and I look forward to showing you some more items in the next few days.

Happy Crafting,

Name Banner

Christmas

Christmas File Tab Card

Hello Stampers,

This is a new card style I have case’d from another SU demonstrator and it is created with the Envelope Punch Board.

This new Envelope Punch Board is an amazing tool and can be used to make up to 60 different sizes of envelopes, boxes, bon bons and so much more!

File Tab CardFile Tab Card

Stampin’ Up! Supplies:

  • Stamps: That’s the Ticket, Christmas Star
  • Envelope Punch Board
  • Ink – Cherry Cobbler
  • Card stock –Cherry Cobbler, Whisper White, Season of Style DSP
  • Accessories – Big Shot, Apothecary Accents Framelits, Paper Trimmer with scoring blade, Cherry Cobbler ribbon, Tombo Glue, Glue Dots, Dimensionals, Sponge Daubers.

Be sure to visit my 24/7 online store for other products!

Happy Stamping,

Kate

Christmas, Tools & Accessories

Envelope Punch Board

Morning Stampers,

I have some very exciting news for you today, the Envelope Punch Board is now available!!!

I was able to get my hands on one of these a couple of weeks back and boy I have had so much fun with it!

Envelope Punch Board

Not only does it make envelopes, but so much more.

Over the coming weeks I will be able to share with you some of the items that can be made with this tool.

CLICK HERE to watch a video on this amazing new item.

To Purchase this item, CLICK HERE.

Here is one of them ~ the Christmas Bon Bon!

Envelope Punch Board

I can see you all wanting to get your hands on one of these and make your Christmas Crackers in coordinating colours for your Christmas tables!!! 

I am holding my next class on 8 November 2013 where you can make 2 Christmas Cards and I can show you how easy it is to make one of these Crackers. Be sure to book in for 8 November from 10.00am – 12.00pm by emailing me cardsbykate@live.com.au

Be sure to visit my online store!

Happy stamping,

Kate