Markers for Colouring

Blendabilities

Hello Crafters,

If you don’t know it yet, I brought home lots of yummy new products from the Stampin’ Up! Convention which will be available in the new 2014-2015 Annual Catalogue.

Over the next month or so, I will share with you, loads of ideas created using some of the new products. Are you excited??!!

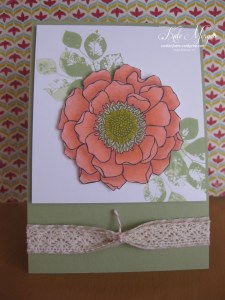
Well here is the first one ~ Blended Bloom Stamp coloured with Blendabilities (alcohol based ink), ideal for shading!
Blended Bloom Blendabilities

The card base is Pear Pizzazz cardstock. The Blended Bloom is stamped with the new Black Memento Ink on Whisper White cardstock.  I coloured the image with the new Calypso Coral Blendabilities and used my So Saffron & Crushed Curry Stampin’ Write Markers for the centre. I then fussy cut the image.

I stamped the leaves (from Kinda Eclectic Stamp Set) in Pear Pizzazz ink onto Whisper White cardstock and layered it to the base with dimensionals. I added the Blended Bloom image with dimensionals also.

Here is a close up of the image.

Blendabilities Blended Bloom

The ribbon is Victoria Crochet Trim layered over Natural Chevron Ribbon and tied in the centre with a piece of Calypso Coral Twine and adhered to the card with glue dots.

I am in love with Blendabilities and cannot wait to add more colours to my collection.

What Sets Them Apart:

  • The Stampin’ Up! rectangular barrel keeps your markers from rolling away!
  • Flat storage helps to maintain the life of each marker.
  • Each marker comes with a tip on each end: brush and fine.
  • Marker tips are made of nylon, which is superior to polyester which can fray.
  • Colour coded caps.
  • Stampin’ Up! markers coordinate wonderfully with our cardstock, and can be used with transparent sheets.

How to Use Blendabilities video

The new 2014-2015 Annual Catalogue goes live on 1 July, but if you would like to receive a copy before then, please Contact Me. This catalogue is full of amazing new products and wonderful colour pictures for ideas. It is a must have for anyone interested in Ink, Paper and Stamps!


Shop Online 24/7 for products

Don’t forget to Follow My Blog to receive blog updates and join my Newsletter Subscription for all the latest news and specials!

Happy Stamping,
Name Banner
Retired Products Lists

SU Retired Products List ~ up to 50% until stocks last

Dear Crafters,

The Stampin’ Up! retiring products lists for Australia have just been released.

Grab yourself a bargain!

From today until 30th June these products are only available until sold out. Lots of great discounts up to 50%.

View and shop the retired lists HERE in my online store.

If you would rather look at a physical list you can download the lists below.

There is a separate list for stamp sets and accessories. I strongly recommend placing orders in my online store though as that will have up to the minute stock levels. I cant guarantee stock levels for any orders taken by phone or email, but as always I’m happy to try.

Download SU Retired Stamp Sets

Download SU Retired Accessories

If you have any questions about retiring products or getting hold of a new catalogue, just contact me and I’ll be happy to help.


Join now for $85 and get to include brand new pre-order items in your starter kit. Contact me for details.

Happy Crafting,

Name Banner

Stampin' Up! Events

Inspire.Create.Share.2014

Hello fellow crafters,

You may have noticed I have been missing lately. Well I am now home from the Stampin’ Up! Convention in my home town, Melbourne. It was my first one & wow, what an event they put on for us.

Three days jam packed of fun, ink, paper, stamps, giveaways, prize patrols, make n takes and so much more. Here are some photos of our fun times with some of my team, Craftalicious. Now to look forward to Convention 2015 on the Gold Coast!!!!

  10380880_770577866300433_1781770310735926235_n

Can you guess what the theme was…. yes, Inspire.Create.Share. and that is exactly what we got!!!!
On arrival on Day 1 it started by collecting their bags then the frenzy of swapping in the Foyer at the Melbourne Convention & Exhibition Centre. There were over 700 women running around very excitedly meeting new people.
The bags were gorgeous red (Real Red) with a blue lining. The gorgeous bag tag on the left hand side was made by one of my room mates, the very talented Angela Footit, and we stayed at the Travelodge Docklands.  We also got a pen with a stylus on the tip for using with a iPad or smart phone. Inside the bag was our program, lanyard, name tag and First Convention pin.
Shelli Gardner – the Founder of Stampin’ Up! welcomed everyone to Convention and got us all inspired for the days ahead.
We received may awesome stamp sets from the new 2014-2015 annual catalogue to create out Make n Takes and here are some of them!
  
Here is Angela and myself with our prizes!
IMG_4764
The amazing Stampin’ Up! team who were an inspiration to all who attended Convention!
 IMG_4767
I hope to be able to share with you some more inspiring creations over the next few weeks, especially the new blendabilities which we received as a gift!!!
Happy Stamping,
Name Banner
Butterflies, feminine

Mother’s Day this Sunday!

Hello Crafters,

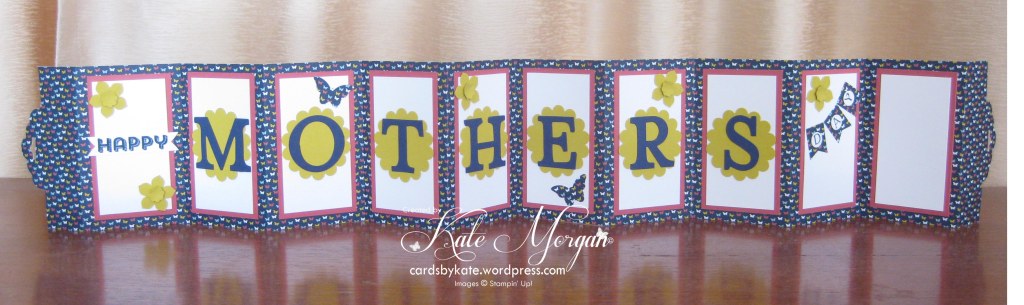
If you don’t know it yet, it is Mother’s Day this Sunday and I have made a few cards in readiness for the celebrations.

I have to say, this style was not the easiest to photograph being such a long card!

IMG_4467

This card is pretty cool! It only uses one page of 12″ x 12″ Designer Paper and is cut into 3 strips, so they are 4″ wide and 12″ long and then joined together to create this concertina style card which folds up and is tied with a ribbon.

IMG_4472

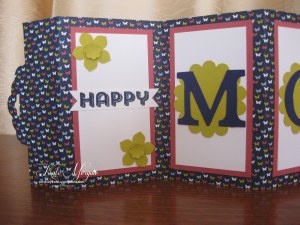
Each end is punched with the Scallop Tag Topper Punch for the ribbon to tie through.

The HAPPY is part of a stamp from the recent Sale-a-bration set, See Ya Later. I just inked the word Happy only then cut it out as a banner!

IMG_4470

My mum loves daffodils, so I tried creating them using the Petite Petals Punch and the floral punch from the Itty Bitty Punch Pack. I think they came up okay and she will be able to tell they are daffodils!

IMG_4469     IMG_4468

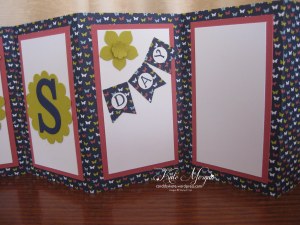
The little banners at the end are made with the Banner Punch and the D,A,Y are stamped and punched out with the 3/8″ circle punch.

IMG_4471

The Designer Series Paper is retired now, but I just love the butterflies on it and the colours, Midnight Muse, Primrose Petals, Very Vanilla & Summer Starfruit.

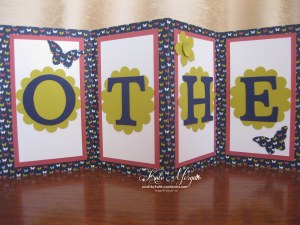
The letters are die cut from the Typeset Dies and layered onto the 1-3/4″ scallop circle punch.

I also added some butterflies punched from the same paper.

Take care and have a wonderful weekend celebrating with your mum this Mother’s Day xxx

Shop Online 24/7 for products

Don’t forget to Follow My Blog to receive blog updates and join my Newsletter Subscription for all the latest news!
Happy Stamping,
Name Banner
Butterflies, Card in a Box Style, feminine

Mother’s Day

Hello Crafters,

If you don’t know it yet, it is Mother’s Day this Sunday and I have made a few cards in readiness for the celebrations.

As you know, the Card in the Box has been such a huge revelation over the past 6 months or so, and I was asked to make one by a work colleague for her hubby to give to his mum. I wanted to try something a little different, so I made a Card in a Box, but a longer version!
Card in a Box Long Version

You will be surprised, but this still fits into a C6 envelope to post. Woohoo!

Here it is from the end, so you can see a bit more dimension.

Card in a Box Long Version

I knew that this special mum was not well at the moment, so I thought that yellows and flowers were the way to go to cheer her up!!!!

Card in a Box Long Version

I used the Petite Petals Bundle (Stamp & coordinating Punch) and some butterflies from the Papillon Potpourri Stamp set.

Card in a Box Long Version

I also added some rhinestones to the centres of the flowers for a bit of sparkle.

I also used the Chalk Talk Bundle (Stamps & coordinating Framelits) for the sentiment.

I will be back on Friday with another Mother’s Day card, so be sure to check back then.

Shop Online 24/7 for products

Don’t forget to Follow My Blog to receive blog updates and join my Newsletter Subscription for all the latest news!

Happy Stamping,
Name Banner
feminine

Washi Tape

Hello Crafters,

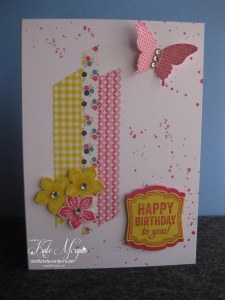
I hope you all had a wonderful weekend. Today I share with you a card that we did at my Punch Art class a week or so ago. I wanted to share with the class just how easy it is to create a card in just a few minutes with Washi Tape!!!

Petite Petals

All we did was apply 3 strips of Wash Tape to one side of the card before using Petite Petals Bundle, Label Love Bundle and the Papillon Potpourri and coordinating punch.

Begin by stamping the images onto cardstock, punching them out and adhering them with dimensionals to the card. It’s that easy!!!!

Stampin’ Up! have some amazing stamp sets with coordinating punches and I have used 3 of them here.

Gingham Garden Washi Tape

I accidentally splashed a little bit of pink ink onto my card, so instead of getting mad and throwing it away and starting again, I decided to bring out the Gorgeous Grunge stamp set and grunge it up a bit… you can’t even tell I made a mistake right?!!!!

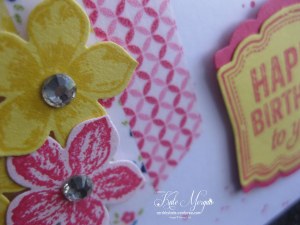
The Washi Tape is Gingham Garden and this also has a coordinating Designer Series Paper.

Gingham Garden Washi Tape

The inks used are Melon Mambo and Daffodil Delight. They are so bright and cheery.

I also added some rhinestones to the centres of the flowers for a bit of bling.

Gingham Garden Washi Tape

I will be back on Wednesday with some Mother’s Day cards ready for Sundays celebrations, so be sure to check back then.

Shop Online 24/7 for products

Don’t forget to Follow My Blog to receive blog updates and join my Newsletter Subscription for all the latest news from Stampin’ Up!

Happy Stamping,
Name Banner
Butterflies, Challenges, feminine, JAI

Screen Divider Card @ JAI#213

Hello Crafters,

At Just Add Ink the challenge for this week is this inspiration picture which has heaps of cool elements to work with, fun patterns, pretty colours and lots of gold! 

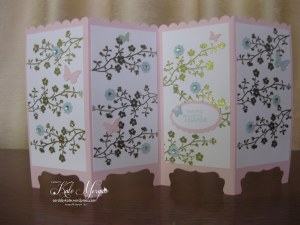
I decided to try the Screen Divider Card, one that has been on my “to do list” for some time now.

I started with a piece of Pink Pirouette cardstock of 11″ x 6″.

I scored it at 2-3/4″, 5-1/2″, 8-1/4″.

Using the decorative label punch, I punched it 4 times to make the legs of the divider.

The top is created with the scallop border punch.

IMG_4474

I stamped the blossom, from the Morning Meadow Stamp Set (Hostess Set) in Versamark on Whisper White cardstock and and heat embossed it with gold embossing powder.

IMG_4475

The sentiment is from Petite Pairs stamped the Soft sky Inkpad. I punched it out with the large oval punch and layered it onto the scallop oval punched out of Pink Pirouette cardstock.

IMG_4476

The butterflies are die cut from the Beautiful Wings Thinlits and the flowers are from the Itty Bitty Shapes Punch Pack.

IMG_4478

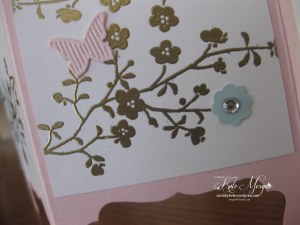
This picture shows the shine of the gold embossing!!!! So pretty!!!

Why don’t you have a go at some of the weekly challenges too on the Just Add Ink page!

Be sure to visit the Just Add Ink page to view the rest of the Design Team samples, they are just gorgeous!

Shop Online 24/7 for products

Happy Crafting,

Name Banner

feminine

Secret Garden Flower Pot

Hello Crafters,

I hope you all had a wonderful Easter and ate loads of chocolate like me!!!

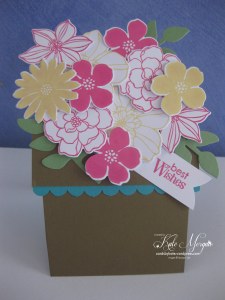
With all the lovely rain we have had over the past two weeks, it has certainly done wonders for my garden, so I wanted to create a card with loads of flowers and why not put them into a flower pot!

Secret Garden

I told you I was putting lots of flowers in and I don’t think I could fit another one, LOL

I have used the Secret Garden stamp set (#129144) and the coordinating Secret Garden Framelits (#129372)

I stamped all of the flowers in the stamp set multiple times in Melon Mambo and Daffodil Delight

The leaves are die cut from Wild Wasabi card stock

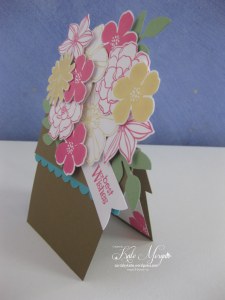
Secret Garden

The flower pot is created using Soft Suede cardstock and the scallop trim is Bermuda Bay

The sentiment is from the stamp set, Petite Pairs which I stamped onto white card with Melon Mambo ink

Secret Garden

I layered nearly every flower except the first one or two with dimensionals to give it that real life look!

This was so much fun to make and it just makes you want to smile with the warm bright colour palette!

I must thank http://www.thecraftyowl.co.uk for showing me how to create this gorgeous card.

Doing anything special on Friday? No?
Well why not join my Punch Art Class.
Be sure to Email Me and book you seat now or join via my Facebook page!

Shop Online 24/7 for products

Don’t forget to Follow My Blog and join my Newsletter Subscription to receive all the latest news from Stampin’ Up!

Happy Stamping,
Name Banner
feminine

Pink Ombre

Hello Crafters,

I was at the hairdressers the other day and the lady opposite me was having her hair coloured to be the ombre look and it gave me an idea.

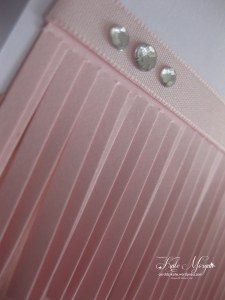
So with my trusty fringe scissors I came up with this.

I have seen many cards made using this technique and being at the hairdressers reminded me to have a go!

Pink Ombre

It was a very quick card to make, selecting 3 colours of similar tones from lighter to darker. You could also do this in blues, greens, golds or even grays.

The ribbon is Pink Pirouette coordinating with the top layer. The middle layer is Blushing Bride and the bottom layer is Primrose Petals.

The sentiment is from the stamp set, Memorable Moments.

The flower is the Petite Petals punch and the centre is one of the punches from the Itty Bitty Shapes Pack (#118309).

Pink Ombre

The fringe scissors are awesome and makes this so much quicker than cutting each slice individually!

Pink Ombre

I love the rhinestones to give it an elegant touch and it really does finish it off nicely. Why don’t you give this a try.

Shop Online 24/7 for products

 Happy Stamping,
Name Banner
Challenges, feminine, Gift Ideas

Designer Card Hangbag

Hello Crafters,

At Dynamic Duos the challenge is Black Tie, Razzleberry, Black and the OPTION of Gold! {DD#99}

I saw this Designer Card Handbag online the other day (thanks Jenny Van Dijk) and have been wanting to make one, so today was the perfect opportunity. It was originally case’d from www.ustamp4fun.com.

I love this colour combination and couldn’t wait to get started!

IMG_4444

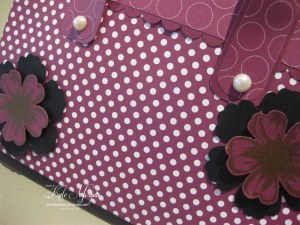
The Designer Series Paper is Polka Dot Parade (#126902) and I used the Rich Razzleberry paper, with the coordinating card stock.

I also used the following punches: Scallop Edge Border Punch (#119882), Blossom (#125603), Pansy (#130698)

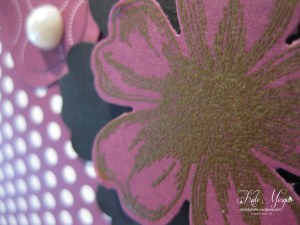
The stamp set is Flower Shop (#130942), inked with Versamark and embossed with Gold Embossing Powder.

I used the Large Pearls to finish off the handles!

This bag is the perfect size to fit in our standard handmade cards and C6 envelopes. How gorgeous would this be for a gift idea to give a hostess for holding a party or to a special family member filled with wonderful card creations!!!

Here are some close up pics!

IMG_4445  IMG_4447

Why don’t you have a go at some of the weekly challenges too on the Dynamic Duos page!

Be sure to visit the Dynamic Duos page to view the rest of the Design Team samples, they are just gorgeous!

Shop Online 24/7 for products

Happy Crafting,

Name Banner