Gift Ideas, Techniques & Tutorials

Shaving Cream Technique

Hello Crafters,

Well I am guessing you are all full to the brim with chocolate after the Easter bunny visiting you yesterday!

I wanted to share with you one more of my Easter Treat Boxes which you have all seen by now, but I have added a new technique, the Shaving Cream technique!

Yes, you heard it right, it is a messy technique, but very effective and we had so much fun playing with it.

Every piece of card is different every time you place it onto the shaving cream!

Here’s what to do:

First you start with spraying some shaving cream onto a large dinner plate, smooth it out slightly, then add a few drops of reinker. I used Strawberry Slush and Coastal Cabana.

Shaving Cream Technique

Then you use a skewer and slowly swirl the colours around in a circular motion until you are happy with the look.
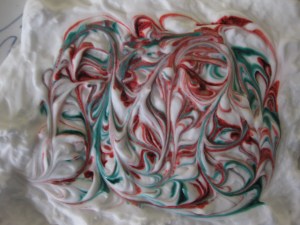
Shaving Cream Technique

Then place your white card stock on top, press down so it is evenly coated, then lift up. Wipe off the shaving cream with some paper towel. I do this in a circular motion, in case some of the ink catches the card (you don’t want straight lines of ink through your work).

Here is a piece of A4 card stock that I cut into 4 before placing into the cream. Isn’t it a cool technique?!!!!

Shaving Cream Technique

And here it is cut up and placed onto my Easter Treat Box!!!

Easter Treat Box

The box is Strawberry Slush card stock. The clear window is punched with the 1-3/4″ circle punch with a sheet of acetate behind. A perforating tool was used to create the perforation after the patterned card was glued down. The trim around the acetate window was created with the 2-3/8″ circle punch.

I stamped the bunny, from the Baby We’ve Grown Stamp Set (Wood #133086, Clear #133089) in Strawberry Slush Ink on the off-cut circle from the window! The sentiment from Teeny Tiny Sentiments is stamped next to the bunny and a hole punched and tied onto the ribbon with some Baker’s Twine.

This time I added some Strawberry Slush ribbon to the top of the box to use as a handle!

This treat box can hold more than 150g of chocolate easter eggs (I have put in 25 eggs)!!!

Here is my Easter Treat Box Tutorial!


Shop Online 24/7 for products

Happy Crafting,

Name Banner

Kids Cards

Monkey Punch Art

Hello Crafters,

Happy Good Friday to you and I hope you are enjoying the start of this Easter break!!!

I know the excitement is certainly building in our house with two very excited girls looking forward to the Easter Bunny visiting on Sunday!

In following on from Wednesday’s blog post on Punch Art, I have another one for you which is super duper cute!

Monkey Punch Art

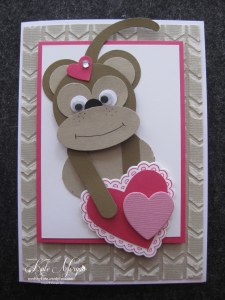
Isn’t she the most gorgeous thing you have seen?!!! I am so pleased with this card, I can see myself making many more!

The base card is white then I layered a piece of Sahara Sand Core’dinations cardstock which I embossed with the Arrows TIEF (available until 30 June) and then sanded it.

The next layer is Melon Mambo and then White on top.

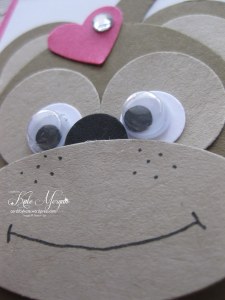
The monkey is created with Crumb Cake & Soft Suede cardstock and the nose is black.

The heart was created by stamping the largest heart in the Hearts a Flutter stamp set and die cutting it out with the coordinating Framelits. The large heart is a punch and the smaller heart is from the Hearts a Flutter framelits. The tiny heart on her head is also a punch with a rhinestone for a bit of bling!

Monkey Punch Art

I used the black Stampin’ Write Marker to draw the mouth and dots. I added some googly eyes for a more effective finish. Doesn’t she just make you go, awwww!

This was so much fun to make and see her come alive as I put it together! Go on, have a go yourself, I know you want to!

I must thank http://www.brandyscards.com for showing me how to create this gorgeous card.

Doing anything special on Anzac Day afternoon? No?

Well why not join my Punch Art Class.

Be sure to Email Me and book your seat now or join via my Facebook link!


All the punches used to create this little monkey are Stampin’ Up! products:

2-1/2″ Circle (120906)

1-3/4″ Circle (119850)

1″ Circle (119868)

3/4″ Circle (119873)

3/8″ Circle (118309) part of 3 set pack

Large Oval (199855)

XL Oval (119859)

Word Window (119857)

Small Heart (117193)

Large Heart (119883)

Shop Online 24/7 for products

Don’t forget to Follow my Blog and join my Newsletter subscription to receive all the latest news from Stampin’ Up!

Happy Stamping,
Name Banner
Kids Cards

Dragon Punch Art

Hello Crafters,

Having my gorgeous two girls home on school holidays and with the wet weather, we have had to find indoor activities and what better way to spend the day creating punch art!

Dinosaur Punch Art     Dinosaur Punch Art

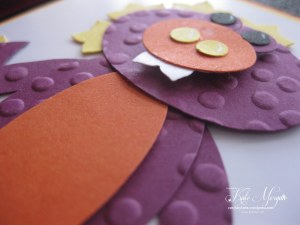
Not sure exactly what they are, whether a dinosaur or a dragon, but how cool are these little fellas?!!!

Yes, they can be quite fiddly to make, but they are so much fun and look at the end result.

If you love this and want to get started making your own, all you need are a few punches. And if you don’t have some of them, they are all available in my online store and orders are shipped to your door within 48hrs of placing the order.

Using Stampin’ Dimensionals gives your creature a real life 3D effect and makes him pop up off the page!

Dinosaur Punch Art

Here I added some detail using a White Gel Pen to the nostrils and eyes (punched using a hole punch)!

Dinosaur Punch Art

These are such effective cards and wonderful characters to create. Why not have a go yourself, you may just surprise yourself!

 Dinosaur Punch Art

Be sure to click on the follow my blog link on the right had side of my homepage as I have another super duper cute card for you shortly!

Stampin’ Up! Punches used:

Shop Online 24/7 for products

 Happy Stamping,
Name Banner
feminine

All Dressed Up

Hello Crafters,

Do I have some news for you… but you will need to wait a minute while I show you a card I have made using the Dress Up Framelits.

Dress Up Framelits
Dress Up Framelits

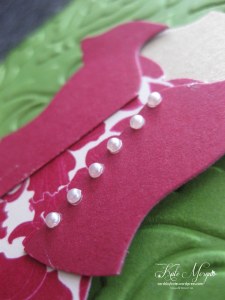
Isn’t it gorgeous?!!! I have even added a little Raspberry Ripple cardigan with pearl buttons. I cannot tell you how quick and simple this was to create.

Dress Up

The background is Gumball Green card stock embossed with the Beautifully Baroque TIEF. The Print Poetry Designer Paper of the dress is on special in the Clearance Rack (be sure to check it out, as products are added regularly)

Print Poetry Designer Series Paper Stack
PRINT POETRY DESIGNER SERIES PAPER STACK

Price$19.95 $7.99

Now for the latest Stampin’ Up! news!

Every Wednesday during April, there are Weekly Deals (starts each Wednesday and ends the following Tuesday) so be sure to check the online store every Wednesday so you don’t miss out by Clicking here

This weeks deals (which end tomorrow night) are:

Dress Up Framelits Dies
DRESS UP FRAMELITS DIES

Price$42.95 $32.21
Floral Fusion Stampin' Up! Sizzlits Die - by Stampin' Up!
FLORAL FUSION STAMPIN’ UP! SIZZLITS DIE

Price$9.50 $7.13
Flower Garden Textured Impressions Embossing Folder Die - by Stampin' Up!
FLOWER GARDEN TEXTURED IMPRESSIONS EMBOSSING FOLDER DIE

Price$13.95 $10.46
Framed Tulips Textured Impressions Embossing Folder Die - by Stampin' Up!
FRAMED TULIPS TEXTURED IMPRESSIONS EMBOSSING FOLDER DIE

Price$13.95 $10.46
Needlepoint Border Textured Impressions Embossing Folders
NEEDLEPOINT BORDER TEXTURED IMPRESSIONS EMBOSSING FOLDERS

Price$13.95 $10.46
Recipes By Design Digital Kit - Digital Download - by Stampin' Up!
RECIPES BY DESIGN DIGITAL KIT – DIGITAL DOWNLOAD

Price$10.95 $6.57
Secret Garden Framelits Dies
SECRET GARDEN FRAMELITS DIES

Price$42.95 $32.21


I have to say, if you own a Die Cutting System, you will love the Dress Up Framelits, the Secret Garden Framelits and the Floral Fusion Sizzlits. 

Below are some cards that I have created using some of these products on special this week only.

Secret Garden Framelits
Dressed Up
Dressed Up
Floral Fusion Sizzlits

Check out the Weekly Deals section in my online store to get yours today!!!

Shop Online 24/7 for products

 Happy Stamping,
Name Banner
Challenges, Gift Ideas, JAI

Easter box for JAI#210

Hello Crafters,

At Just Add Ink the challenge for this week is “EASTER BAGS,BOXES or BASKETS”….

It’s perfect timing for getting some Easter packaging done for next week!

Because I have already shared with you my Easter Treat Box that I created a few weeks ago (my tutorial is also on that link),

I needed to come up with something new!!

IMG_4437

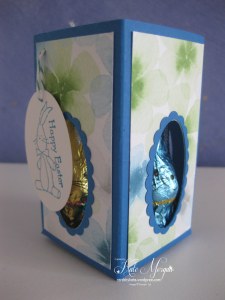
I decided to downscale, as we really don’t need too much chocolate (well that’s what I try and tell myself lol) and so I came up with this cute little gift idea.

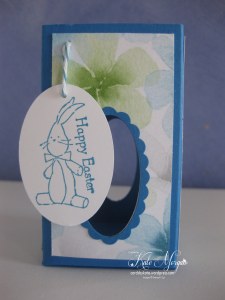
Each side has an opening created with the oval punch and scalloped oval punch to make the borders.

The coordinating Designer Series Paper is Watercolour Wonder (#132994) from the Occasions catalogue, available until 30 June.

Easter Box

I stamped the bunny, from the Baby We’ve Grown Stamp Set (Wood #133086, Clear #133089) in Island Indigo on Whisper White cardstock and punched it out with the Large Oval punch. The sentiment is from Teeny Tiny Sentiments stamped the same colour. I punched a small hole and added some of the Baker’s Twine through the hole and tied it in a knot on the inside.

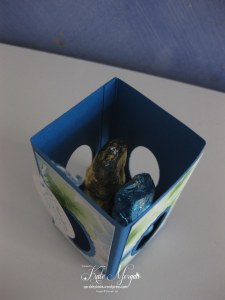
Here it is without the chocolate bunnies inside!

Easter Box

Why don’t you have a go at some of the weekly challenges too on the Just Add Ink page!

Be sure to visit the Just Add Ink page to view the rest of the Design Team samples, they are just gorgeous!

Shop Online 24/7 for products

Happy Crafting,

Name Banner

Kids Cards

Who loves Lego?

Hello Crafters,

Tomorrow my little girl heads off to her first birthday party ‘she’ has been invited to, by a friend at Preschool. She is so excited to be invited and her sister isn’t!!! She feels like a big girl now!

Lego

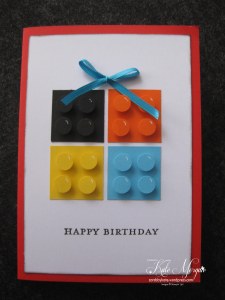
Because it is a boys birthday, I thought that Lego was the way to go for this card (especially with the Lego movie out at the moment) and what kid doesn’t love Lego?!!!.

I started with a card base of red, layered with white and sponged the edges for a bit of a grungy look.

I cut 4 squares from coloured card and punched circles and added them with dimensionals.

I used the white gel pen to each dot to give the glossy effect.

The ribbon was tied in a bow and added with a glue dot. This ribbon was actually cut off a top I purchased recently… you know the bits they put on the inside of the shoulders to stop the top sliding off the hangers!!! Nothing gets wasted in this house!!!! LOL

The sentiment is from the stamp set, Morning Meadow, a hostess gift with the current catalogue.

Lego

This is such an effective card and so simple to create! Why not have a go yourself, you will be surprised how quickly it will come together.


Shop Online 24/7 for products

 Happy Stamping,
Name Banner
feminine

Nail Polish Card

Hello Crafters,

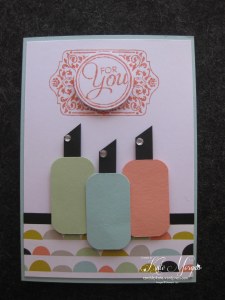
The school holidays have arrived and my girls want to get all girly and paint their nails! I remembered seeing a card on Pinterest that I fancied, so here we go.

I did the base card in Pool Party, then added a layer of Whisper White and stamped two images from the Chalk Talk stamp set with Crisp Cantaloupe ink. I punched out the For You image with a 1-1/4″ circle punch and added it with dimensionals.

The gorgeous little nail polish bottles are made with Crisp Cantaloupe, Pistachio Pudding, Pool Party and black card stock.

The designer paper is from the Sweet Sorbet DSP pack.

IMG_4377

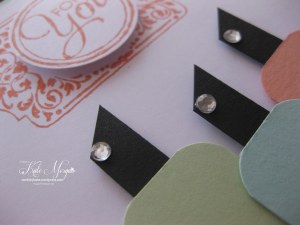
The nail polish bottles are adhered with dimensionals also and a little rhinestone added for a bit of bling! What lady who paints her nails doesn’t love a bit of bling?!!!!


Here is a close up!

IMG_4378

I love this card and can see myself making many more of these!
Stampin’ Up! products used:

Shop Online 24/7 for products

Happy Crafting,
Name Banner

Wedding

Wedding Card

Hello Crafters,

Today I want to share with you a wedding card I was asked to make for a work colleagues sister who got married on Saturday!

Naturally she wanted something special for her sister, so I got out the Scallop Tag Topper Punch.

I did the base card in White, then added a layer of Silver Foil Sheet and stamped an image from the Label Love stamp set with Versamark ink and embossed with silver embossing powder.

I punched the Mr & Mrs image with the Artisan Label punch. I punched another from the Silver Foil sheet and cut it in half through the centre and glued each piece to the image so it gives it a layered effect.

The embossing is done with the Lacy Brocade TIEF (r).

Scallop Tag Topper Punch

The bells are stamped with an image from the Best of Brides & Babies stamp set, only available until the end of April 2014!

I used some Silver ribbon to tie the card closed.

Here is a close up!

Scallop Tag Topper Punch

I love how this turned out and love the silver and white combination for a clean and classy look for a wedding.
Stampin’ Up! products used:

Shop Online 24/7 for products

Happy Crafting,
Name Banner

Challenges, Masculine

PCCCS#87

Hello Crafters,

With an extra hours sleep today (daylight savings ending) I have been up and busy entering some card challenges!

At Paper Craft Crew Challenges this week, it’s a Card Sketch Challenge!

Card Sketch 87

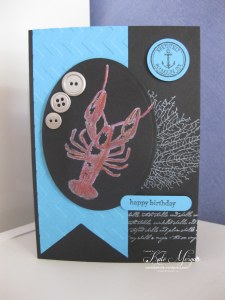
I wanted to try something completely different today with this challenge. I felt the need to work on some more masculine cards (certainly not my favourite style with all girls in our family), and also to try the Black Magic technique. So here we go!

I stamped the lobster from the stamp set, By the Tide with White Craft Ink onto black card stock and then heat set it.

Colour over the white ink with watercolour pencils. Start with the lighter colours and then build up the shading with the darker colours. What a cool effect you end up with!

Black Magic Technique

I used a black card base and added a Tempting Turquoise banner embossed with the Chevron TIEF. Before adhering the banner, I stamped a couple of other images from the By The Tide stamp set in White Craft ink.

The anchor image was stamped with Jet Black Stazon ink onto Tempting Turquoise card and punched with the 1″ circle punch and adhered with a dimensional.

The sentiment is stamped from Teeny Tiny Sentiments stamp set and I punched it out with the Word Window punch, before sticking down with more dimensionals.

Black Magic Technique

The Basic Metal Buttons are from the current Occasions Catalogue and give a real masculine feel to finish off this card.

Be sure to have a go at some Challenges, they are great fun to play along and see what others design, so head over to Paper Craft Crew Challenges for more inspiration from the Design Team!


 Happy Stamping,
Name Banner
Challenges, feminine, JAI

JAI#209

Hello Crafters,

At Just Add Ink this week, it’s a Just Add…… Layers challenge!

Petal Parade

I am loving these colours together and I am already missing my favourite Sweet Sorbet DSP from Sale-a-bration 2014 and the coordinating Petal Parade stamp set.

I think I have a few layers here, starting with the Pool Party card base.

The next layer is Whisper White with the Sweet Sorbet DSP with some black 1/8″ taffeta ribbon.

Another Pool Party layer with Whisper White on top with stamped images from the Petal Parade stamp set and adhered with dimensionals.

On top of this is another layer of banners and flower adhered with dimensionals and some punched itty bitty shapes held down with mini brads. I also added a clear button with some twine.

The sentiment is stamped from Teeny Tiny Sentiments stamp set and I punched it out with the Word Window punch, before sticking down with more dimensionals.

IMG_4384

These colours of Pool Party, Black and White are just stunning and work so well together!

Be sure to have a go at some Challenges, they are great fun to play along and see what others design, so head over to Just Add Ink for more inspiration from the Design Team!


Shop Online 24/7 for products

 Happy Stamping,
Name Banner