Tonight the Art with Heart team are sharing creative projects with an Easter theme. Don’t forget, Sale-a-bration ends on 31 March! There is still time to earn free product with purchase or even join our Stampin’ Up! team. Ask any of the girls on the hop for more details.
If you’re already hopping, then you just came to me from the talented, Sue Madex. If you’re just joining, great! Use the “next” button at the end of my post to hop all the way around. Blog Hops are full circles, so you can start hopping here and then at the end of each post there is a link to the next one. There is also a list of participants at the end in case of any broken links. Now let’s get started!
My Easter projects tonight have a heavy focus on the soon to retire In Colours 2017-2019.
Stampin’ Up! 2017-2019 In Colours
craftwithkate.com
I adore the Fable Friends stamp set and just had to use it for my Easter projects. This card is created using the paper piecing technique. This is where you stamp onto some pretty designer paper and then cut sections of it out and glue to another stamped image. You can see I’ve done it with the ducks jacket and top of her hat! I used the pretty Needlepoint Nook Designer Series Paper. I love the Rectangle stitched framelits and the Silver Glimmer edging was cut with the Decorative Border Punch. The sentiment is created using the Well Said stamp set and coordinating Well Written framelits (purchase these together as the bundle to save 10%).
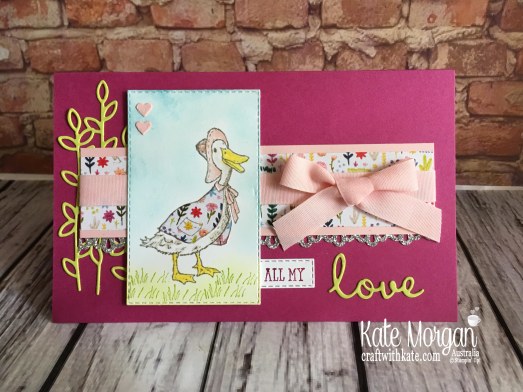
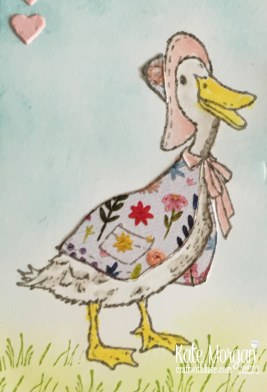
Here’s a closer look! I used my Blender Pen with the inkpads to add some Gray Granite to her feathers, Pineapple Punch for her beak and feet and Powder Pink for the hat and ribbon around her neck. The grass is stamped with Lemon Lime Twist and then I sponged some of the same colour using a sponge dauber. I also did this for the sky with Balmy Blue ink.
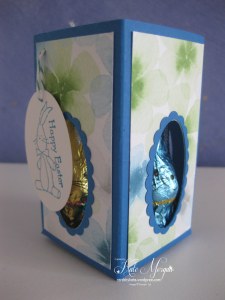
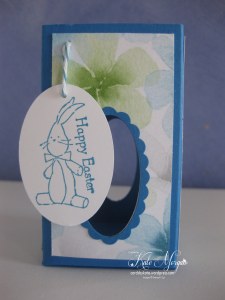
My next project is a Divided Gift Box with 3 sections in it and a window in the top to entice you inside! The tag was simply created using the Well Said bundle as used in the first project. I had to tie some of this gorgeous variegated ribbon around it too.
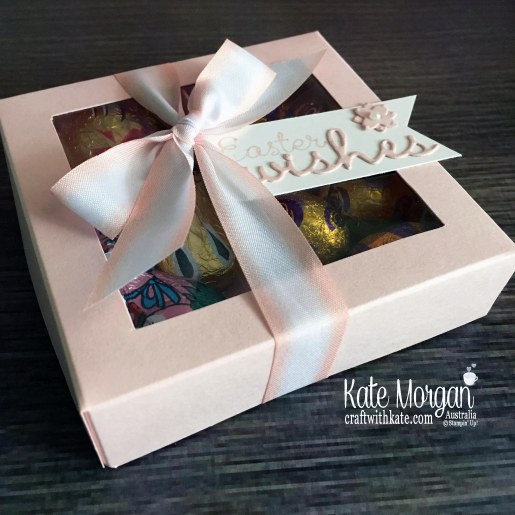
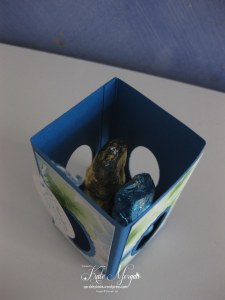
Ooh and look what’s inside?!!! I mean, who doesn’t love a little chocolate treat at this time of year?!!!

What you need to make this box:
Base: 14.5cm x 14.5cm, score at 2.5cm on all 4 side
Lid: 14.8cm x 14.8cm, score at 2.5cm on all 4 side
To cut the window in the centre of the lid, place it in your Stampin’ Trimmer lining the left side at 3.8cm. Lift the cutting arm and move the blade to 3.8cm, place down onto the cardstock and cut to 11cm. Rotate & repeat this on the other 3 sides.
Window Sheet: 9cm x 9cm glue to inside of lid once it’s put together.
Insert 1: 14cm x 9.3cm, score at 4.5cm, 7cm, 9.5cm
Insert 2: 14cm x 4.5cm, score at 4.5cm, 7cm, 9.5cm
Thanks for visiting tonight. A full list of products can be found at the end of the post.
Don’t forget to email me at craftwithkate@live.com.au to request your copy of a Catalogue or to ask about joining the Art With Heart team.
Now it’s time to follow the blog hop to our next participant, the lovely, Ros Davidson.

If you find a broken link or have come to this blog hop from a different entry point, you can view the participants below.
- Catherine Proctor
- Caroline Manwaring
- Sue Madex
- Kate Morgan
- Ros Davidson
- Kathryn Mangelsdorf
- Rachel Palmieri
- Rebecca Jacovou
- Judy May
- Rachel Woollard
- Christina Barnes
- Tina Gillespie
- Vicki Boucher
Happy Hopping!

Product List


- Gray Granite Classic Stampin’ Pad
- Berry Burst Classic Stampin’ Pad
- Balmy Blue Classic Stampin’ Pad
- Pineapple Punch Classic Stampin’ Pad
- Lemon Lime Twist Classic Stampin’ Pad
Card Stock
- Powder Pink A4 Cardstock
- Whisper White A4 Card Stock
- Lemon Lime Twist A4 Cardstock
- Berry Burst A4 Cardstock
- Silver Glimmer Paper
- Needlepoint Nook 12″ X 12″ (30.5 X 30.5 Cm) Designer Series Paper
Tools & Adhesive
- Liquid Multipurpose Glue
- Bone Folder
- Stampin’ Trimmer
- Paper Snips Scissors
- Simply Scored
- Sponge Daubers
- Blender Pens
Ribbon & Trim
Accessory
Big Shot
Bundles