Welcome to the Colour Creations Instahop. You can follow us on Instagram starting @craftwithkate. Each week we will showcase the Stampin’ Up! colours in alphabetical order.
Week 32 – Misty Moonlight
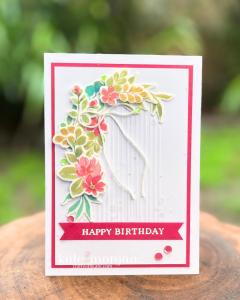
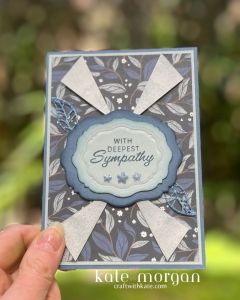
This handmade card features the Peaceful Garden Designer Series Paper (DSP) and some soon to be released in January, Beautifully Celebrated dies.
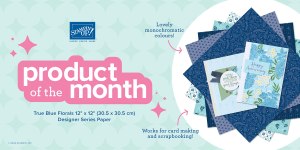
This card is cased from Kathy Ellerbusch Alt, who showed how to create one in a recent ‘live’ on Facebook using the newly released Product of the Month (POM) True Blue Florals DSP. More details below.

Measurements
Misty Moonlight card base: 21cm x 14.8cm, scored @ 10.5cm
Cloud Cover: 14.3cm x 10cm
Designer Series Paper: 14cm x 6cm (centre), 14cm x 4.5cm (2, one each side), 14cm x 2cm (inside)
Basic White: 14.3cm x 10cm (inside)
How you can re-create this card
- Score and fold the card base.
- Adhere the insert inside with the strip of DSP on the right hand side.
- Adhere the Cloud Cover layer to the card base.
- Adhere the 14cm x 6cm DSP to the centre of the card.
- Take the 14cm x 4.5cm DSP and add adhesive to one side only. The left piece has adhesive only on the left and the opposite on the other side.
- Fold back the inside corners of the DSP. Starting with the top left, start the crease from the edge of the DSP underneath (centre piece). Once you have this one done, you can repeat on the others to mimic the first one.
- Die cut the two labels and the glitter leaves. The centre label I added the smaller label on top and ran through my embossing machine with the Silicone Craft Sheet to get the embossing.
- Stamp the sentiment.
- Using a blending brush, add ink to the edges of each label.
- Adhere the labels together then add Dimensionals on the back and adhere it the centre of the card. I also placed a mini dimensional under each of the DSP corner folds to hold them in place.
- Add the embellishments.
Thanks for dropping by. I hope you join me next Wednesday for Mossy Meadow inspiration.
Product of the Month (December)
Product of the Month exclusive items that aren’t available in any catalogue or Online Exclusives. A new release every month, available once per month with a qualifying product order — once they’re sold out, they’re gone for good. Add $125+ in product to you cart, then you can add the POM for $9. Click here for how to order.

Product List @stampinupofficial
Stamps: Peace on Earth
Dies: Beautifully Celebrated
Ink: Misty Moonlight
Paper: Basic White, Cloud Cover, Misty Moonlight, Peaceful Garden DSP, Peaceful Garden Glimmer, Basic White C6 Envelopes
Other: Hues of Blue Flowers, Acrylic Blocks, Paper Snips, Bone Folder, Paper Trimmer, Multipurpose Glue, Mini Stampin’ Dimensionals, Stampin’ Cut & Emboss Machine, Take Your Pick Tool, Simply Shammy.
*can be purchased together as a bundle to save 10%

Don’t forget to Follow My Blog to receive blog updates and all the latest news and specials!