On Sunday it was my mother-in-law, Bev’s birthday and this was the card we sent her. She lives 6 hours drive away from us, so we don’t get to visit them often, but we are very close. Bev is even a team member and we are going to Auckland together next month for OnStage Live event… the biggest Stampin’ Up! event of the year, and we cannot wait!!!
These distinctive stamps make creating so easy. These flowers look so real and they are only stamped in one colour and one impression!!! What a great background it makes, and doesn’t it look like designer paper?!!!
Highland Heather and Soft Sea Foam are a delightful colour combination, don’t you think? I adore it together.
Bev lives 6 hours drive away from us and so I thought this was the perfect sentiment for the inside of the card xx
To purchase these products click on the images below in the product list to take you directly to my online store!
Welcome back to another Art With Heart Team Colour Creations weekly Blog Hop. Today we are featuring our 36th colour; Petal Pink.
This colour has more of an apricot tone and it is one of the many colours in the Needlepoint Nook Designer Series Paper. I have gone with the Bargello Technique again to create the background. You may have seen me use this Technique in last Friday’s post.
My Colour Combination is: Petal Pink, Berry Burst, Old Olive
I die cut a Vellum oval and embossed it with the Needlepoint Elements Framelit. I did this so it didn’t totally hide that gorgeous Bargello background.
Head on over to Catherine’s blog where you’ll find the links to other participants.
To purchase these products click on the images below in the product list to take you directly to my online store!
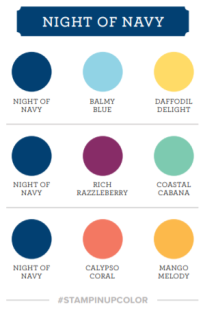
Welcome back to another Art With Heart Team Colour Creations weekly Blog Hop. Today we are featuring our 32nd colour; Night of Navy.
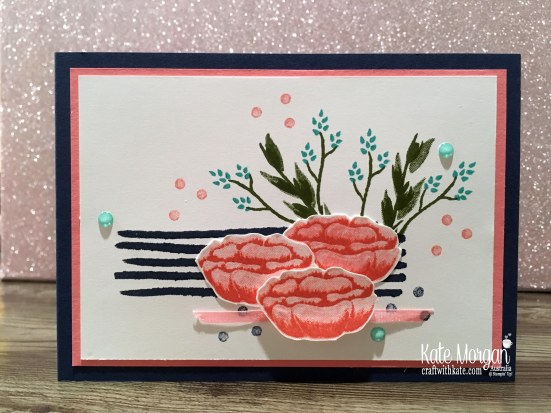
My card tonight uses the colour combination: Night of Navy, Calypso Coral, Flirty Flamingo, Bermuda Bay & Mossy Meadow.
We received this stamp set, Incredible Like You, at OnStage as an all attendee giveaway and I really wasn’t sure about it. But, the only thing to do is open it up, find some coordinating colours and stamp and it turned out okay!
I do love the Flirty Flamingo/Calypso Coral combination of the flowers. Don’t they look great?!! I stamped them on Whisper White and fussy cut them. The bottom one I added with dimensionals rather than glue and I placed a small piece of the Flirty Flamingo ribbon behind it.
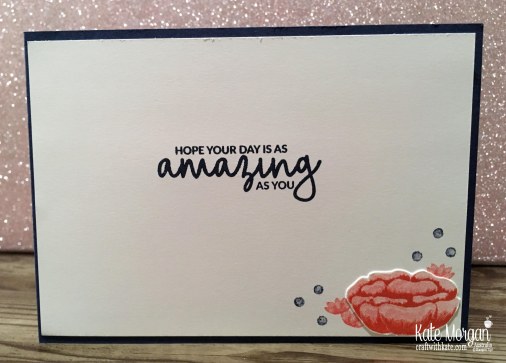
On the inside I added the sentiment in Night of Navy and some more flowers in the corner.
Head on over to Catherine’s blog where you’ll find the links to other participants.
To purchase these products click on the images below in the product list to take you directly to my online store!
Today I share with you a card that took a little while to create and understand how it actually worked when putting it together. When you see it, you will be amazed, but I have to admit there was some frustration at the beginning!
I’m using the Let the Good Times Roll bundle in the Occasions catalogue.
I started with an A5 piece of Lemon Lime Twist card stock = 8¼” x 5⅞” folded in half.
The Whisper White insert measures 8″ x 5½”.
Firstly, I will share with you the inside of the card before the front, and you will see why in a second. This is the most amazing 3D pop up card you will have seen in a while!
What kid would not get a thrill out of opening this card?!!!! Isn’t it just so cool?!!
This is a 14 piece photopolymer set, so it makes it super easy to line up the stamped images as well as using the coordinating dies to cut them out. I have lots of colours as I think it is such a fun card that screams colour!
Here is the front of the card:
Now a few tips I have found when using this bundle:
use whisper white, not the thick whisper white card, it’s easier to fold the tracks
do not score your white card all the way through. Only score each side about 1/2″, line up the die and then cut, then use a ruler to score across to the edge of the die cut
Score along each edge of the tracks and the bottom edge before trying to fold them
Add an extra layer over the framework of the roller coaster for strength
it will fold flat, you just need patience in the manipulating of the tracks
I made a quick 30 second video to show how it folds flat, view here. (I’m not into making videos, so no instructions with it, lol).
You can also view the YouTube video by Brandi at the Stampin’ Up! home office here to see more about how to create the pop up section!
When you spend $90+ during Sale-a-bration, you get to choose 1 free item from the Sale-a-bration brochure below. Go on, have a look, you know you want to!!!
A full list of products can be found at the end of this post!
Sale-a-bration period to earn FREE product is 3rd January – 31st March 2018 Occasions catalogue begins on 3rd January and runs through until 31st May 2018
Click on the pictures above to download your PDF copy!
Don’t forget to Follow My Blog to receive blog updates and join my Newsletter Subscriptionfor all the latest news and specials!
It’s less than a week until my sisters birthday, and I know she loves orchids as she has been successfully growing them for many years. When I saw the Climbing Orchid Bundle on page 21 of the Annual Catalogue, I knew I had to purchase it! By purchasing the stamp set and framelits together, you save an extra 10%.
I’m not sure if I will give this card to her or make some more, but this is my first play and it certainly won’t be my last ♥
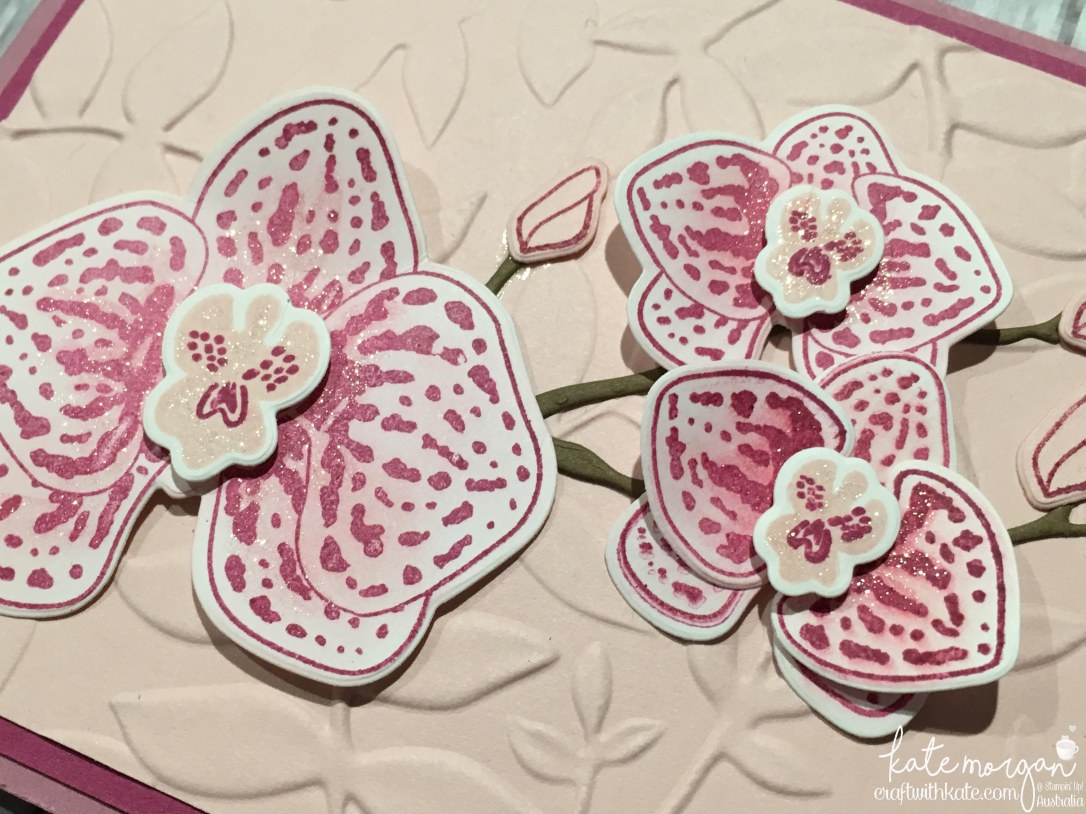
I love the softness of the colouring on these flowers. I used a sponge dauber to lightly colour the petals with Powder Pink, then Berry Burst ink before applying some Wink of Stella. The stem is die cut using the branch from the Seasonal Layers Thinlits!
The top photo is a little dark and the one below, is a little bright, but I was trying to show you the Wink of Stella glimmer on the flowers!
Check out that embossing on the Powder Pink background, isn’t it gorgeous?!! This is the new Dynamic Textured Embossing Folder, Layered Leaves.
I wasn’t sure about adding a sentiment to the front of the card, so I decorated the inside and added the “enjoy today” sentiment with another small orchid!
A full list of product can be found at the end of this post!
Don’t forget to Follow My Blog to receive blog updates and join my Newsletter Subscriptionfor all the latest news and specials!
Welcome to another Art with Heart Team blog hop where we are focusing on fancy folds. You will find loads of creative inspiration tonight, showcasing different folding techniques and projects. Don’t be afraid of trying some Fancy Fold cards; they may look intimidating, but in fact, they are not that difficult to create.
If you’re already hopping, then you just came to me from the talented, Tina Gillespie. If you’re just joining, great! Use the “next” button at the end of my post to hop all the way around. Blog Hops are full circles, so you can start hopping here and then at the end of each post there is a link to the next one. There is also a list of participants at the end in case of any broken links.
Now let’s get started!
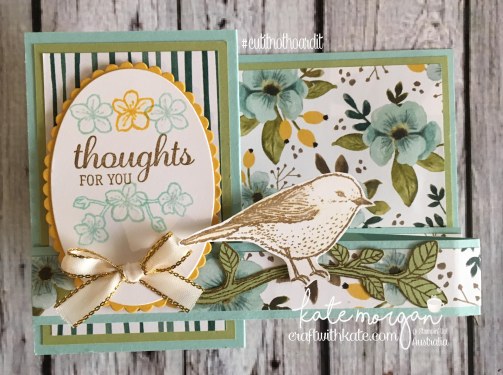
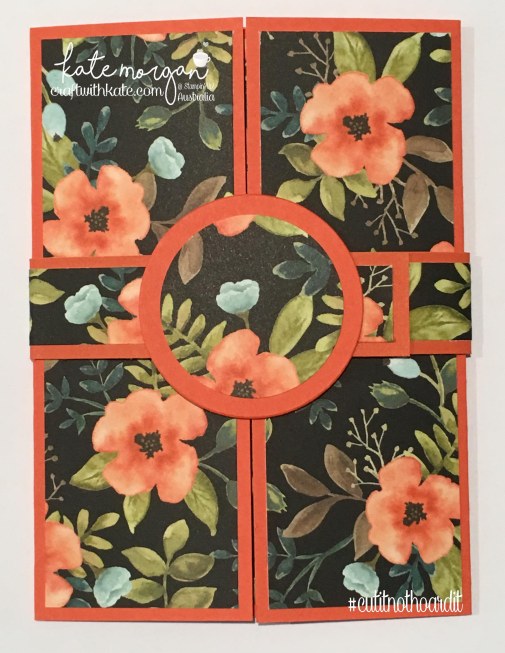
For my projects today I am using the Best Birds stamp set with the Whole Lot of Lovely Designer Series Paper. I love how striking this Designer Paper is too and I knew it had to be a focal point. #cutitnothhoardit
Fancy Fold Card #1
For my first card today, I am sharing a fairly simple fancy fold card, a Double Z Fold.
The card base is Pool Party card = 11⅜” x 5⅛” and score at 2¾” & 5½”. Trim off a 1″ strip from the bottom of the card which will create the double z fold. You just flip that strip over, so the shorter end is on the right as shown. Then you decorate as you like. Here is my colour combination using the coordinating colours in the Designer Paper!
Back panel of the card
Products used
Stamps:Best Birds Inks: Crushed Curry, Pool Party, Soft Suede Card/Paper: Crushed Curry, Pear Pizzazz, Pool Party, Whisper White, Whole Lot of Lovely DSP Accessories: Big Shot, Layering Ovals Framelits dies, Magnetic Platform, Stampin’ Trimmer, Paper Snips, Stampin’ Scrub, Stampin’ Mist, Tombo Multipurpose Glue, Simply Scored, Clear Block Bundle, Dimensionals, Fast Fuse, Tombo Glue, Wink of Stella, Blender Pen, ⅜” Gold Metallic-Edge Ribbon
Fancy Fold Card #2
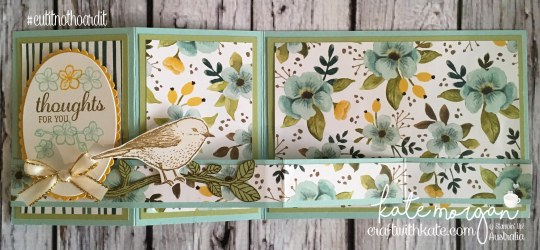
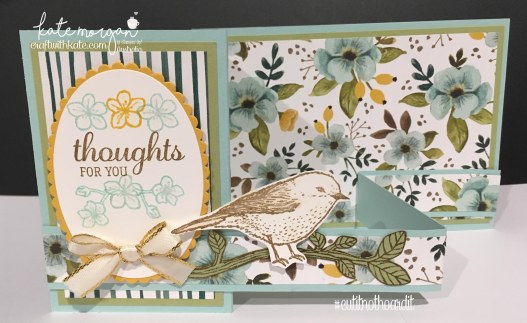
For my second one, I have a more advanced fancy fold card. I am sharing a style that I think is amazing, but I’ve never found it in Australian cardstock sizes, so I created my own A5 Gatefold Shutter card. It took quite a bit of time to figure out all the correct measurements, but I am super happy with the outcome. Now I have mastered it, I can whip them up in no time at all!
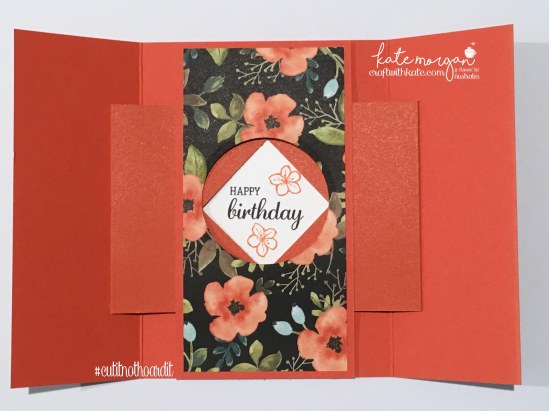
When you take off the belly band, the centre diamond opens to reveal a secret message inside!
Kids love this style of card, they think it’s like magic when it opens up. They look difficult to make, but if you follow the instructions, they are actually quite easy.
If you would like a copy of my FREE tutorial how I made these cards, head over to my ‘Free Tutorials’ page to download your PDF copy, but make sure you continue the blog hop first to see what all the other talented ladies have created!
Products used
Stamps:Best Birds Inks:Basic Black & Tangerine Tango Card/Paper: Tangerine Tango, Whisper White, Whole Lot of Lovely DSP Accessories: Big Shot, Layering Circles Framelits dies, Magnetic Platform, Stampin’ Trimmer, Paper Snips, Stampin’ Scrub, Stampin’ Mist, Tombo Multipurpose Glue, Simply Scored, Clear Block Bundle, Dimensionals, Fast Fuse, Tear & Tape, Bone Folder, Ruler, Pencil, 1¾” circle punch, 2¼” circle punch
Thanks for visiting today.
Don’t forget to email me at craftwithkate@live.com.au to request your copy of any Catalogue or to ask about joining the Art With Heart team.
Now it’s time to follow the blog hop to our next participant, Andrea Roberts.
If you find a broken link or have come to this blog hop from a different entry point, you can view the participants below:
My project today uses the Coffee Cafe stamp set and coordinating Coffee Cups Framelits dies, and the Coffee BreakDesigner Series Paper. #cutitnothoardit
I made this card for one of my closest friends for her birthday last week. We try to get together weekly for coffee, so I thought this was kind of appropriate 😉
Angela also loves blue, so what better colours to use than Soft Sky, teamed with browns with white.
I love this coordinating Designer paper and the new Year of Cheer Specialty Washi Tape, which you can see two thin strips of the gold; one across the centre of the ribbon and the other on the coffee cup.
The inside of the card has this sentiment from the Special Celebrations stamp set.
How cool is it that the images on the Designer Series Paper can also be die cut with the coordinating dies!!! I love this new feature of Stampin’ Up!
A full list of product can be found at the end of this post!
Don’t forget to Follow My Blog to receive blog updates and join my Newsletter Subscriptionfor all the latest news and specials!
This week my team received their shares that we organised, including Designer Series Papers and some ribbons from the new Annual catalogue, and boy, they are just stunning in real life! Here is mine 😉
So, today I have a very simple, but pretty card using loads of new Annual catalogue product, including the Petal Garden DSP, Pool Party Shimmer Ribbon, Pretty Label Punch and the Happy Birthday Gorgeous stamp set.
I just adore this paper! I love every pattern in the pack and that is rare for me, but they are just stunning. I can’t wait to create some more projects with these papers. Here they are:
Oh and that shimmer ribbon is divine and adds a touch of softness. You know, I would never have put Pool Party and Old Olive together as a colour combination, but somehow, it just works!
What do you think of this card? It seriously took less than 10 minutes to create 😉
Tonight I join the challenge at Just Add Ink, #356.
I have chosen Metallics and Balloons for my card, along with some brand new products from the upcoming 2017-2018 annual Stampin’ Up! catalogue. I know you love a sneak peek to see some new items coming soon 😉
The Happy Birthday Gorgeous Bundle is just that, gorgeous!
I have used two of the new In Colours; Lemon Lime Twist & Powder Pink. Aren’t they just stunning together?!!! The stamp set is called Happy Birthday Gorgeous and I randomly stamped the flowers over the top layer of white card.
the happy birthday sentiment is die cut from the Happy Birthday Thinlits die in the gold glimmer paper.
I also love how this stamp set coordinates with the Balloon Punch we already have!
What do you think of this card?
Why don’t you head on over to the Just Add Ink page for some more inspiration.
Don’t forget to Follow My Blog to receive blog updates and join my Newsletter Subscriptionfor all the latest news and specials!
Did you notice some new images today? Yes, I thought it was time to update my ‘branding’ and add some watercolour flowers in some of my favourite colours. What do you think of them? I love it!
With any $90 order you can choose 1 item for FREE
with a $180 order you can choose 2 items for FREE
with a $270 order you can choose 3 items for FREE
ETC
Here are all the FREE items you can choose from!
Don’t forget to Follow My Blog to receive blog updates and join my Newsletter Subscriptionfor all the latest news and specials!


 Mini Striped Ribbon")


 Designer Series Paper")


 Metallic-Edge Ribbon")