Birthday, Blog Hop/Instagram Hop, Designer/Patterned/Specialty Papers (DSP), Fancy Folds, Handmade Cards, Masculine, Stampin' Up!

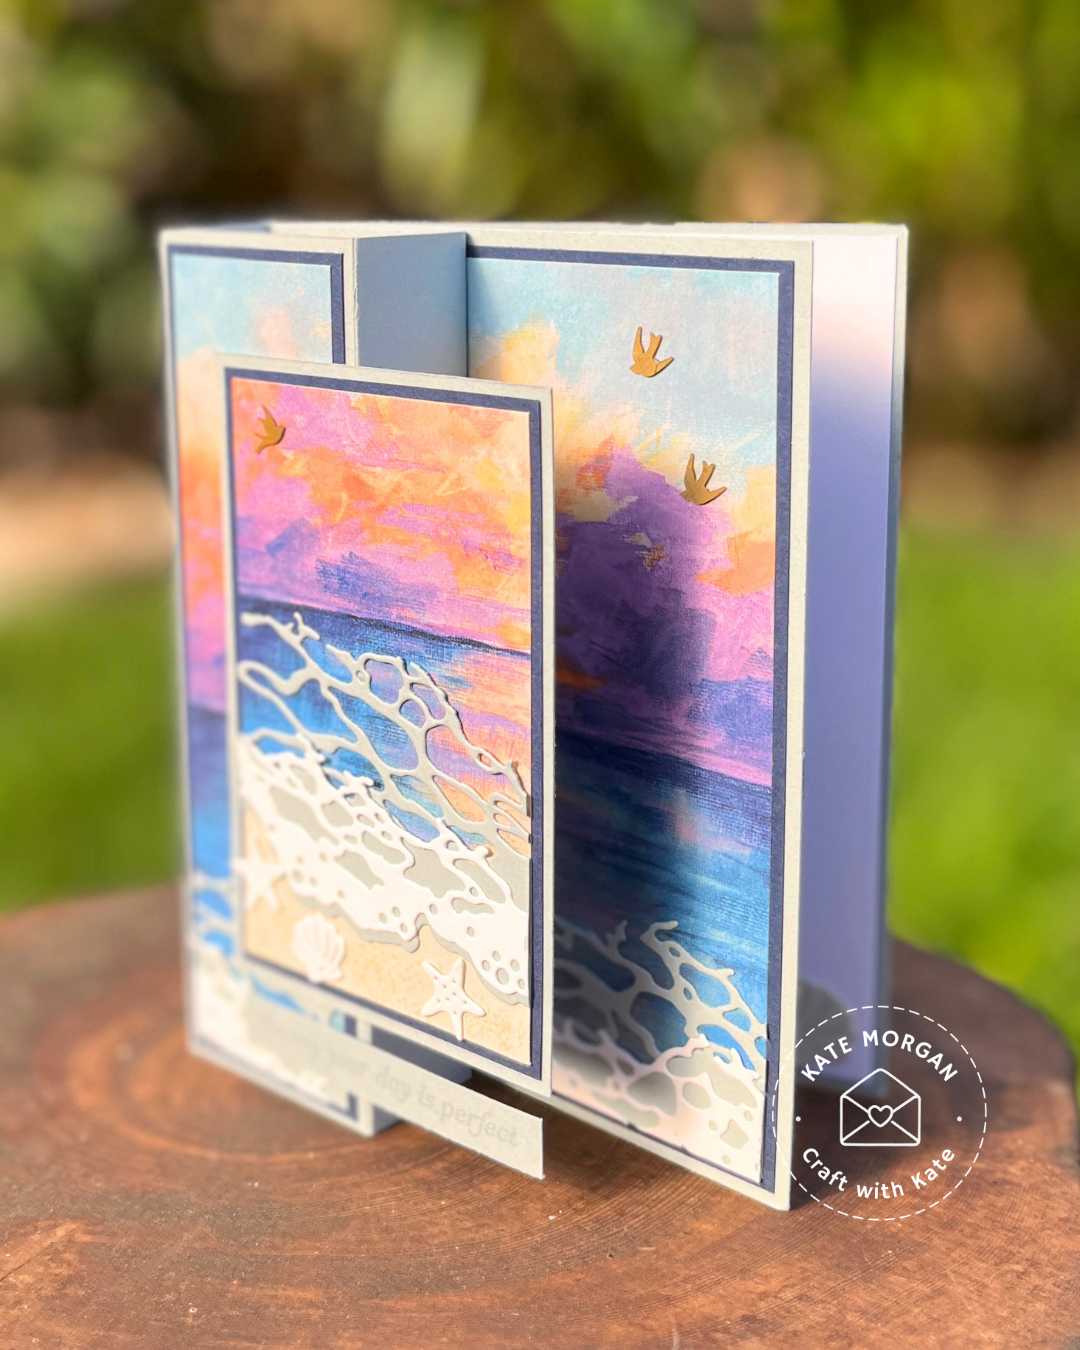
Cloud Cover: Masculine Pillar Fun Fold Card with Rolling Waves & Scenic Coast

Welcome to the Colour Creations Instagram Hop. You can follow us on Instagram starting @craftwithkate. Each week we will showcase the Stampin’ Up! colours in alphabetical order.

Week 16 – Cloud Cover

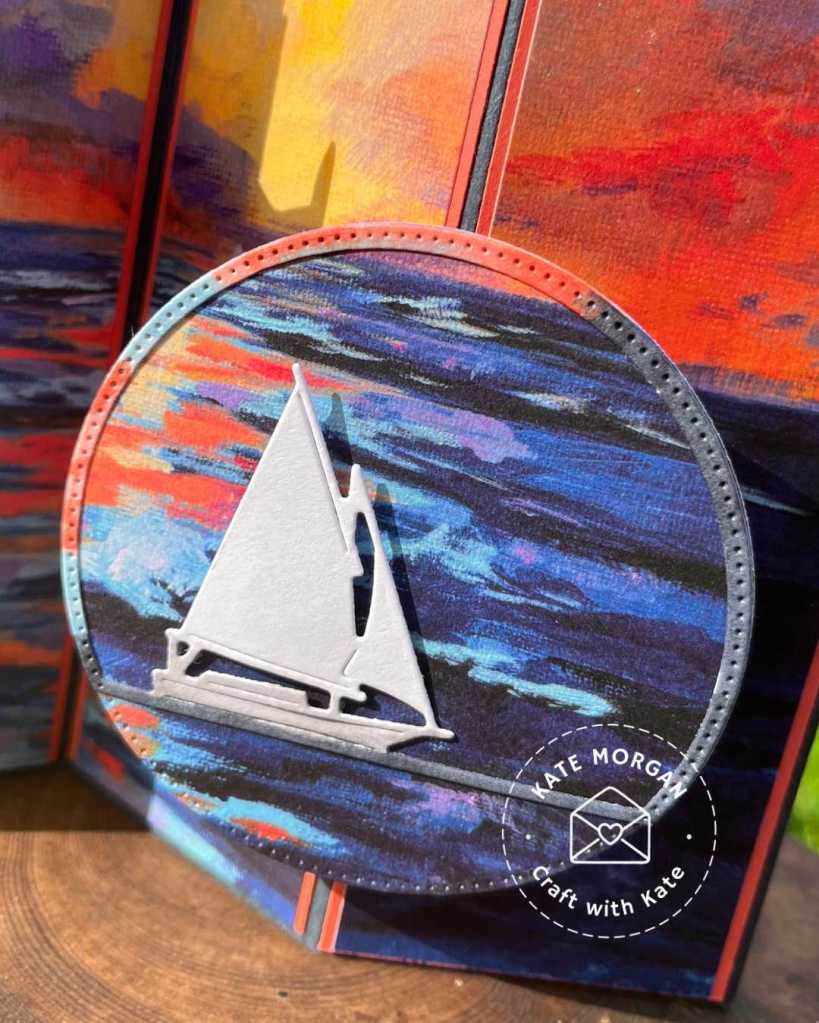
My card this week is a pillar card using the Rolling Waves dies and the Scenic Coast Specialty DSP that is perfect for a masculine birthday.

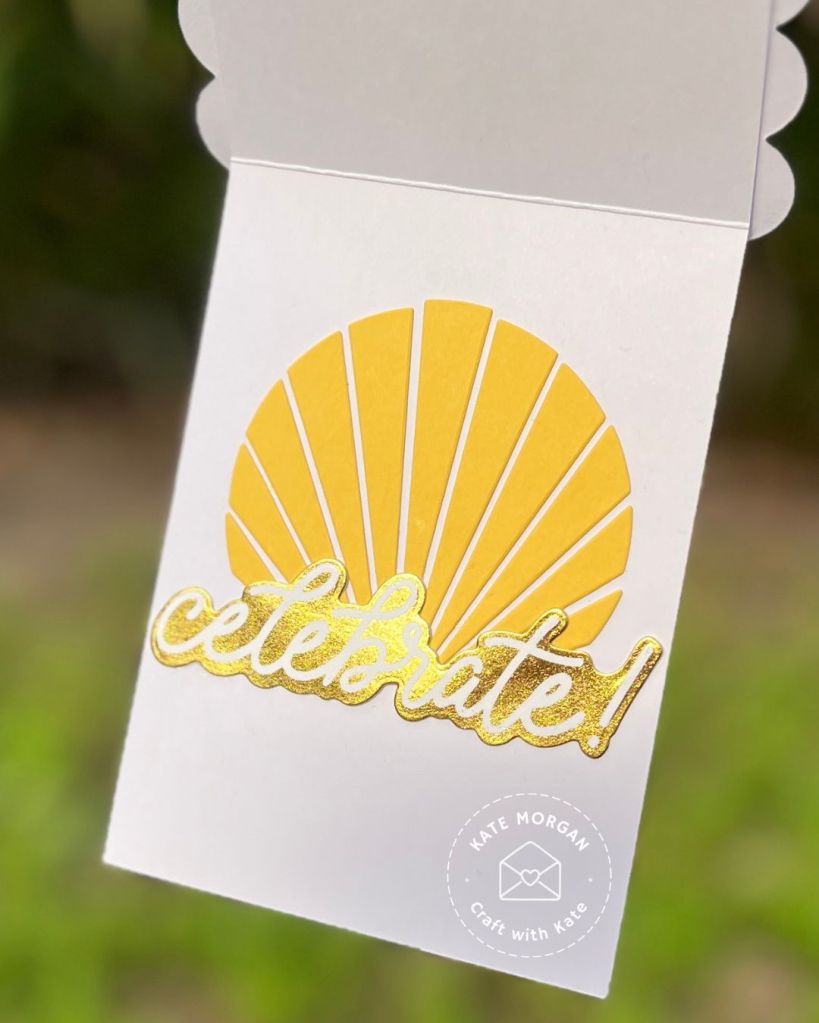
A Cloud Cover card base with Night of Navy matt layers behind the Scenic Coast SDSP. I’ve also used Basic Beige card for the sand, Basic White and Cloud Cover to die cut the waves. I added some shells to the sand and the inside of the card and some small gold birds to the sky.

I didn’t want to just have the message panel on the back visible, so I created a tab on one side and adhered this to the back of the card to hide my mesage (computer printed). Some more die cut shells added in the corner.

Measurements
Card base: 25cm x 14.5cm
Cloud Cover: 7cm x 10.5cm (front), 7cm x 1.5cm (sentiment), 14.5cm x 12.5cm (back) plus extra for die cutting
Night of Navy: 13.9cm x 10.1cm, 13.9cm x 4.1cm, 6.6cm x 10.1cm
DSP: 13.5cm x 9.7cm, 13.5cm x 3.9cm, 9.7cm x 6.4cm
Basic White: 10.6cm x 14.1cm (message) plus extra for die cutting
Crumb Cake: 6.4cm x 5cm

  1. Score the card base by scoring @ 4.5cm, 7cm, 11.5cm, 14cm.
  2. Before adhering the left column, I adhered the Night of Navy matt cardstock pieces in place.
  3. Die cut the waves from Cloud Cover card and the ‘foam’ die from Basic White card a couple of times and adhere together.
  4. Add a piece of Crumb Cake card to the bottom of the 9.7cm x 6.4cm piece of DSP. To work out the size, hold the waves across the DSP and see where to cut it on an angle so it is hidden behind the waves.
  5. Use Crumb Cake ink to stamp some of the texture for the sand.
  6. Adhere the wave die cuts across the bottom of each piece of DSP and cut off the excess with scissors. Use these on the DSP for the column.
  7. Adhere each of the DSPs to the matt card.
  8. Adhere the largest panel to the inside of the card base,
  9. Fold the scored column into a cube and add glue to the end piece to adhere against the centre scoreline.
  10. Push the column flat to the right and hold for the panel to set.
  11. While the column is flat, add glue to the reverse side of the feature panel (remember only along the side that will adhere to the column). Centre it between the top and bottom of the card and ensure it doesn’t go past the card base while pushed flat!
  12. Stamp your sentiment and adhere on the column below the main feature.
  13. Take the Cloud Cover 14.5cm x 12.5cm and score the short side @ 11cm.
  14. Add glue to the tab and adhere to the back along the spine of the card.
  15. Add the Basic White sentiment panel (I printed mine from my computer).
  16. Add some die cut shells and gold bird embellishments.

Thanks for dropping by. I hope you join us next week for Coastal Cabana.

Be sure to add the Product of the Month (POM) for $9 when you add $125+ in product to your cart.

Product List @stampinupofficial
Stamps:
Rolling Waves*
Dies: Rolling Waves*
Ink: Basic Beige, Cloud Cover
Paper: Basic White, Basic Beige, Cloud Cover, Night of Navy, Scenic Coast Specialty DSP, Basic White C6 Envelopes
Other: Adhesive-backed Dragonflies & Birds, Acrylic Blocks, Bone Folder, Paper Trimmer, Multipurpose Glue, Tear & Tape, Stampin’ Cut & Emboss Machine, Take Your Pick Tool, Simply Shammy.
*can be purchased together as a bundle to save 10%


Be sure to download a PDF copy of current catalogues from my SU Catalogue Library page.

Don’t forget to Follow My Blog to receive blog updates and all the latest news and specials!

Birthday, Blog Hop/Instagram Hop, Designer/Patterned/Specialty Papers (DSP), Handmade Cards, Stampin' Up!, Techniques & Tutorials

Calypso Coral:Sunset Coast Pop Up card

Welcome to the Colour Creations Instagram Hop. You can follow us on Instagram starting @craftwithkate. Each week we will showcase the Stampin’ Up! colours in alphabetical order.

Week 14 – Calypso Coral

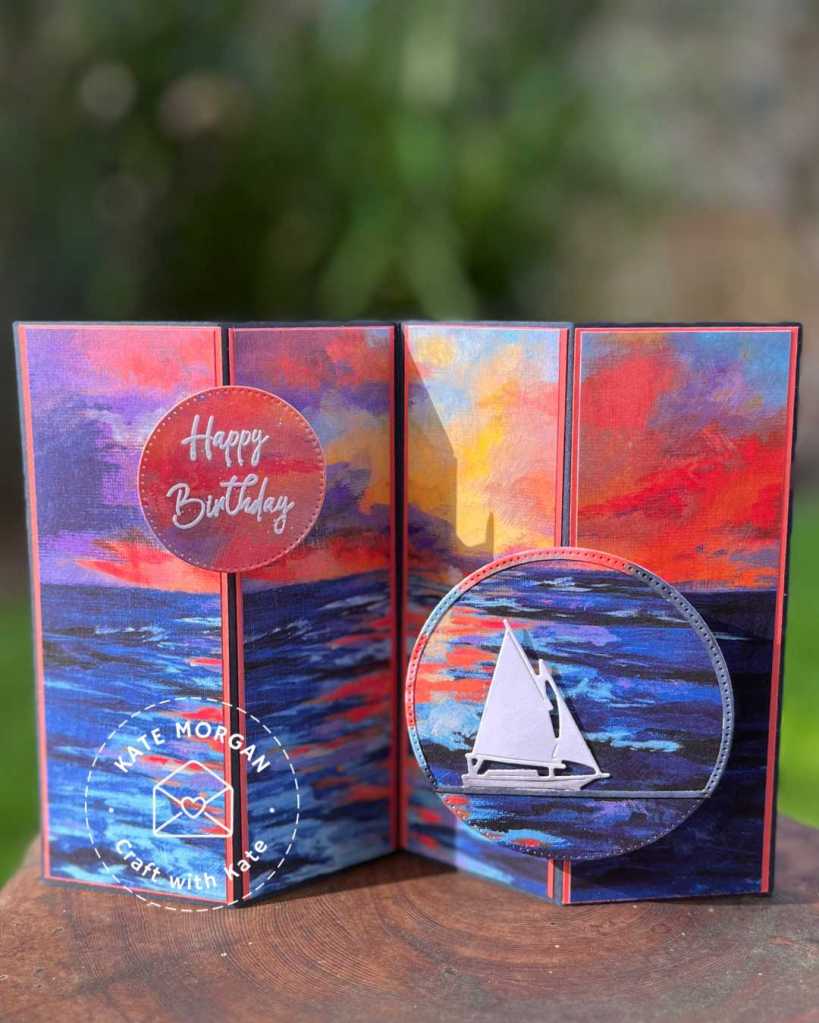
My card this week features this glorious Scenic Coast Specialty Designer Series Paper (DSP) and the Sunset Coast dies.

Here is the inside of my card – it is scored into 4 equal panels with matt layers of Calypso Coral card then the DSP. The two stitched circles are sitting on a mechanism, so they float above the card.

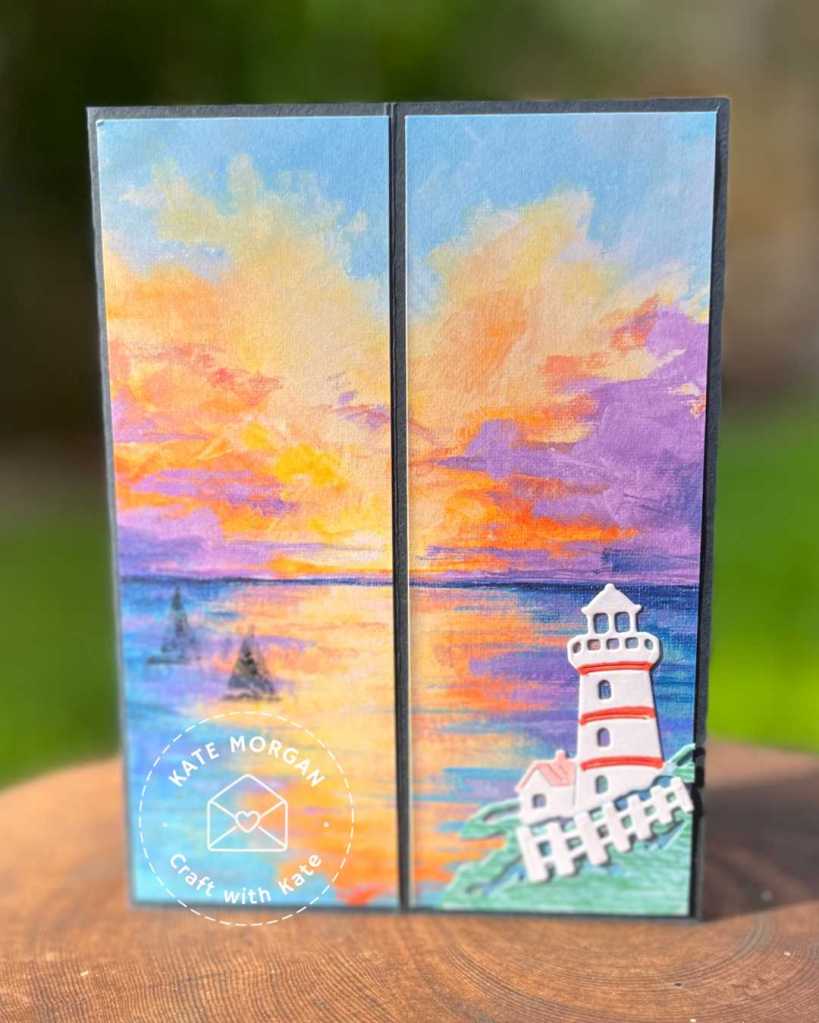
The card front I left very simple with more DSP and the lighthouse (with Calypso Coral stripes) in the bottom corner, and I stamped some boats on the water. On the back of the card, I added two Basic White layers to write the message to the recipient.

You can watch my quick Tutorial on how to construct the pop up mechanisms by clicking here

Measurements
Card base: 21cm x 14.5cm, score @ 10.5cm and at 5.25cm from each end.
Mechanisms: 10cm x 3cm score @ 1.5cm, 2.5cm, 3.5cm, 6.5cm, 7.5cm, 8.5cm (2).
Matt (inside) : 5cm x 14.2cm (4)
DSP (iside): 4.8cm x 14cm (4)
White card (back): 5cm x 14.2cm (2) plus extra for die cuts
DSP (front): 5cm x 14.2cm (2)

Thanks for dropping by. I hope you join us next week for Cherry Cobbler.

Be sure to add the Product of the Month (POM) for $9 when you add $125+ in product to your cart.


Be sure to download a PDF copy of current catalogues from my SU Catalogue Library page.

Don’t forget to Follow My Blog to receive blog updates and all the latest news and specials!

Birthday, Blog Hop/Instagram Hop, Designer/Patterned/Specialty Papers (DSP), Handmade Cards, Markers for Colouring, Masculine, Stampin' Up!

Blueberry Bushel: Sunset Coast Masculine Birthday card

Welcome to the Colour Creations Instagram Hop. You can follow us on Instagram starting @craftwithkate. Each week we will showcase the Stampin’ Up! colours in alphabetical order.

Week 11 – Blueberry Bushel

My card this week is has the stunning Scenic Coast Specialty Designer Series Paper (DSP) for a beautiful sunset scene with the lighthouse [Sunset Coast dies] on the edge of the coast.

A Blueberry Bushel card base with a Basic White matt layer and a piece of the DSP on top.

The lighthouse die is cut from a piece of Basic White card which is trimmed down to appear like the lighthouse is sitting on the edge of a cliff. I used blending brushes to add Smoky Slate ink at the top and on the right side of the lighthouse and keeper’s cottage. Then some Blueberry Bushel ink is blended down the cliff with Secret Sea ink blended at the bottom.

I also added extra highlighting with Blends Combo Markers in Smoky Slate, Darling Duckling and Poppy Parade on the buildings, and on the cliff I used Smoky Slate at the top and Blueberry Bushel further down. This is then glued to the corner of the DSP.

Here’s a little tip for creating the sentiment which is on Blueberry Bushel card with White Wow Emboss Powder.

Thanks for dropping by. I hope you join us next week for Bubble Bath.

Be sure to add the Product of the Month (POM) for $9 when you add $125+ in product to your cart.

July 2026 – Begonia Belle Stamp Set (168592) Share joy, love, and happy wishes with the Begonia Belle Stamp Set. With the two-step stamps, you can make beautiful begonias with rich dimension or use them individually to create breathtaking blooms. Stamp a lovely background image with the texture piece or mix up the sentiments to build even more meaningful messages.


Be sure to download a PDF copy of current catalogues from my SU Catalogue Library page.

Don’t forget to Follow My Blog to receive blog updates and all the latest news and specials!
Birthday, Blog Hop/Instagram Hop, Designer/Patterned/Specialty Papers (DSP), Handmade Cards, Markers for Colouring, Stampin' Up!, Techniques & Tutorials

Scenic Coast with Rolling Waves card & Video Tutorial

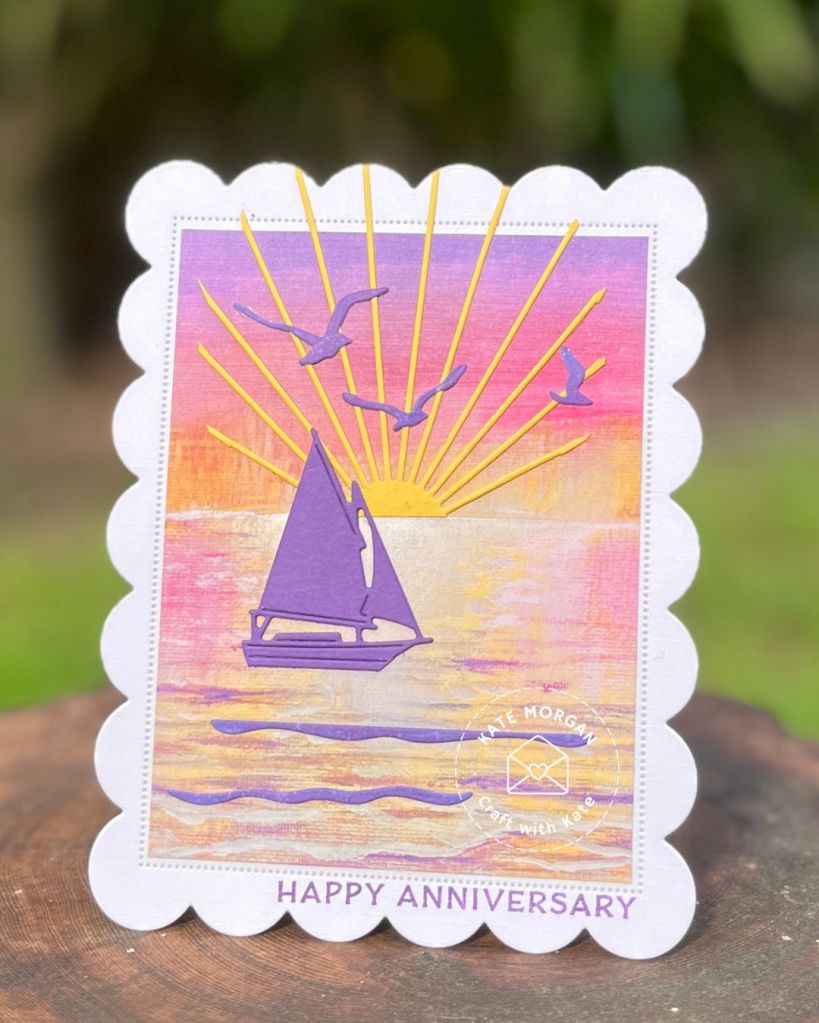
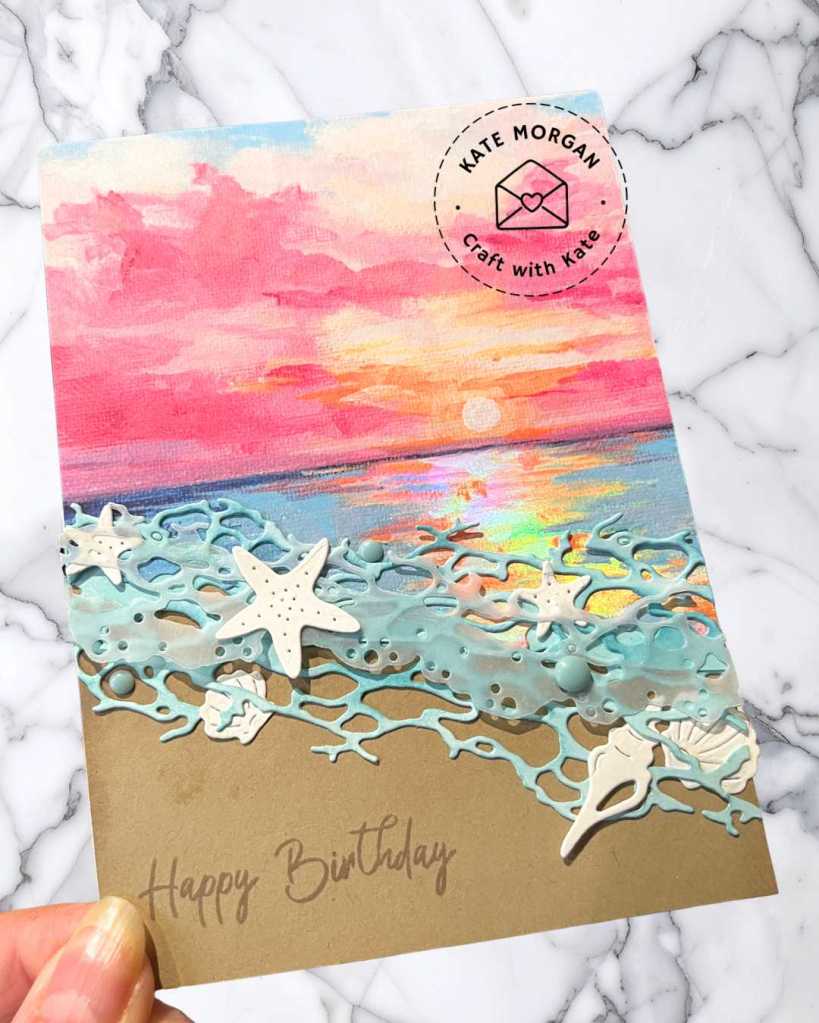
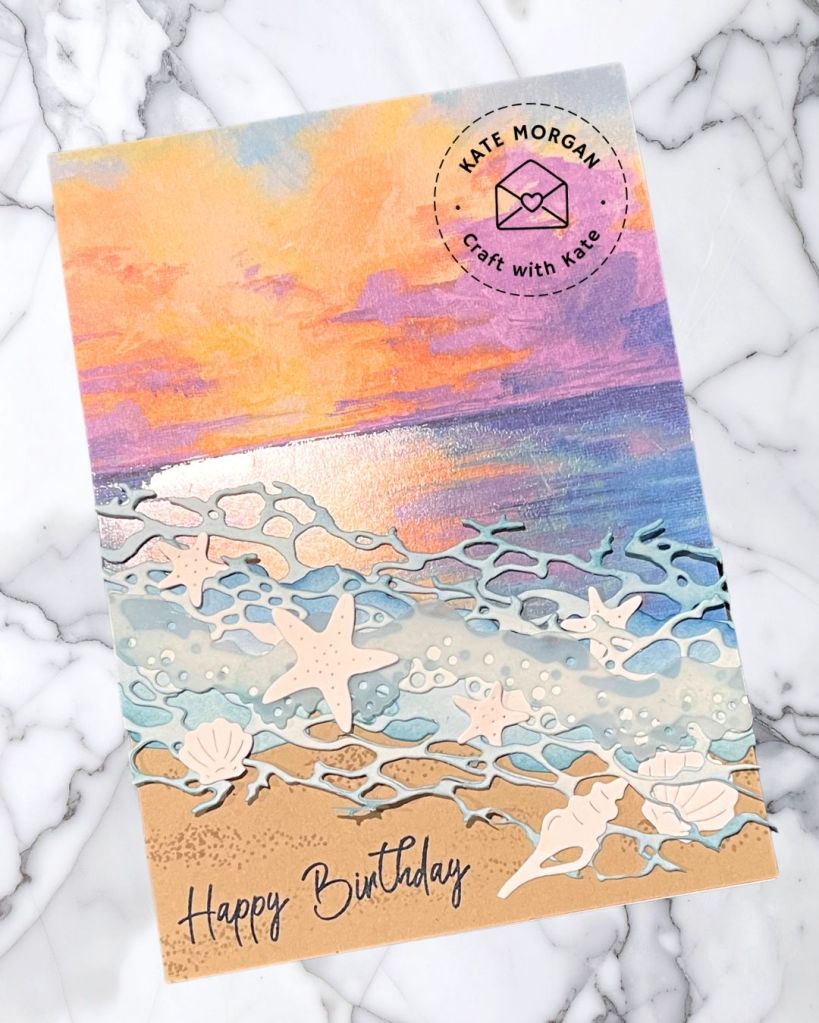
Today’s cards features the stunning Scenic Coast Specialty Designer Series Paper (DSP) for a beautiful sunset scene with the Rolling Waves Bundle.

These products are just perfect together, don’t you think?

My mum’s family have a beach house overlooking East Beach in Port Fairy, a small coastal town in the Western District of Victoria. I have very fond memories of waking up to the sound of the waves rolling in, it was such a calming sound and so good for the soul. We would take leisurely strolls on the beach and collect many shells along the way.

Here is my first card with the stunning sunset paper.

and here’s another version

I received so many beautiful comments and I was asked how I created these cards, so here is my Video Tutorial. Click here. I would very much appreciate it if you left a comment for me, if you found this video helpful!

Thanks for dropping by. Be sure to return next week for more inspiration with this stunning Scenic Coast SDSP!

Be sure to add the Product of the Month (POM) for $9 when you add $125+ in product to your cart.

July 2026 – Begonia Belle Stamp Set (168592) Share joy, love, and happy wishes with the Begonia Belle Stamp Set. With the two-step stamps, you can make beautiful begonias with rich dimension or use them individually to create breathtaking blooms. Stamp a lovely background image with the texture piece or mix up the sentiments to build even more meaningful messages.


Be sure to download a PDF copy of current catalogues from my SU Catalogue Library page.

Don’t forget to Follow My Blog to receive blog updates and all the latest news and specials!

Blog Hop/Instagram Hop, Designer/Patterned/Specialty Papers (DSP), Fancy Folds, Stampin' Up!, Techniques & Tutorials

Azure Afternoon: Blackout Technique & Twin Peaks card

Welcome to the Colour Creations Instagram Hop. You can follow us on Instagram starting @craftwithkate. Each week we will showcase the Stampin’ Up! colours in alphabetical order.

Week 6 – Azure Afternoon

I have 2 cards for you!

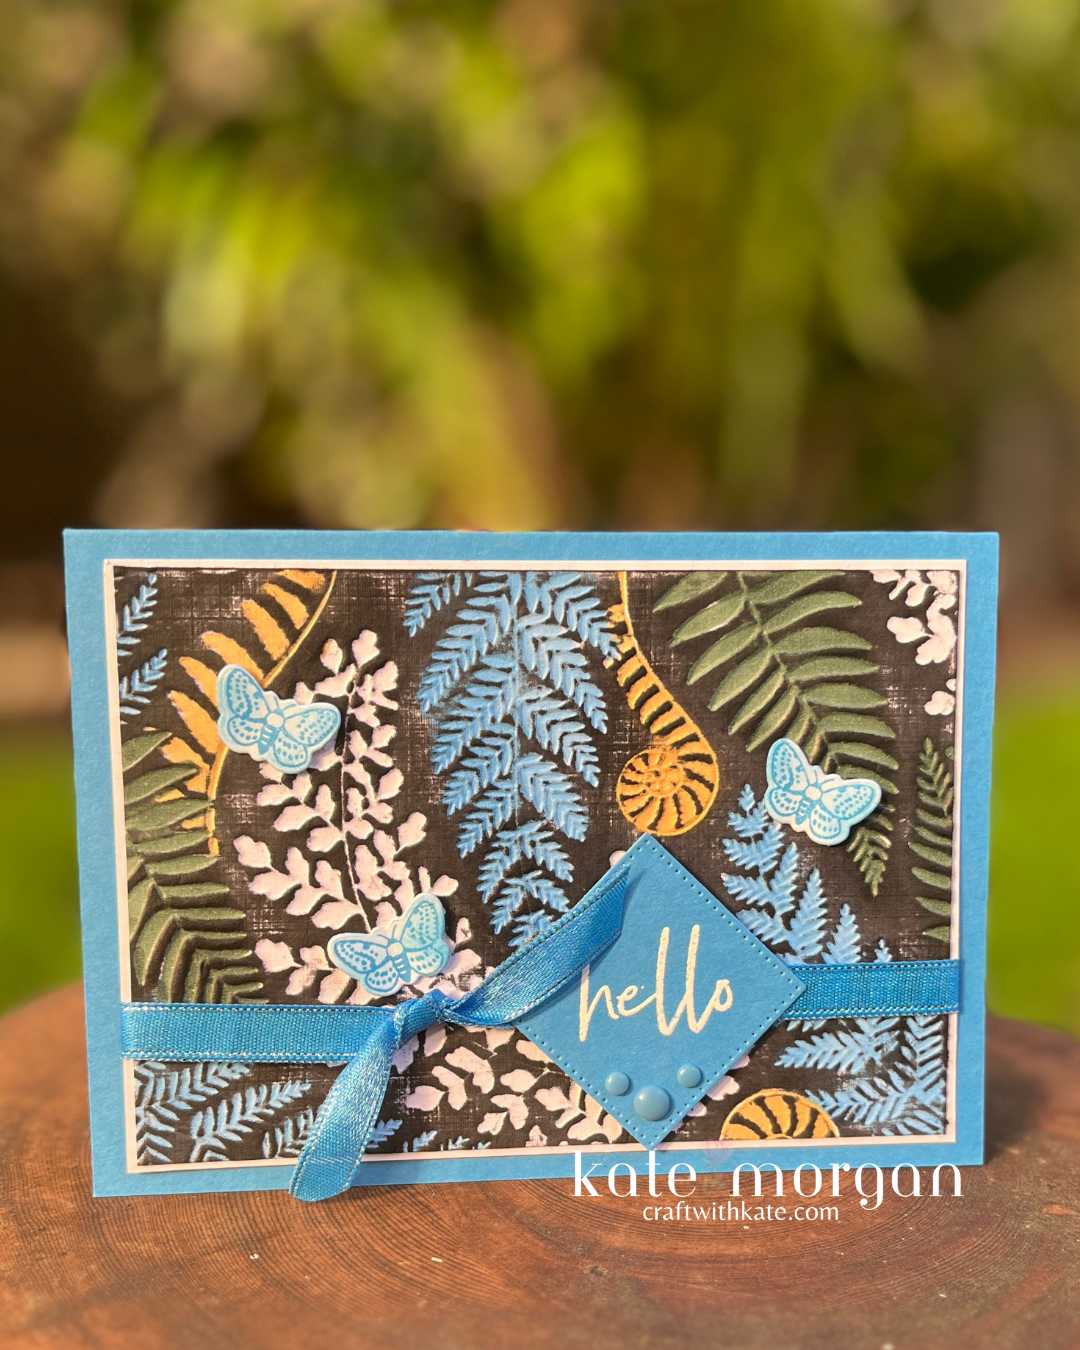
Card 1 – has the Blackout Technique with the Fern & Flora 3D embossing folder. Colouring the debossed side images with Blends Combo Markers and then dragging the Black Memento inkpad across the entire card. This is adhered to a Basic White matt with some ribbon wrapped around, then adhered to the card base. Some moths are stamped and coloured with the Wink of Stella for shine.

A simple sentiment is stamped in Versamark ink, White WOW Emboss Powder added and melted with the Heat Tool. This is cut with the Stylish Shapes dies and added on Dimensionals to the card and some In Color™ Dots to finish. 

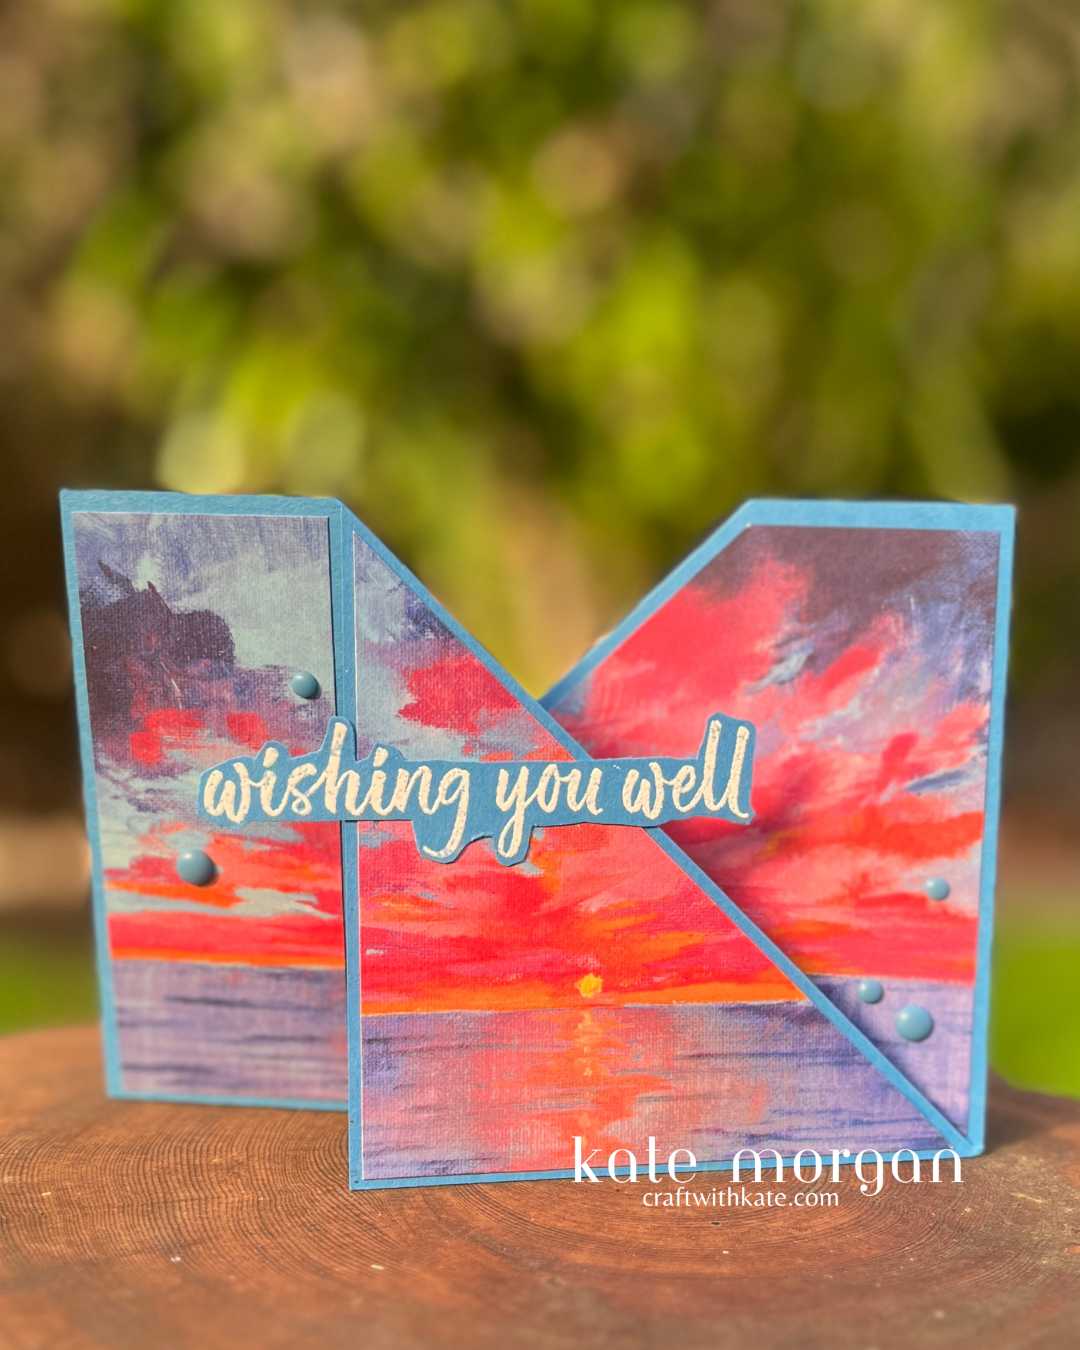
Card 2 – a Twin Peaks card with the beautiful Scenic Coast Specialty Designer Series Paper.

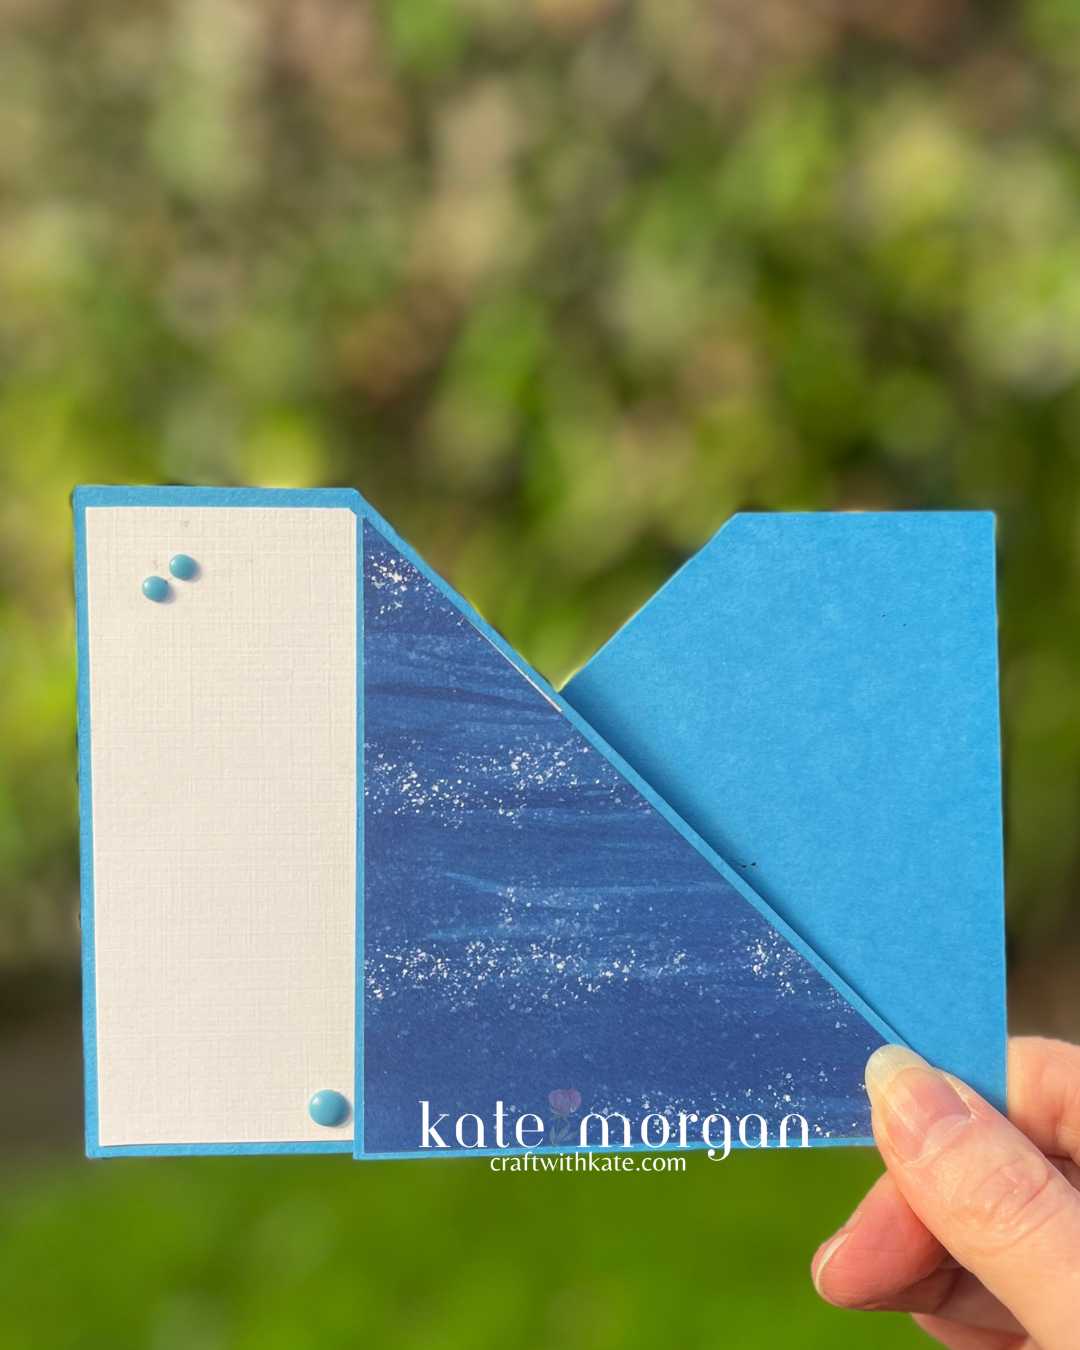
and the back has a white panel to write your message.

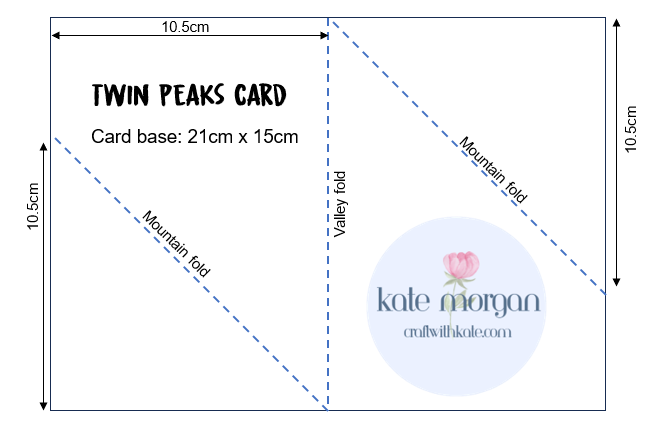
This is a simple card to create – here is the template. 

Thanks for dropping by. I hope you join us next week for Balmy Blue.

Be sure to add the Product of the Month (POM) for $9 when you add $125+ in product to your cart.


Be sure to download a PDF copy of current catalogues from my SU Catalogue Library page.

Don’t forget to Follow My Blog to receive blog updates and all the latest news and specials!