Even thought this is a Christmas suite of products, it doesn’t have to necessarily be used for Christmas cards. I am sharing a card tonight that I have made for a family member who loves flowers, especially roses and as soon as I saw this paper I knew it had to be used for her birthday card. This card is super simple and for the Beginner Stamper in mind, as it is mainly using the gorgeous Designer Paper as the focus.
Using another of the Ornate Frames Dies adds a gorgeous filigree pattern for the sentiment to be stamped in metallic ink. Wrapping some Gold ribbon around the centre over the paper joins and adding a bow in the same ribbon.
The inside of the card has some more of the same Designer Paper glued to a strip of Cherry Cobbler card and glued to some Whisper White card.
Click here to see the other ladies’ Heart of Christmas inspiration!
A full list of products can be found at the end of the post.
Yes, I flew here this morning in time for the Stampin’ Up! OnStage Local event tomorrow for demonstrators. I am so excited because my dear friend, Catherine, picked me up from the airport and has invited me to stay with her and her family for two nights 🥰 We are going to have SO MUCH FUN!!!
I’ll share more information about OnStage early next week when I get home, but for now I share the card I made for my husband’s birthday on Wednesday. Let me start by saying I adore this sweet stamp set, Birthday Goodness, however it was best to make a card rather than bake the images for him, although I know he would have loved a stack of donuts!
Look at the gorgeous shimmery glimmer of the icing. This is the Shimmery Crystal Effectsadded last for that gloriously inviting glaze!!!
The cake stand was coloured using the Wink of Stella and the Delicata Celestial Copper Ink Refill. I did this by dropping 1 small drop of ink refill onto a clear block and by swirling the Wink of Stella through it, I was able to get a lovely soft coppery shine to apply to the stand. Initially I was going to colour the entire stand, but I think just using it as a feature trim and leaving the main part white, gives it more class!, don’t you think?!
The inside is also stamped and coloured in the same colours as the front.
A full list of products can be found at the end of the post.
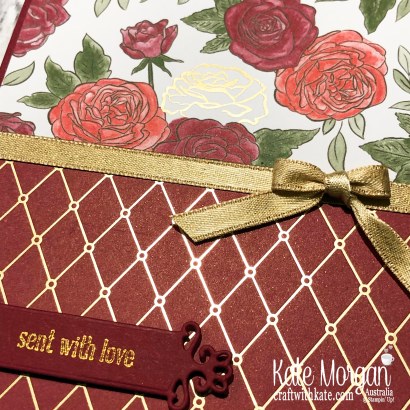
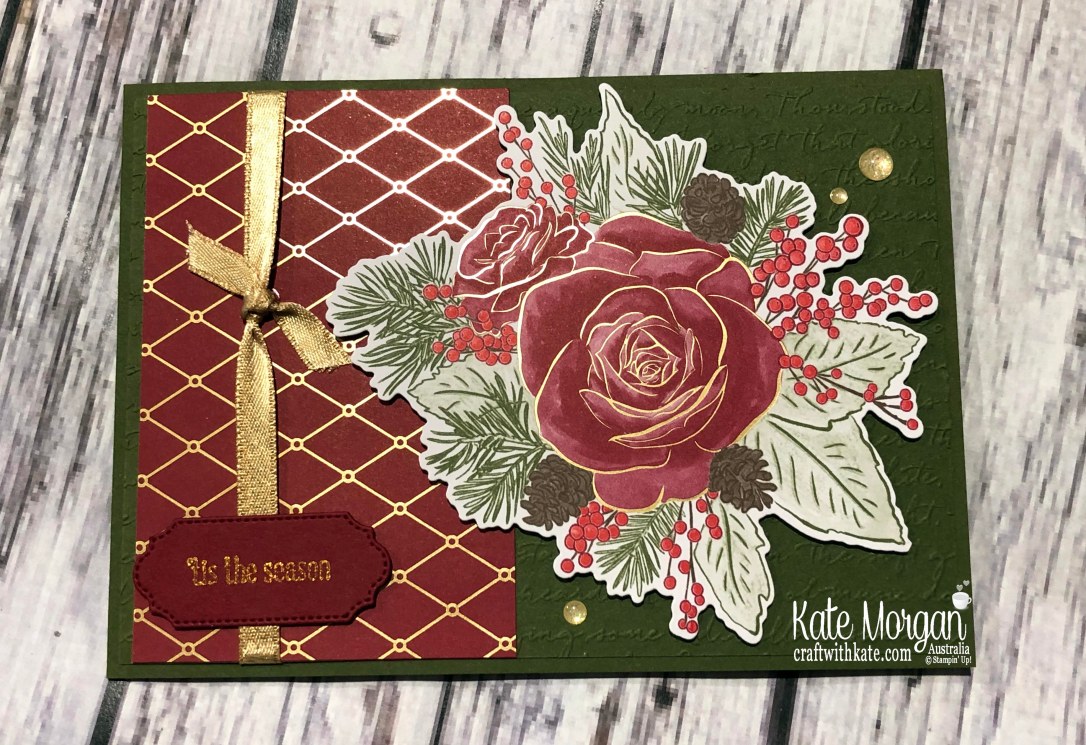
Tonight’s Heart of Christmas card is using the Christmastime is Here Suite available until the end of November. It is a really beautiful suite of products, especially if you love roses!
This image is actually die cut from one of the sheets of the Designer Paper. That certainly makes things easier, although I do enjoy colouring, but sometimes you just need to get things done in a hurry, right?!!
The card base is Mossy Meadow with another piece of card cut 5mm shorter to layer on top. This piece is embossed with the Scripty 3D Textured Impressions Embossing Folder. Glue a piece of DSP to the left and wrap the ribbon around and tie is a knot. Now glue this layer to your card.
The sentiment is stamped in metallic ink onto a frame from the Ornate Frames Dies, which you can find in the Holiday catalogue (pg53). So many sentiments fit into these dies and they are a must have addition to your craft room!
Add some Gold Glitter Enamel Dots and you have a wonderful card to send a loved one this Christmas.
Click here to see the other ladies’ Heart of Christmas inspiration!
A full list of products can be found at the end of the post.
Tonight is a copper detailed deerfrom the Annual catalogue. I’m really pleased it carried over from last Christmas, as it has been a favourite of mine. I am teaming it up tonight with the Brightly Gleaming SpecialtyDesigner paperfrom the current Holiday catalogue. Don’t you just love all those foil elements?!
Did you notice these Ornate Frames diesin the Halloween section? Here in Australia, Halloween is not as big as in the USA, and I don’t create for the occasions, but these really looked fabulous and I got them to use for sentiments. You wouldn’t believe how many different stamp sets fit into them!!!
The Delicata Celestial Copper ink looks fab on dark card as do the leafy foil elements behind the sentiment. On the inside, I simply added some more of the ribbon wrapped around a strip of Night of Navy card and adhered it all to some Very Vanilla card stock.
A full list of products can be found at the end of the post.
Have you heard about the Christmastime is Here Suite? It is available for the month of November, but only while stocks last. You can purchase all of the items with one order code (153947) or you can choose individual items!
ITEM
DESCRIPTION
PRICE
152156
Gold 1/4″ (6.4 mm) Shimmer Ribbon
$12.25
152155
Gold Glitter Enamel Dots
$14.00
152154
Christmastime is Here Specialty Designer Series Paper
$25.00
152159
Charming Rose Bracelet
$38.00
152144
Roses Dies
$52.00
152431
Christmas Rose Stamp Set
$66.00
153944
Christmas Rose Bundle
$106.00
153947
Christmastime is Here Suite Bundle (everything above)
$195.25
Today I will be sharing a Z fold card using the gorgeous 12″ x 12″ Specialty Designer Series Paper. I have fussy cut this image on the front from one of the sheets of DSP (yes, no colouring required)! I used another piece of DSP for the inside of the card, with a strip of Gold Foil.
The front panel, I stamped the sentiment in Cherry Cobbler ink before embossing it with the Tufted 3D Embossing Folder. The image was glued on and two of the Gold Glitter Enamel Dots added.
Look at the gold lines of the petals!!! It is super shiny and adds so much class to the richness of the colours in these roses.
The card fully open is just as pretty and there is plenty of room for your Christmas message.
Click here to see the other ladies’ Heart of Christmas inspiration!
A full list of products can be found at the end of the post.
Tonight’s card is a gift and card all in one; a bookmark card!
I used this particular piece of Designer Paper, so the bookmark can be used all year round and doesn’t just reflect Christmas!
Card base: 10¾” x 5¾”, score at 4¼”. Rotate 180o and score again at 2¼” then perforate this line. Insert the smaller end into the Scallop Tag Topper Punch so the edge lines up with the perforation. Trim off the excess. Then decorate with Designer Paper, stamps, punches, ribbons and trims!
A full list of products can be found at the end of the post.
The Most Wonderful Time Product Medley on page 39 in the Holiday catalogue is featured again tonight.
I cannot tell you how quick it has been to create cards with this medley. You can pretty much cut up different pieces of DSPs from the pack to different sizes and just add them to your cards as they all coordinate. I start doing this and then work out what size I want the feature piece to be. In this first card, I wanted a square and because I chose the DSP with the trees, I thought it would be perfect to stamp the smaller tree and add the reindeer.
The banner stickers make adding sentiments super fast too!
This next card I kept the DSP to one larger piece and added the feature in the centre with some ovals. The tree in the centre is a sticker and I just added some of the tinsel trim around it and a Copper Star Element on top.
The sentiment is stamped in the Golden Glitz Delicata metallic ink on Thick Whisper White card.
Click here to see the other ladies’ Heart of Christmas inspiration!
A full list of products can be found at the end of the post.
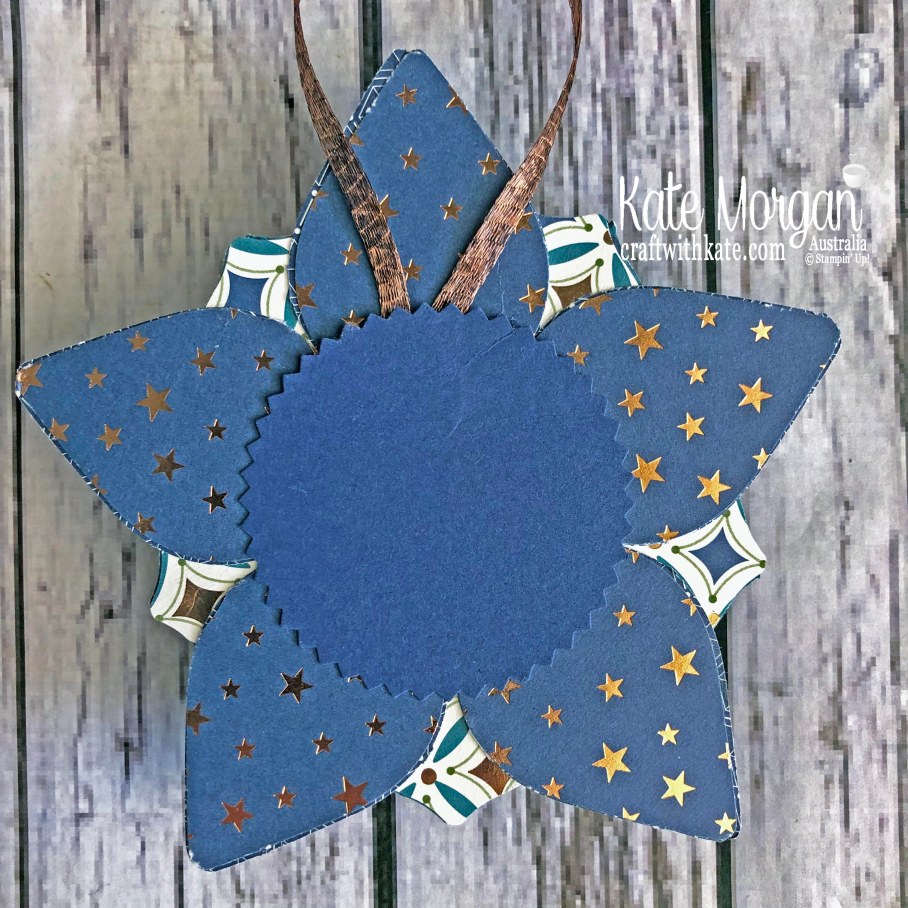
Tonight marks 2 months until Christmas and so I have begun making my Christmas Star ornament that lots of other creative people are making at the moment with the Brightly Gleaming Suite; mainly using the Gleaming Ornaments Punch Pack with the Specialty Designer Series Paper.
You need to punch 20 of the larger ornament and 20 of the smaller ornament in a different design. Score 15 of each design down the middle and glue 3 together, then glue this to one of the remaining punched pieces you haven’t scored. This allows the star to sit flat against a wall or door.
In the centre, I punched a Copper Foil Star using a retired punch and then added a Copper Star Element to the centre.
and the back looks like this with the Starburst Punch:
A full list of products can be found at the end of the post. Click here to see how it’s put together.
Welcome to another Art With Heart Blog Hop. This month we are featuring Stampin’ Up’s! versatile range of Embossing Folders. There are new Embossing Folders available in every Stampin’ Up! catalogue and they are an inexpensive way of adding WOW to your projects. Currently there are 24 different Embossing Folders in the range.
Tonight we plan on showing you lots of ideas on how to use these folders.
If you’re already hopping, then you just came to me from the talented, Sujatha Harding. If you’re just joining, great! Use the “next” button at the end of my post to hop all the way around. Blog Hops are full circles, so you can start hopping here and then at the end of each post there is a link to the next one. There is also a list of participants at the end in case of any broken links.
Now let’s get started!
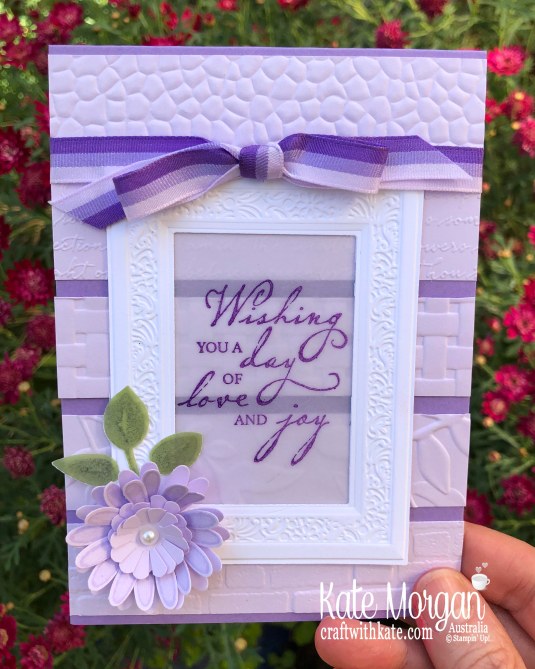
My first project uses many of the Stampin’ Up! Dynamic Textured Embossing Folders all in the one card. By just using 5 panels embossed with a different folder, gives loads of interest and texture to this card. On top of that, I have added the Heirloom Frames & 3D Embossing Folder!
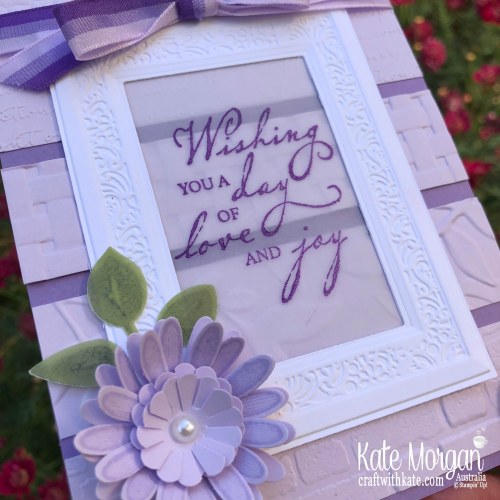
The Purple Posy ink is now in stock and it is such a glorious colour. I have stamped the daisy four times with the ink before punching with the Medium Daisy Punch. Then I punched a couple of scallop circles from a retired punch and cut into each of the scallops to create petals, using fingers to create the curl. I added a pearl to the centre and a velum leaf underneath. The sentiment (Woven Heirloom stamp) is stamped onto White Vellum and glued behind the frame.
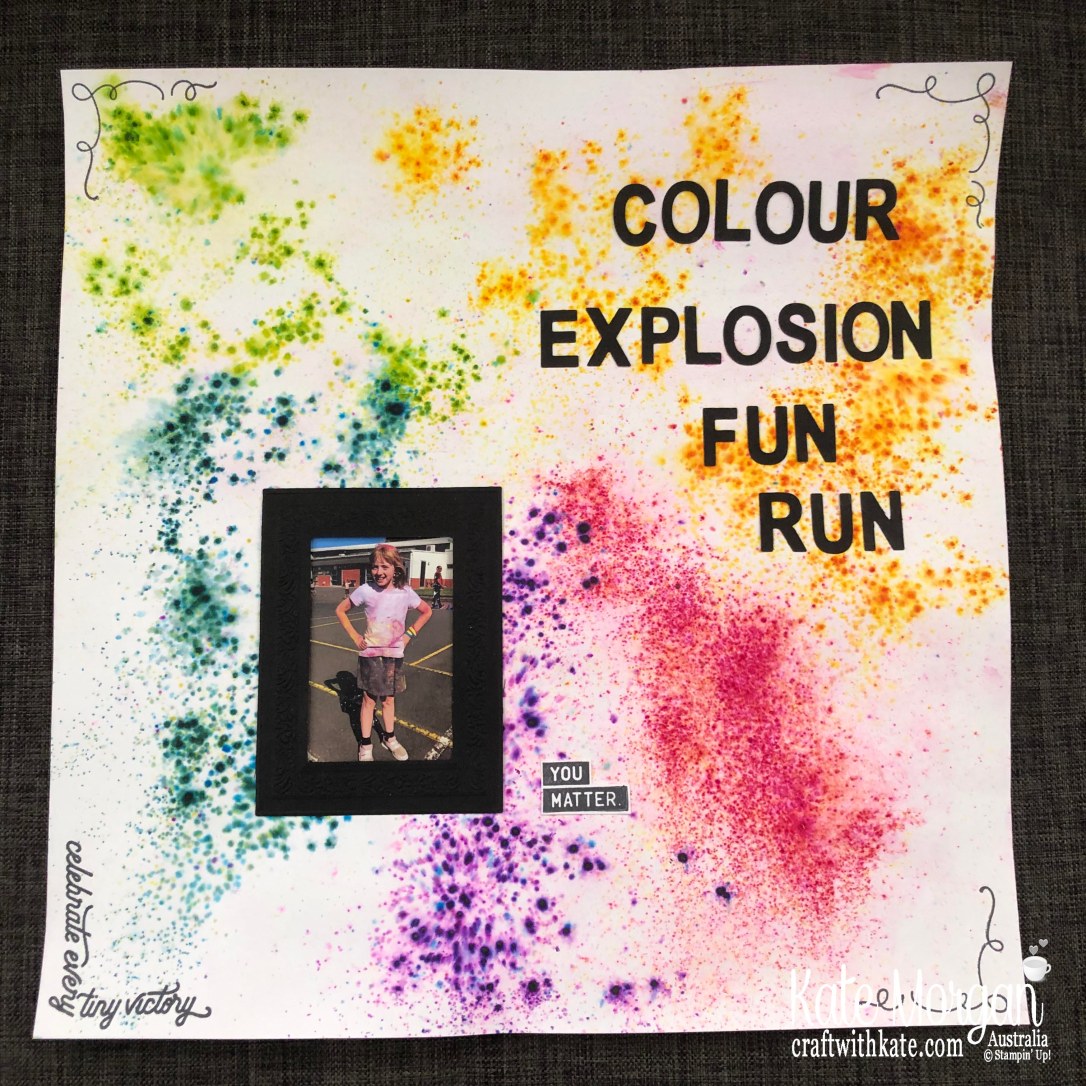
My next project is a 12″ x 12″ scrapbook page using the Pigment Sprinkles; the perfect product for this particular page. My 10 year old had so much fun at the recent Colour Explosion Fun Run held at her school. Look at that smile, it says it all!
The pigment Sprinkles can be quite messy to use and you need the smallest amount to create vibrant backgrounds. I sprinkled all the different colours onto the page and then used the Spritzer to add water and spread the colour.
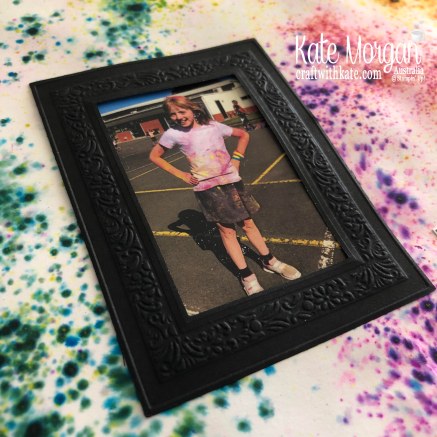
Here is a close up of the embossed frame. I just had to create a page for her to remember the day in future years to look back on and have fond memories.
For best results when using the Stampin’ Up! 3D Embossing Folders; use the 3D Embossing Folder Plate; it adds a little more oomph to your die sandwich to make those 3D designs pop.
3D embossing Folder Plate $17.50 (149658)
A list of products can be found at the end of this post.
Now it’s time to follow the blog hop to our next participant, the lovely, Rachel Woollard.
If you find a broken link or have come to this blog hop from a different entry point, you can view the participants below.
I am using the Brightly Gleaming DSP from the Holiday catalogue again for tonight’s projects. I have simply punched the smaller ornament 6 times from different papers in this pack and glued them to the card in a tree shape. Even the sentiment was perfect for the trunk. The background is embossed with the Scripty Embossing Folder and I used the Delicata Copper Metallic ink pad around the edges and placed a copper starelement on top of the tree. I also added some of the Noble Peacock Rhinestones for extra sparkle.
My next project also uses the Brightly Gleaming DSP, but this time a Christmas decoration to hang on your Christmas Tree! It is simply made using the 2″ circle punch with 12 circles folded in half and glued together. The Copper Trim coordinates perfectly and is 12″ folded in half with a knot at one end. Place it through the centre before gluing the final circles together. This one looks a little battered as my cat decided she wanted to tap it off my craft table and chase it around the room 😯
Click here to see the other ladies’ Heart of Christmas inspiration!
Don’t miss this stamp sale, make sure you get your order in before midnight tonight. There are some awesome sets to choose from! Click here to see what’s available in my online store.
A full list of products can be found at the end of the post.


 Shimmer Ribbon")


")
")


 Classic Weave Ribbon")


")


")
")


 Reversible Ribbon")


")


 Circle Punch")

