One week to Christmas, where has this year gone? It has flown by so quickly and the kids finish school on Friday, so they will be around to help out prior to Christmas Day celebrations and my brother-in-laws home. What are you doing for Christmas?
Tonight I have a sneak peek of the Stamp set we received at OnStage last month, Timeless Tulips. It also has a coordinating punch, so no need to fussy cut the tulips, yay!
This is a Pear Pizzazz card base and then stamping onto Whisper White with Pear Pizzazz and Rococo Rose ink. Stamp 3 extra large tulips and 2 leaves and punch out. Add these with dimensionals once the card is put together. Linen thread is wrapped around twice and tied in a bow. The sentiment is also from the same set and added with mini dimensionals.
I hope you are ready for Christmas, then early next year, Stampin’ Up!s Sale-a-bration begins!
We are back for another week of Heart of Christmas and again I am sharing the Christmastime is Here Suite.
This Christmas Rose stamp set (#153944) and coordinating Roses dies(#152431) are super pretty and as you will see, when coloured with Stampin’ Blends Markers, you can create some amazing Christmas projects. You can also purchase the Stamp set and dies as a bundle saving 10% (#153947), but they are only available while stocks last.
I really love the richness of this card and the pop of colour of the featured rose.
Coloured with Stampin’ Blends Markers; Cherry Cobbler, Poppy Parade, Old Olive, Mossy Meadow, Crumb Cake and Colour Lifter. The berries also have some Glittery Crystal Effects for added shine.
The inside is decorated too with some more DSP, Gold Foil and the sentiment (Merry Christmas to All) is stamped in Poppy Parade ink.
Click here to see the other ladies’ Heart of Christmas inspiration!
A full list of products can be found at the end of the post.
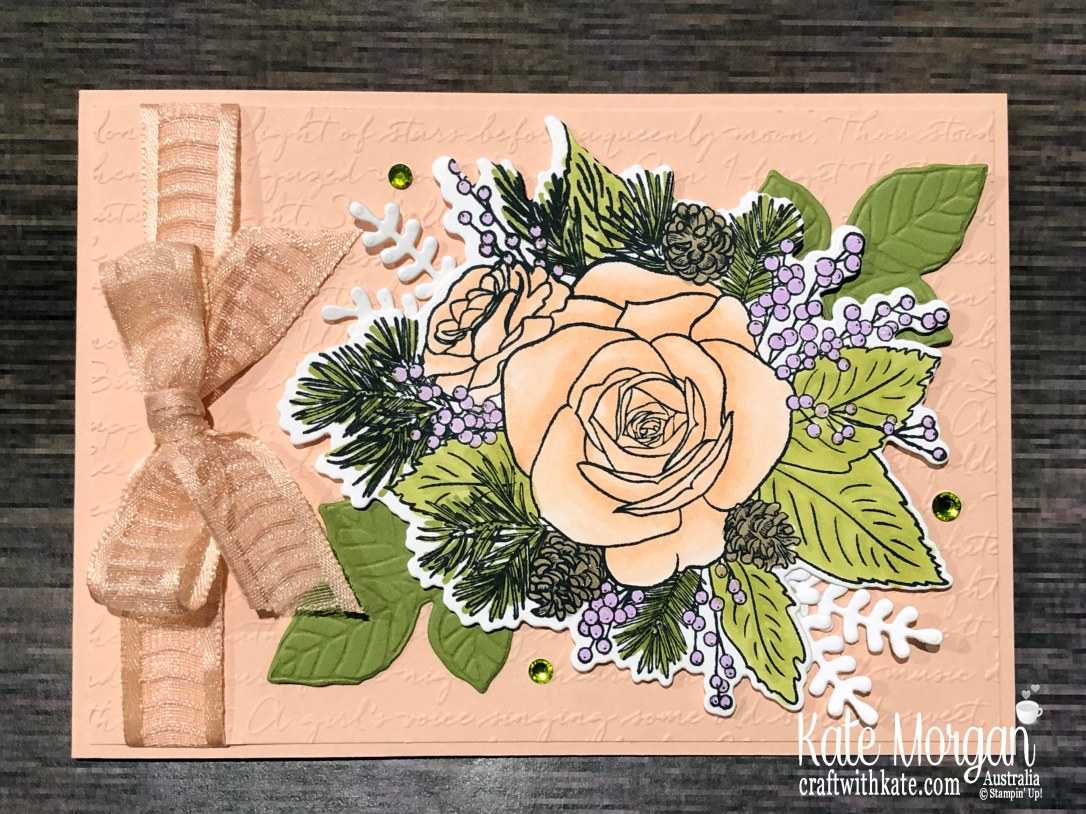
Tonight I am sharing the Christmastime is Here Suite, only available while stocks last, so make sure you add it to your cart now if you are thinking of purchasing it. My card tonight is not so Chrismassy though and I wanted to show you that it can be used for other occasions!
This Christmas Rose stamp set (#153944) and coordinating Roses dies(#152431) are available as a bundle saving 10% (#153947) or individually.
I deliberately haven’t added a sentiment to this card, as I was experimenting with different colours. I used to love the Just Joey roses at my mums house as they were this very soft peachy pink colour. I have used Petal Pink for mine.
Can you see all the glitter on the roses? It’s a little hard to see in the photo, but when I was adding the Wink of Stella to the purple berries and the pine cones, my Wink of Stella got flowing a bit too quicklyand I ended up with glitter on my fingers. So I just rubbed my fingers over the rose petals! I love the soft effect it adds.
A full list of products can be found at the end of the post.
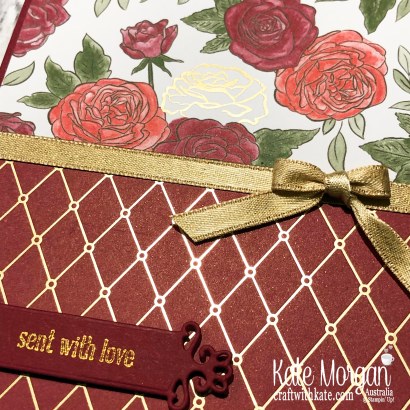
Even thought this is a Christmas suite of products, it doesn’t have to necessarily be used for Christmas cards. I am sharing a card tonight that I have made for a family member who loves flowers, especially roses and as soon as I saw this paper I knew it had to be used for her birthday card. This card is super simple and for the Beginner Stamper in mind, as it is mainly using the gorgeous Designer Paper as the focus.
Using another of the Ornate Frames Dies adds a gorgeous filigree pattern for the sentiment to be stamped in metallic ink. Wrapping some Gold ribbon around the centre over the paper joins and adding a bow in the same ribbon.
The inside of the card has some more of the same Designer Paper glued to a strip of Cherry Cobbler card and glued to some Whisper White card.
Click here to see the other ladies’ Heart of Christmas inspiration!
A full list of products can be found at the end of the post.
Have you heard about the Christmastime is Here Suite? It is available for the month of November, but only while stocks last. You can purchase all of the items with one order code (153947) or you can choose individual items!
ITEM
DESCRIPTION
PRICE
152156
Gold 1/4″ (6.4 mm) Shimmer Ribbon
$12.25
152155
Gold Glitter Enamel Dots
$14.00
152154
Christmastime is Here Specialty Designer Series Paper
$25.00
152159
Charming Rose Bracelet
$38.00
152144
Roses Dies
$52.00
152431
Christmas Rose Stamp Set
$66.00
153944
Christmas Rose Bundle
$106.00
153947
Christmastime is Here Suite Bundle (everything above)
$195.25
Today I will be sharing a Z fold card using the gorgeous 12″ x 12″ Specialty Designer Series Paper. I have fussy cut this image on the front from one of the sheets of DSP (yes, no colouring required)! I used another piece of DSP for the inside of the card, with a strip of Gold Foil.
The front panel, I stamped the sentiment in Cherry Cobbler ink before embossing it with the Tufted 3D Embossing Folder. The image was glued on and two of the Gold Glitter Enamel Dots added.
Look at the gold lines of the petals!!! It is super shiny and adds so much class to the richness of the colours in these roses.
The card fully open is just as pretty and there is plenty of room for your Christmas message.
Click here to see the other ladies’ Heart of Christmas inspiration!
A full list of products can be found at the end of the post.
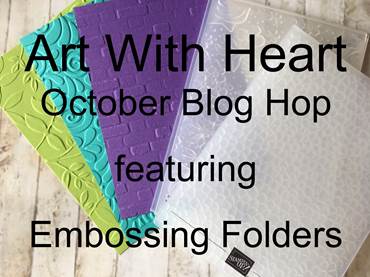
Welcome to another Art With Heart Blog Hop. This month we are featuring Stampin’ Up’s! versatile range of Embossing Folders. There are new Embossing Folders available in every Stampin’ Up! catalogue and they are an inexpensive way of adding WOW to your projects. Currently there are 24 different Embossing Folders in the range.
Tonight we plan on showing you lots of ideas on how to use these folders.
If you’re already hopping, then you just came to me from the talented, Sujatha Harding. If you’re just joining, great! Use the “next” button at the end of my post to hop all the way around. Blog Hops are full circles, so you can start hopping here and then at the end of each post there is a link to the next one. There is also a list of participants at the end in case of any broken links.
Now let’s get started!
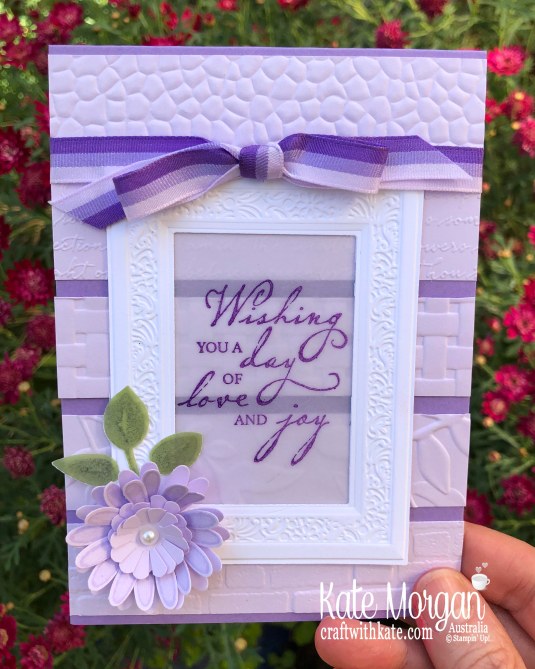
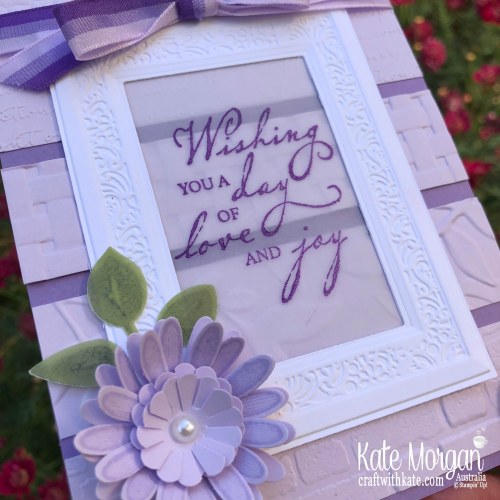
My first project uses many of the Stampin’ Up! Dynamic Textured Embossing Folders all in the one card. By just using 5 panels embossed with a different folder, gives loads of interest and texture to this card. On top of that, I have added the Heirloom Frames & 3D Embossing Folder!
The Purple Posy ink is now in stock and it is such a glorious colour. I have stamped the daisy four times with the ink before punching with the Medium Daisy Punch. Then I punched a couple of scallop circles from a retired punch and cut into each of the scallops to create petals, using fingers to create the curl. I added a pearl to the centre and a velum leaf underneath. The sentiment (Woven Heirloom stamp) is stamped onto White Vellum and glued behind the frame.
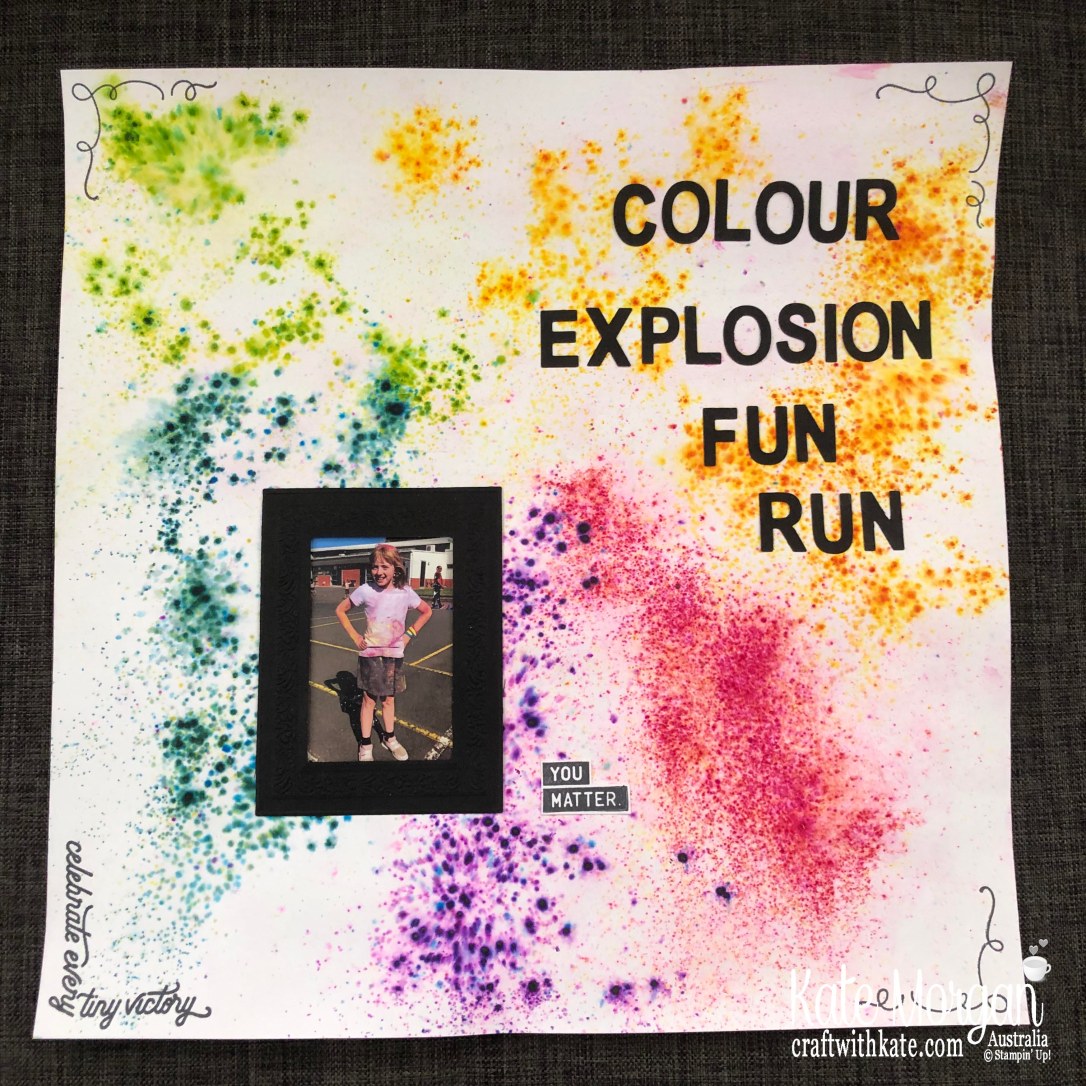
My next project is a 12″ x 12″ scrapbook page using the Pigment Sprinkles; the perfect product for this particular page. My 10 year old had so much fun at the recent Colour Explosion Fun Run held at her school. Look at that smile, it says it all!
The pigment Sprinkles can be quite messy to use and you need the smallest amount to create vibrant backgrounds. I sprinkled all the different colours onto the page and then used the Spritzer to add water and spread the colour.
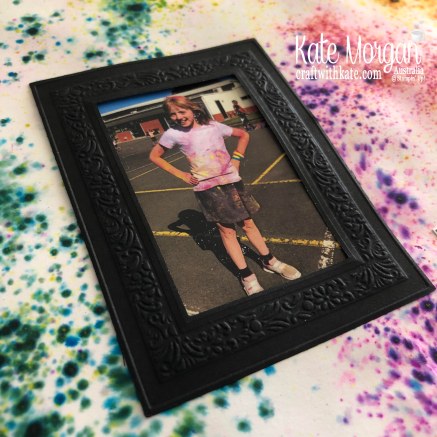
Here is a close up of the embossed frame. I just had to create a page for her to remember the day in future years to look back on and have fond memories.
For best results when using the Stampin’ Up! 3D Embossing Folders; use the 3D Embossing Folder Plate; it adds a little more oomph to your die sandwich to make those 3D designs pop.
3D embossing Folder Plate $17.50 (149658)
A list of products can be found at the end of this post.
Now it’s time to follow the blog hop to our next participant, the lovely, Rachel Woollard.
If you find a broken link or have come to this blog hop from a different entry point, you can view the participants below.
Tonight the Art with Heart team are sharing amazing projects featuring Stampin’ Up! Designer Series Paper, most of which is in the current promotions where you can buy 3 packs of Designer Series Paper and receive 1 pack for free! Only available until 30 September!
For more information about the promotion, contact any of the ladies on the blog hop and we will be happy to help you.
If you’re already hopping, then you just came to me from the talented, Sharon Davern. If you’re just joining, great! Use the “next” button at the end of my post to hop all the way around. Blog Hops are full circles, so you can start hopping here and then at the end of each post there is a link to the next one. There is also a list of participants at the end in case of any broken links.
Now let’s get started!
Project #1 This Woven Threads DSP is just stunning and features the new In Colours. I have chosen the piece with Seaside Spray and Terracotta Tile. By punching the pieces of DSP and gluing them down with a small gap between them, creates this wonderful effect. The ribbon and the Ornate Frames Dies are from the Holiday catalogue and coordinate perfectly. These dies are part of the Halloween suite, however I love them on their own with other stamped sentiments.
Project #2 The Perennial Essence DSP is stunning and reflects Monet’s artworks. Having studied art at school, this was the first DSP added to my list. The Floral Essence Bundle coordinates with it and I added the flower to the bottom corner, so the DSP is the showcase.
Here is a closer look at the Delicata Golden Glitz inkpad on the vellum. I wasn’t sure how well it would dry and I was impatient, so I added clear embossing powder and heat set it. I was amazed that the glimmer still showed through so well!
Project #3 This card is a CASE (Copy & Share Everything) from a card on page 132 of the Annual Catalogue, although I have changed up lots of the products. The See a Silhouette DSP is so bold and bright and I found this pattern very overpowering, but by cutting the images out, you produce something wonderful! I adore these Heirloom 3D Frames too for the embossed background.
A full list of products can be found at the end of this post.
As you can see there are so many wonderful DSP packs in this Buy 3 Get 1 Free special. I have shown you 3 of them! Hurry, the special ends on 30 September 2019!
A full list of products can be found at the end of this post.
Now it’s time to follow the blog hop to our next participant, my dear friend and Sydney team member, Catherine Proctor.
If you find a broken link or have come to this blog hop from a different entry point, you can view the participants below.
Tonight I have a collage scene using the fox image from the Wildly Happy stamp set. I have also used the Pigment Sprinkles on the Fluid 100 Water colour paper to create that textured background of the grass. Simply wet the paper with an AquaPainter and carefully sprinkle a very small amount of colour onto the paper. You will see it spread instantly and such vibrant colour. I also added a little water in the Stampin’ Spritzer to add a little more water to spread the colour. Leave it to dry completely before cutting the hill shape with scissors. The smaller hill is Mossy Meadow card, cut with the Layering Oval framelits and embossed with the Suble Dynamic Embossing Folder for extra texture.
The tree is cut using the Sweet Silhouettes dies in Early Espresso card. I added this with mini dimensionals to add some height above the foxes.
The foxes are coloured using Stampin’ Blends markers and fussy cut before adding them to the card. I love how they are curled up resting under the tree!
A full list of products can be found at the end of the post.
When I started this card, I had the White card embossed with the ScriptyEmbossing Folder and the Tasteful backgrounds dies cut in Copper Foil and glued to the centre, but then I was stuck for inspiration on how to continue and finish this card.
Anyway, after a few weeks on the sidelines, it finally came to me like a light bulb moment, so to speak! I wanted to keep it delicate and so added the Petal Pink card base and then the oval Heirloom 3D Embossing folder and die to frame the copper picture.
I also purchased the Ornate Frames Dies from the Holiday catalogue in my pre-order, so I got those out and the Celestial Copper ink pad and stamped Happy Birthday, because we all need plenty of those cards! This new metallic ink pad dries really well and won’t smudge if left to dry. You can use the Heat Tool to dry it quicker, but it is so much better than the old Metallic Encore ink pads we used to have. I will have to place another order to add the Silver and Gold ones to my stash now I know how good they are!
I tied a bow with some copper trim and added it to the centre with a glue dot. So in the end, I was very happy with how this turned out. What do you think?
A full list of products can be found at the end of the post.
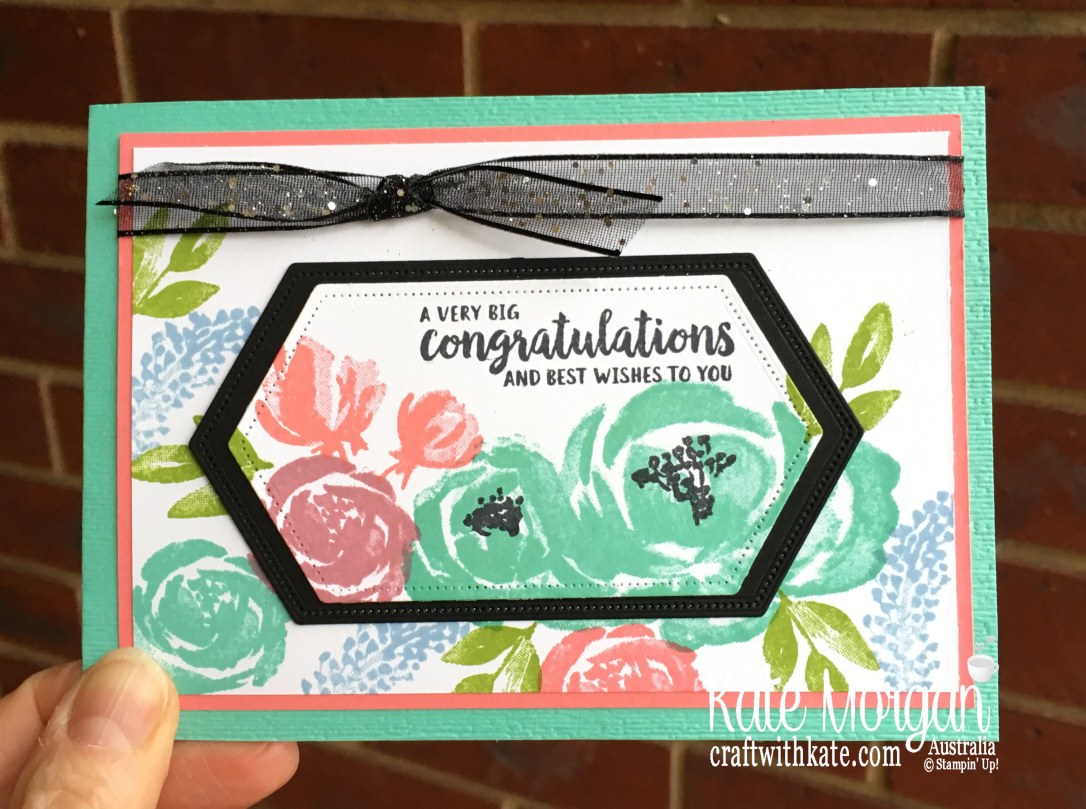
Tonight I have a card that I cased from the Creativity Cave. I just loved the bright colours with the splash of black!
This stamp set, Beautiful Friendship, would have to be one of my favourites from the Annual catalogue this year. The Subtle 3D embossing folder would have to be my favourite of all the embossing folders too.
This stamp set has 13 photopolymer stamps and it’s only $38.00… such amazing value. Check out those perfect sentiments and the font is gorgeous.
00Beautiful Friendship Photopolymer Stamp Set #149252 Price: $38.00
Have you purchased this set yet? Why not? You won’t be disappointed!
A full list of products used on my card can be found at the end of this post!


")
")


 Vellum Cardstock")


")


 Shimmer Ribbon")


")


 Glittered Organdy Ribbon")

