Birthday, Challenges, feminine, JAI, Kids Cards

Hey, Girl

Dear Crafters,

Hey, Girl #Stampin' Up!

Have you lost your mojo?

Well why not try a challenge at Just Add Ink. The challenge this week is an Sketch Challenge JAI#271.

Hey, Girl #Stampin' Up!

I stamped and coloured the image of the girl with Copic markers. The image was again stamped onto DSP and I cut out the dress and glued it onto the girls body.

Colours used: Basic Black, Real Red, Silver and Whisper White.

Hey, Girl #Stampin' Up!

Please leave a comment below, if you think my card met this sketch challenge.

Why don’t you give a challenge a go, they are so much fun. Head across to the Just Add Ink page for more inspiration and see how the designers interpreted this challenge.

All Catalogues, Clearance Rack & Weekly Deals are available online here! They are full of amazing new products and wonderful inspiration. It is a must have for anyone interested in Ink, Paper and Stamps!

Shop Online 24/7 for products

Don’t forget to Follow My Blog to receive blog updates and join my Newsletter Subscription for all the latest news and specials!

Happy Stamping,

Name Banner

Birthday, Kids Cards

Birthday Candles

Dear Crafters,

Today I share another card made using the Build a Birthday stamp set, but this time not to make a cake!!!

I have used my favourite colour, Watermelon Wonder with the Cherry on Top Designer Series Paper Stack as my colour scheme.

Cherry on Top Designer Series Paper Stack by Stampin' Up!

Each sheet is double-sided for double the creative options. Smaller size works beautifully on card fronts. * 48 sheets, 4 each of 12 double-sided designs * 6″ x 6″ * Acid free * Lignin free Coordinating colors: Bermuda Bay, Crushed Curry, Cucumber Crush, Hello Honey, Pool Party, Tip Top Taupe, Watermelon Wonder, Whisper White Price: $14.00 (#138443)

Build a Birthday Stampin' Up!

I stamped the candles in the 5 new In Colours and then cut around them in a rectangle shape. I mounted this onto some Cucumber Crush card stock.

Build a Birthday Stampin' Up!

The banners behind were made with the Cherry on Top DSP and using the new Triple Banner Punch (a must have item!!!). I used the Word Window punch to cut out the sentiment and added it with dimensionals.

This was another very quick and easy card to create using the Build a Birthday stamp set!

Build a Birthday Stampin' Up!

Please leave a comment below if you like my card.

All Catalogues, Clearance Rack & Weekly Deals are available online here! They are full of amazing new products and wonderful inspiration. It is a must have for anyone interested in Ink, Paper and Stamps!

Shop Online 24/7 for products

Don’t forget to Follow My Blog to receive blog updates and join my Newsletter Subscription for all the latest news and specials!

Happy Stamping,
Name Banner
Birthday, feminine

Who wants Birthday Cake?

Dear Crafters,

Today I share a card made using the Build a Birthday stamp set, one of my favourites in the current annual catalogue. If you haven’t purchased this stamp set, it is a must have. Not only can you make birthday cards with it, but you can turn the candles into a card for Christmas! Be sure to stay tuned in the following weeks to see one of those!!!

I have used Watermelon Wonder with the Cherry on Top Designer Washi Tape as my colour scheme.

In this pack, you get 5 yards on each roll in the coordinating colours: Bermuda Bay, Crushed Curry, Cucumber Crush, Pool Party, Tip Top Taupe, Watermelon Wonder.

Build a Birthday Stampin' Up!

I stamped the cake stand first in Tip Top Taupe ink, before adding strips of washi tape, layering them one on top of the other to create the cake layers. I stamped the flags and the sentiment last in Watermelon Wonder ink.

Build a Birthday Stampin' Up!

I added 2 small flowers (Itty Bitty Accents Punch Pack) and layered them on top of each other with a rhinestone in the centre.

This card was so quick and easy to create and at little cost using washi tape!!!

Build a Birthday Stampin' Up!

Please leave a comment below if you like my card.

All Catalogues, Clearance Rack & Weekly Deals are available online here! They are full of amazing new products and wonderful inspiration. It is a must have for anyone interested in Ink, Paper and Stamps!

Shop Online 24/7 for products

Don’t forget to Follow My Blog to receive blog updates and join my Newsletter Subscription for all the latest news and specials!

Happy Stamping,
Name Banner
Birthday, Kids Cards, Punch Art

Turtle time

Dear Crafters,

Today I share a card made using the Happy Patterns Decorative Masks, not only to create my background, but also it reminded me of the shell of a turtle. So that is what I did!

Stampin Up Turtle Happy Patterns

I have used Lost Lagoon and Mint Macaron as my colour scheme. I inked over the mask in the lighter colour first, then slightly moved the mask and inked with the darker shade.

My turtle shell is the Tree Builder punch, his legs and head are the Word Window punch.

Isn’t he just the cutest?!!!!!

Stampin Up Turtle Happy Patterns

Please leave a comment below if you like my card.

All Catalogues, Clearance Rack & Weekly Deals are available online here! They are full of amazing new products and wonderful inspiration. It is a must have for anyone interested in Ink, Paper and Stamps!

Shop Online 24/7 for products

Don’t forget to Follow My Blog to receive blog updates and join my Newsletter Subscription for all the latest news and specials!

Happy Stamping,
Name Banner
Birthday, Butterflies, feminine, Gift Ideas

Tin of Cards

Dear Crafters,

Today I share the amazing Tin of Cards with the coordinating stamp set!


This fun printed tin gives you plenty of room to store the cards that you make in this kit, plus room for more. Kit includes enough card bases and accents for 16 cards, 4 each of 4 designs. Complete the kit using the Tin of Cards Stamp Set (item #138946). Stamps, ink, and adhesive sold separately. Instructions included.
* 16 card bases and envelopes
* 1 printed tin box with lid, 6-3/4″ x 4″ x 5-3/8″
* 10 sheets of 4-1/4″ x 6-1/4″ Designer Series Paper, 2 ea. of 5 designs
* 4 die-cut Designer Series Paper strips
* Gold Glimmer Paper hearts
* Die-cut accents
* Printed acetate sheet
* Gold foil strips
* Metallic gold thread
* 1 sheet clear star epoxy stickers
* Gold epoxy hearts
* 4 wood die cuts
* 9 file tab dividers
* Coordinates with the Tin of Cards Stamp Set (item 138946)

Coordinating colors: Bermuda Bay, Calypso Coral, Crushed Curry, Mint Macaron, Wild Wasabi, White

Let’s get started!

I began with stamping each of the dividers in Jet Black Stazon.

Tin of Cards

Then I stamped the cute little border around each of the dividers with Mint Macaron ink to match the colour of the tin!

Tin of Cards

Now I have the dividers sorted, time to get making the 16 cards, 45 of each design.

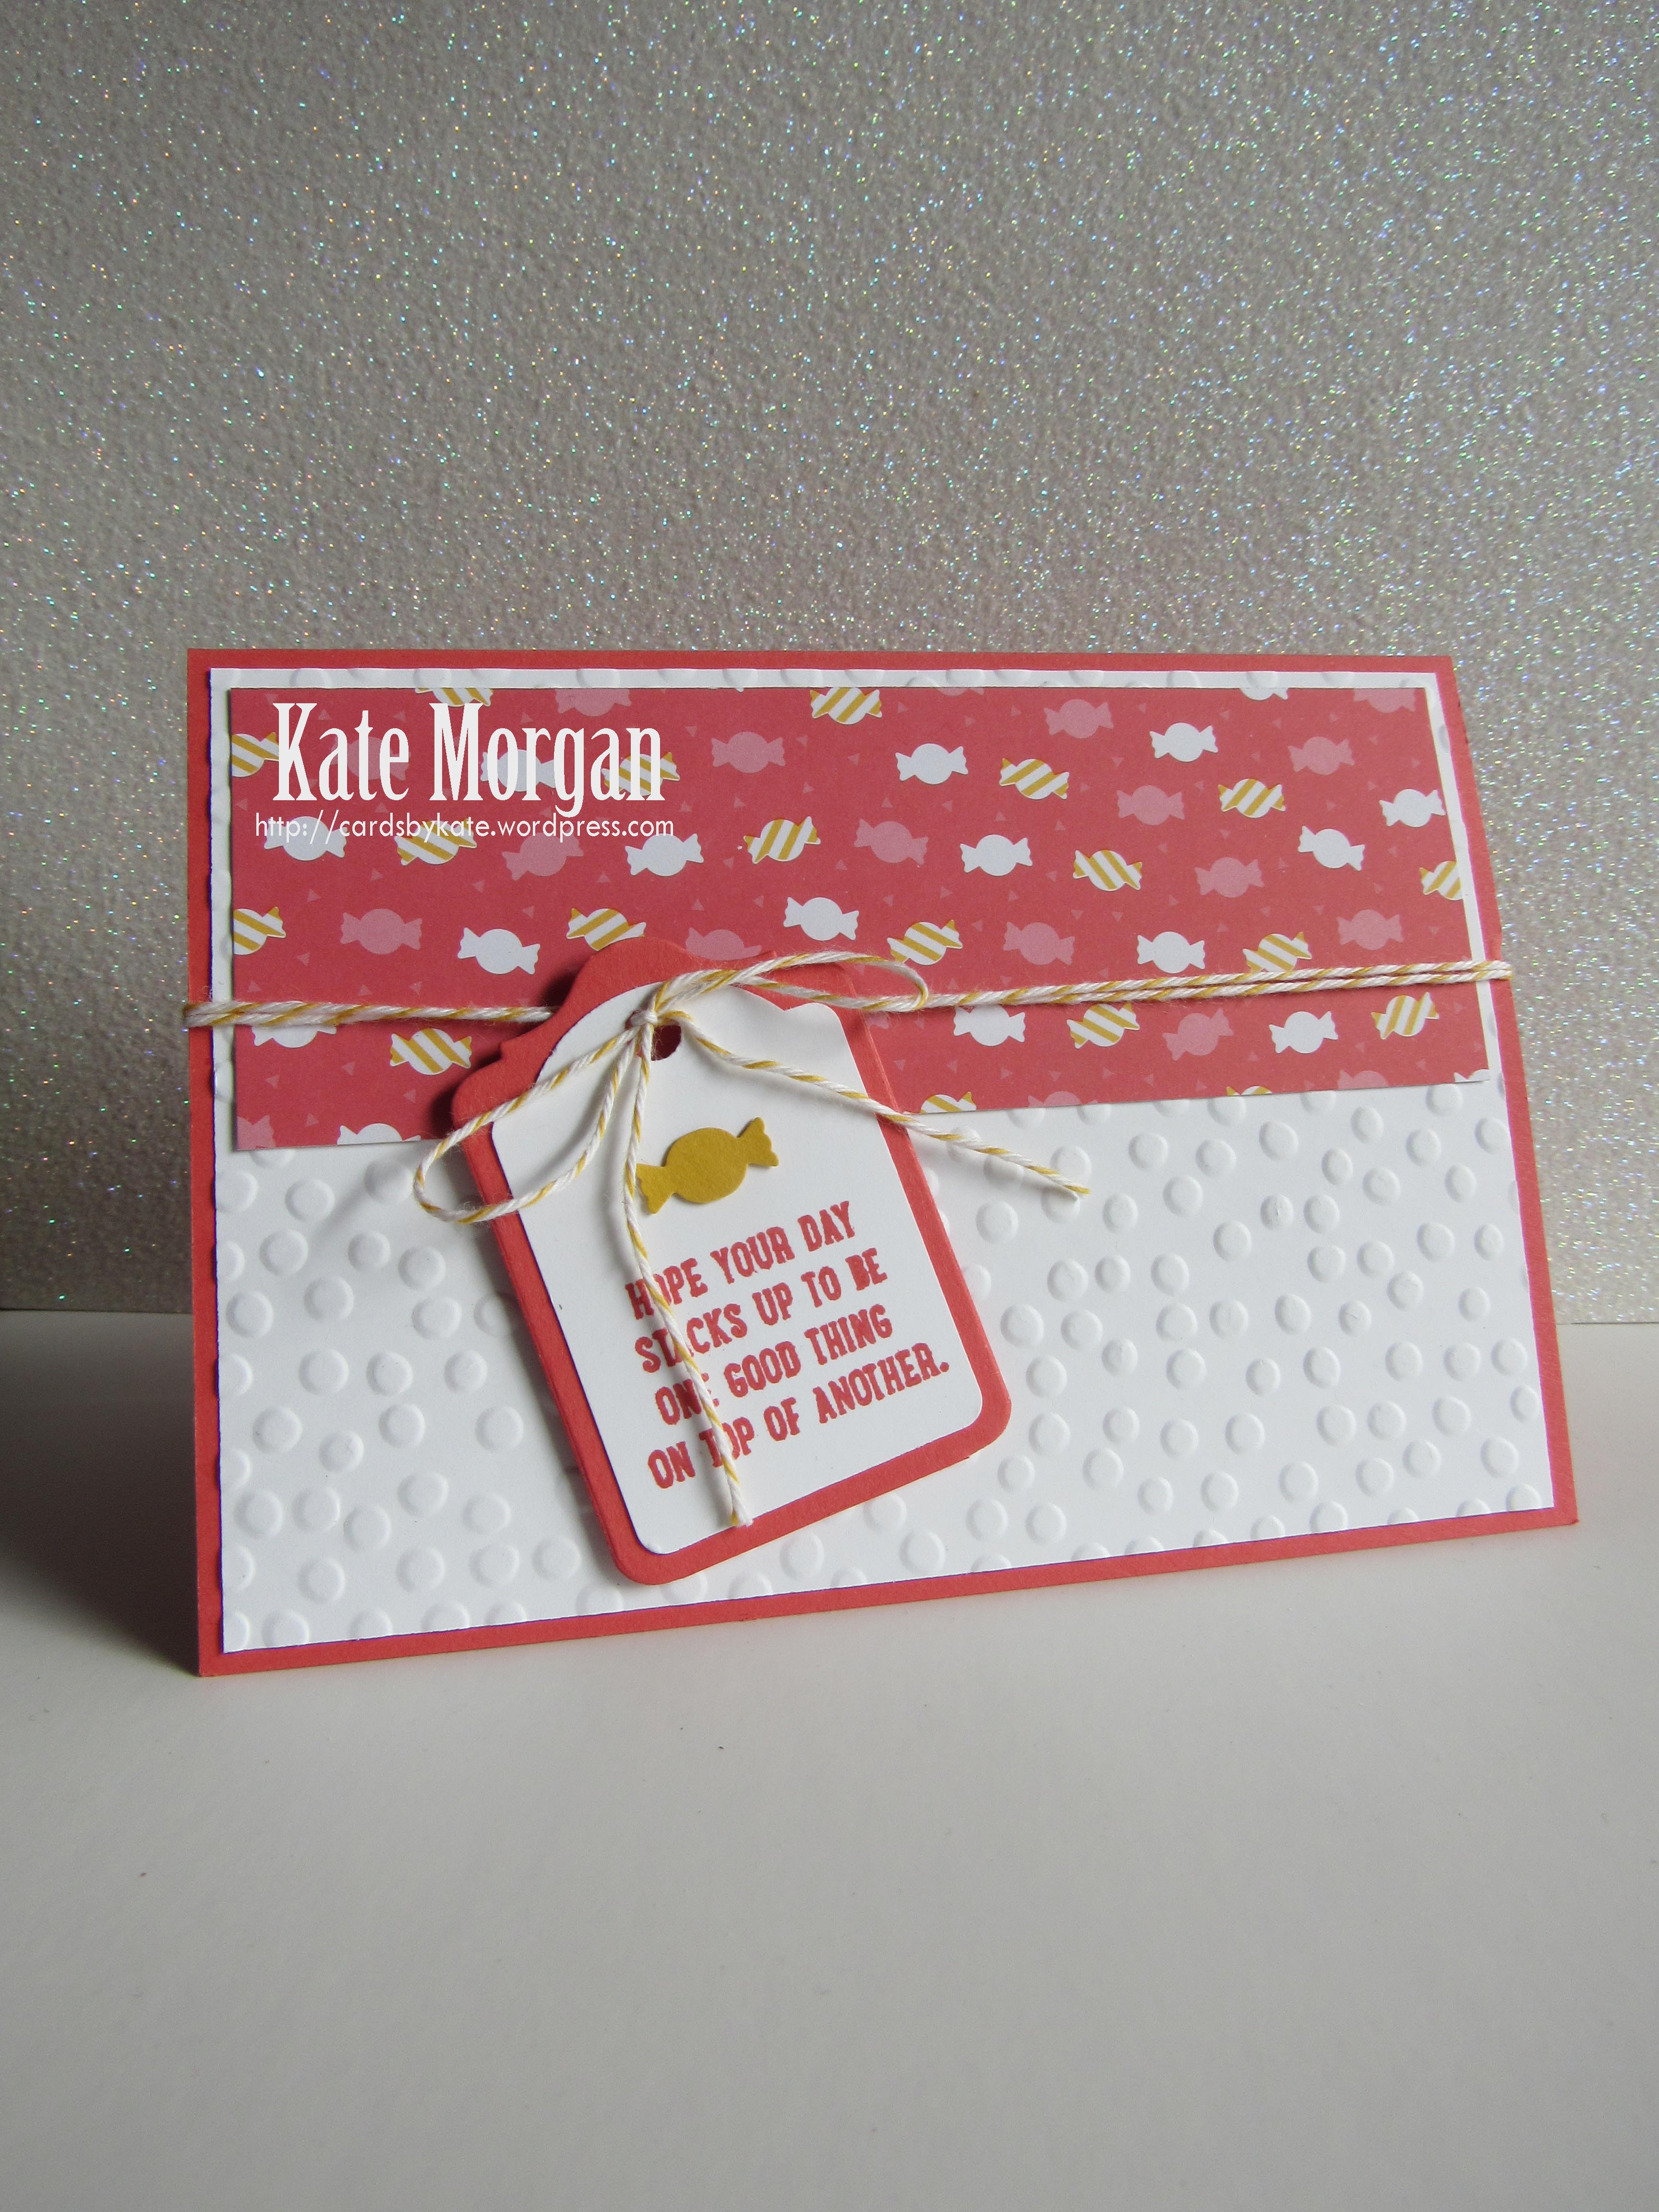
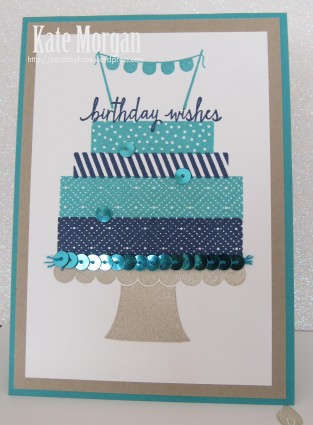
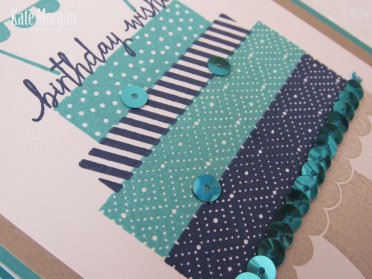
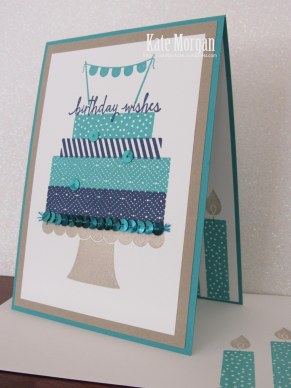
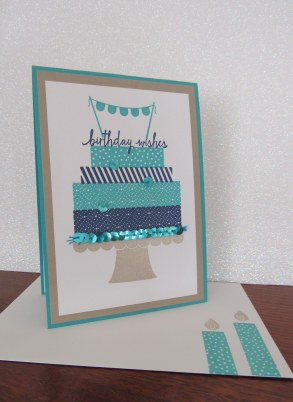
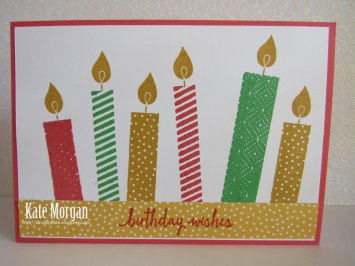
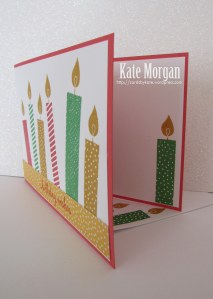
This first card is all pre-stamped except for the banner which I stamped with Mint Macaron ink.

Tin of Cards

I cannot tell you just how quick and easy these cards are to make and the instructions are very easy to follow.

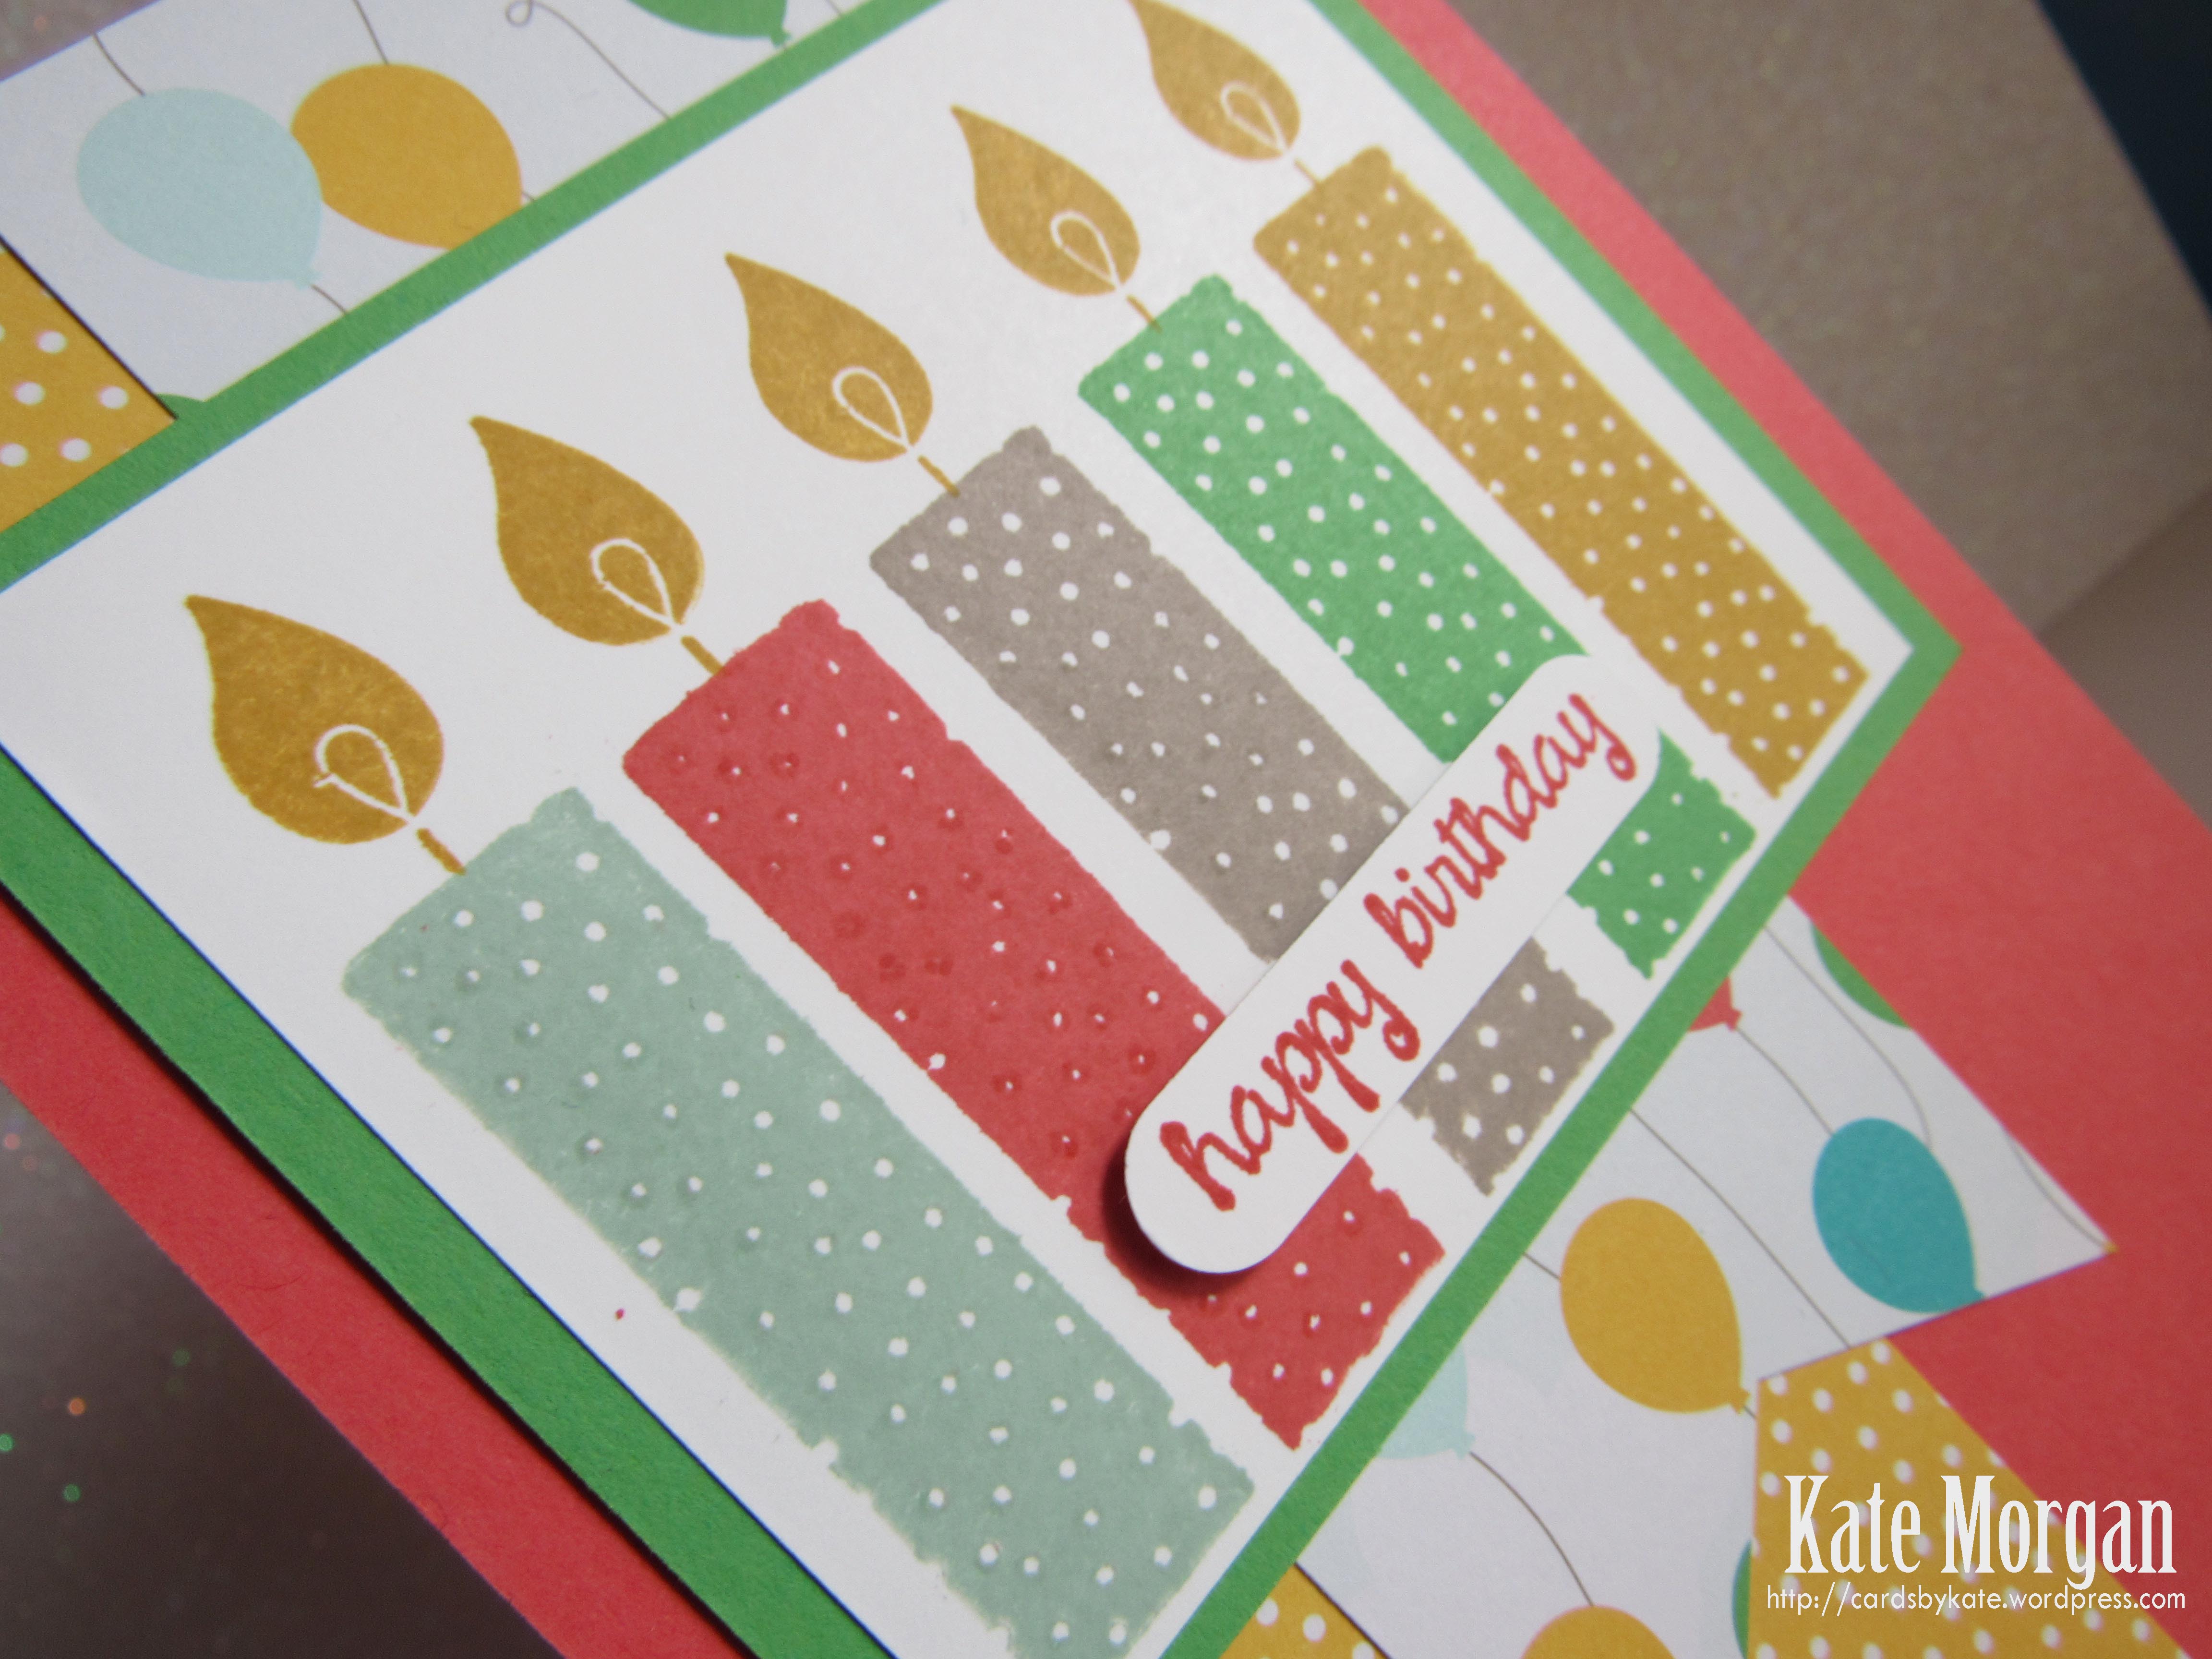
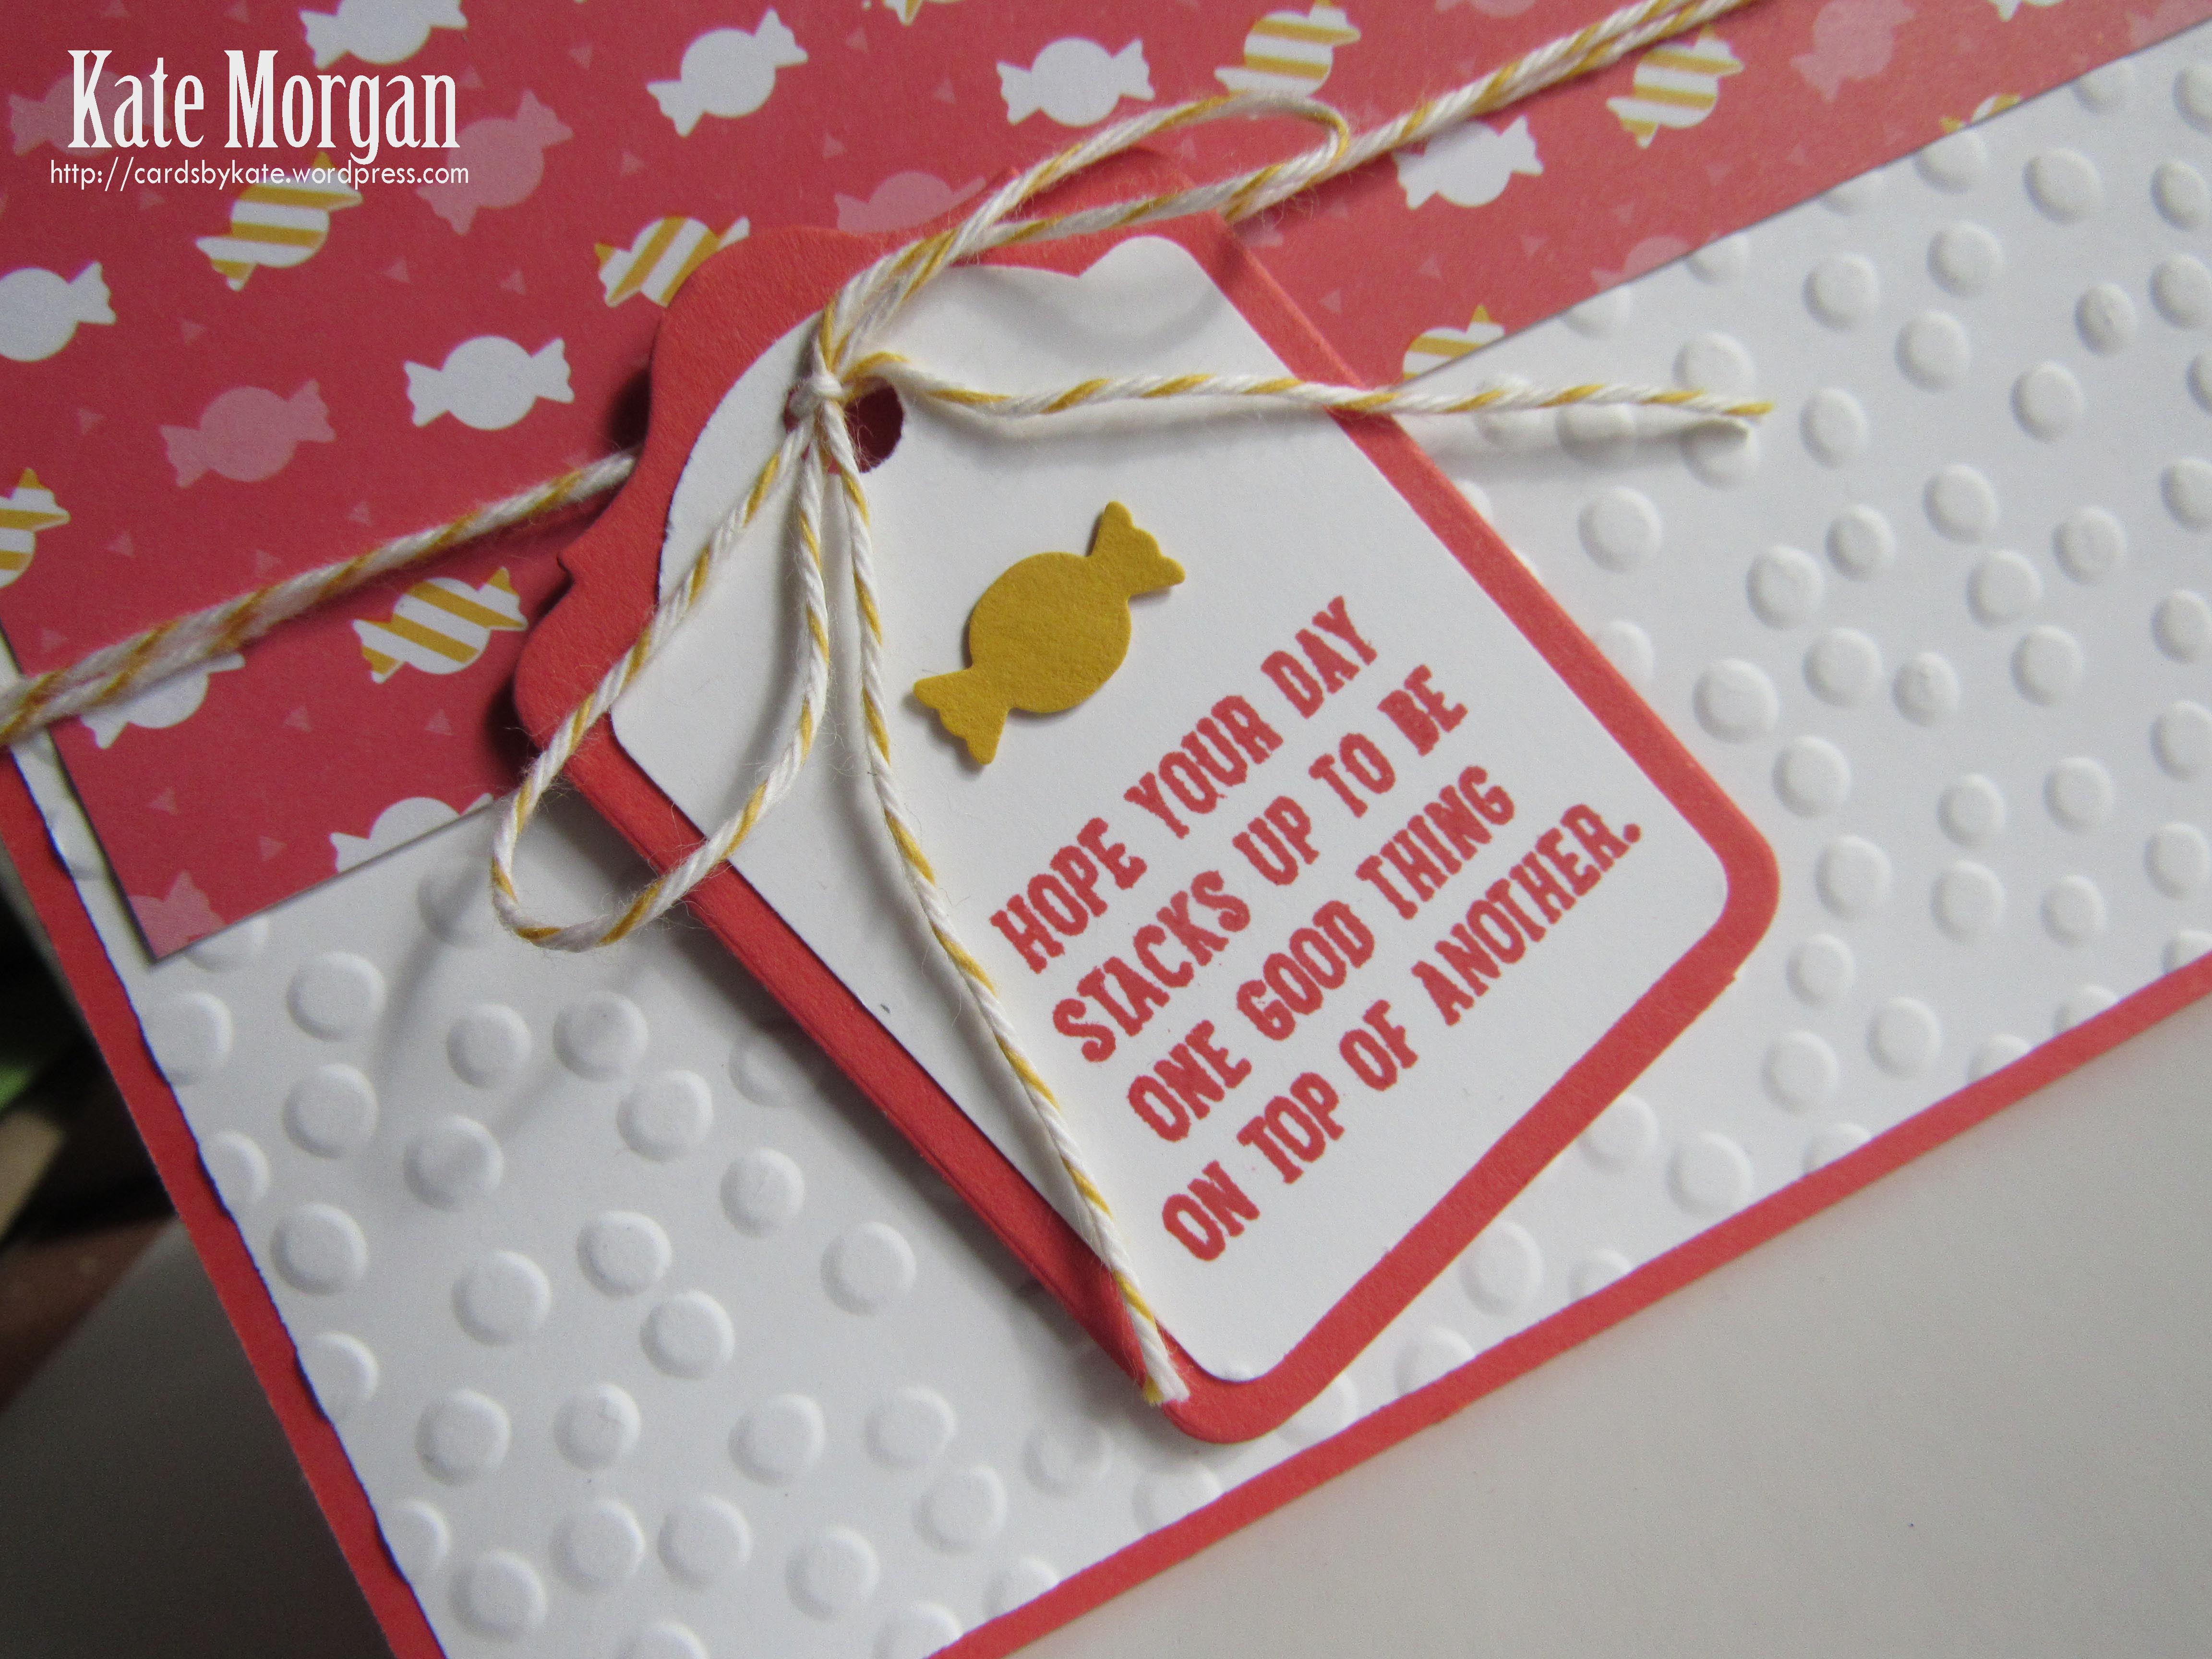
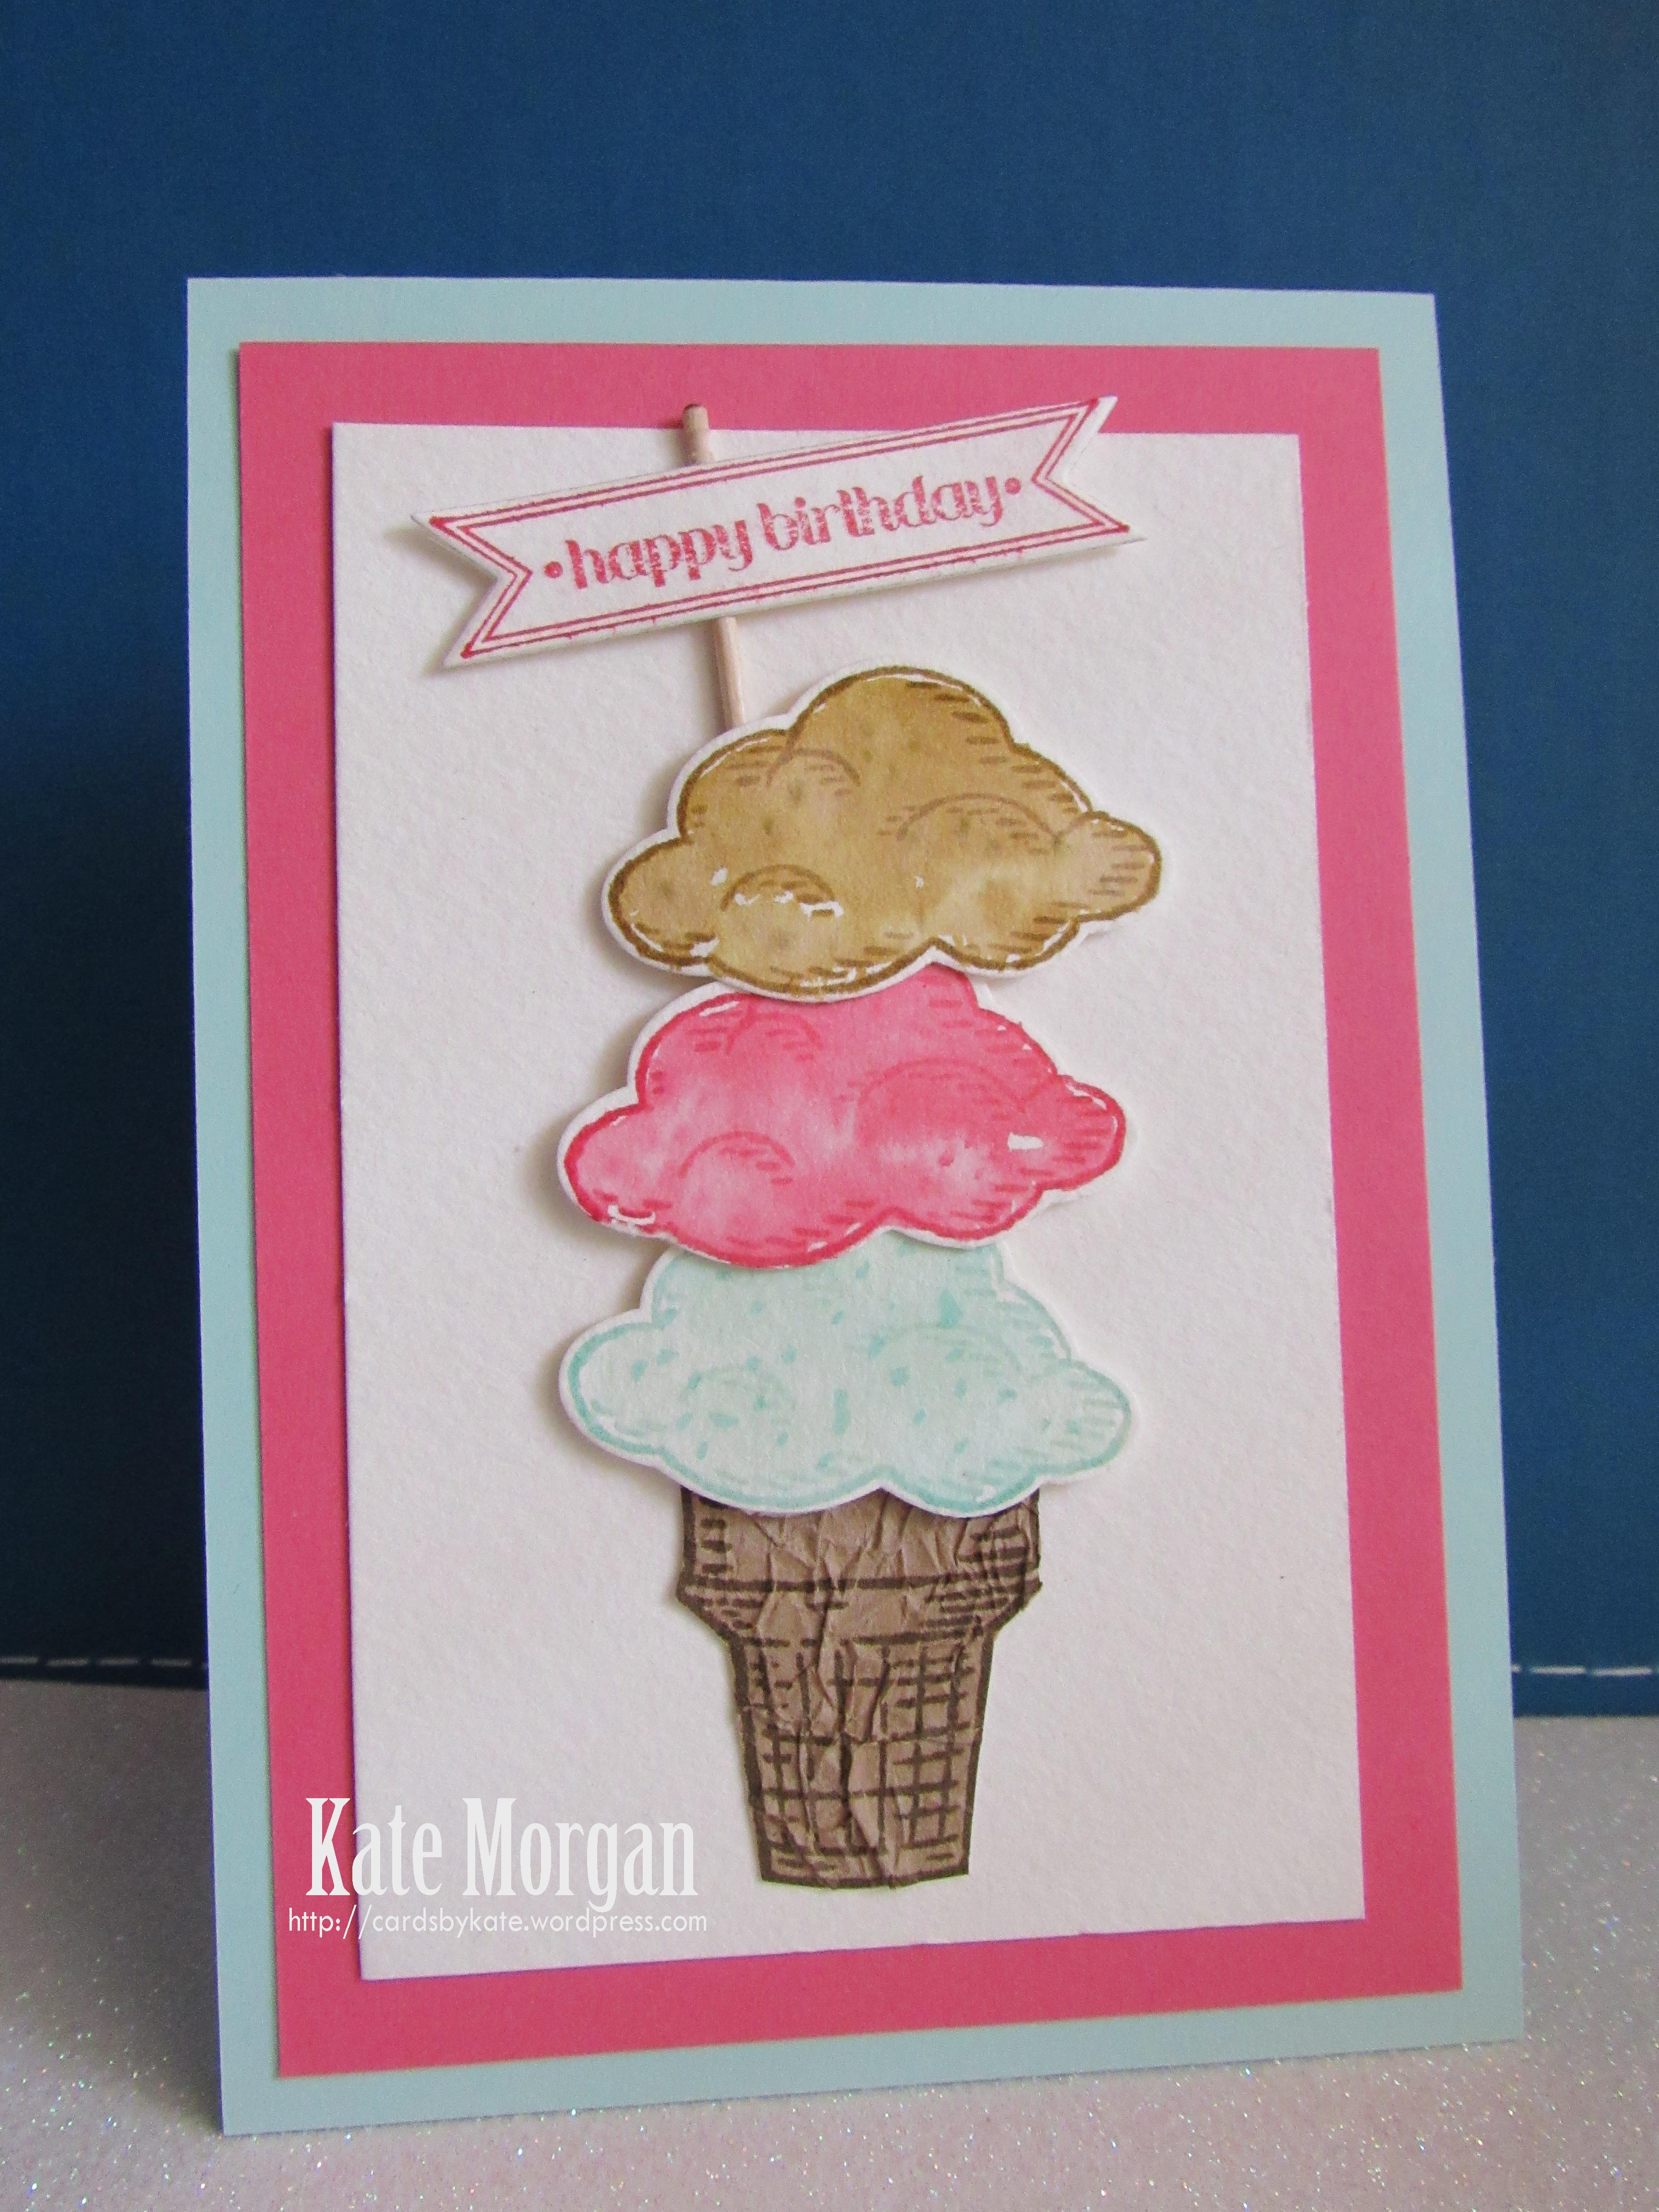
This next card I adhered the yellow strip and then stamped the crosses above and below. I stamped the happy birthday with Stazon ink and added the gold glimmer heart that was already punched for me!

Tin of Cards

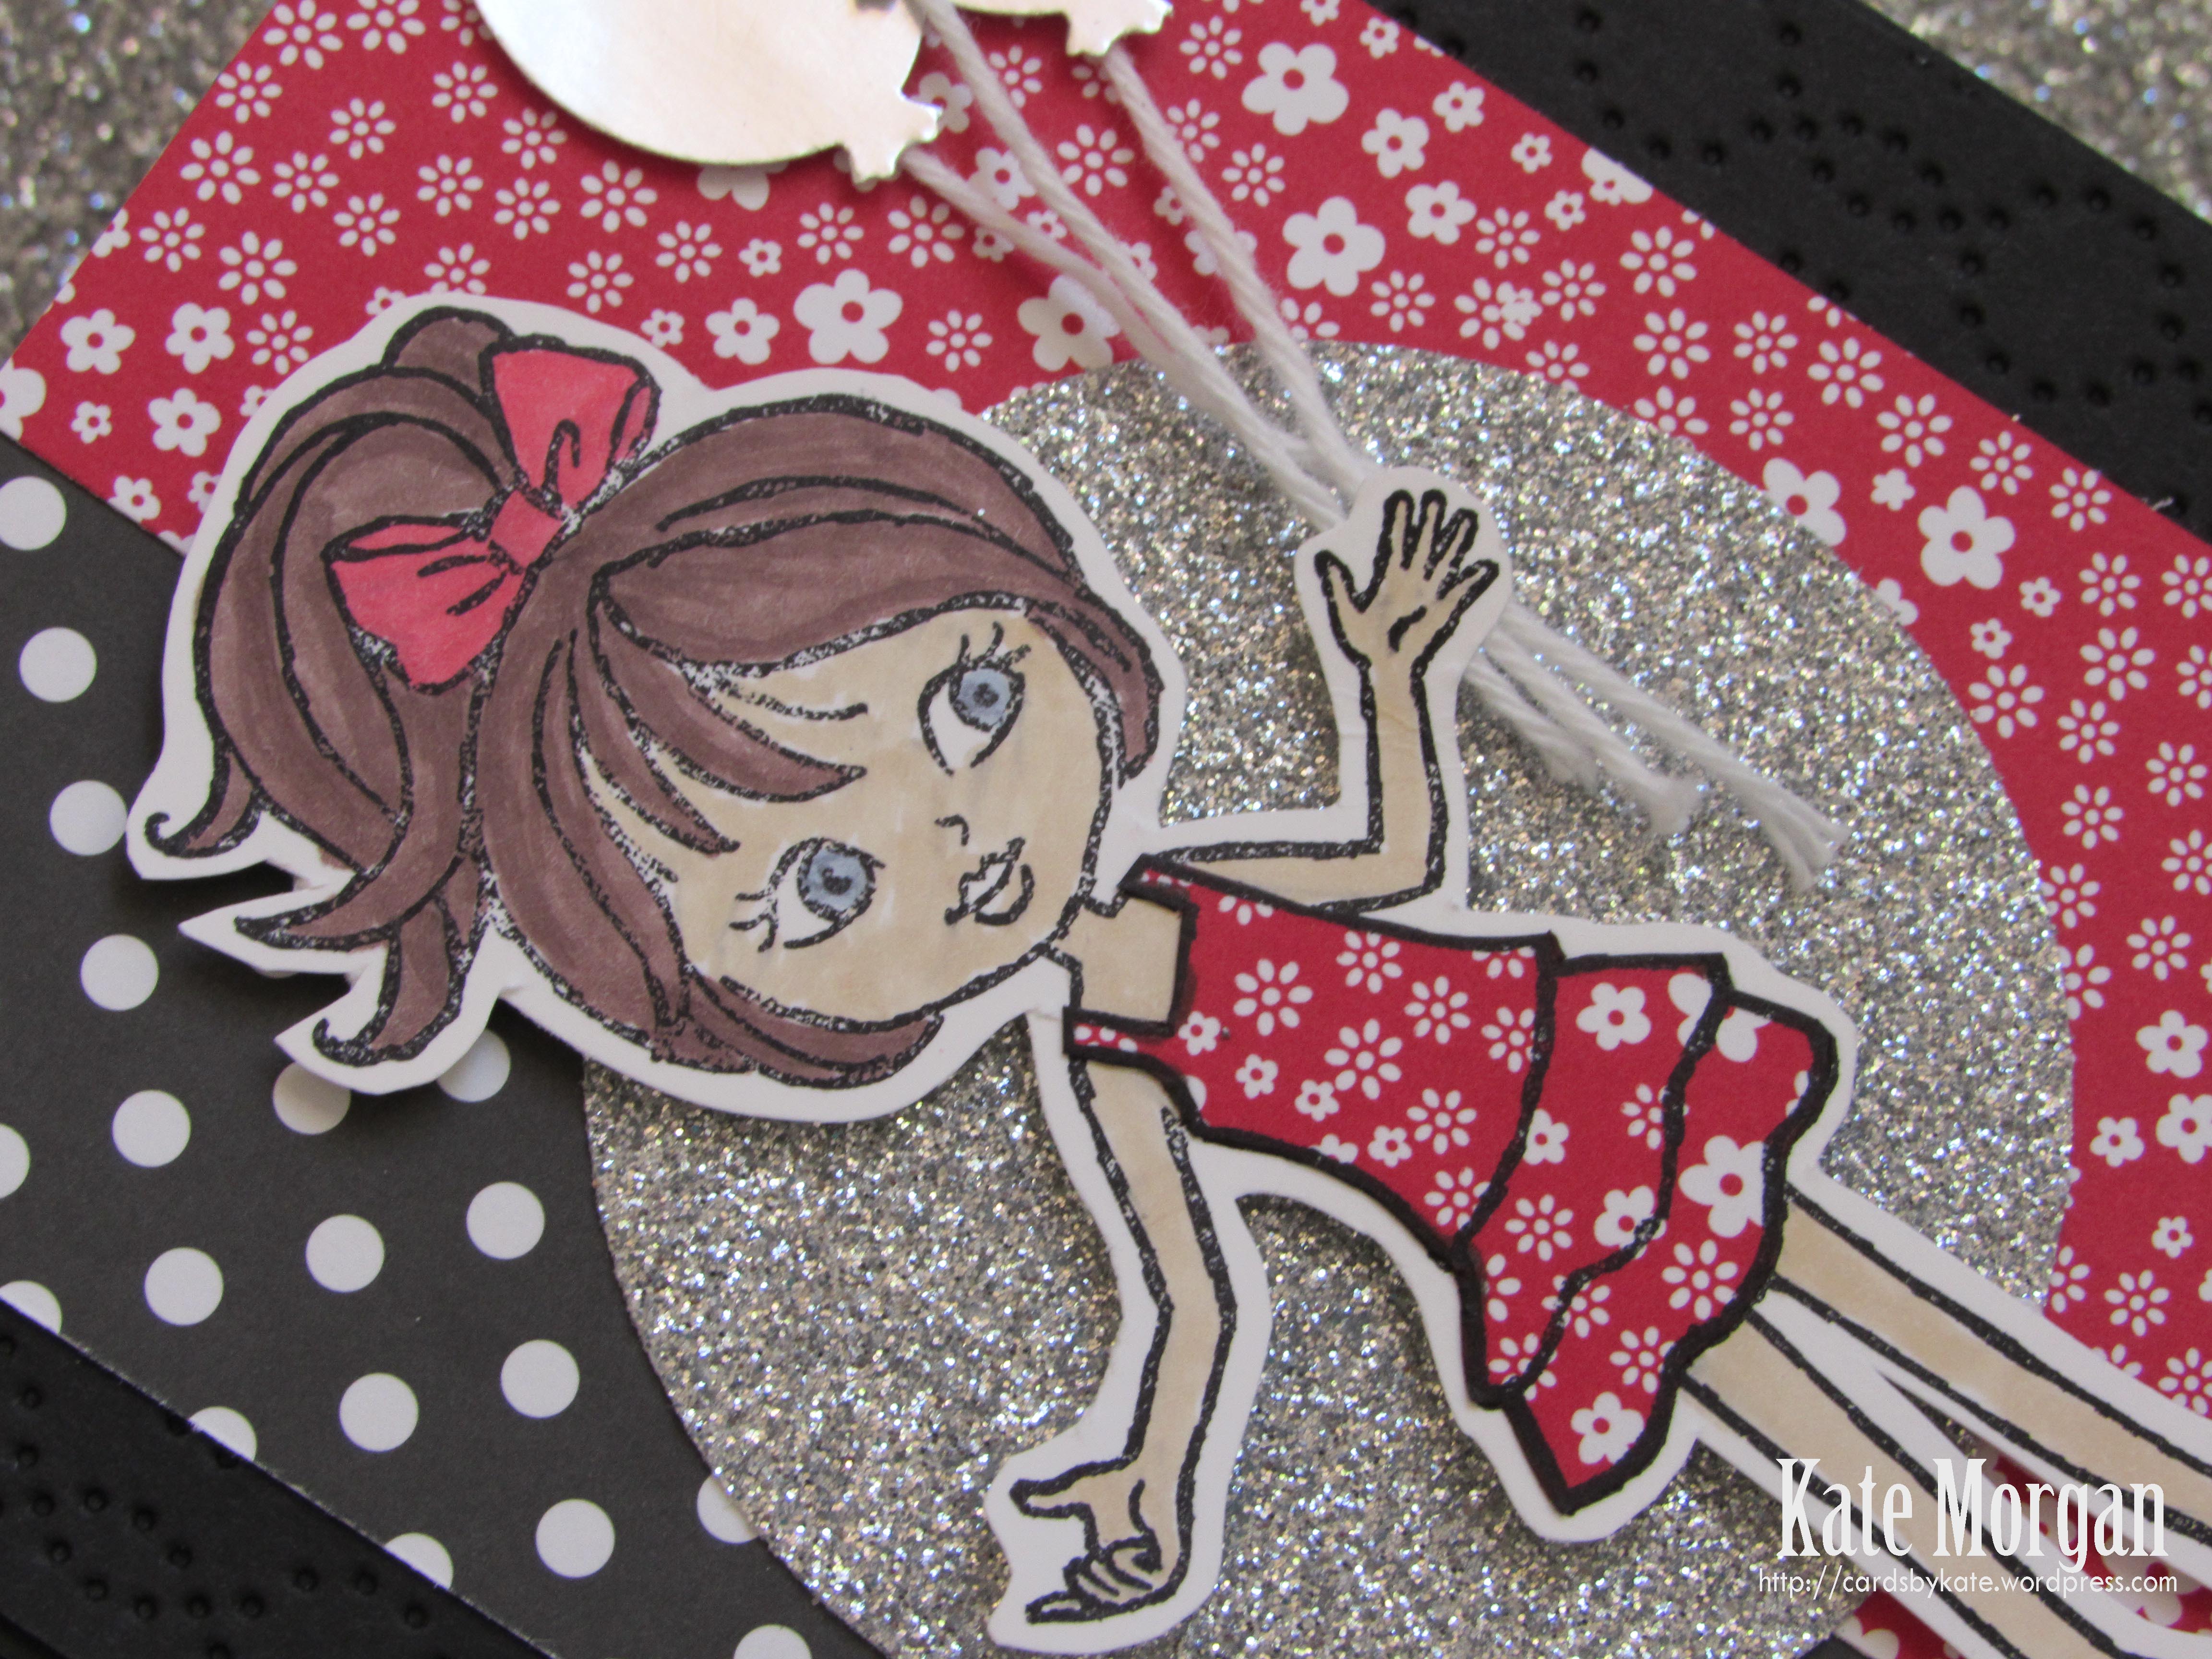
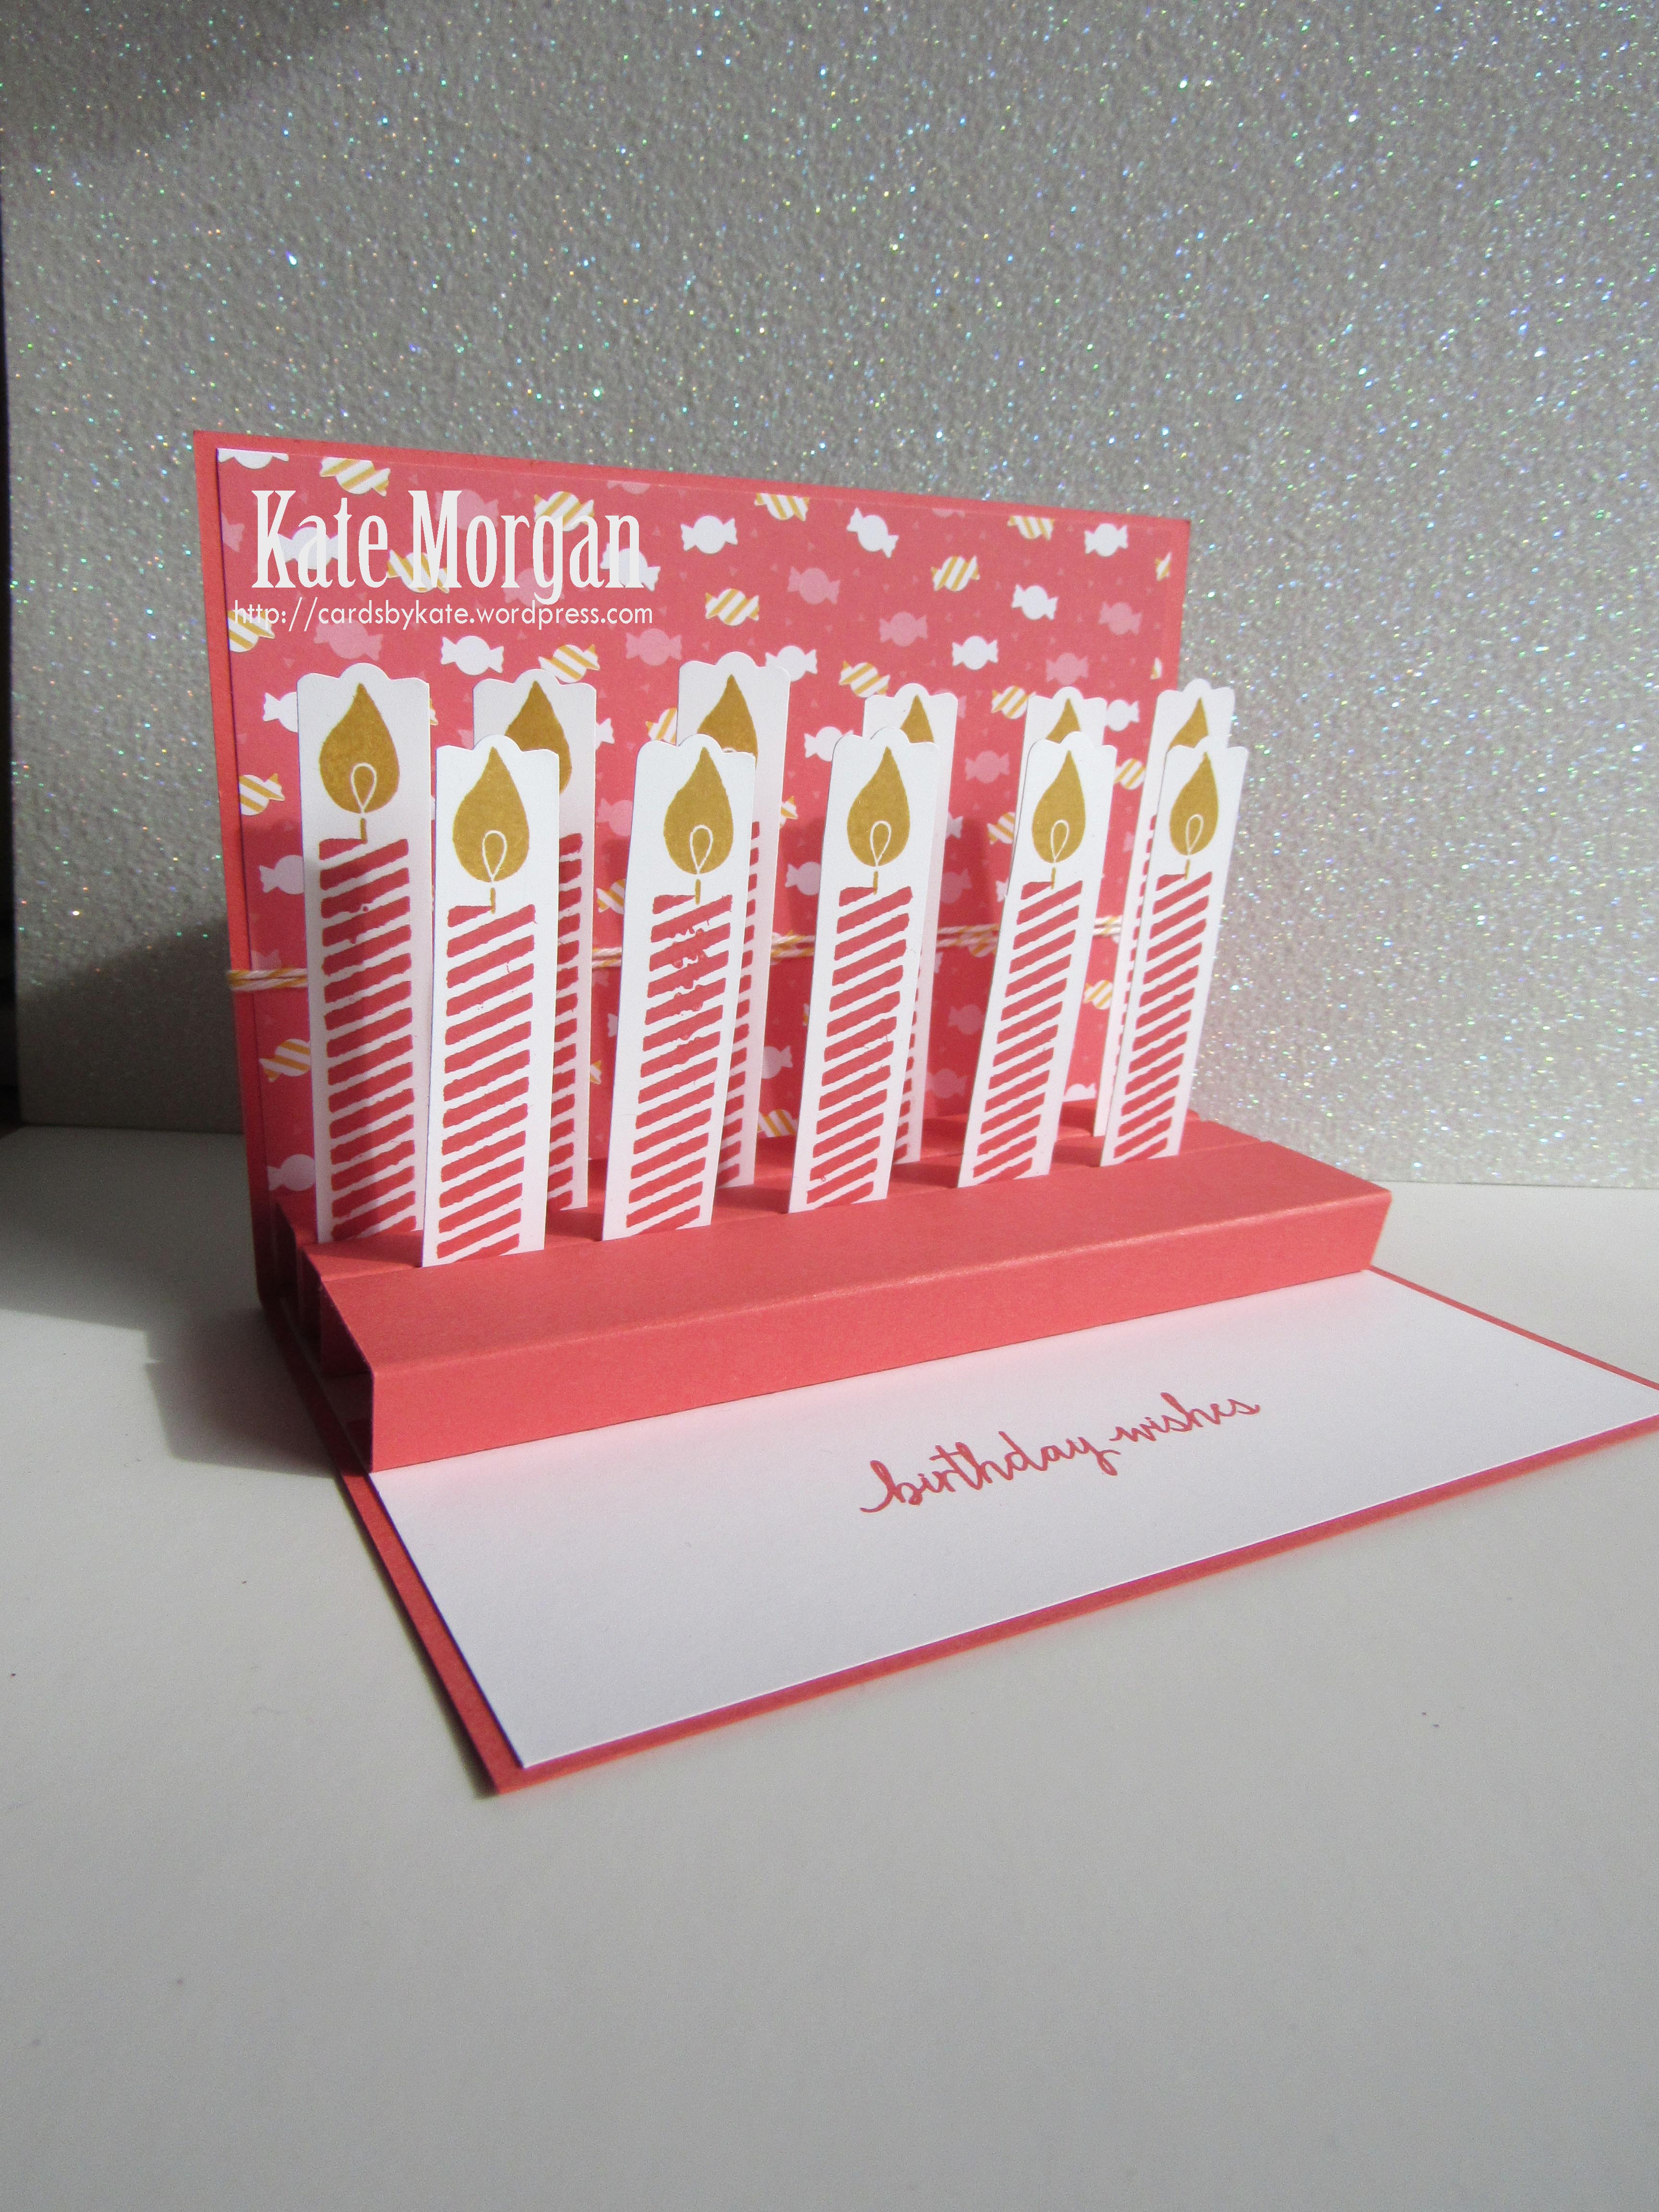
Sorry about the reflections in this card, but that gold is so shiny, it was impossible not to get reflections. The hardest part about putting this one together is getting the twine to sit exactly how you want it behind the circle image!!!

Tin of Cards

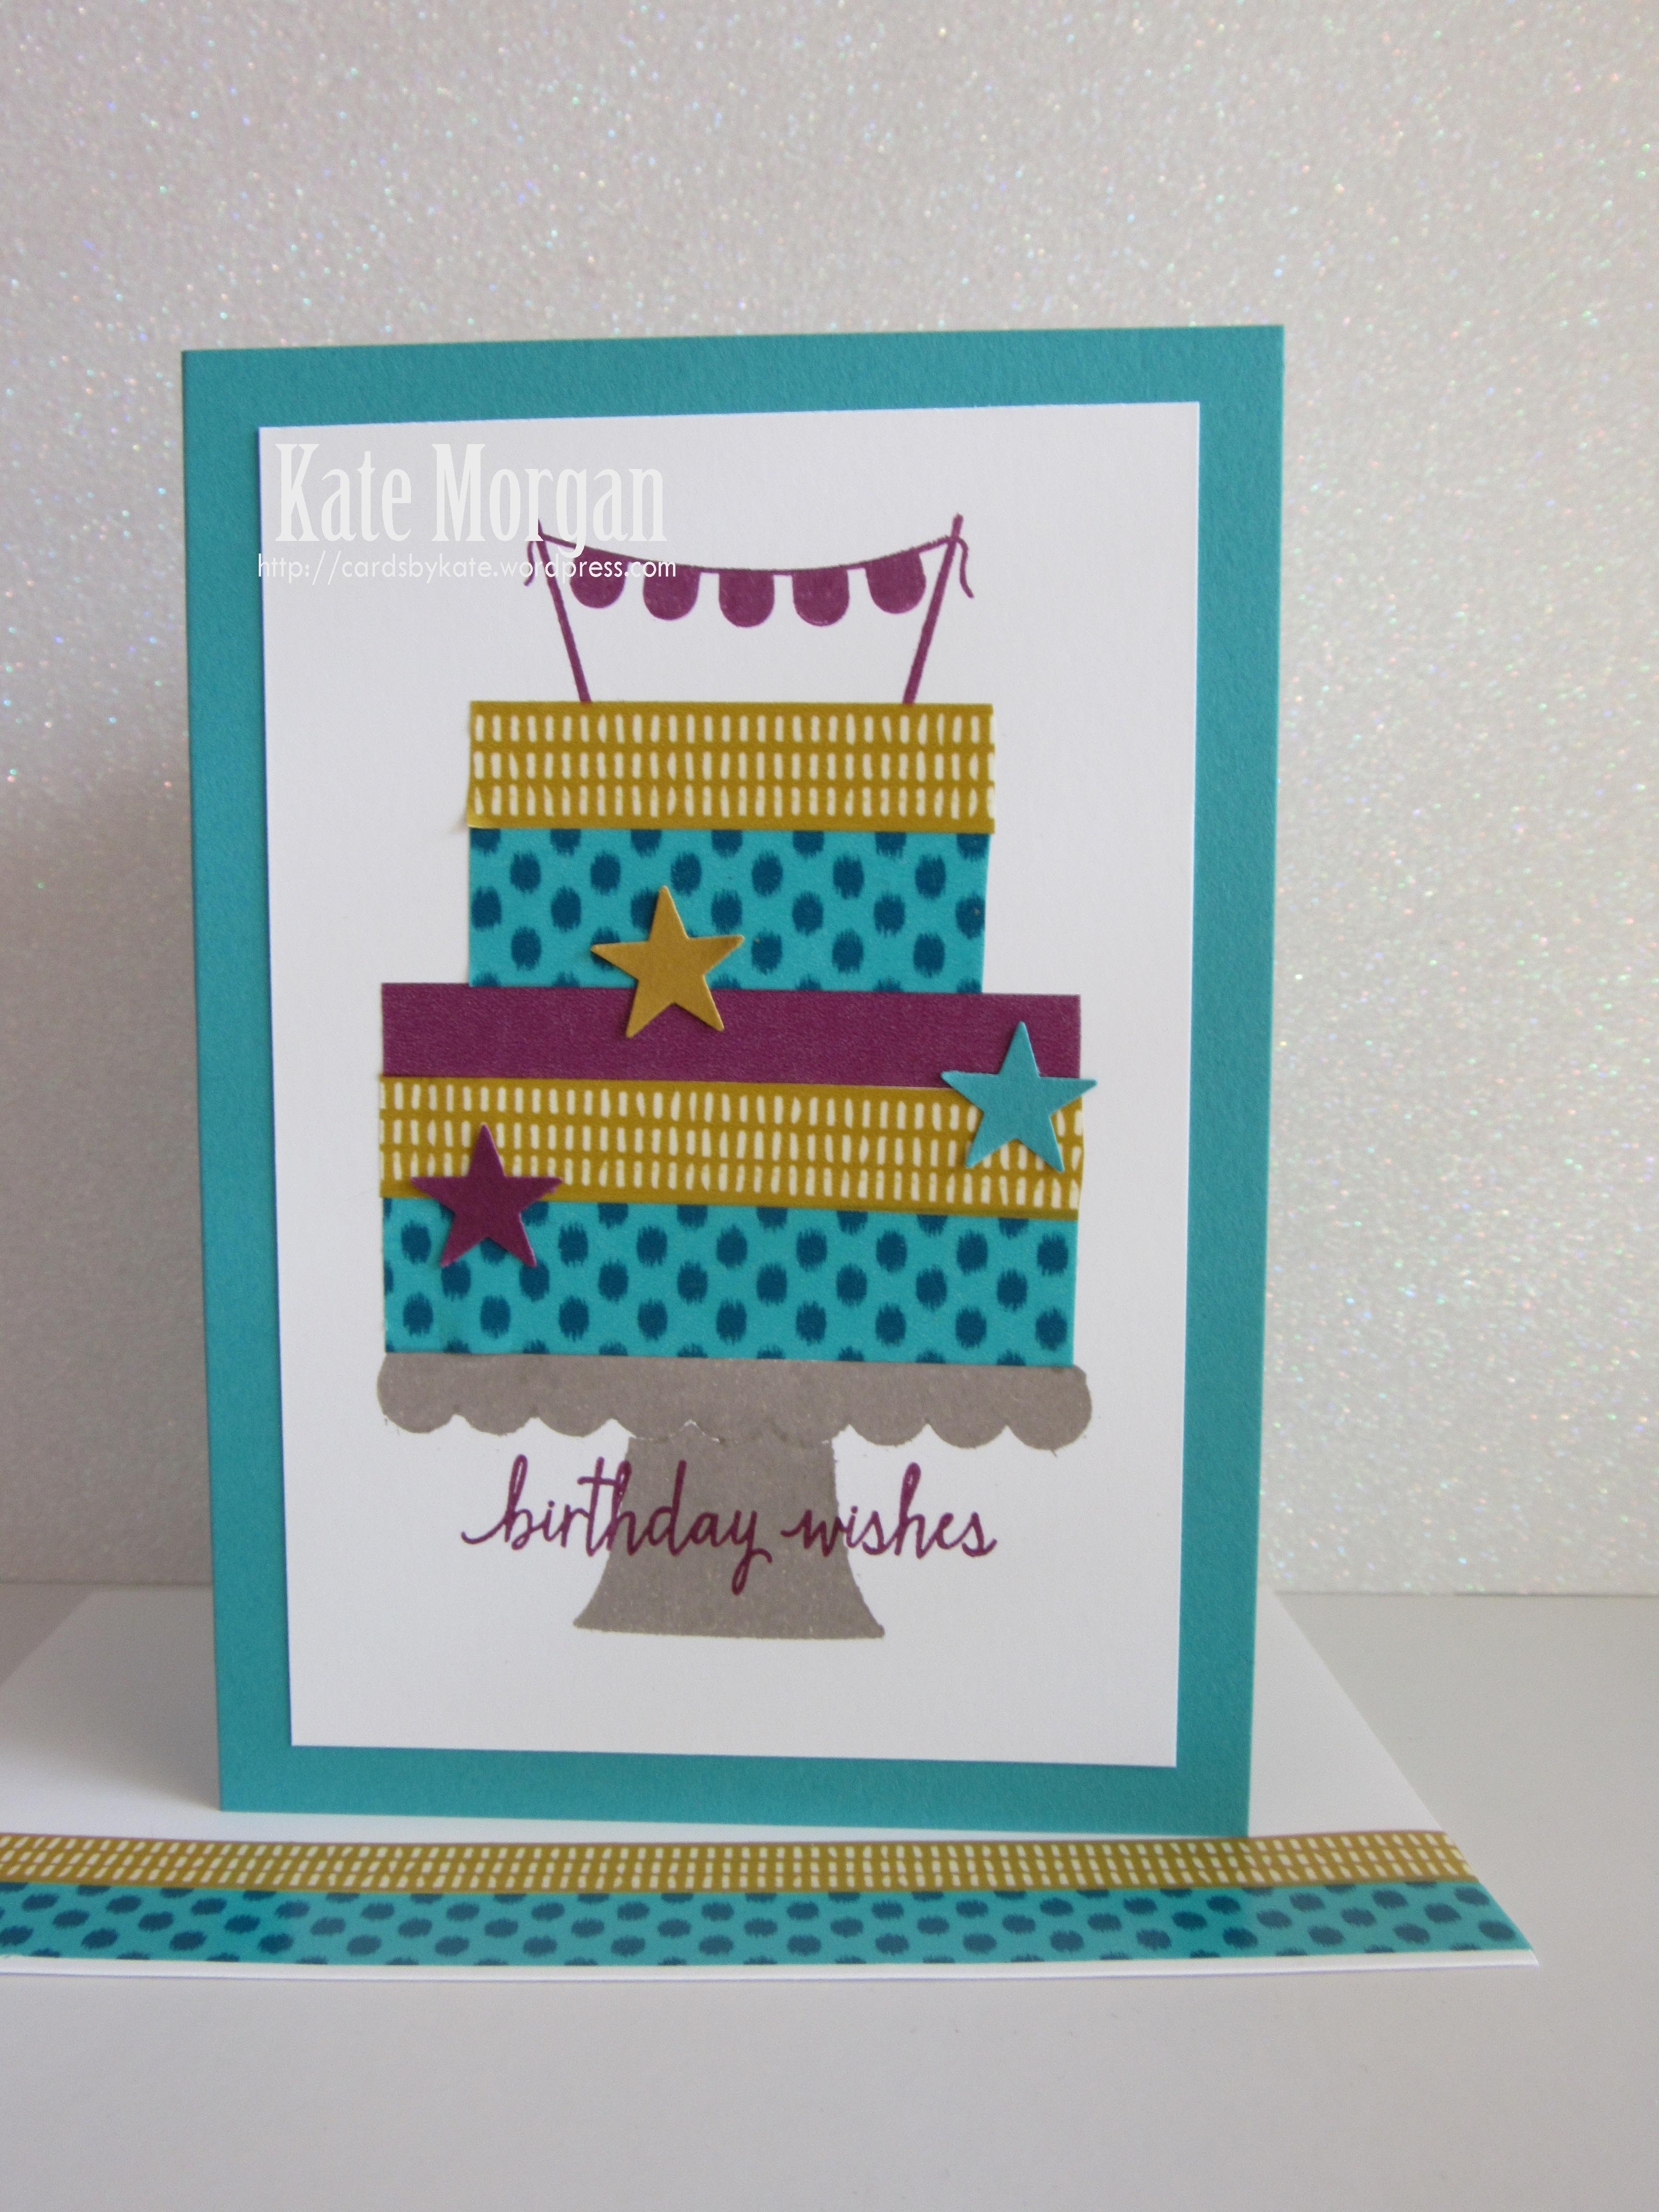
And for the last design, has to be my favourite because it has butterflies!

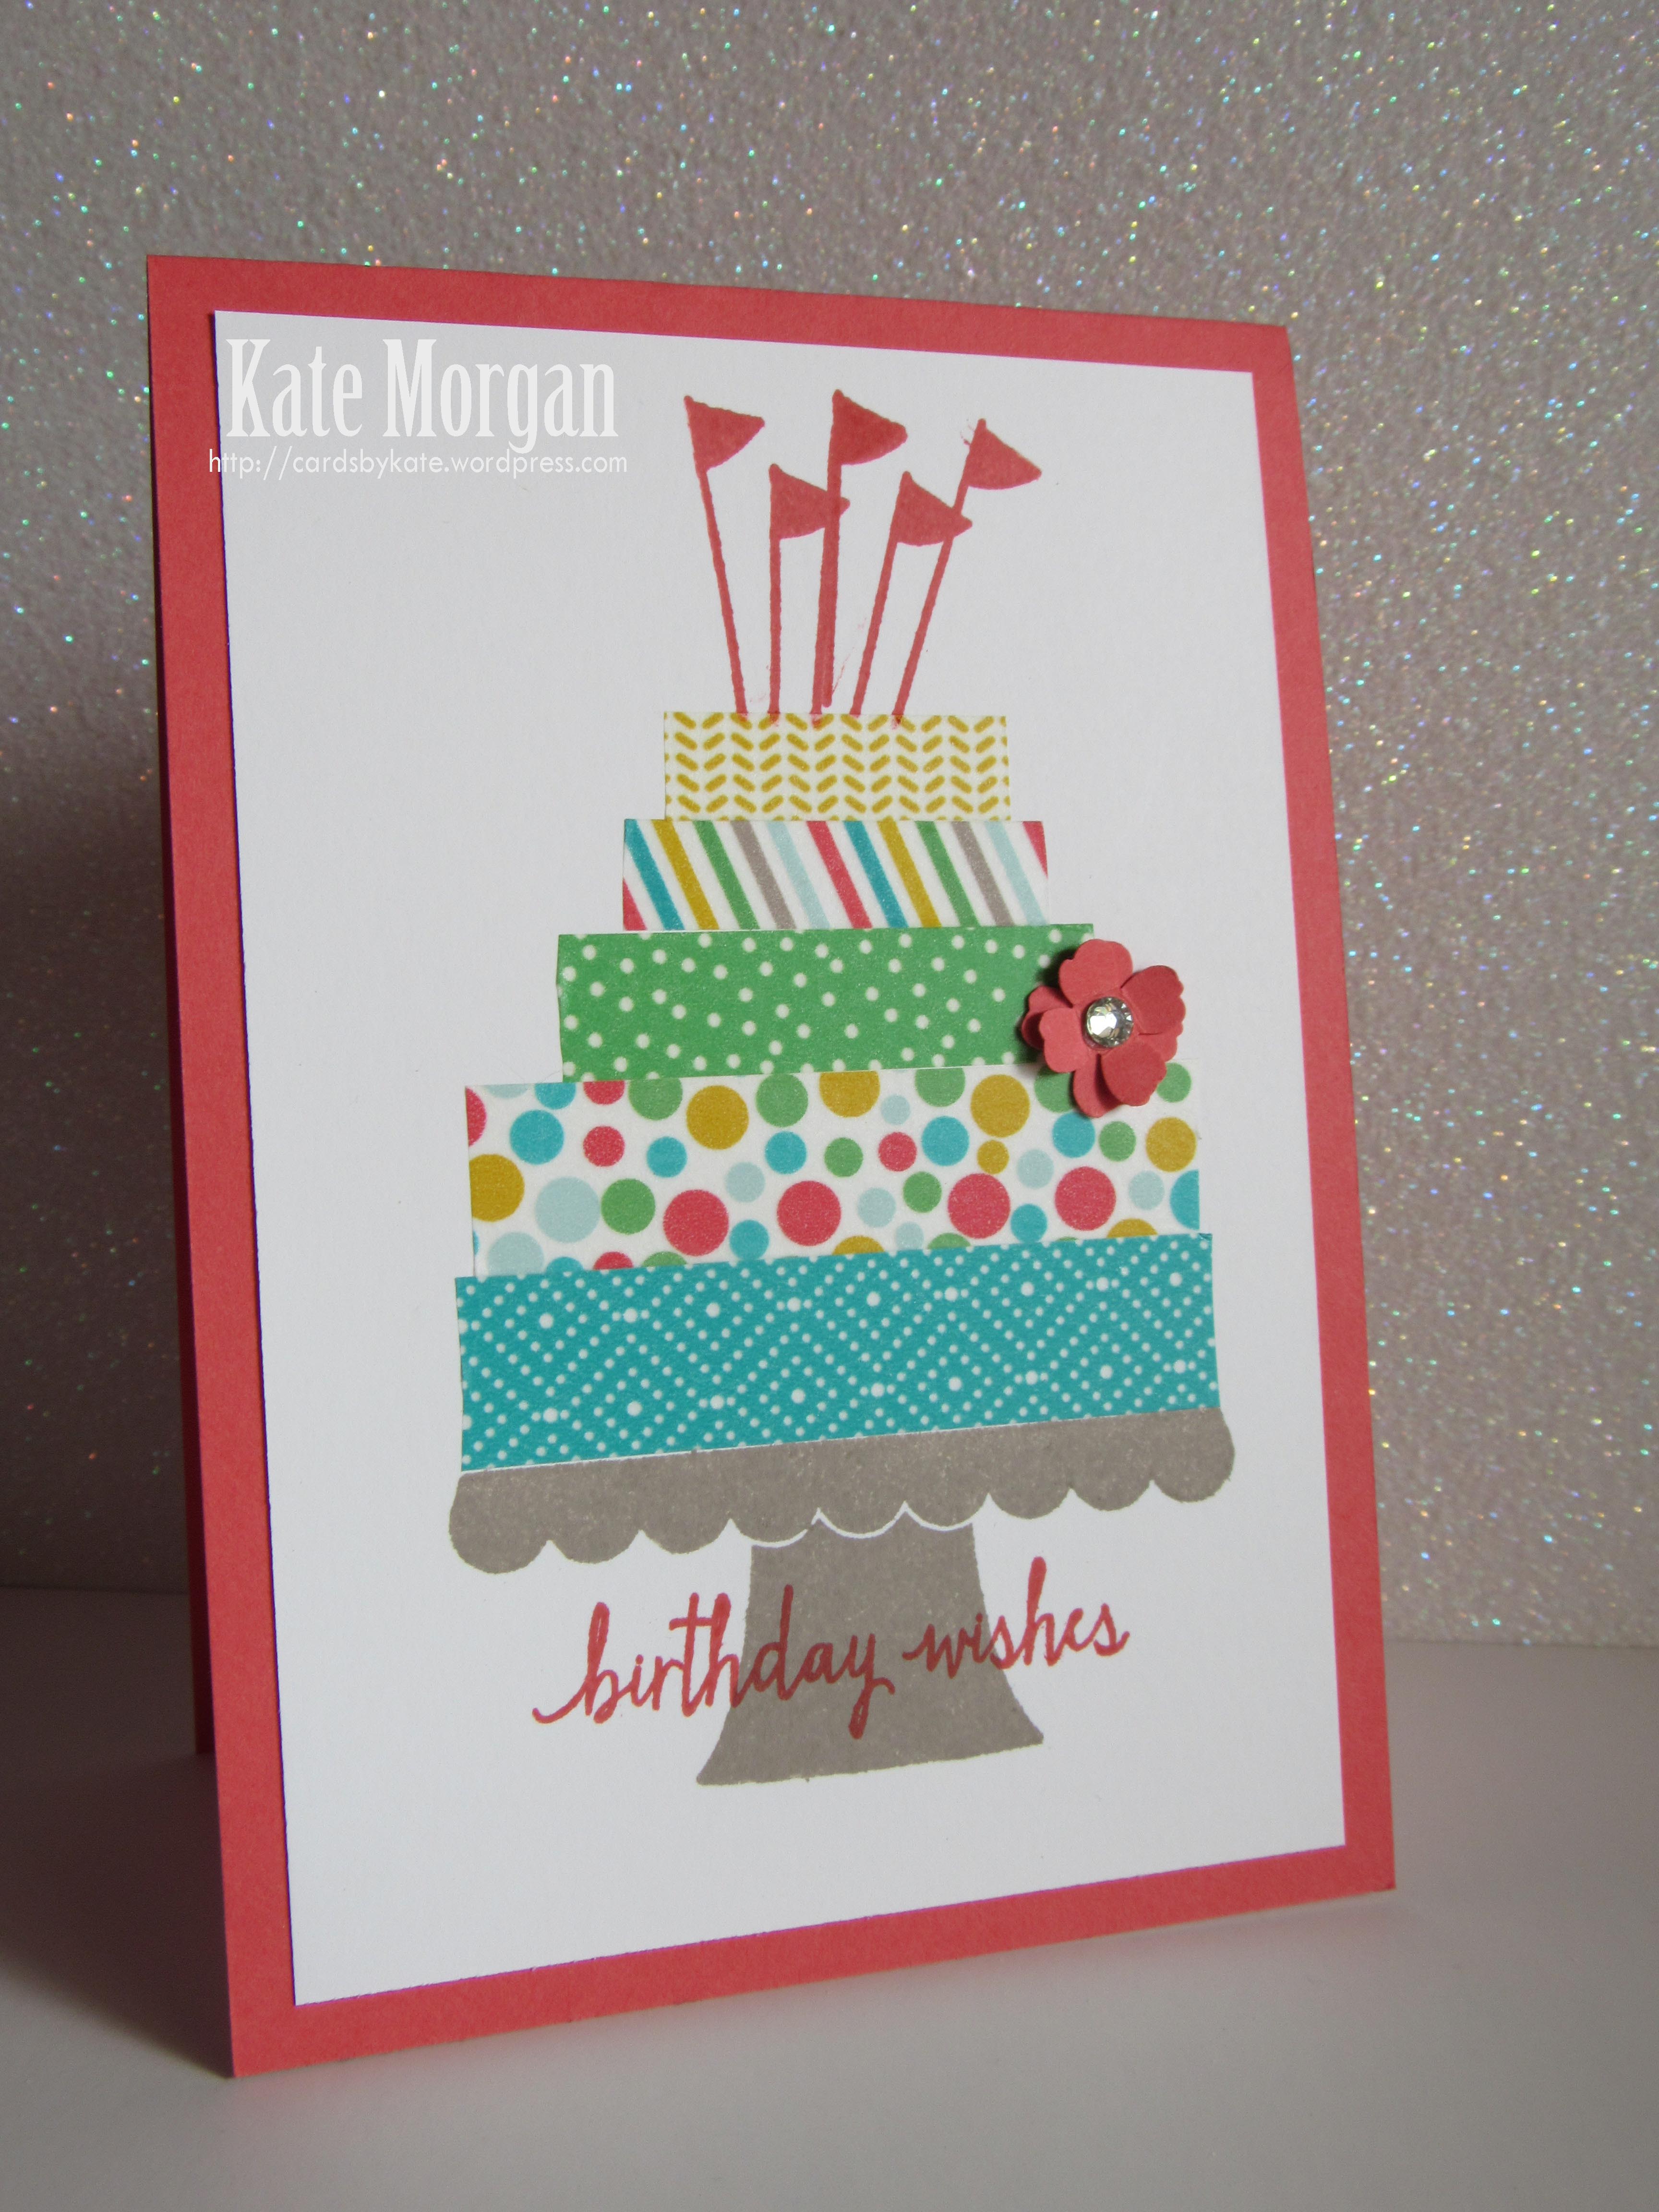
This one was a bit more stamping, but still super easy and I love the look of this one.

Tin of Cards

Click Here to watch the YouTube video on this product, Tin of Cards!

What do you think of this Tin of Cards set? I was very pleased with just how wonderful and easy this was to create in one afternoon. I would love for you to leave a comment also.


All Catalogues, Clearance Rack & Weekly Deals are available online here! They are full of amazing new products and wonderful inspiration. It is a must have for anyone interested in Ink, Paper and Stamps!

Shop Online 24/7 for products

Don’t forget to Follow My Blog to receive blog updates and join my Newsletter Subscription for all the latest news and specials!

Happy Stamping,

Name Banner

Birthday, Techniques & Tutorials

Birthday Pop Up Card

Dear Crafters,

Today I share my Build a Birthday card with a difference. This is a pop up card, so slightly more advanced technique, but still easy when you follow the steps.

Let’s get started!

Here is the front of the card, and yes, it just looks like a normal C6 card, but wait til you see inside. I started with an A5 sheet of Watermelon Wonder card stock folded in half. I embossed a piece of Whisper White card with the Decorative Dots TIEF and adhered that to the front of the card. Then I added a smaller piece of Designer Series Paper from the Cherry on Top DSP Stack.

Build a Birthday Stampin Up!

I stamped the sentiment onto white card and used the Note Tag Punch. I also used the Chalk Talk framelits to die cut the Watermelon Wonder piece, but cut one end off. It fits perfectly under the Note Tag Punch!!!!

Build a Birthday Stampin Up!

On the inside top of the card, I glued another piece of the Cherry on Top DSP Stack paper before winding some twine around and through the tag and tying in a bow.

Now here is the fun part!

Check out all these candles that pop up when you open the card. How cool is that!

Build a Birthday Stampin Up!

I stamped all the candles and cut them out and punched the top of each one above the flame by placing it in the Modern Label punch!

Here is a side view of the open card.

Build a Birthday Stampin Up!

This was not my original idea although I did need to change the measurements from Foolscap to A4 dimensions. I need to thank Georgia Giguere for this idea and you can view her video here https://youtu.be/iBD0r_V9YmE

All Catalogues, Clearance Rack & Weekly Deals are available online here! They are full of amazing new products and wonderful inspiration. It is a must have for anyone interested in Ink, Paper and Stamps!

Shop Online 24/7 for products

Don’t forget to Follow My Blog to receive blog updates and join my Newsletter Subscription for all the latest news and specials!

Happy Stamping,

Name Banner

Birthday

Birthday Washi Cake

Dear Crafters,

Washi Tape is certainly becoming a huge part of the craft world and it is no wonder as to why.

What’s to love about washi tape? Everything! The designs and colors. The versatility. The simplicity – just tear, tape, and transform. Go basic and use single strips as accents. Or step it up and combine strips to create custom backgrounds, decorate, and more. It’s an effortless way to add color to your projects and it’s not expensive.

Today I am using the richly coloured, Bohemian Designer Washi Tape, 3 rolls per pack, 1 of each design. It comes in 3 widths, 1 roll of each width: 3/8″, 1/2″, 5/8″ and it is 5 yards per roll for only $8.75. Coordinating colours: Bermuda Bay, Delightful Dijon, Island Indigo, Rich Razzleberry, Very Vanilla.

Build a Birthday Stampin' Up!

I began stamping the cake stand in Tip Top Taupe ink and then layered the Washi Tape. It’s that easy!

Then stamped the banner on the top in Rich Razzleberry ink and punched some stars from coordinating card stock.

Build a Birthday Stampin' Up!

I stamped some candles on the inside of the card and added 2 strips of washi tape across the bottom of the envelope.

Build a Birthday Stampin' Up!

You could make loads of these cards using different washi tape. So quick and easy, it’s almost scary hehe.

All Catalogues, Clearance Rack & Weekly Deals are available online here! They are full of amazing new products and wonderful inspiration. It is a must have for anyone interested in Ink, Paper and Stamps!

Shop Online 24/7 for products

Don’t forget to Follow My Blog to receive blog updates and join my Newsletter Subscription for all the latest news and specials!

Happy Stamping,

Name Banner

Birthday, feminine, Kids Cards, Masculine

Boho bakes a cake!

Dear Crafters,

Following on from yesterday’s post with the Build a Birthday stamp set, I wanted to share some more cards with you, also using the Bohemian Borders stamp set!

So what do you think? Just a whole lot of lines and patterns? Yes, well that is what I thought too when I first saw this stamp set and wondered why on earth I needed to have it! Well, as I share this next card with you, you too, may just be adding this stamp set to your next order!!!

I am also using the Build A Birthday stamp set for the cake stand, sentiment and the banner at the top, but my cake layers are stamped using the Bohemian Borders stamp set.

Build a Birthday Stampin' Up!

Create it the same way that we placed the layers yesterday, but you may have noticed that the layers are shorter than the stamps themselves. Well here’s a handy little tip: take 2 large post it notes and put them along the side of the card lining them up with the edges of the cake stand, then stamp. Peel away the post it notes and you have a perfectly baked cake! lol

Build a Birthday Bohemian Borders Stampin' Up!

Don’t you just love baking cakes? Well this is mess free baking, unless of course you get ink everywhere!

Build a Birthday Bohemian Borders Stampin' Up!Don’t forget to decorate the inside of your card and the envelope!

All Catalogues, Clearance Rack & Weekly Deals are available online here! They are full of amazing new products and wonderful inspiration. It is a must have for anyone interested in Ink, Paper and Stamps!

Shop Online 24/7 for products

Don’t forget to Follow My Blog to receive blog updates and join my Newsletter Subscription for all the latest news and specials!

Happy Stamping,

Name Banner

Birthday, Blog Hop/Instagram Hop

Blog Hop: New Annual Catalogue

Dear Crafters,

AWHT Logo-001

Today I bring you another AWHT blog hop with some of the awesome ladies in the Art With Heart Stampin’ Up! Team. Today our focus is on our New Annual Catalogue!

I would also like to highlight the joining special for the month of June. Our group is one of the largest teams in Melbourne and offer support, fun and friendship to anyone who would like to join us; from Hobby demonstrators to Business demonstrators to anyone in between. And for the month of June, there is a bonus special, you get to choose any two stamp sets of your choice for free along with your starter kit ($169). What are you waiting for, contact me today to find out more.

You have come to my blog from the very talented, Ros Davidson.  Now let’s get started!

For my projects today, I have used the Build a Birthday Stamp Set.

I was so excited when I first saw this set demonstrated at Convention on the Gold Coast, that it was going straight onto my wish list! And let me tell you, it hasn’t disappointed. I have made so many cards already with this versatile stamp set.

This card is made using Night of Navy, Crumb Cake and Bermuda Bay. I am totally loving this colour combination.

Build a Birthday Stampin Up!

I have used Bermuda Bay as my card base with a layer of Crumb Cake. The images are stamped onto Whisper White card using the Build a Birthday stamps, layering each one on top of the other with the coordinating ink pads. The best bit is that this set in photopolymer (completely clear) so you can easily line up the layers, one on top of the other!

I added some Bermuda Bay sequin trim, how gorgeous does it look? Check out that shine!

Build a Birthday Stampin Up!

I stamped the inside panel of the card with some birthday candles.

Build a Birthday Stampin Up!

I also stamped on the envelope.

Build a Birthday Stampin Up!

And here is another card using this same stamp set, but in a different format. See those cake layers are now candles!!!

Build a Birthday

Build a Birthday

Thanks for visiting today. Don’t forget to email me at craftwithkate@live.com.au to request your copy of the new Annual Catalogue or to ask about joining the Art With Heart team.

Let’s keep this blog hop hopping. Next up we have the lovely, Kayleen McLean.

AWHT Logo2

If you find a broken link or have come to this blog hop from a different entry point, you can view the participants below:

  1. Kathryn Ruddick
  2. Jenny Van Dijk
  3. Kathryn Mangelsdorf
  4. Nikki Sadler
  5. Ros Davidson
  6. Kate Morgan (that’s me!)
  7. Kayleen McLean
  8. Genna Gifford
  9. Tina Gillespie
  10. Judy May
Birthday

Sprinkles of Life

Dear Crafters,

Today I share with you another sneak peek of some new product in the Annual Catalogue which starts 2 June!

This stamp set I use today is the Ronald McDonald House Charities set for this year. Stampin’ Up! donates time and money to support RMHC. To date, we’ve contributed over $1,000,000 to RMHC and their network of local RMHC Chapters. RMHC keeps families together and surrounded by love when their children are receiving medical treatment far from home.

Buy the Sprinkles of Life Stamp Set and Stampin’ Up! will donate $3 from every sale to RMHC.

But the bonus is that there is a coordinating punch!

Who doesn’t love ice-cream, right?!!!  It is certainly a special treat in our house and my kids love this card I am about to share with you today.

This stamp set is photopolymer, so it is completely clear so you can stamp exactly where you want it to be! Love, love, love my photopolymer stamps!!!

Sprinkles of Life

The base card is Pool Party with a layer of Strawberry Slush, then a layer of Watercolour paper. I stamped the ice-cream scoops onto Watercolour paper in the above inks and used my Aqua-painters to water colour the centres.

I used the coordinating Tree Builder Punch to cut them out. This makes cardmaking so easy!

Now, you know when your order of Stampin’ Up! goodies arrives at your door in a Big Brown Box and all that extra brown paper, well….. that brown paper does come in handy some times! Check out the cone – I scrunched up some of that brown paper and then flattened it slightly and put it on some card that has lots of rows of Fast Fuse on it. It sticks really well. Then I stamp the cone image and cut it out!

Sprinkles of Life

I added the ice-cream scoops and the happy birthday banner with dimensionals. The small pole is just a toothpick!

I absolutely love this set and know that you will too, especially once I share some other projects over the next few months as I am sure to make plenty with this set!

I would love you to comment below with your thoughts on this card.

Don’t forget that the Retired Product List is still available so click here to shop online 24/7!

I also want to remind you that the end date for the 2014-2015 annual catalogue has changed from 30 June to 2 June! So be prepared for this change and get those orders in before the items run out.

All Catalogues, Clearance Rack & Weekly Deals are available online here! They are full of amazing new products and wonderful inspiration. It is a must have for anyone interested in Ink, Paper and Stamps!

Shop Online 24/7 for products

Don’t forget to Follow My Blog to receive blog updates and join my Newsletter Subscription for all the latest news and specials!

Happy Stamping,

Name Banner