Welcome to the Colour Creations Instahop. You can follow us on Instagram starting @craftwithkate. Each week we will showcase the Stampin’ Up! colours in alphabetical order.
Week 45 – Real Red
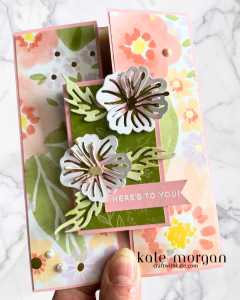
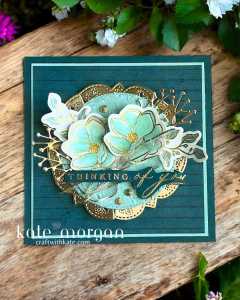
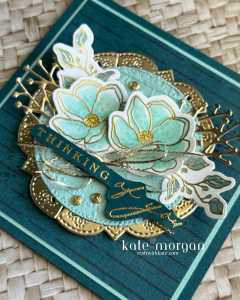
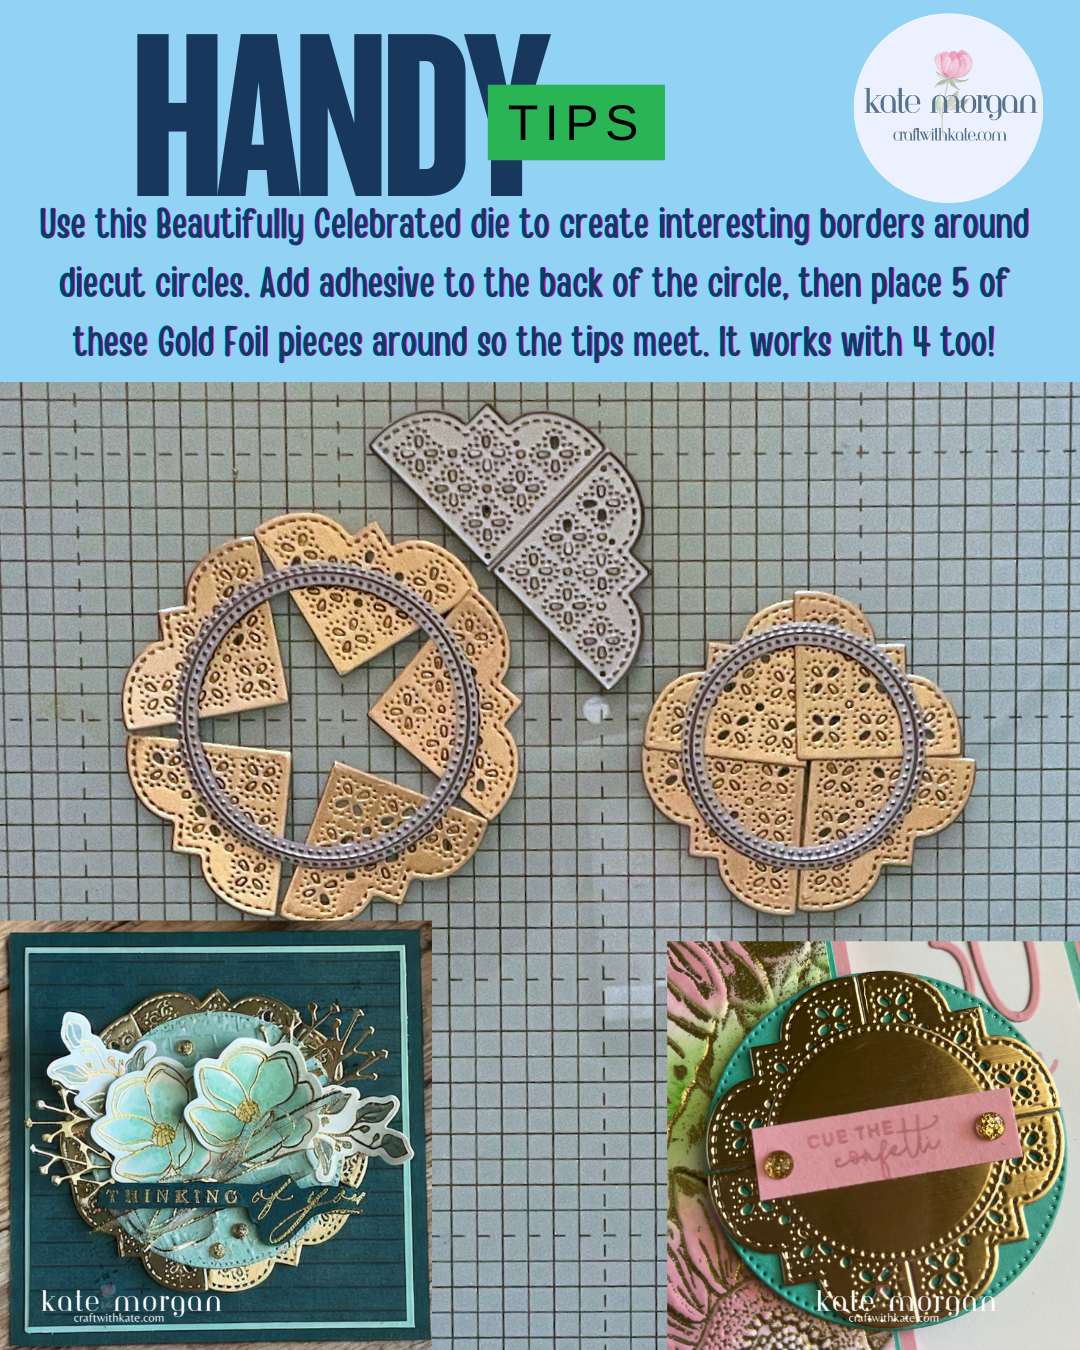
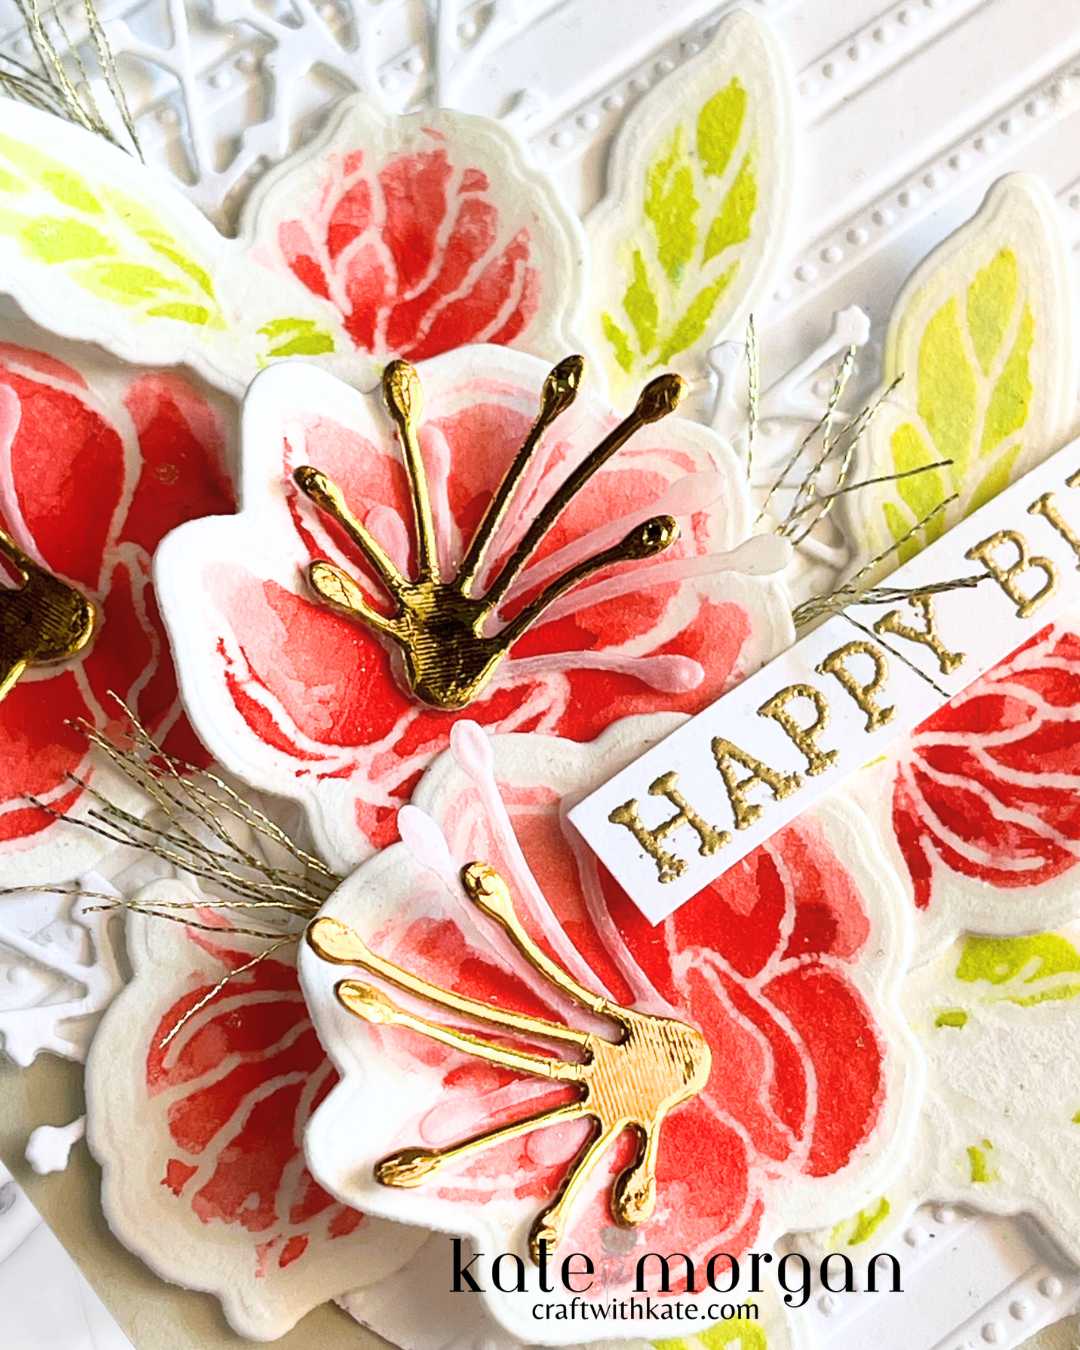
This handmade card features a Basic Beige card base stamped with Versamark ink and a splatter stamp for a soft tone on tone look. A piece of Basic White card is diecut with the Beautifully Celebrated dies is run throught the Lovely Stripes 3D Embossing Folder and adhered to the centre of the card.

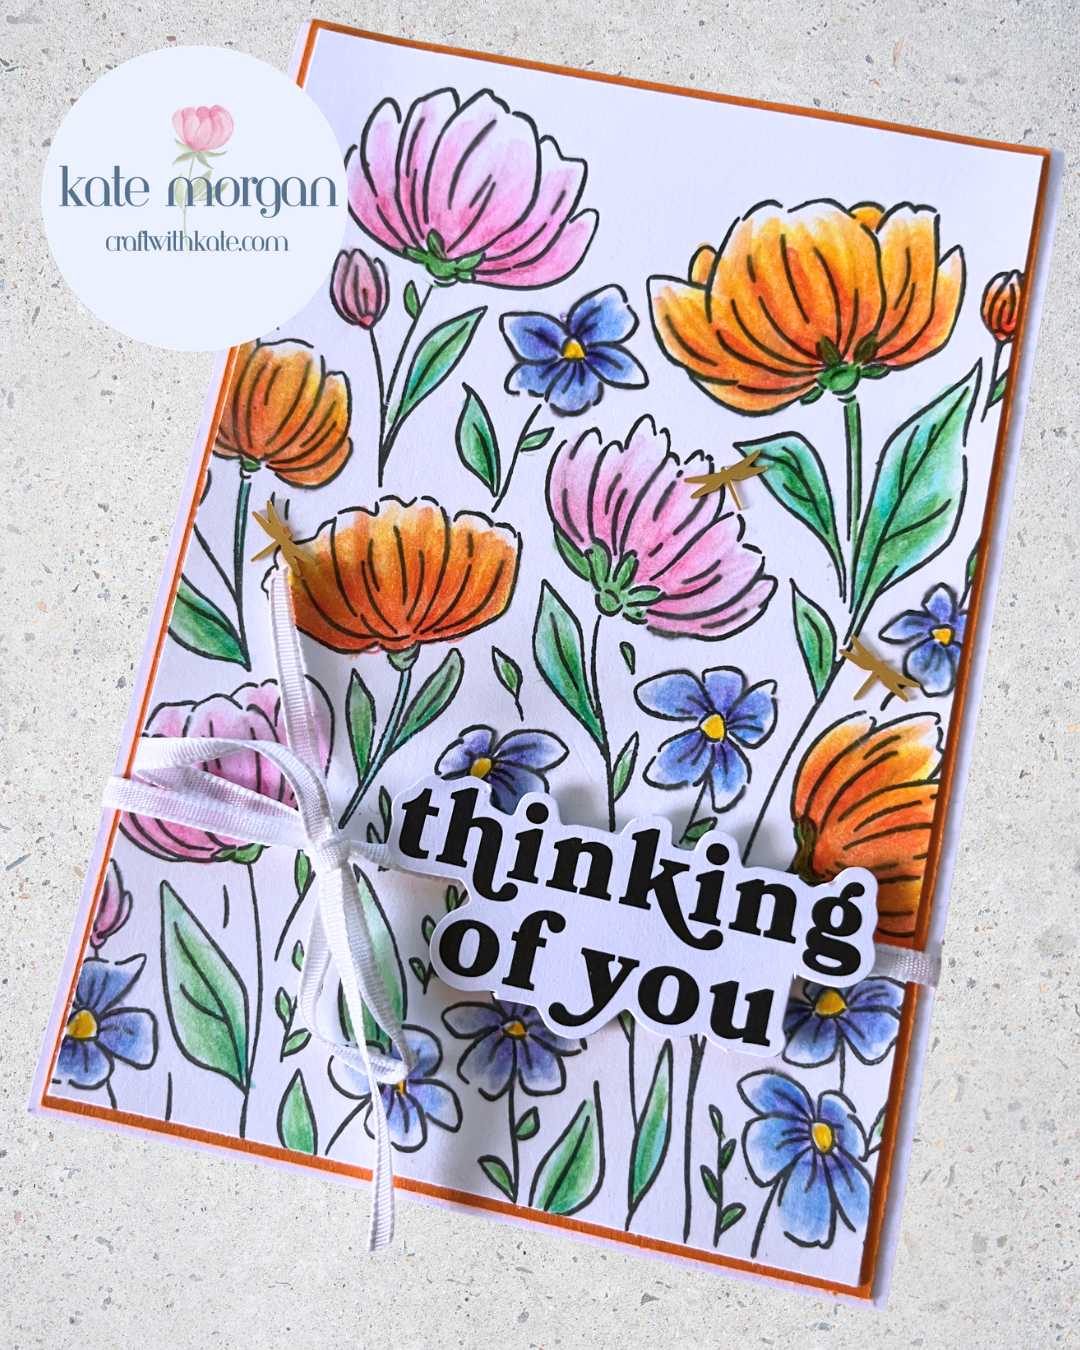
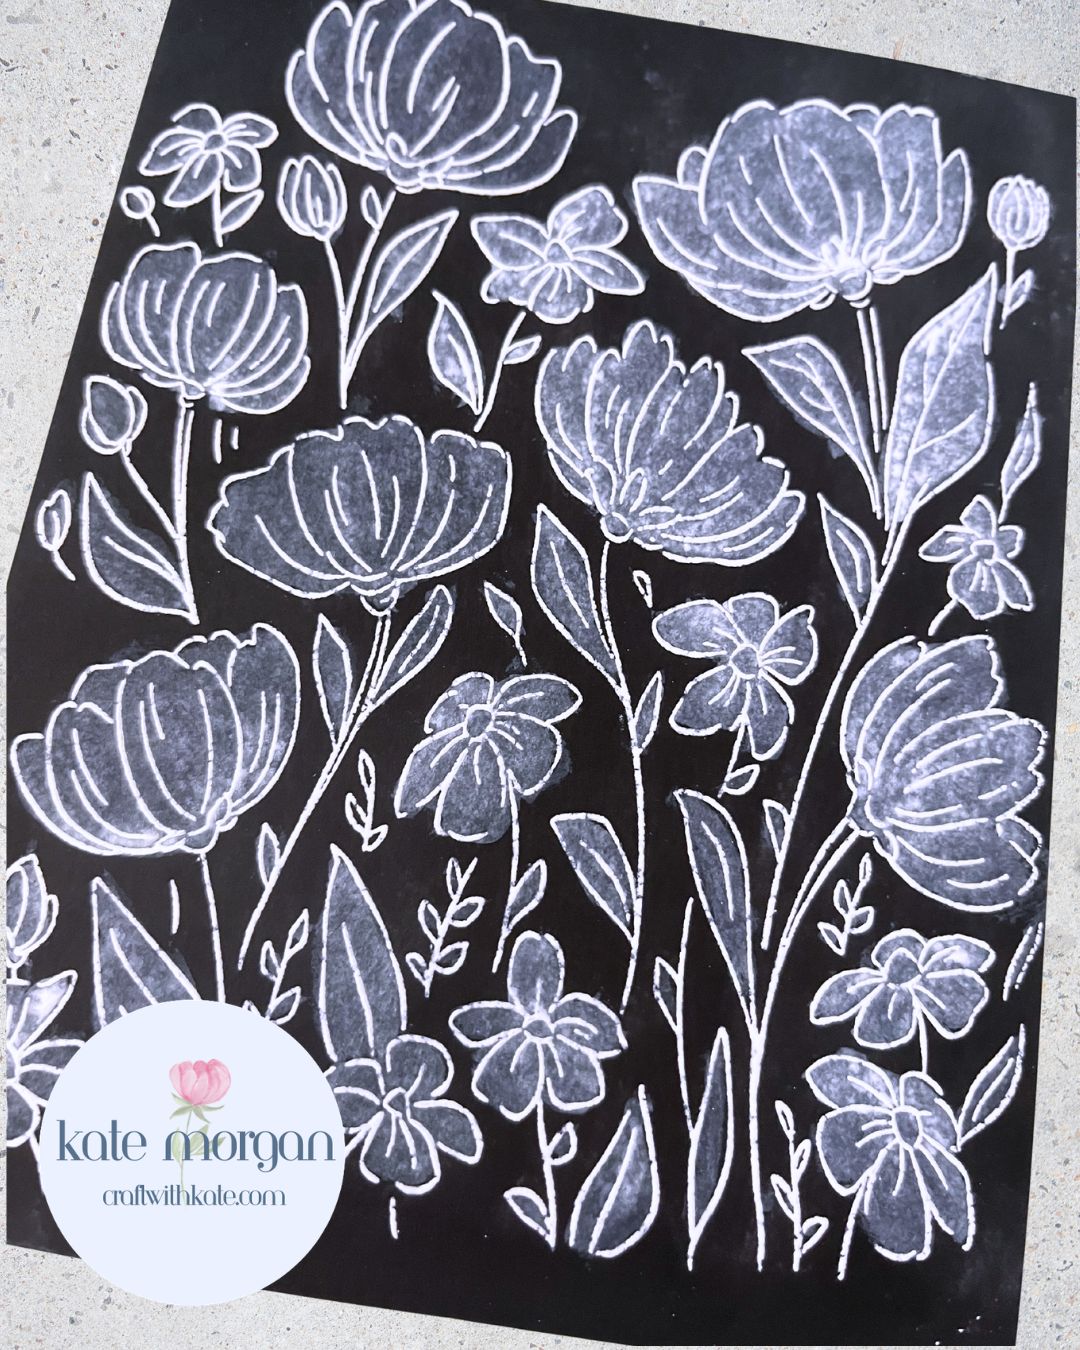
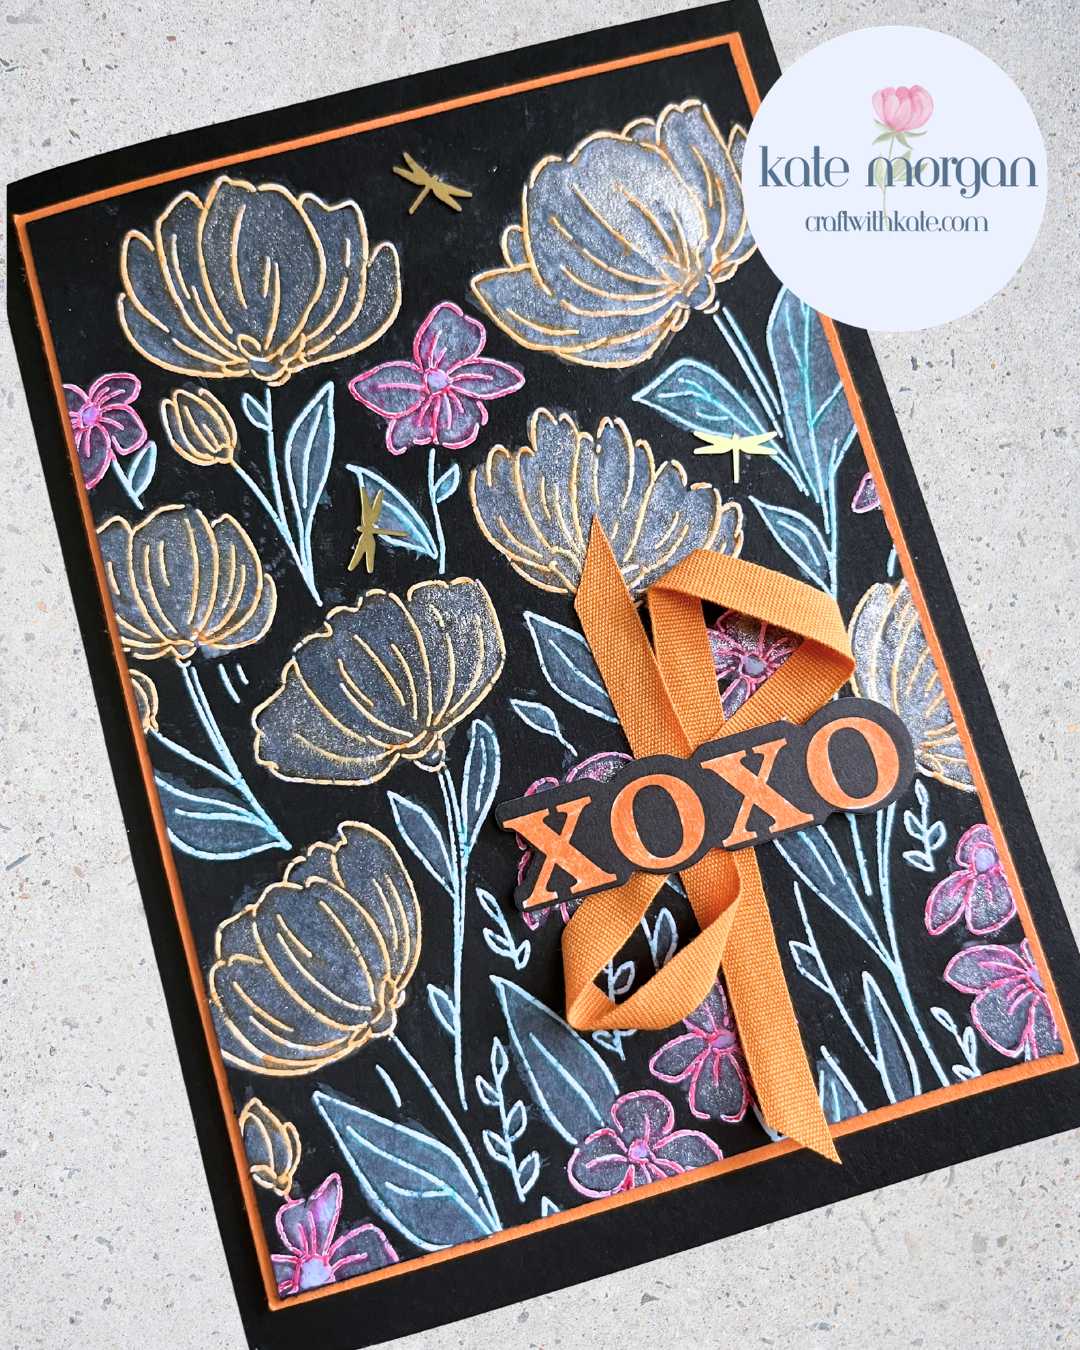
The flowers and leaves are stamped in Versamark ink on Watercolor paper, Clear Embossing Powder added and melted with my Heat Tool. These are then watercoloured using Real Red and Lemon Lime Twist inks & water with a brush, then diecut with the coordinating dies. Some more foliage is diecut with Basic White card and Vellum. The stamen are cut in Vellum & Gold Foil. The Simply Said sentiment is Gold Heat Embossed. You can also see some delicate threads, these are the Gold Twisted Thread that I unravelled. Wink of Stella is splatted by lightly tapping it against a Bone Folder.
I also shared this Flowers Fair card earlier in the week on Instagram & Facebook using Blends Combo markers.

Thanks for dropping by. I hope you join me next week for Shaded Spruce inspiration.
Be sure to add the Product of the Month (POM) for $9 when you add $125+ in product to your cart.
Product List @stampinupofficial
Bundles*: Beautifully Celebrated, Simply Beautiful
Stamps: Simply Said
Ink: Lemon Lime Twist, Real Red, Versamark
Paper: Basic Beige, Basic White, Fluid 100 Watercolor, Vellum, Gold Foil, Basic White C6 Envelopes
Other: Gold Twisted Thread, Wink of Stella, Gold & Clear Emboss Powder, Lovely Stripes 3D Embossing Folder, Seal, Acrylic Blocks, Bone Folder, Paper Trimmer, Multipurpose Glue, Mini Stampin’ Dimensionals, Glue Dots, Tear & Tape, Stampin’ Cut & Emboss Machine, Take Your Pick Tool, Simply Shammy, Heat Tool.
*can be purchased together as a bundle to save 10%

Don’t forget to Follow My Blog to receive blog updates and all the latest news and specials!