Birthday, Blog Hop/Instagram Hop, Designer/Patterned/Specialty Papers (DSP), Handmade Cards, Stampin' Up!, Techniques & Tutorials

Daffodil Delight: Full of Life Birthdays

2024-25 blog header

I’m thrilled you are here to join us each Wednesday evening for the AWHT Colour Creations Blog Hop showcasing the full range of 50+ gorgeous Stampin’ Up! colours.

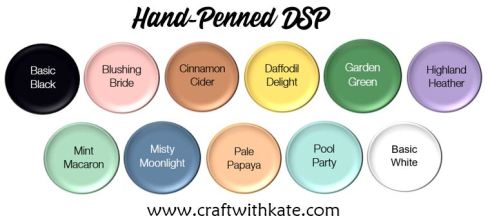
Week 22 – Daffodil Delight

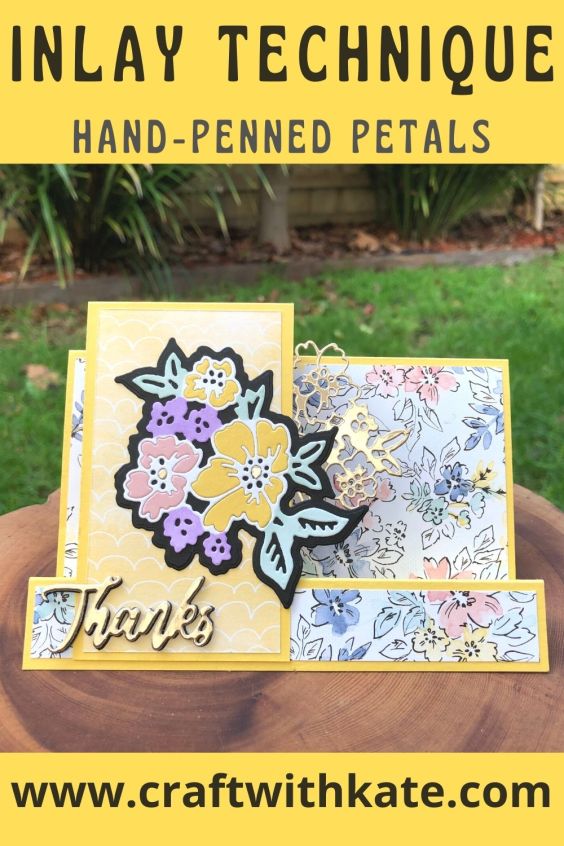
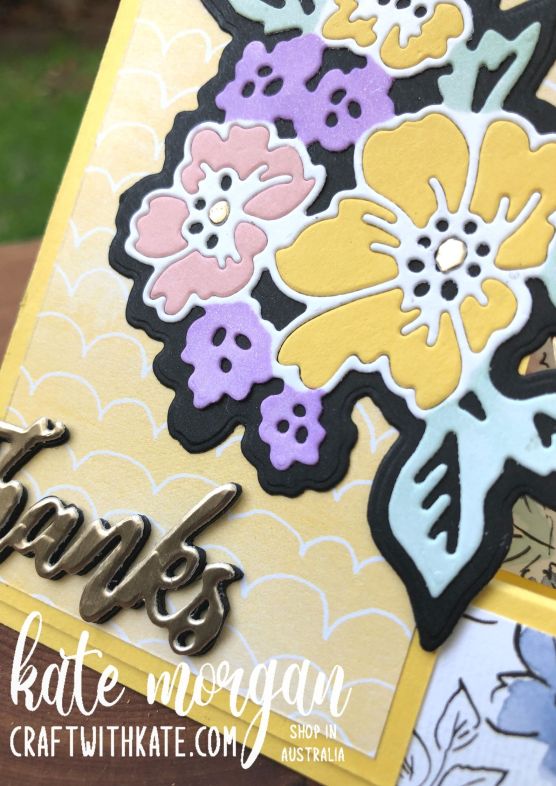
Today I feature the Full of Life 6″ x 6″ DSP and the Alphabet A La Mode dies for this inlay technique.  I began with a 3″ strip of the DSP which I cut down to the length of my card and added Adhesive Sheet behind it. I placed the ‘birthday’ letters on top and held them in place with a large post it note so they didn’t move and ran it through my die cutting machine. I did the same on a piece of Black cardstock. I glued the DSP panel to a piece of Textured Metallic Specialty Foil Paper and glued it to the cardfront.

Birthday card 1 for Daffodil Delight Colour Creations Blog Hop by Kate Morgan Stampin Up Australia 2024 inside

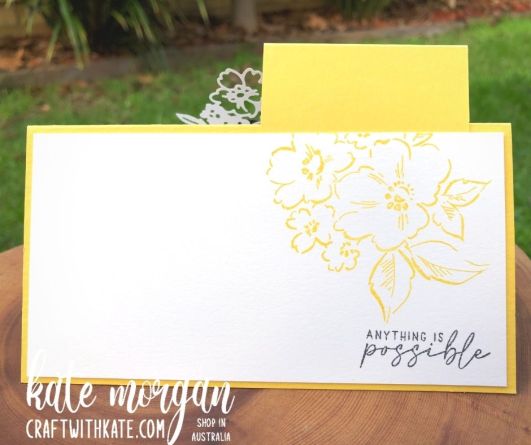
The letters were replaced with the black letters and because I didn’t want to waste the colourful letters, I recreated the card in reverse! On this second card, I mounted the black card onto some of the Gold Foil from the same Textured Metallic Specialty Paper pack! The ‘happy’ is stamed in Versamark ink, White WOW Emboss Powder added and melted with my Heat Tool.

Birthday card 2 for Daffodil Delight Colour Creations Blog Hop by Kate Morgan Stampin Up Australia 2024 inside

Thanks for dropping by. I hope you join me next Wednesday for inspiration using Early Espresso.

Please enjoy the wonderful inspiration of our next team member, Christine Blain.

2024-25 Next Blog Button

The full list of participants for this week can be viewed on Catherine Proctor’s blog.

Product List
Stamps: 
Simply Said
Dies: Alphabet A La Mode
Card/DSP/Specialty Paper: Basic Black, Daffodil Delight, Full of Life DSP, Textured Metallics Specialty DSP, Basic White C6 Envelopes
Inks: Black Memento, Versamark
Embellishments: Adhesive-backed Shiny Sequins, Neutrals Adhesive-backed Sequins
Accesories/Adhesives/Tools: Adhesive Sheets,White WOW Emboss Powder, Heat Tool, Paper Snips, Bone Folder, Paper Trimmer, Multipurpose Glue, Stampin’ Dimensionals, Stampin’ Cut & Emboss Machine, Take Your Pick Tool, Simply Shammy, Tear & Tape

Shop with Kate Morgan


Be sure to download a PDF copy of current catalogues from my SU Catalogue Library page.

Don’t forget to Follow My Blog to receive blog updates and all the latest news and specials!

Birthday, Blog Hop/Instagram Hop, Designer/Patterned/Specialty Papers (DSP), Flowers, Handmade Cards, Stampin' Up!, Techniques & Tutorials

Blueberry Bushel Gingham Die Cut Inlay Technique

2023-2024 AWH Colour Creations header

Each week some of the Art With Heart team are joining  the Colour Creations Blog Hop to bring you creative inspiration showcasing our range of 50+ gorgeous Stampin’ Up! colours.

Week 14 – Blueberry Bushel

Today I have chosen to focus on the Die Cut Inlay Technique, where you use a die such as the Gorgeous Garden dies, and cut it a few times from different card/DSP.  I have used Basic White for the main die, and glued it to a pieced of Blueberry Bushel card. Then I die cut the same die with the Glorious Gingham 6″ x 6″ Designer Series Paper. I took the petal pieces out and glued them into the white layer. Yes, it takes a little bit of time, but the effect is so beautiful and it makes it easier using the Take Your Pick Tool with the putty tip (or tweezers).

Die Cut Inlay Technique card using Stampin Up Gorgeous Garden dies by Kate Morgan Australia 2023 Blueberry Bushel

For the centres of the flowers, initially I was going to use a yellow tone cardstock, but then remembered I had some of the gold More Dazzle Specialty paper. I actually cut small squares of this and placed them on the back of the die where the centres of the flowers are, and carefully placed the top acrylic plate on and ran it through my die cutting machine. I mean you can’t waste that gorgeous dazzle, right?!!!

Die Cut Inlay Technique card using Stampin Up Gorgeous Garden dies by Kate Morgan Australia 2023 Blueberry Bushel.

The sentiment from Charming Sentiments Stamp Set is inked in Versamark, White Emboss Powder added and melted using the Heat Tool. It is cut out using the coordinating Sentiments Silhouette dies. Some Gold 1/8″ Trim is placed behind and then Dimensionals so it pops up on the card. On the inside, I have a Basic White layer with some gingham dsp along the bottom edge.

Die Cut Inlay Technique card using Stampin Up Gorgeous Garden dies by Kate Morgan Australia 2023 Blueberry Bushel inside

Product List
Stamps:
Charming Sentiments
Dies: Gorgeous Garden dies, Sentiment Silhouette dies
Card/Paper: Basic White, Blueberry Bushel, More Dazzle 6″x6″ Specialty
Designer Series Paper: Glorious Gingham 6″x6″
Other: Gold & Silver Trim Combo Pack, Versamark Ink, White Emboss Powder, Heat Tool, Take Your Pick Tool, Paper Snips, Multipurpose Glue, Stampin’ Dimensionals, Mini Stampin’ Cut & Emboss Machine, Stampin’ Cut & Emboss Machine, Paper Trimmer, Simply Shammy, Bone Folder

Thanks for dropping by. I hope you can join me next Wednesday for inspiration using Cajun Craze.

Please hop across to our next participant and enjoy the wonderful inspiration of Andrea Sargent.

2023-2024 Next blog button AWH Colour creations

If you come across a broken link or have come from a different entry point, a full list of participants can be viewed on Cathy Proctor’s blog.

Shop Online Craft with Kate10-yr-anniversary-badge


Be sure to download a PDF copy of current catalogues from my SU Catalogue Library page.

Don’t forget to Follow My Blog to receive blog updates and join my Newsletter Subscription for all the latest news and specials!

Blog Hop/Instagram Hop, Designer/Patterned/Specialty Papers (DSP), feminine, Flowers, Handmade Cards, Markers for Colouring, Stampin' Up!, Thank you

CCBH Daffodil Delight – Inlay Technique Fancy Fold Card

CCS Logo 2021-22

Each week some of the Art With Heart team are joining the Colour Creations Blog Hop to bring you creative inspiration to showcase our range of 50+ gorgeous Stampin’ Up! colours.

Week 15 – Daffodil Delight

The Hand-Penned Petals Bundle is the focus of tonight’s card, along with the very pretty Hand-Penned DSP. As you can see my card base is Daffodil Delight.

Hand-Penned DSP

Inlay Technique Fancy Fold card using Hand-Penned Bundle for Daffodil Delight CCS by Kate Morgan, Stampin Up Australia 2021

The Penned Flower dies which are part of this bundle, were used to die cut the floral images. The Gold Foil one is adhered behind the front panel and the Basic Black background adhered to the front of the panel. I die cut the intricate die in Basic White card, as well as Blushing Bride,Daffodil Delight & Gold Foil. I removed the inside pieces and placed them inside the white die cut for the inlay technique. I used my Blends Markers (Highland Heather, Mint Macaron), to colour the leaves and smaller flowers.

The Word Wishes dies are are used to cut the sentiment on the card front. I cut it multiple times, 4 times in Basic Black card and once in Gold Foil and glued them all together.

Inlay Technique Fancy Fold card using Hand-Penned Bundle for Daffodil Delight CCS by Kate Morgan, Stampin Up Australia 2021.

Stamp the floral image on the white panel with Daffodil Delight ink and the sentiment in Memento Black ink. You can place the white panel on the back or the inside of the card. I chose to glue it to the back to cover up where my panel joined the card base. The flowers have Wink of Stella on them for a gorgeous shine!

Inlay Technique Fancy Fold card using Hand-Penned Bundle for Daffodil Delight CCS by Kate Morgan, Stampin Up Australia 2021 back

Cardstock Measurements:
Daffodil Delight card base: 21cm x 14.8cm, score (landscape) at 8cm, 16cm, 18.5cm.
Daffodil Delight card (panel): 15.5cm x 6cm. Score at 10.5cm.
Basic White card (back): 14.3cm x 7.5cm.
DSP layers: 14.3cm x 7.5cm (background), 14.3cm x 2cm (front), 10cm x 5.5cm (panel).

Thanks for dropping by. All the products used tonight are linked at the end of this post!

Please click on the image below to head across to the next blog on tonight’s hop and see the wonderful inspiration of Tina Gillespie!

CCS Next Button

If you come across a broken link or have come from a different entry point, a full list of participants can be viewed on Catherine Proctor’s blog.

Shop Now for Items specific to this project

Saleabration Products (select free with qualifying order) before 30 September 2021

Shop Online Craft with Kate


Be sure to download a PDF copy of current catalogues from my SU Catalogue Library page.

Don’t forget to Follow My Blog to receive blog updates and join my Newsletter Subscription for all the latest news and specials!

Birthday, Handmade Cards, Techniques & Tutorials

Balloons with Wink of Stella

Dear Crafters,

You have to check out the brand new Wink of Stella Brush. They are a glitter pen with a brush for accenting stamped images. They come in clear and gold.


Add sparkle to your projects without the mess. The Wink of Stella Glitter Brush is perfect for writing and adding subtle controlled glitter to stamped images. The brush tip produces thick and thin lines, allowing artistic freedom.
* Clear
* 1-7/8″ x 7″ | 4.8 x 17.8 cm
* Archival quality
* Acid free
* Xylene free

$14.00 (141897)

Today I have used the clear one!

Balloon Framelits, Wink of Stella, Greetings Thinlits #stampinup Occasions 2016 @cardsbykate

I have used the Balloon Framelits and die cut one in some acetate to create a stencil/mask.

I placed it over the white card and sponged the Calypso Coral balloon first, then moved it down and sponged the So Saffron balloon. The next ones were Mint Macaron, Marina Mist & Wisteria Wonder.

Balloon Framelits, Wink of Stella, Greetings Thinlits #stampinup Occasions 2016 @cardsbykate

Next I used the Greetings Thinlits and die cut the “cheers” sentiment across the balloons. I then die cut another 2 of the same sentiment from scrap white card.

I glued the card base and the stamped balloon sheet together and then glued the 3 layers of the cheers sentiment on top of each other, making sure I placed the coloured one on top! This gives that inlay look.

Last of all, I added the Wink of Stella to the top of each balloon to highlight them.

Balloon Framelits, Wink of Stella, Greetings Thinlits #stampinup Occasions 2016 @cardsbykate

Click here to watch the YouTube video on the Wink of Stella brush. It has some really cool tips!


All Catalogues, Clearance Rack & Weekly Deals are available online here! They are full of amazing new products and wonderful full colour picture inspiration. It is a must have for anyone interested in Ink, Paper and Stamps!

Shop Online 24/7 for products

Don’t forget to Follow My Blog to receive blog updates and join my Newsletter Subscription for all the latest news and specials!

Enjoy the many perks of being a Demonstrator (even just for yourself as a Hobby Demonstrator) by joining my friendly team, click HERE for details.

Happy Stamping!

Name Banner