This super simple Cross card features the beautiful Floral Delight Designer Series Paper (DSP) and my new favourite In Color™, Secret Sea. It just goes with everything and is my new ‘black’!
This is a standard A5 side opening card, but has the cross feature on the front that folds flat to go into a C6 envelope. This could be used for a Sympathy card or an Easter card.
Product List
Stamps: Simply Said Dies: Impressions Abloom Ink: Secret Sea Paper: Basic White, Secret Sea, Pecan Pie, Peach Pie, Floral Delight DSP, Basic White C6 Envelopes Other: Acrylic Blocks, Paper Snips, Bone Folder, Paper Trimmer, Multipurpose Glue, Mini Stampin’ Dimensionals, Stampin’ Cut & Emboss Machine, Take Your Pick Tool, Simply Shammy. @stampinupofficial
*can be purchased together as a bundle to save 10%
Be sure to download a PDF copy of current catalogues from my SU Catalogue Library page.
Don’t forget to Follow My Blog to receive blog updates and all the latest news and specials!
Welcome to another Art with Heart Team blog hop where we are focusing on fancy folds. You will find loads of creative inspiration tonight, showcasing different folding techniques and projects. Don’t be afraid of trying some Fancy Fold cards; they may look intimidating, but in fact, they are not that difficult to create.
If you’re already hopping, then you just came to me from the talented, Tina Gillespie. If you’re just joining, great! Use the “next” button at the end of my post to hop all the way around. Blog Hops are full circles, so you can start hopping here and then at the end of each post there is a link to the next one. There is also a list of participants at the end in case of any broken links.
Now let’s get started!
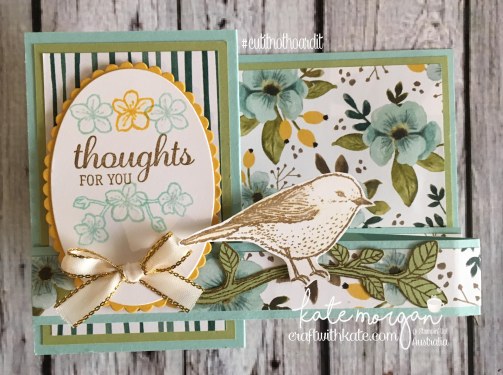
For my projects today I am using the Best Birds stamp set with the Whole Lot of Lovely Designer Series Paper. I love how striking this Designer Paper is too and I knew it had to be a focal point. #cutitnothhoardit
Fancy Fold Card #1
For my first card today, I am sharing a fairly simple fancy fold card, a Double Z Fold.
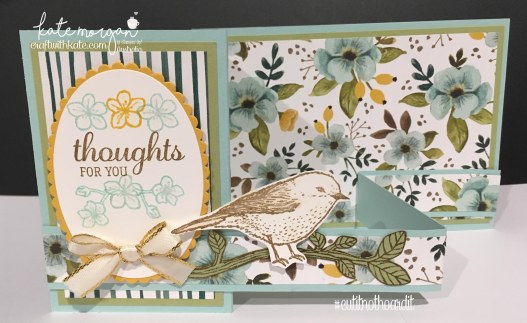
The card base is Pool Party card = 11⅜” x 5⅛” and score at 2¾” & 5½”. Trim off a 1″ strip from the bottom of the card which will create the double z fold. You just flip that strip over, so the shorter end is on the right as shown. Then you decorate as you like. Here is my colour combination using the coordinating colours in the Designer Paper!
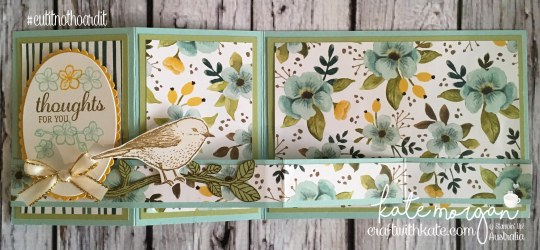
Back panel of the card
Products used
Stamps:Best Birds Inks: Crushed Curry, Pool Party, Soft Suede Card/Paper: Crushed Curry, Pear Pizzazz, Pool Party, Whisper White, Whole Lot of Lovely DSP Accessories: Big Shot, Layering Ovals Framelits dies, Magnetic Platform, Stampin’ Trimmer, Paper Snips, Stampin’ Scrub, Stampin’ Mist, Tombo Multipurpose Glue, Simply Scored, Clear Block Bundle, Dimensionals, Fast Fuse, Tombo Glue, Wink of Stella, Blender Pen, ⅜” Gold Metallic-Edge Ribbon
Fancy Fold Card #2
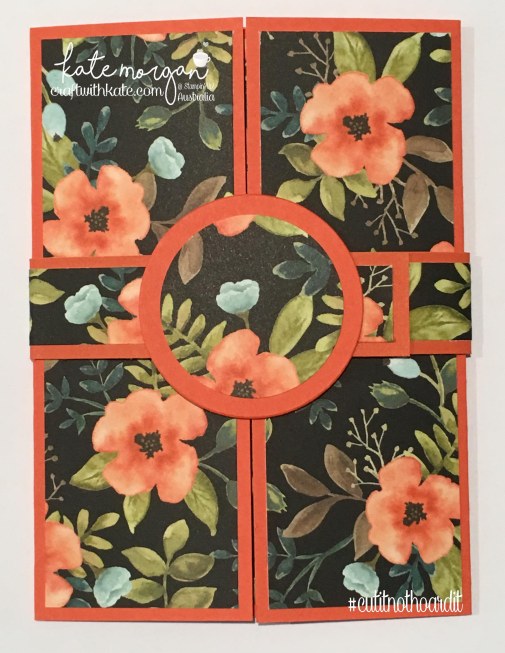
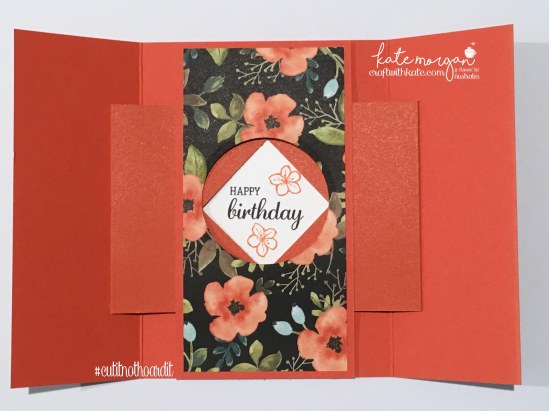
For my second one, I have a more advanced fancy fold card. I am sharing a style that I think is amazing, but I’ve never found it in Australian cardstock sizes, so I created my own A5 Gatefold Shutter card. It took quite a bit of time to figure out all the correct measurements, but I am super happy with the outcome. Now I have mastered it, I can whip them up in no time at all!
When you take off the belly band, the centre diamond opens to reveal a secret message inside!
Kids love this style of card, they think it’s like magic when it opens up. They look difficult to make, but if you follow the instructions, they are actually quite easy.
If you would like a copy of my FREE tutorial how I made these cards, head over to my ‘Free Tutorials’ page to download your PDF copy, but make sure you continue the blog hop first to see what all the other talented ladies have created!
Products used
Stamps:Best Birds Inks:Basic Black & Tangerine Tango Card/Paper: Tangerine Tango, Whisper White, Whole Lot of Lovely DSP Accessories: Big Shot, Layering Circles Framelits dies, Magnetic Platform, Stampin’ Trimmer, Paper Snips, Stampin’ Scrub, Stampin’ Mist, Tombo Multipurpose Glue, Simply Scored, Clear Block Bundle, Dimensionals, Fast Fuse, Tear & Tape, Bone Folder, Ruler, Pencil, 1¾” circle punch, 2¼” circle punch
Thanks for visiting today.
Don’t forget to email me at craftwithkate@live.com.au to request your copy of any Catalogue or to ask about joining the Art With Heart team.
Now it’s time to follow the blog hop to our next participant, Andrea Roberts.
If you find a broken link or have come to this blog hop from a different entry point, you can view the participants below:
Today I have used the Window Box Framelits to create a Ribbon Dispenser.
I posted this on one of our private Stampin’ Up! Facebook Forums, and the response I got was enormous (over 1.3k likes) and so many requests for a tutorial on how I made it.
I love the detail on each end and you can decorate it with any Designer Series Paper!!!
I have attempted doing a written tutorial for this, but please let me know if you find it hard to follow, as I didn’t write down instructions when I was creating this the first time! You can download the PDF tutorial by clicking here window-box-thinlits-ribbon-dispenser-by-craft-with-kate.
What do you think of this project? This would make a great gift for a crafty friend or a Hostess gift for a workshop!!!
Sale-a-bration time!!!
With any $90 order you can choose 1 item for FREE
with a $180 order you can choose 2 items for FREE
with a $270 order you can choose 3 items for FREE
ETC
Here are all the FREE items you can choose from!
Products Used:
Cardstock: Island Indigo, Blooms & Bliss DSP Inks: Melon Mambo Other: Big Shot, Window Box framelits, Tombo Multipurpose Glue, Trimmer, Paper Snips, Tear & Tape Adhesive, 1/2″ circle punch
Don’t forget to Follow My Blog to receive blog updates and join my Newsletter Subscriptionfor all the latest news and specials!