feminine, Techniques & Tutorials

Water Colour Background

Hello Crafters,

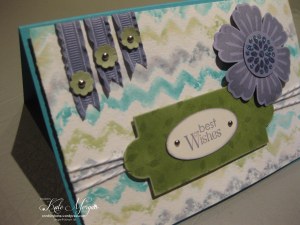
Today I am sharing a card I made using the water colour technique for the background of my card. Can you believe, I have never used the watercolour paper until now?

And check out the colours ~ I have used Wisteria Wonder, Pear Pizzazz & Bermuda Bay!
IMG_4794

The card base is Bermuda Bay. Now to explain how I created that gorgeous water colour background.

I used the Chevron Textured Impressions Embossing Folder and the Stampin’ Write Markers in each of the colours alternating the colours on each of the lines on one side of the TIEF. You may notice that the ink drys, but do not worry until you have finished adding the inks. Once finished, I sprayed the embossing folder with Stampin’ Mist (you know the stuff we use with our Stampin’ Cleaner!!!) and then put a piece of water colour paper on top and closed the folder gently and rub. Open the folder and tada, you have a gorgeous water colour background. Put this aside to dry.
IMG_4795

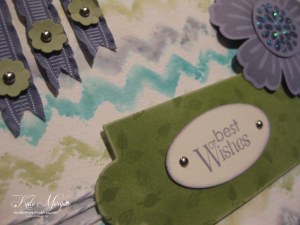
The flower from the Mixed Bunch stamp set and punched out with the Blossom punch and the 1″ circle punch. I curled the petals using my thumb and joined the pieces with dimensionals.

Here is another close up of the image.
IMG_4793

I just love this background and will certainly try some more water colouring!!!


The new 2014-2015 Annual Catalogue goes live on 1 July, but if you would like to receive a copy before then, please Contact Me. This catalogue is full of amazing new products and wonderful colour pictures for ideas. It is a must have for anyone interested in Ink, Paper and Stamps!

Don’t forget to check the retired stamps and accessories lists, there are sure to be products to please, but hurry, only available while stocks last!

Shop Online 24/7 for products

Don’t forget to Follow My Blog to receive blog updates and join my Newsletter Subscription for all the latest news and specials!

Happy Stamping,
Name Banner
Gift Ideas, Techniques & Tutorials

Shaving Cream Technique

Hello Crafters,

Well I am guessing you are all full to the brim with chocolate after the Easter bunny visiting you yesterday!

I wanted to share with you one more of my Easter Treat Boxes which you have all seen by now, but I have added a new technique, the Shaving Cream technique!

Yes, you heard it right, it is a messy technique, but very effective and we had so much fun playing with it.

Every piece of card is different every time you place it onto the shaving cream!

Here’s what to do:

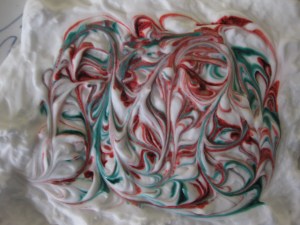
First you start with spraying some shaving cream onto a large dinner plate, smooth it out slightly, then add a few drops of reinker. I used Strawberry Slush and Coastal Cabana.

Shaving Cream Technique

Then you use a skewer and slowly swirl the colours around in a circular motion until you are happy with the look.

Shaving Cream Technique

Then place your white card stock on top, press down so it is evenly coated, then lift up. Wipe off the shaving cream with some paper towel. I do this in a circular motion, in case some of the ink catches the card (you don’t want straight lines of ink through your work).

Here is a piece of A4 card stock that I cut into 4 before placing into the cream. Isn’t it a cool technique?!!!!

Shaving Cream Technique

And here it is cut up and placed onto my Easter Treat Box!!!

Easter Treat Box

The box is Strawberry Slush card stock. The clear window is punched with the 1-3/4″ circle punch with a sheet of acetate behind. A perforating tool was used to create the perforation after the patterned card was glued down. The trim around the acetate window was created with the 2-3/8″ circle punch.

I stamped the bunny, from the Baby We’ve Grown Stamp Set (Wood #133086, Clear #133089) in Strawberry Slush Ink on the off-cut circle from the window! The sentiment from Teeny Tiny Sentiments is stamped next to the bunny and a hole punched and tied onto the ribbon with some Baker’s Twine.

This time I added some Strawberry Slush ribbon to the top of the box to use as a handle!

This treat box can hold more than 150g of chocolate easter eggs (I have put in 25 eggs)!!!

Here is my Easter Treat Box Tutorial!


Shop Online 24/7 for products

Happy Crafting,

Name Banner

Techniques & Tutorials, Tools & Accessories

Nifty tip!

Hello Crafters,

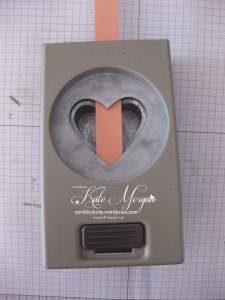
Today I share with you a really nifty tip, how to make a simple arrow from your Heart punch!!!

Heart Punch      Heart Punch

This is just so cool and so quick and easy, I just had to share with you!


To order your Heart punch, simply click on the image below!

 Happy Stamping,
Name Banner
Techniques & Tutorials

Bouncing Brayer

Hello Crafters,

This week, I got out my brayer to have a play with some background colour.

I think they call this the bouncing brayer technique, although I need lots more practice at it!!! lol

I inked up the brayer with the lighter colour first, then each of the other colours from lightest to darkest, boucing the brayer around the card to create this effect. Glue it onto a piece of Tangerine Tango cardstock, then onto a Rich Razzleberry card base.

IMG_4252

I used my Big Shot machine to die cut a floral framelit in Rich Razzleberry card stock and adhered it to the centre of the card.

I punched 5 circles from the Tangerine Tango card stock. Using the paper snips I cut into the centre of each one, then put a glue dot on one tip where I cut in from and pulled the other side over the top of the glue dot. This formed the shape of each petal. I used glue dots to put it together before adding a Very Vintage Designer button with a piece of twine tied in a knot.

Here is a close up!

IMG_4253

 
Products Used:
Card: Rich Razzleberry, Tangerine Tango, Whisper White
Ink: Melon Mambo, Rich Razzleberry, Tangerine Tango
Punch: 1-3/4″ Circle
Other: Big Shot, Floral Frames Framelits, Paper Snips, Glue Dots, Twine, Very Vintage Designer Button, Tombo Glue

Shop Online 24/7 for products

Happy Crafting,

Name Banner
Techniques & Tutorials

Treat Favour Pouch

Hello Stampers,

This is a very simple treat favour pouch that would be easy for the kids to make for their dads for Valentine’s Day!

This technique is called the diaper fold technique, just the same as when you folded those cloth nappies for your children (cough cough) and you know how quick they were to pin!!! LOL

I used a 6″ x 6″ square piece of Soho Subway Designer Series Paper to create this project, but you could make bigger ones using 12″ x 12″.

Create a cute little pouch out of one piece of paper. Supplies One square piece of lightweight card stock or double-sided patterned paper Scoring tool Embellishments (optional)
Create a cute little pouch out of one piece of paper.
Supplies
One square piece of lightweight card stock or double-sided patterned paper
Scoring tool
Embellishments (optional)
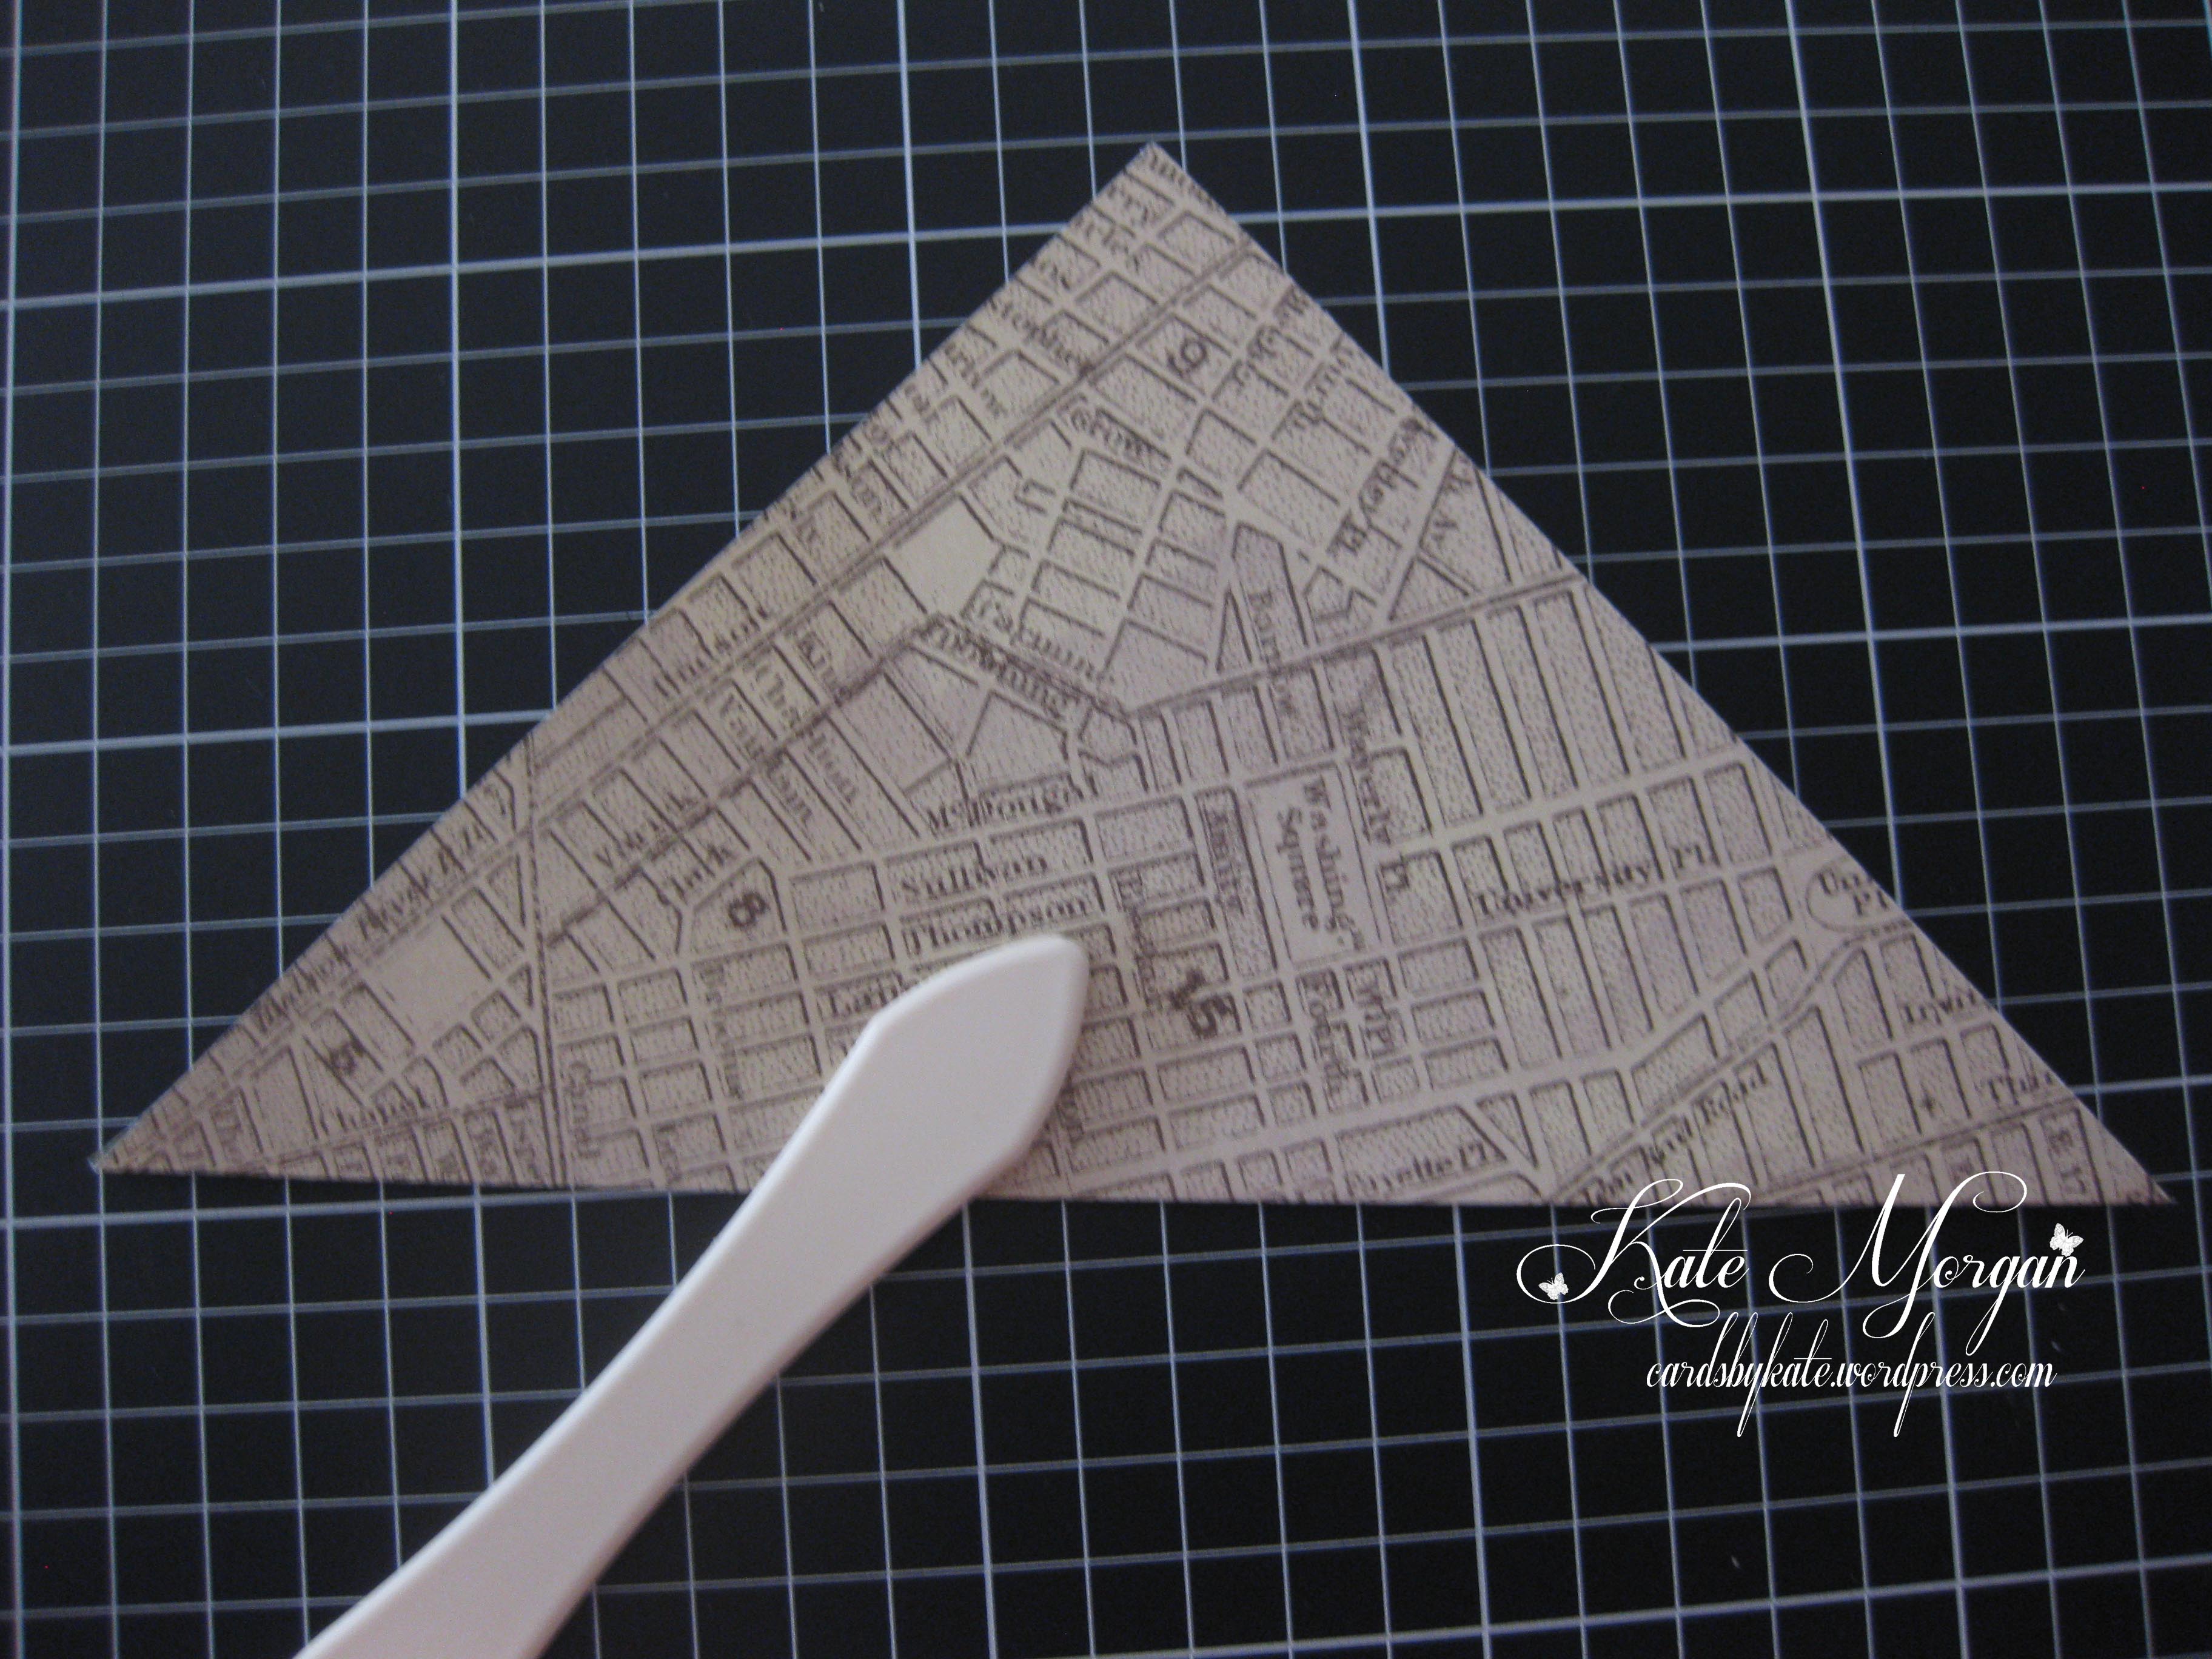
Step-by-Step Fold paper in half diagonally.

Fold paper in half diagonally.

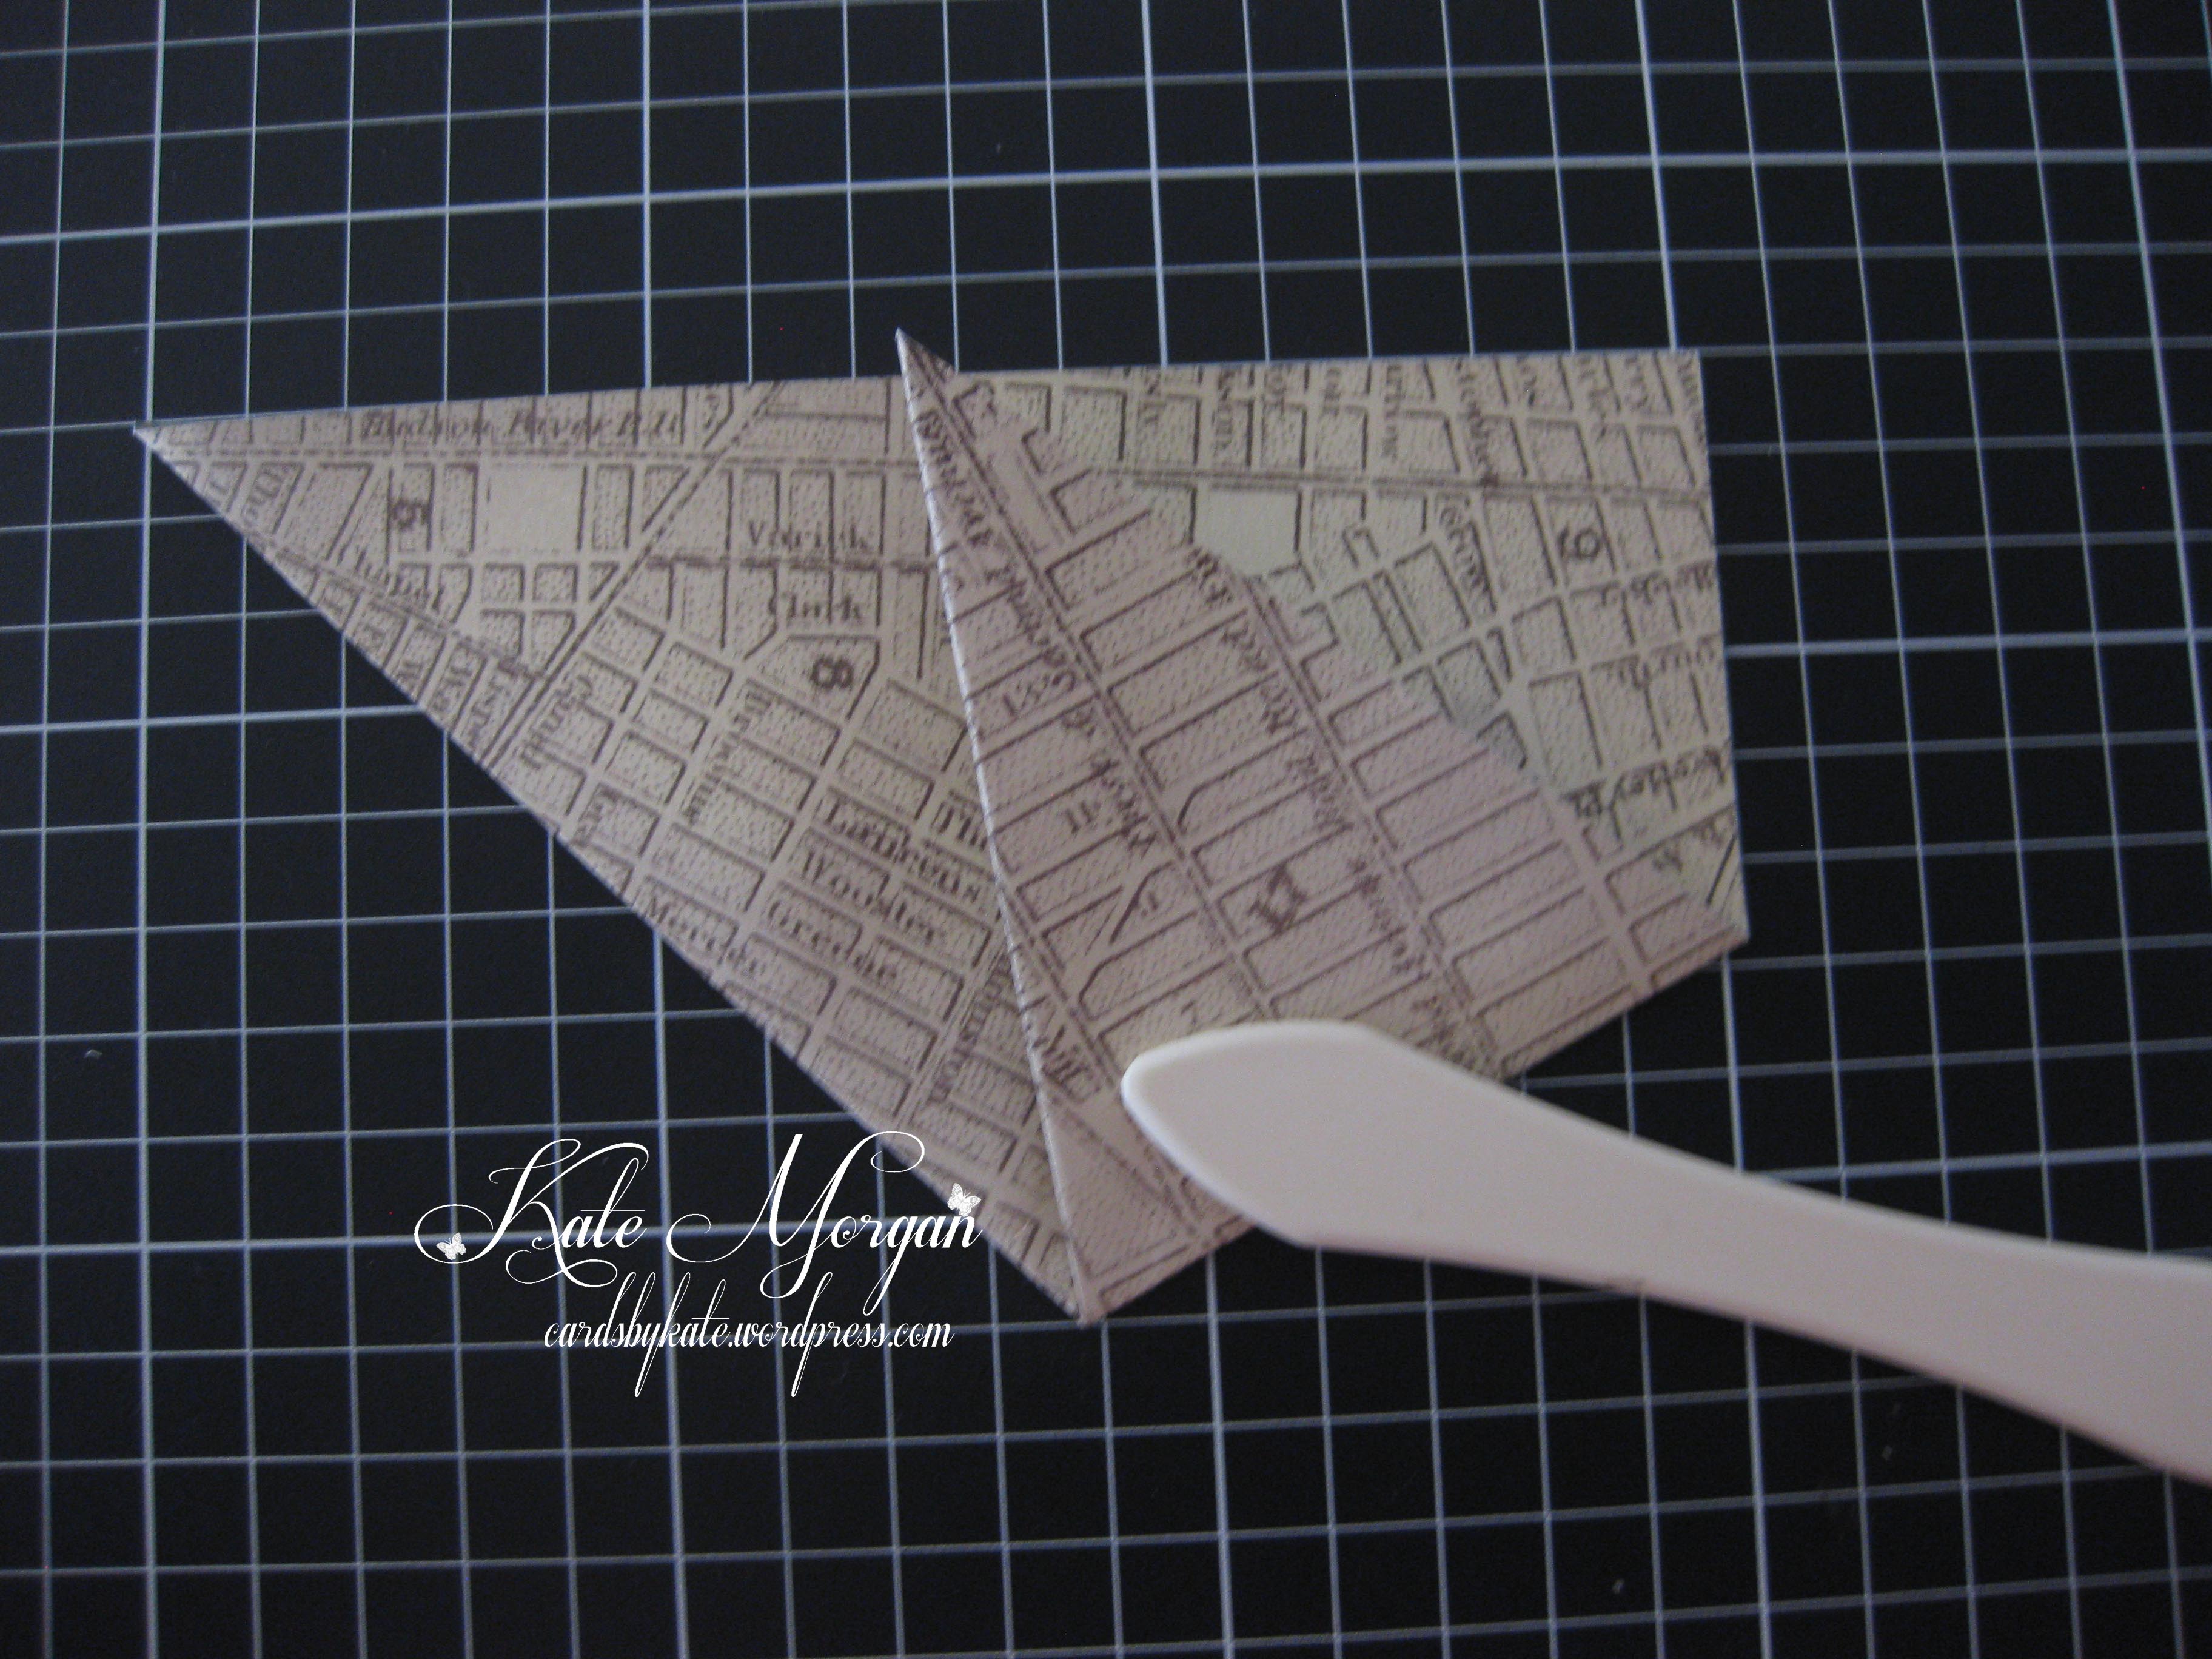
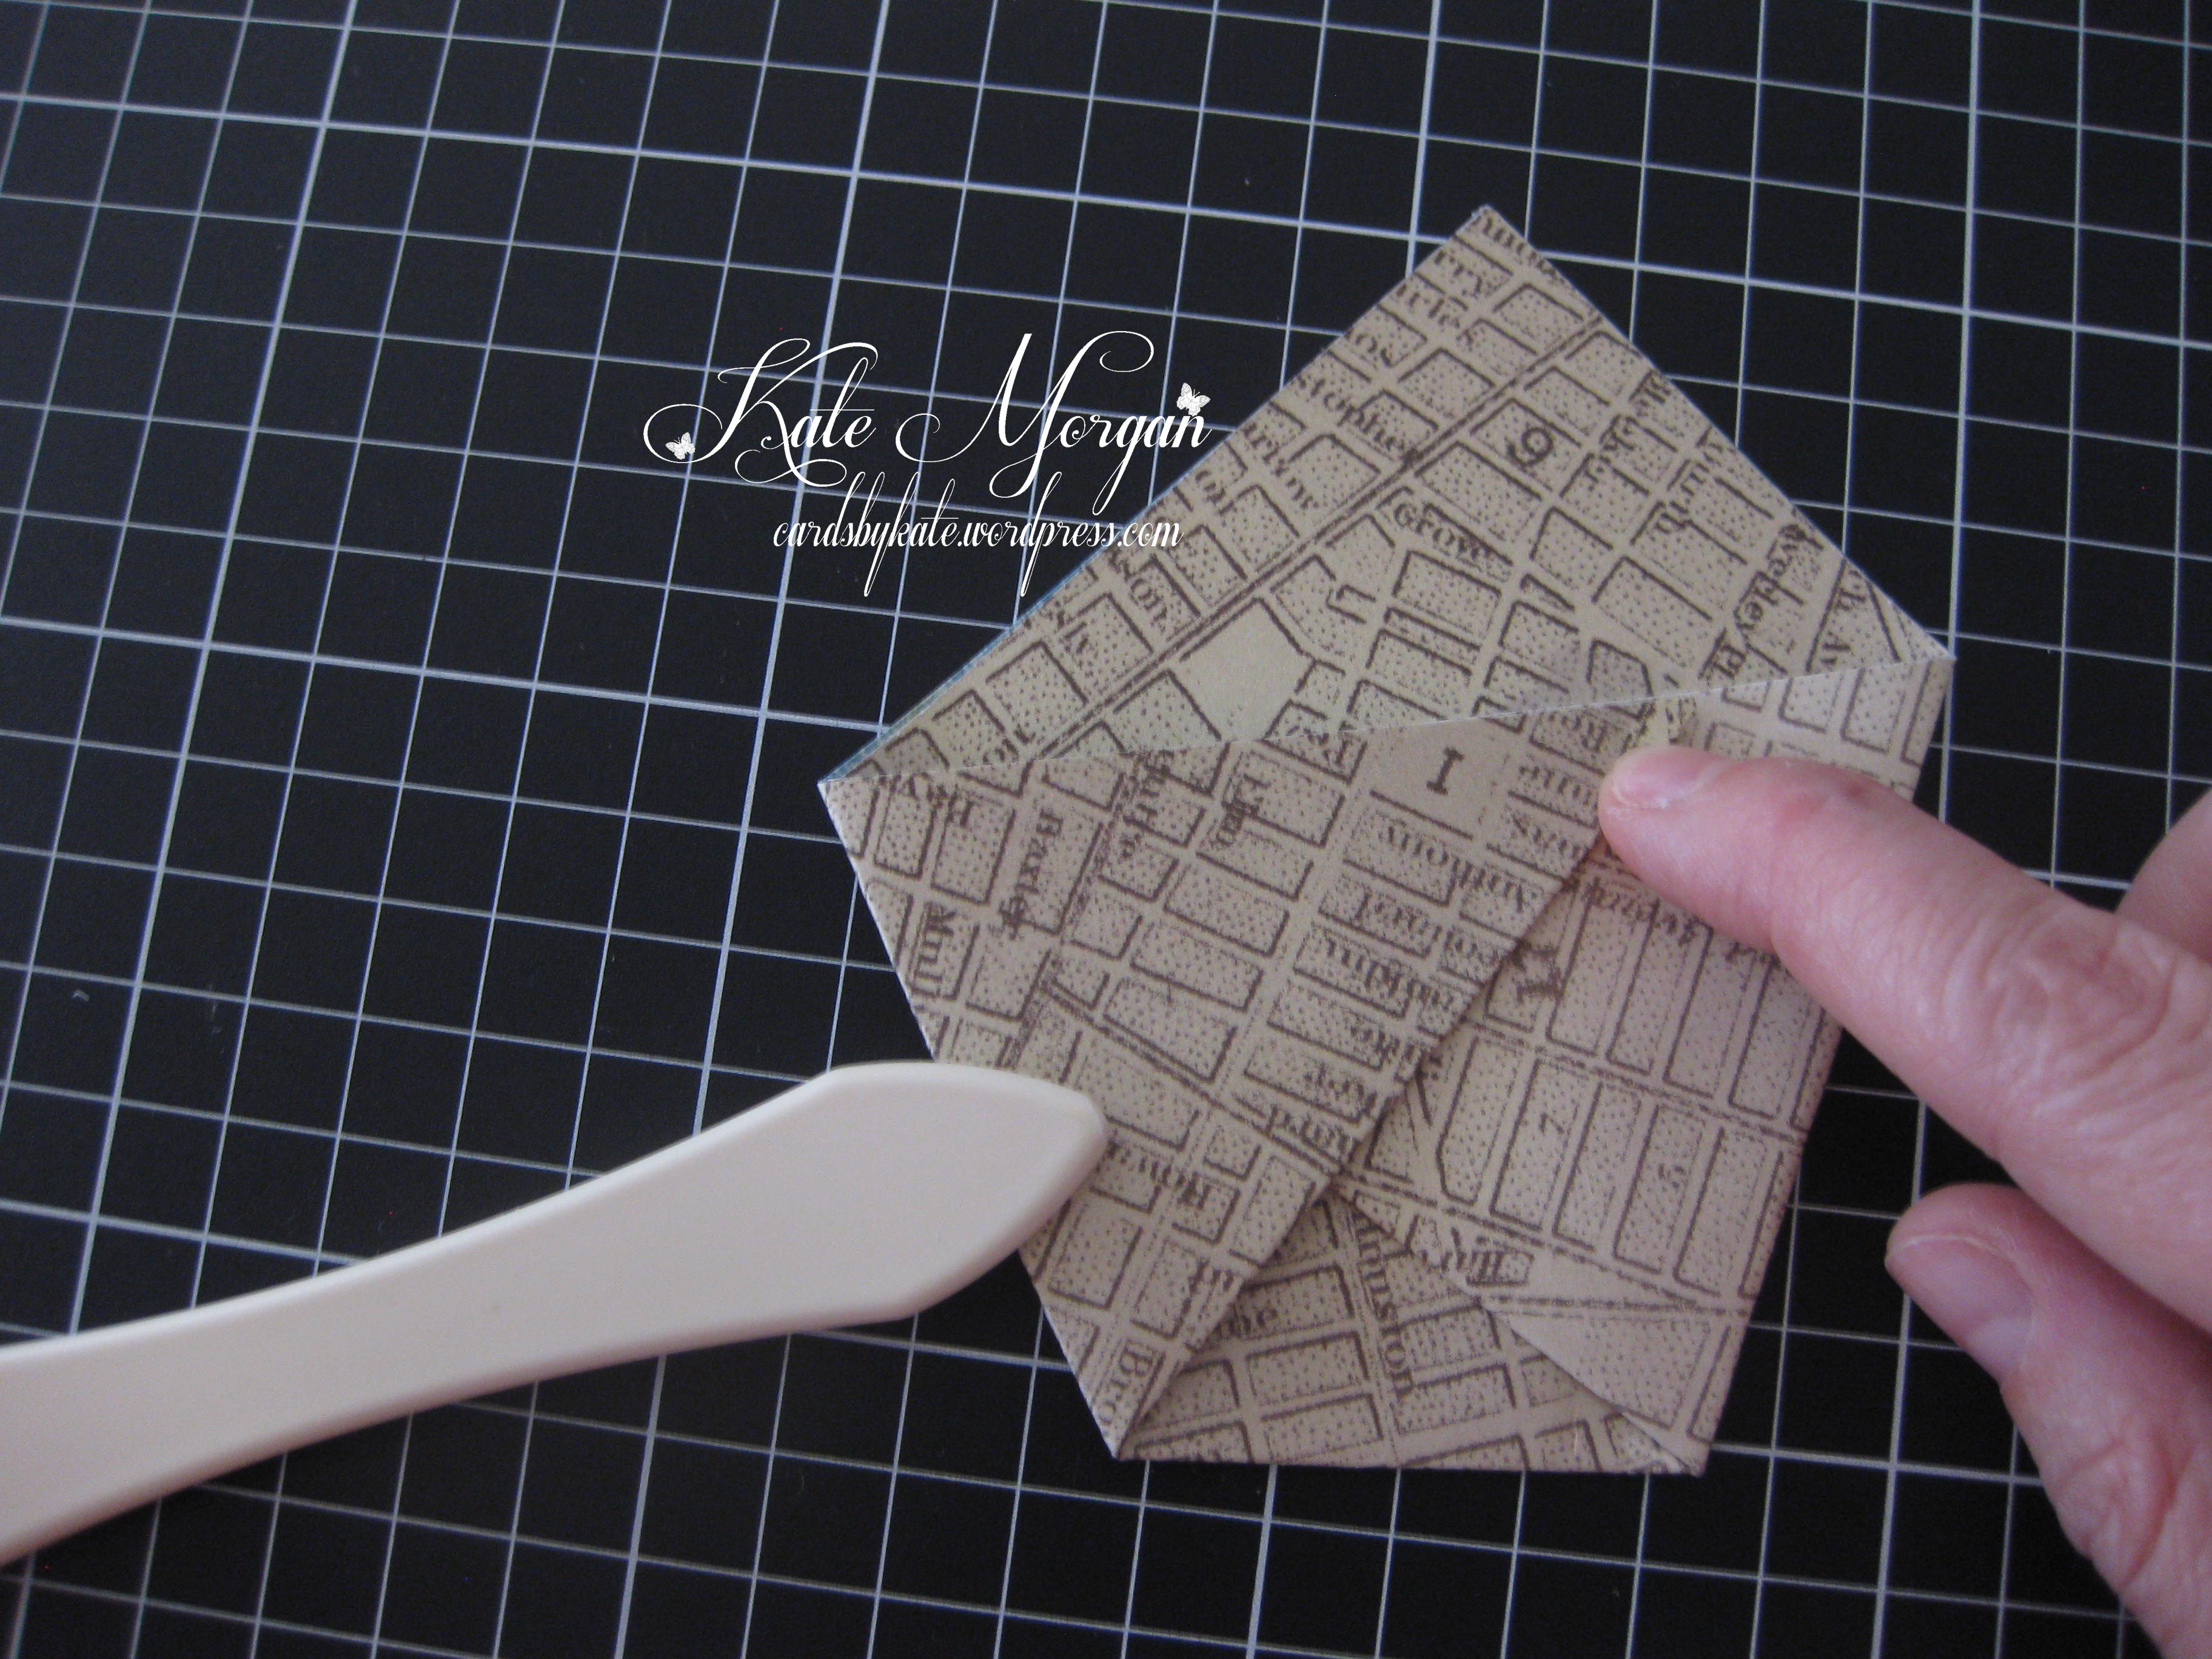
Take one of the lower corners of your triangle and fold it over to the middle of the other triangle side.

Take one of the lower corners of your triangle and fold it over to the middle of the other triangle side.

Take the other lower corner of the triangle and fold it over to the middle of the opposite side.

Take the other lower corner of the triangle and fold it over to the middle of the opposite side.

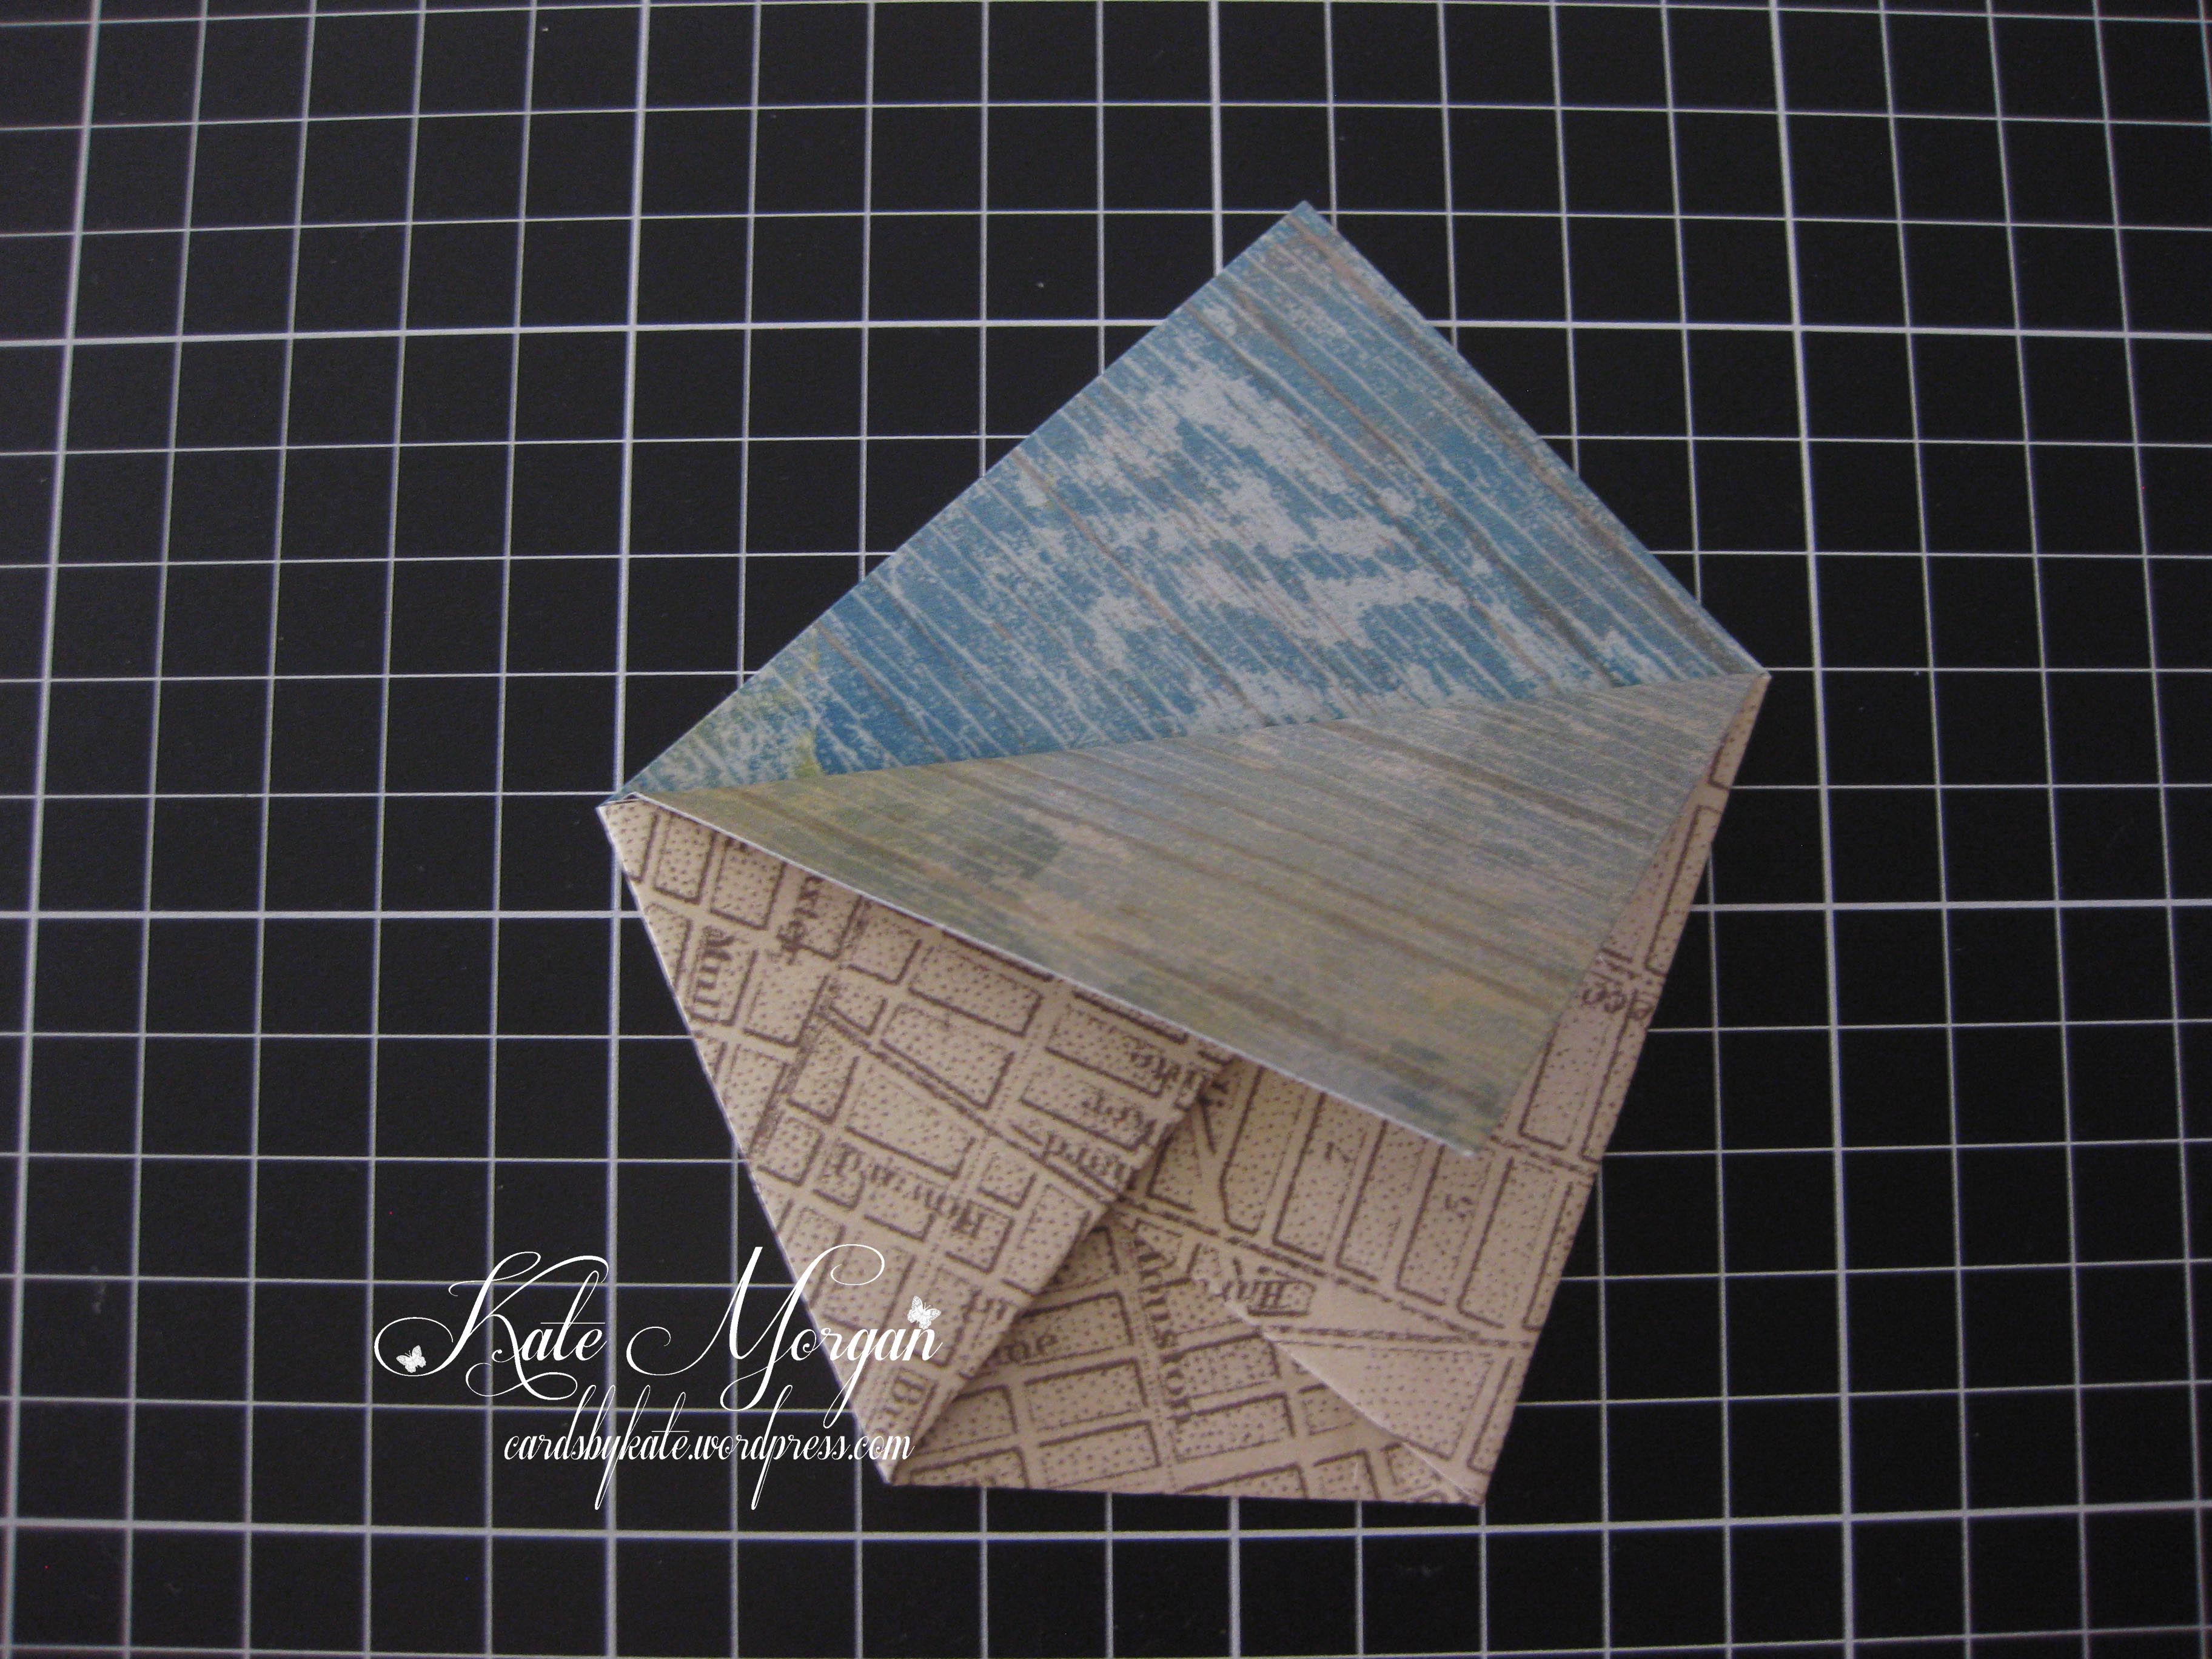
Take one layer of your top corner and fold it down to create your pouch.

Take one layer of your top corner and fold it down to create your pouch.

Decorate and fill your pouch.

Decorate and fill your pouch.

Isn’t it so cute? This can be folded in minutes, so no excuses not to have something small to give to your loved ones this Valentines Day.

You can also use these for party favours!
Happy Crafting!

Kate

feminine, Techniques & Tutorials

Upright Diamond Fold Card

Hello Stampers,

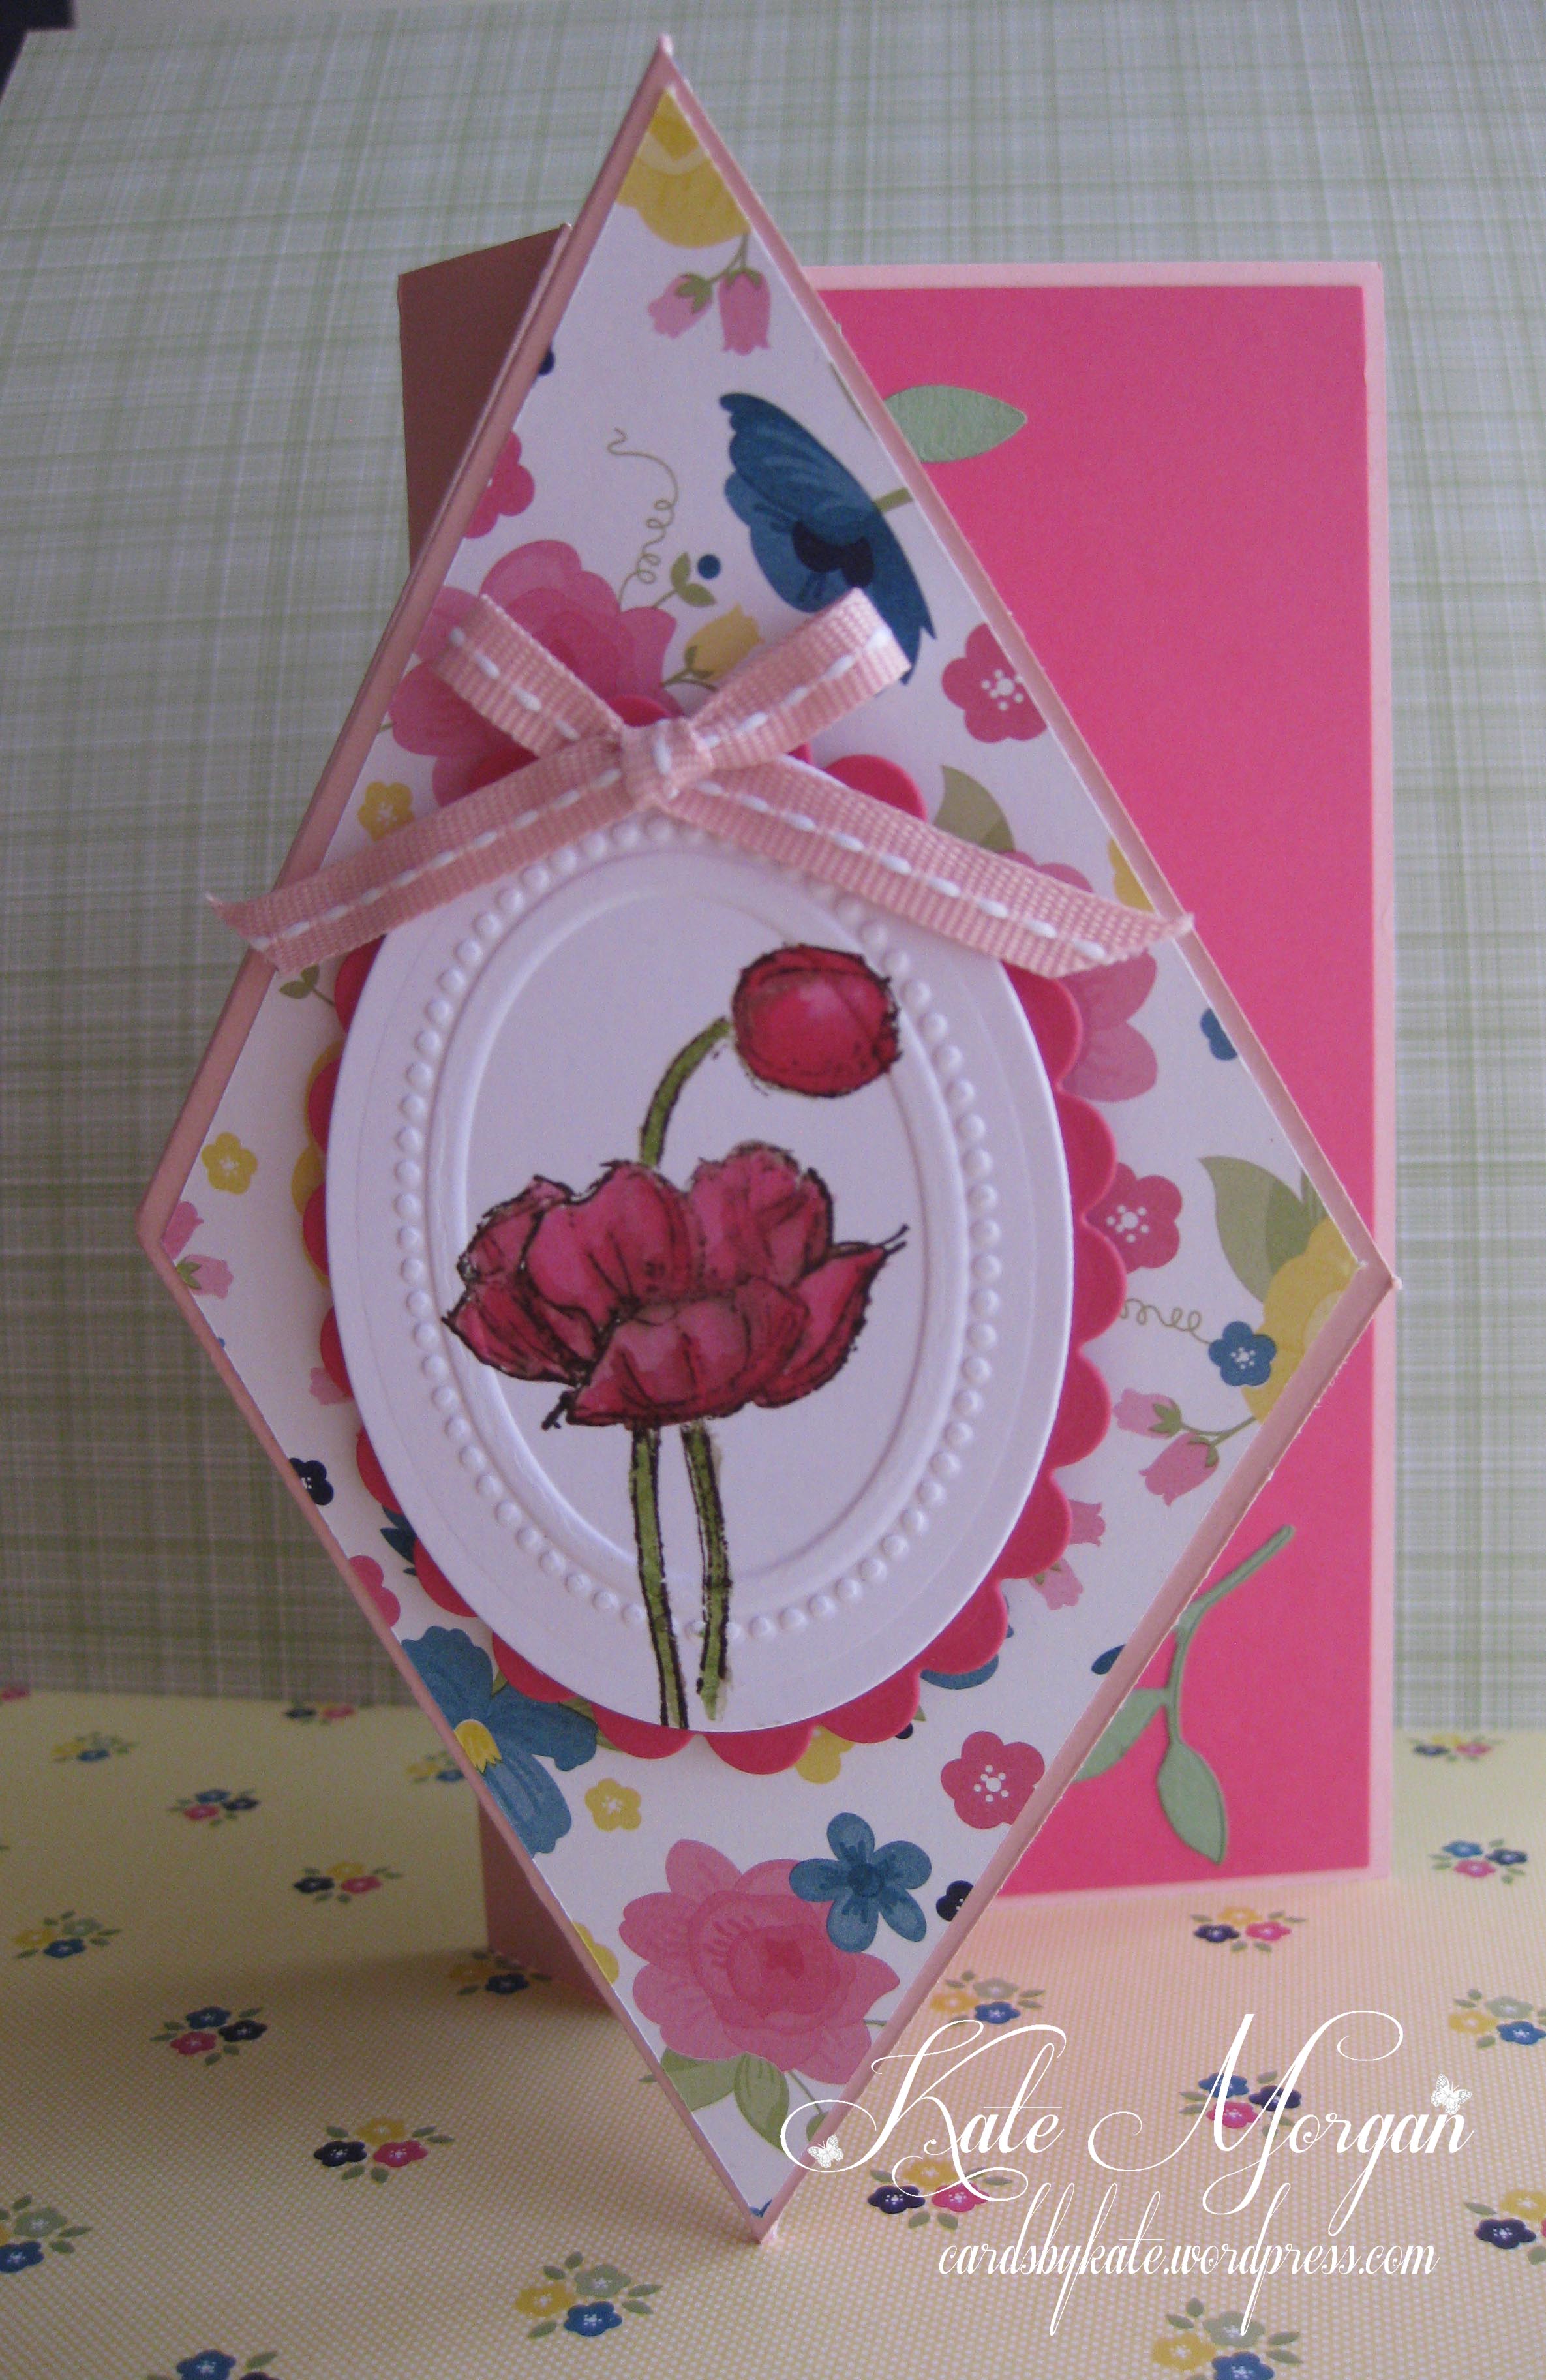
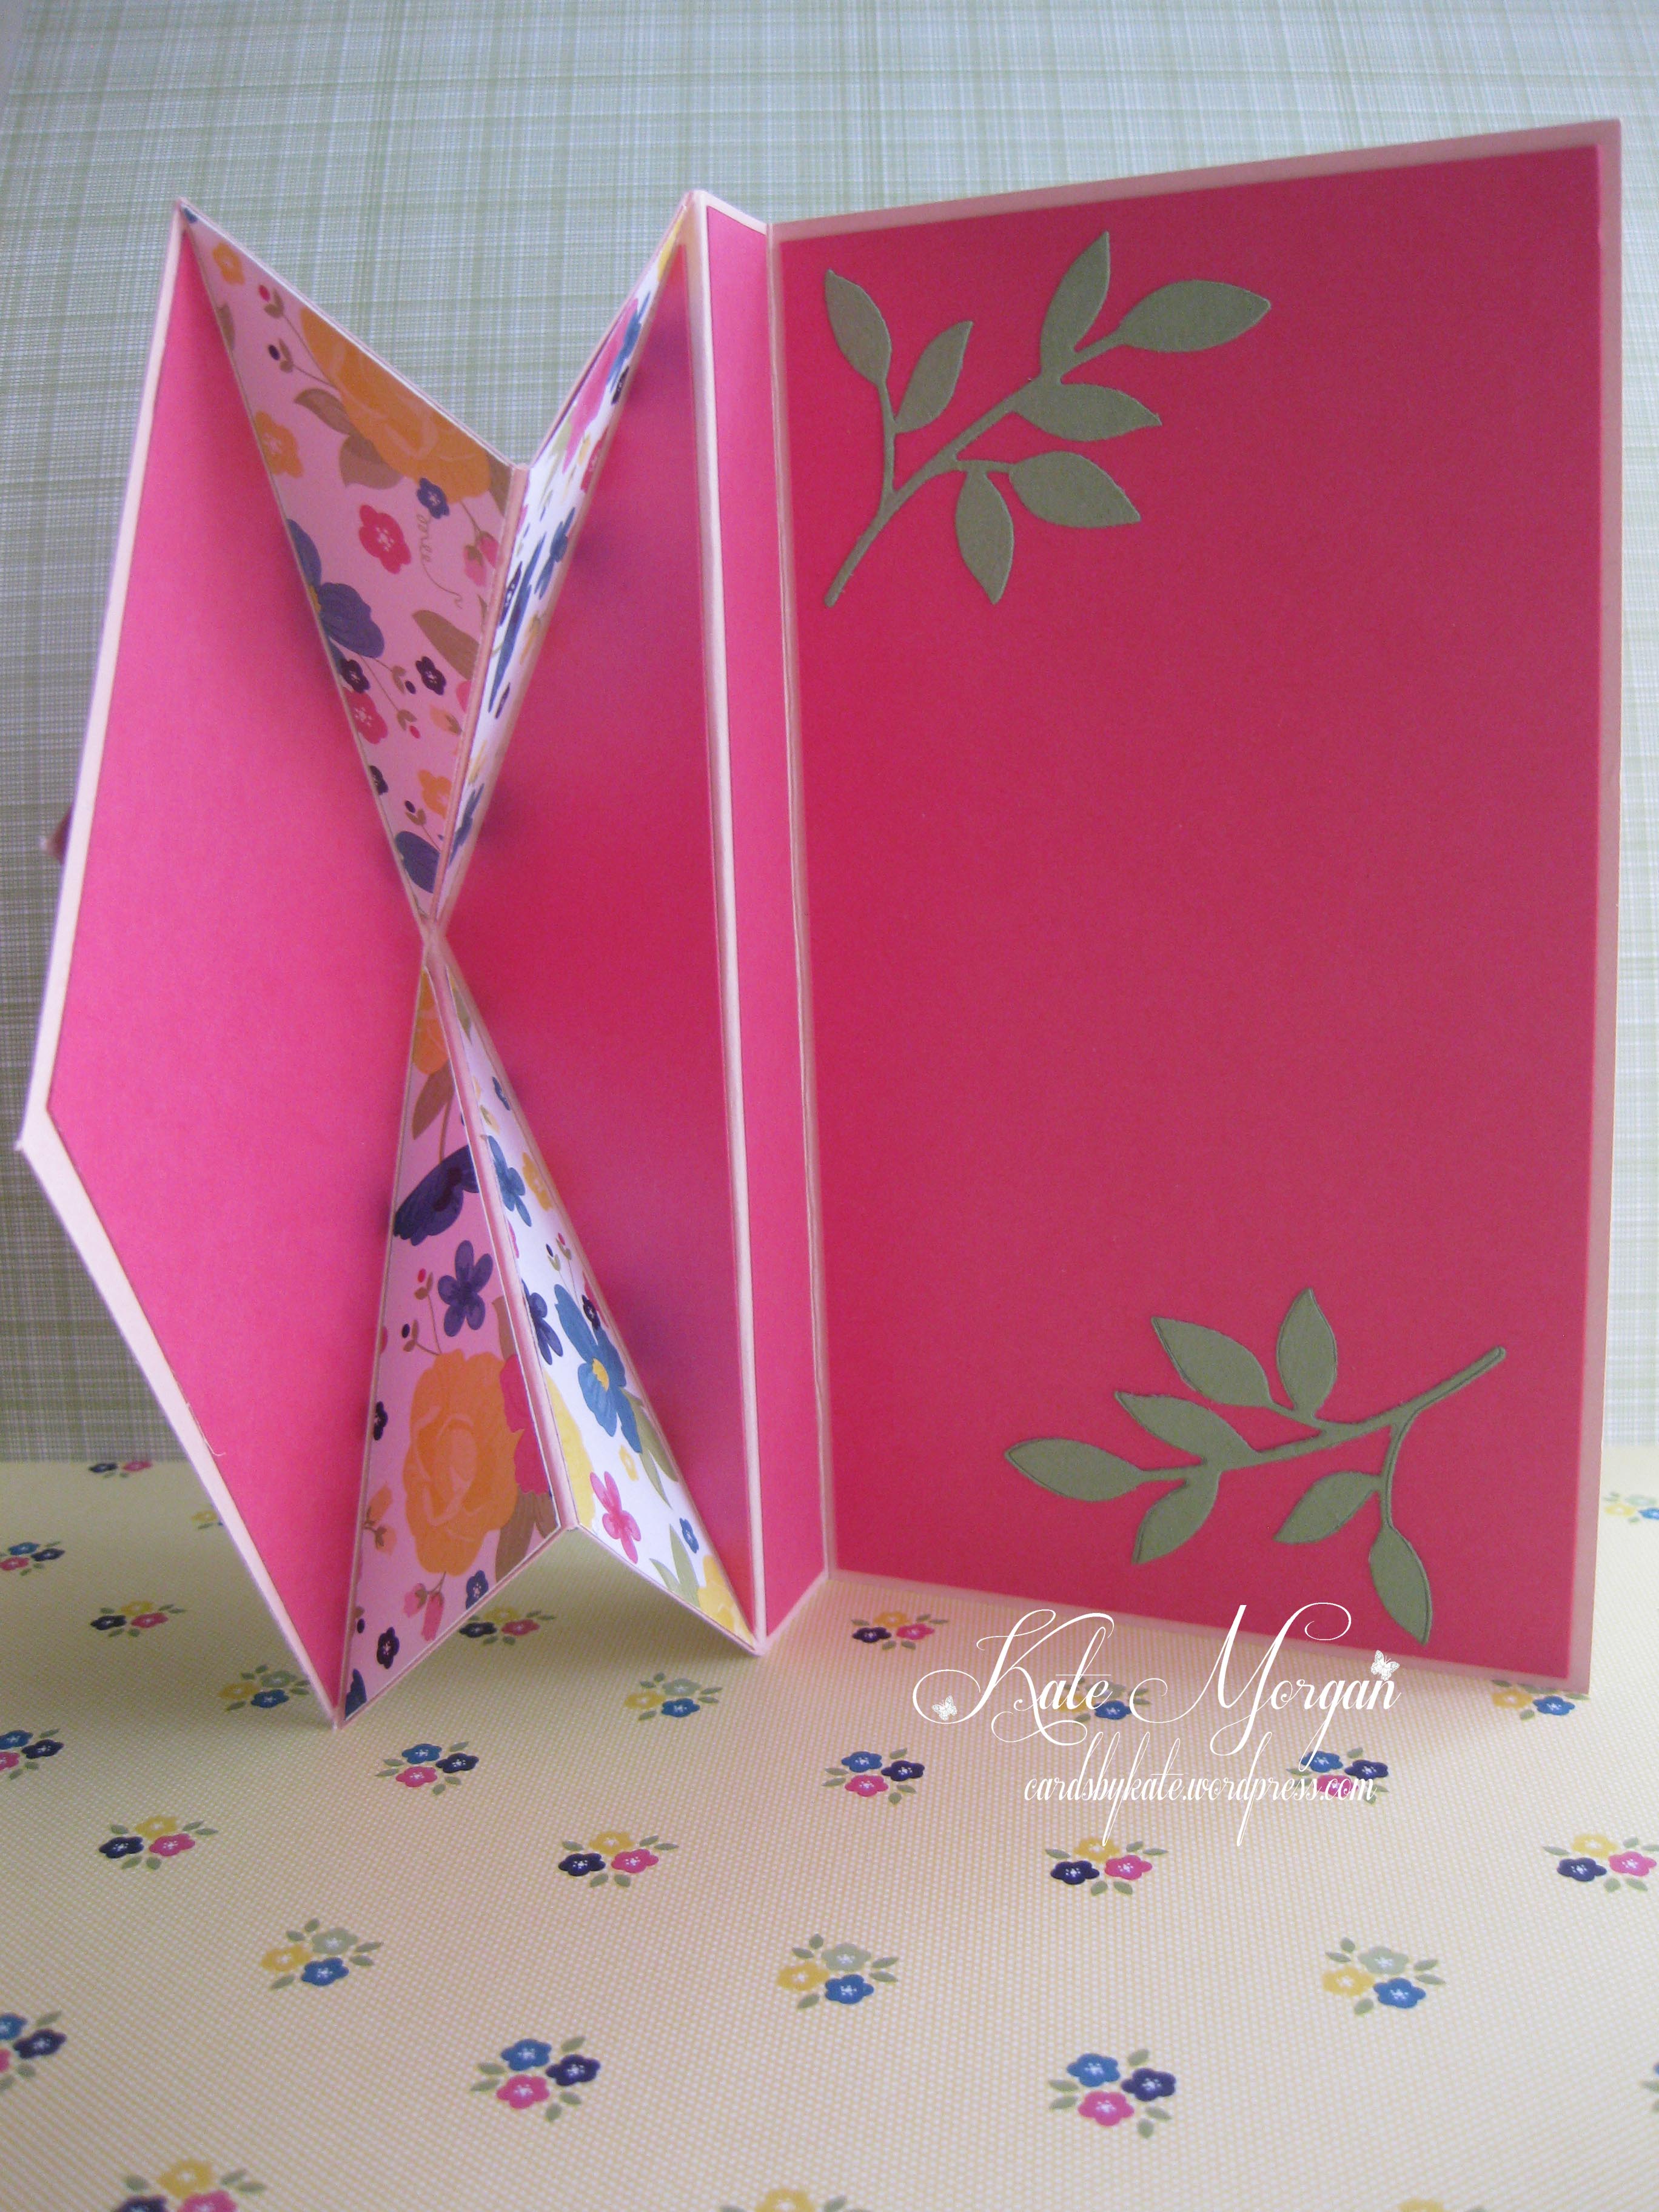
Today I have been having a play with a new type of card folding technique ~ the Upright Diamond Fold.

It is quite different to any other card I have made before!

Upright Diamond Fold
Front of card

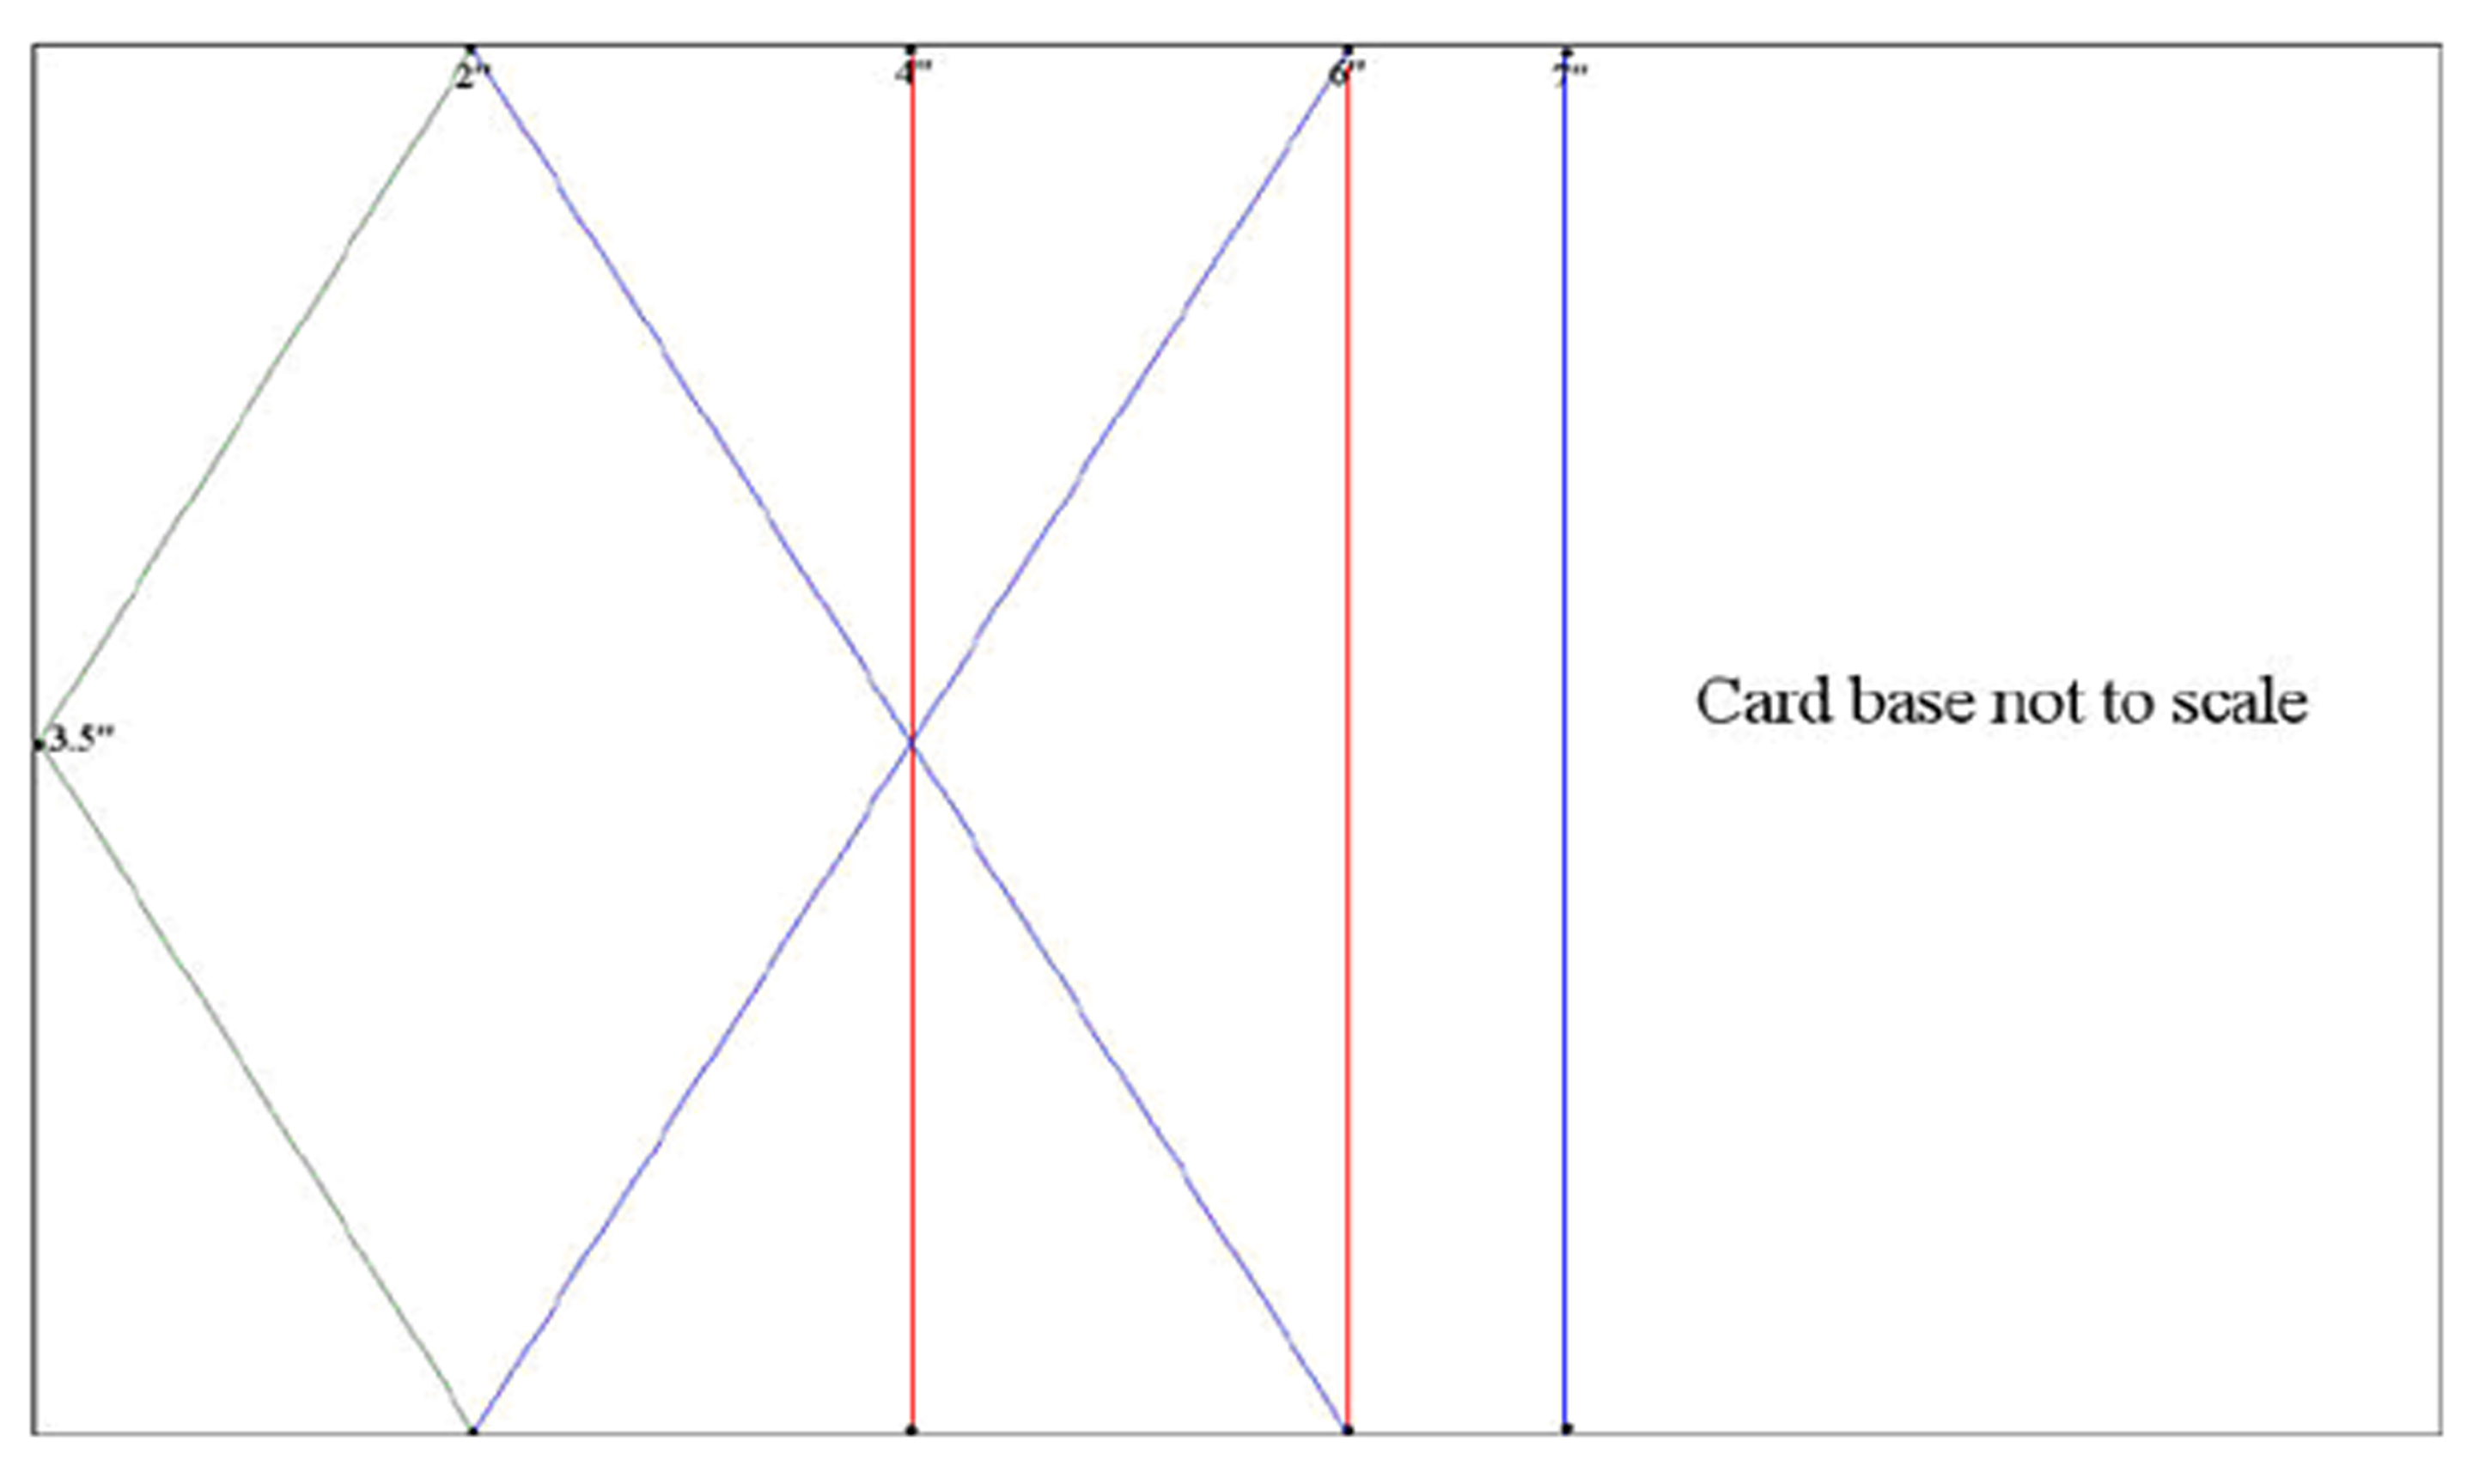
To begin I used a card base of 11” x 7” cardstock .

On both long sides make a mark at 2”, 4”, 6” and 7”

On the left short side make a mark at 3½”

Diamond Fold

Valley fold on the blue lines

Mountain fold on the red lines

Cut on the green lines

To make the diamond shape layer, cut a piece of DSP 3¾” x 6¾”

Diamond

Make a mark at the 1 7/8” on the short sides and 3 3/8” on the long sides.

Cut on the green lines.

Decorate as desired.

Upright Diamond Fold
Inside of card

I have used the Gingham Garden Designer Series Paper with Melon Mambo, Blushing Bride, Wild Wasabi, and the Designer Frames Embossing Folder.

Let me know what you think of this style of card by leaving a comment below.

Happy Stamping!

Kate

25% off, Techniques & Tutorials

Stitches & Craft Show

Morning Stampers,

I would like to thank everyone for their support for me as I attended the Stitches & Craft Show at Caulfield Racecourse.

The show was held daily from Thursday 24th to Sunday 27th October between 10am – 4.30pm.

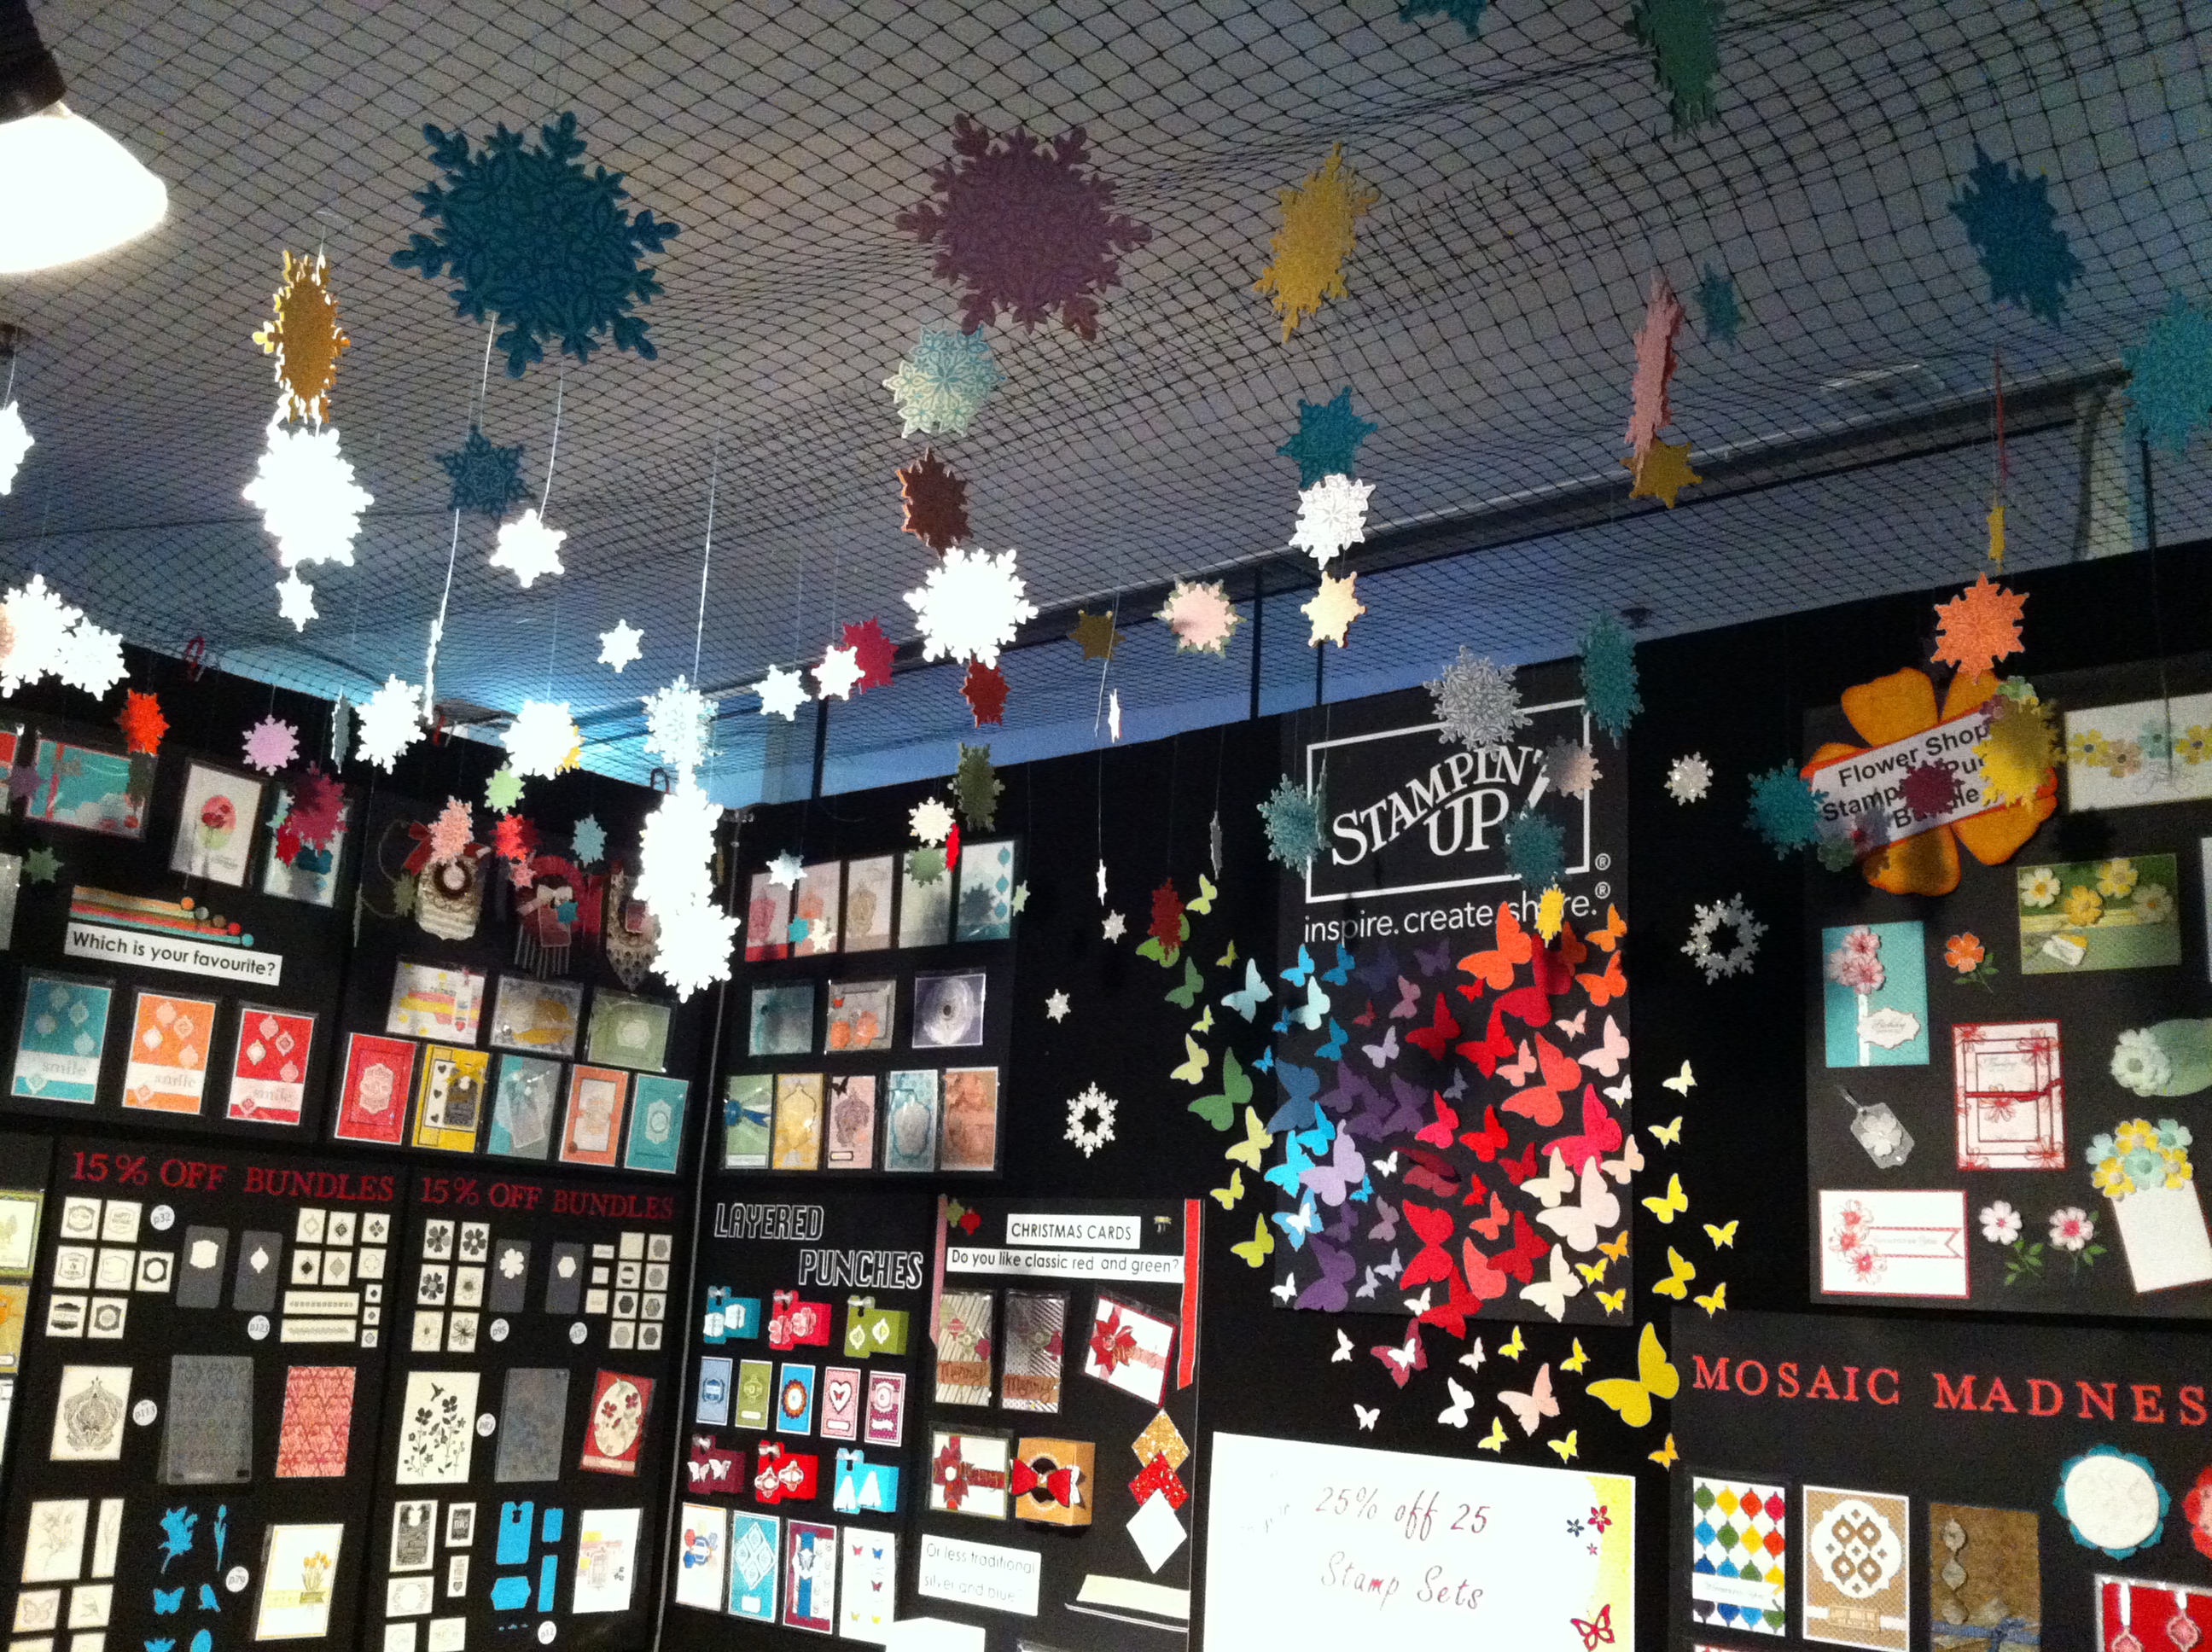
I was on the Stampin’ Up! stand on Friday 25th October and I had a ball.

I met so many lovely crafters who came to watch our demonstrations and see our beautiful displays.

We certainly hope we have given each and every one of you some inspiration!

Stampin' Up! Stand at the Stitches & Craft Show, Caulfield Racecourse
Stampin’ Up! Stand at the Stitches & Craft Show, Caulfield Racecourse

We even had loads of Festive Flurry ornaments dangling from the rooftop!

Here is what I demonstrated on the day.

IMG_3678

It was sponging and masking!

I think many people who stopped by to watch my demonstration of this technique, were surprised at how quick and simple it was, but also just how effective it was once complete! The image used was the Lovely as a Tree stamp set.

Don’t forget today is the last day to order any of the 25% Off 25 Stamp Sets.

Click here to take you directly to my online store to see which 25 stamp sets are 25% off!!!!

Happy Stamping,

Kate

feminine, Techniques & Tutorials

Faux Tile Stamping


Morning Stampers,

Another new technique I am trying for the first time, Faux Tile Stamping!

IMG_3679

Stampin’ Up! products used:

Stamp Set: Secret Garden & Petite Pairs

Inkpads: Gumball Green, Tangerine Tango, Daffodil Delight

Cardstock: Daffodil Delight & Whisper White

Tools: Paper Trimmer, Simply Scored, Large Oval Punch, Modern Label Punch, Square Lattice TIEF, Big Shot, Secret Garden Dies

Accessories:  Tombo Glue, Dimensionals, Sponge Dauber


To purchase any of these items, be sure to visit my online store!

Happy stamping,

Kate

Techniques & Tutorials

Sponging & Masking Technique

Good morning Stampers,

This morning I want to share with you the Sponging and Masking Technique.

IMG_3678

To create this card, I cut a piece of Whisper White cardstock 10.5 x 7.5cm.

Then punched a circle out of a post it note ensuring I get most of the sticky back behind my punch. (This is best punched by doing about 4 post it notes at once).

Place the circle post it note onto your small cardstock and then begin the sponging with the lightest colour first (I started with the Blushing Bride).

Start the sponging from off the page and then slowly, in circular motions, move onto the cardstock. Start slowly and build up your colour by going over the area repeatedly.

When you’re ready to add the Tempting Turquoise, start at the bottom of the cardstock and work your way up to blend the colours together. Go back to the first colour to continue blending if need be. When you are happy with your colourings, remove the circle punch!

Next, add your stamped image, in this case I used the Lovely as a Tree Stamp Set, using black ink.

I cut a piece of silver ribbon and stuck it down across one end with Glue Dots. Tie a bow and add this to the ribbon so it looks like once piece of ribbon tied with a bow. This way it uses less ribbon!

Next I stamped my sentiment towards the bottom right corner of the A5 card.

Finally, I added 6 dimensionals to the back of the stamped card and adhered it to the top section of the card.

Stampin’ Up! products used:

Stamp Set: Lovely as a Tree, Simply Sketched (Hostess)

Inkpads: Blushing Bride, Tempting Turquoise, Black

Cardstock: Whisper White

Tools: Paper Trimmer, Circle 1 3/8″ Punch

Accessories:  Glue Dots, Dimensionals, Sponge Daubers, Silver Ribbon, Post It Note

To purchase any or all of these items, be sure to visit my online store!

Happy stamping,

Kate

Gift Ideas, Techniques & Tutorials

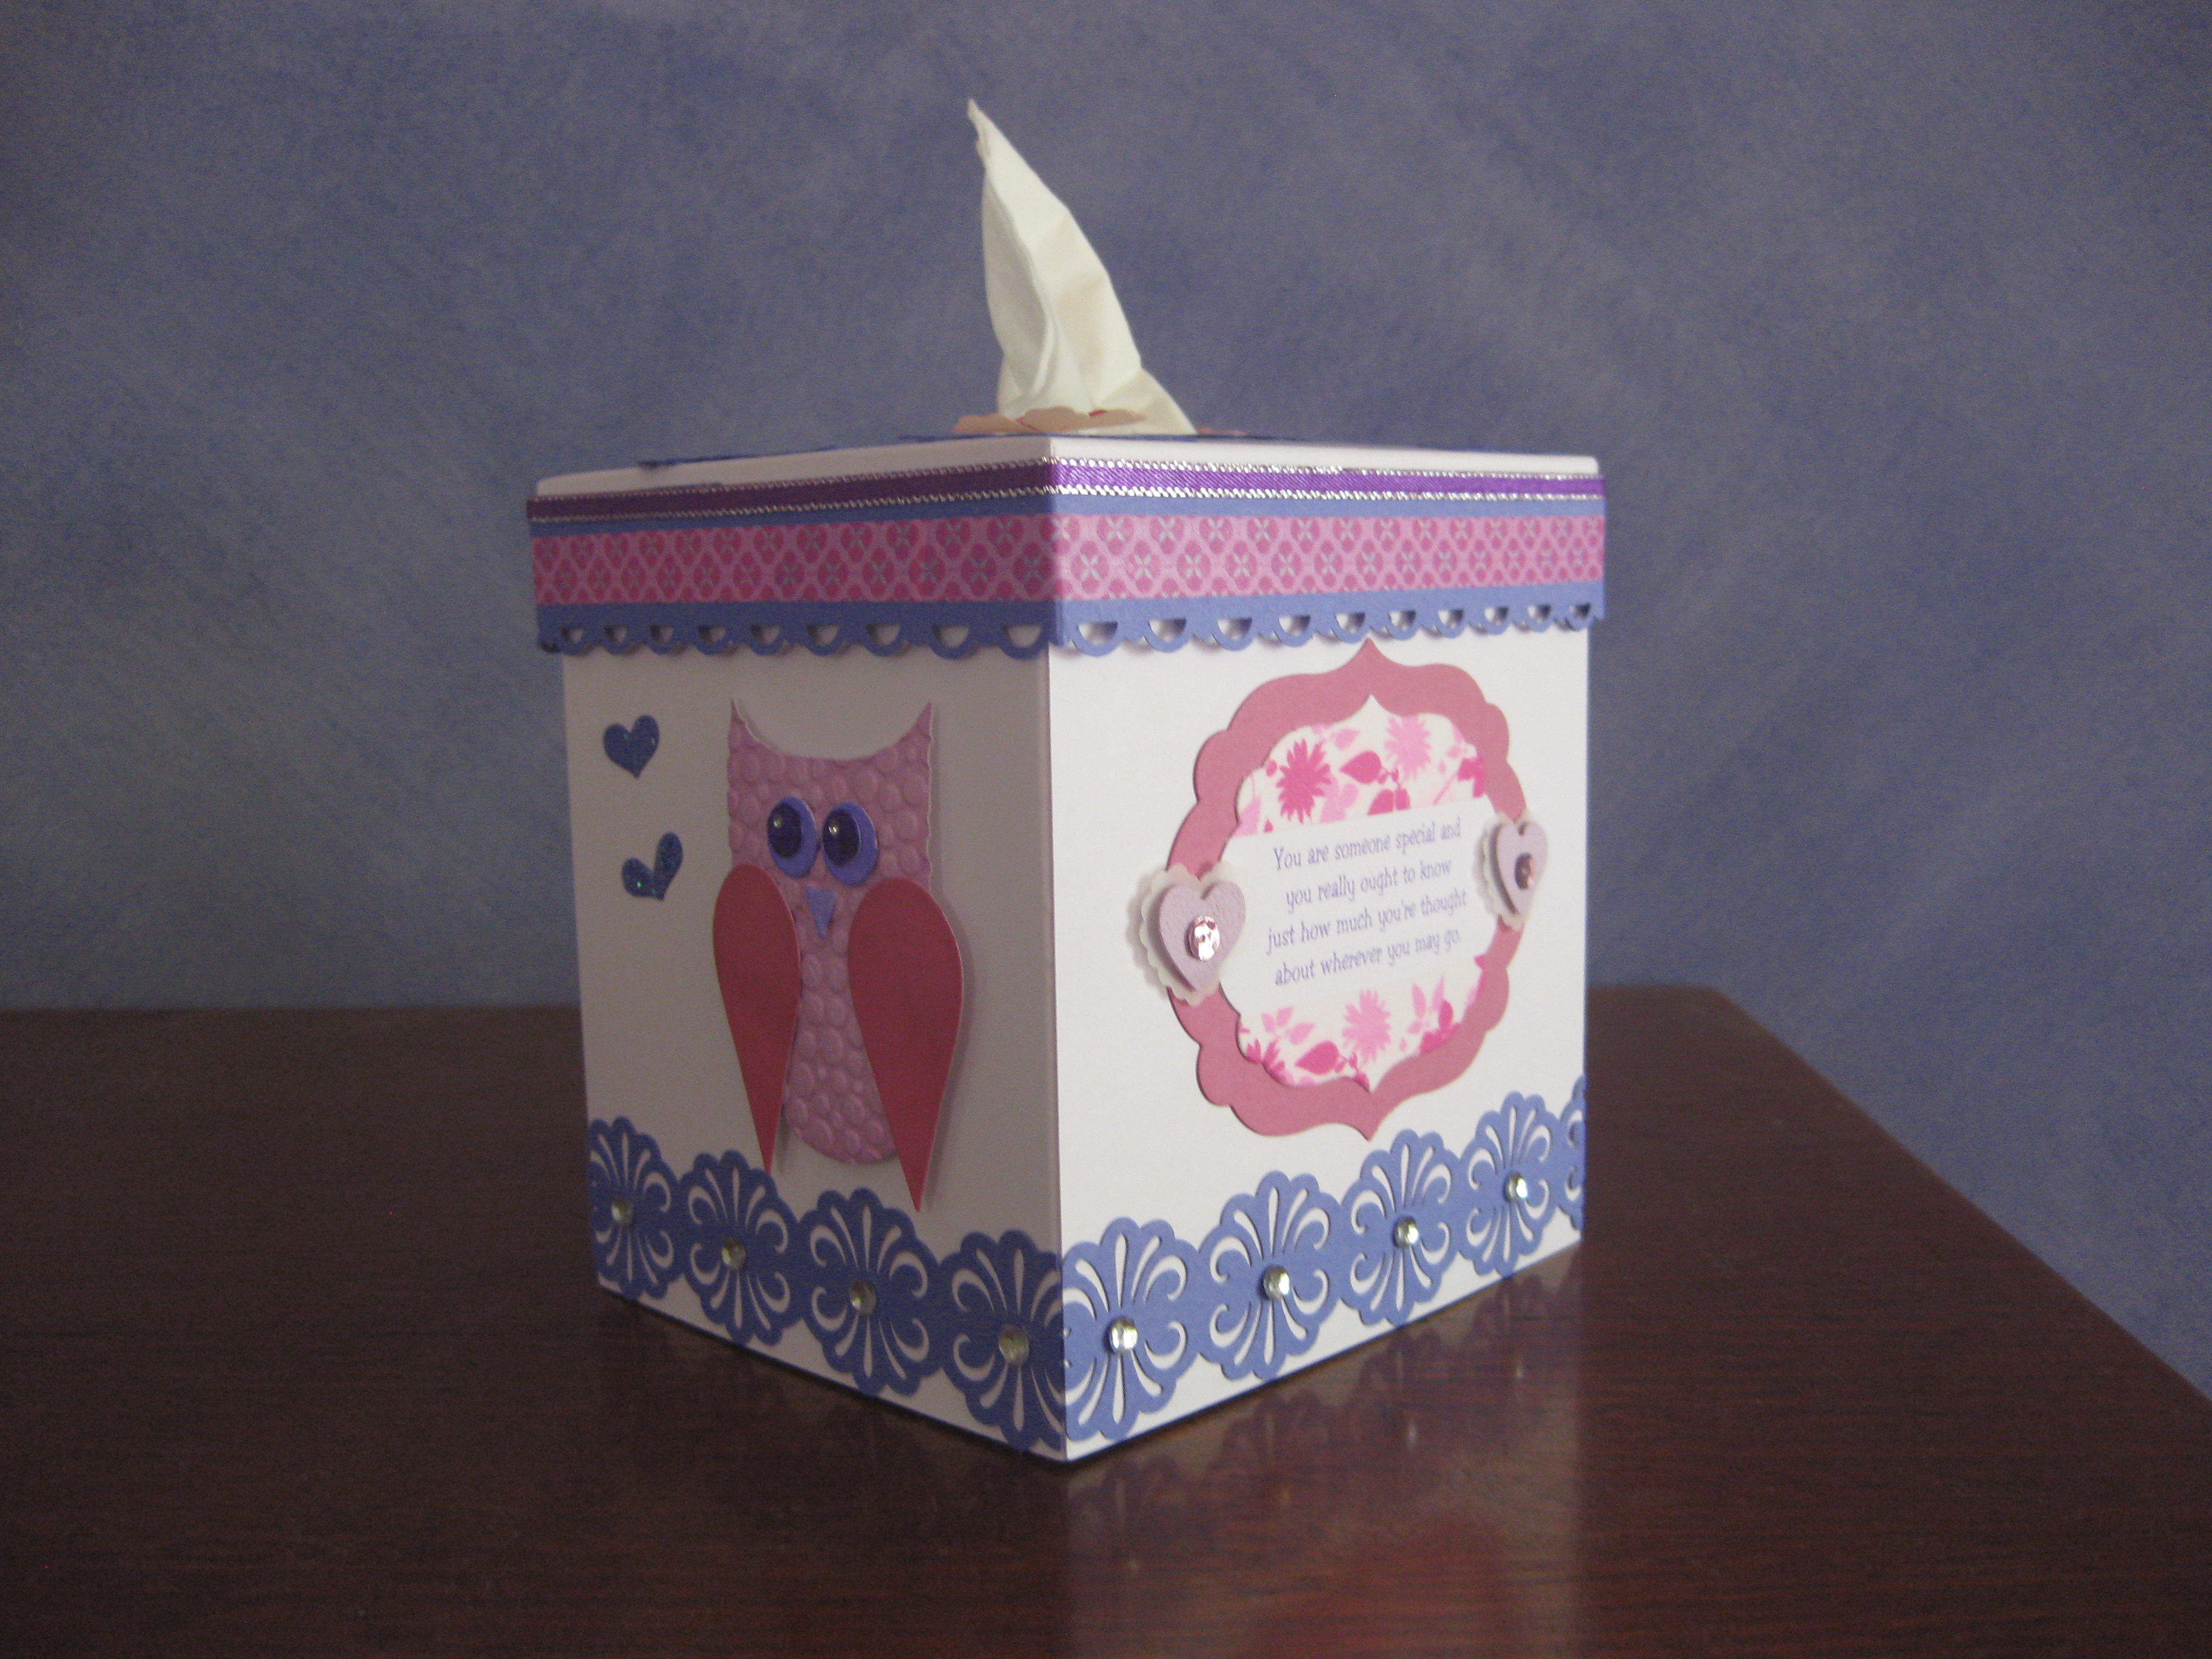
Square Tissue Box Cover

Image

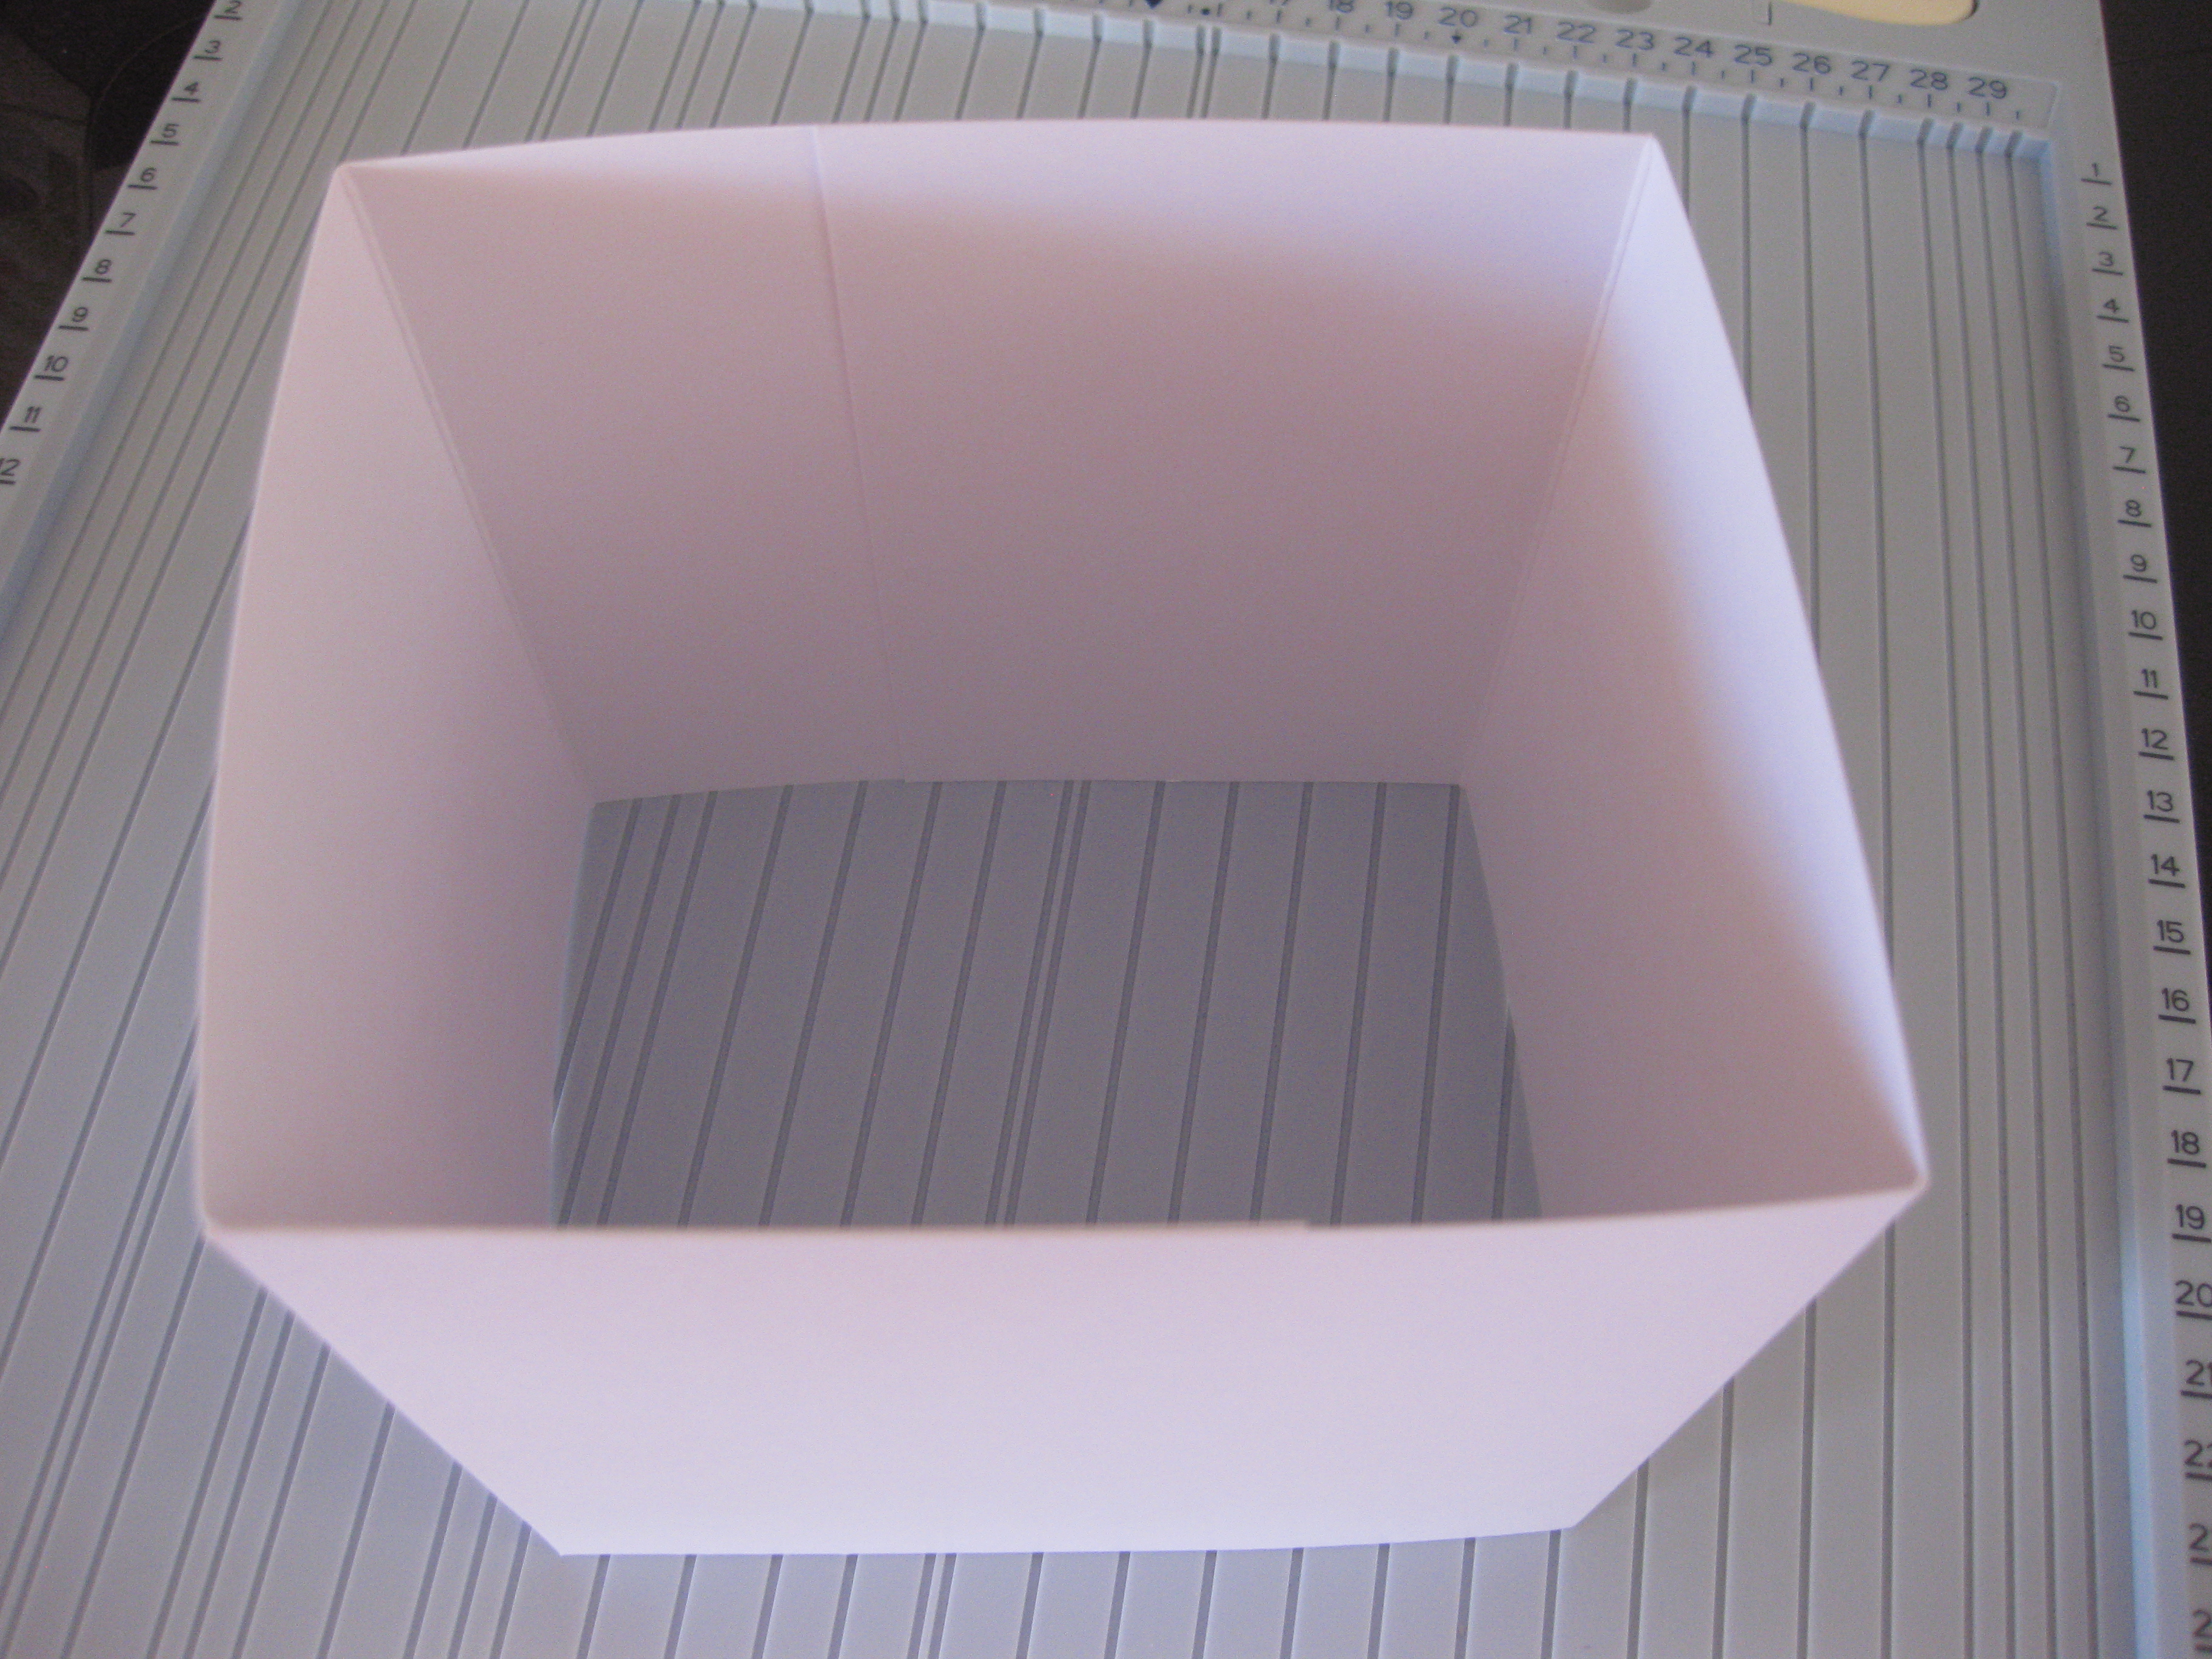
To construct the box with lid, you will need 3 x A4 Card, 300gsm.

For the base

Cut 2 pieces of Card so they are 27.9cm x 12cm. Then score at 12cm & 22cm.

Image

Do the same for the second one so you have 2 the same.

Image

Join together by placing the shorter edge inside the longer edge to make the box shape and the outer edge meets the corner of the box. TIP: Ensure that it fits around the tissue box, before gluing together!

Image

Image

For the top

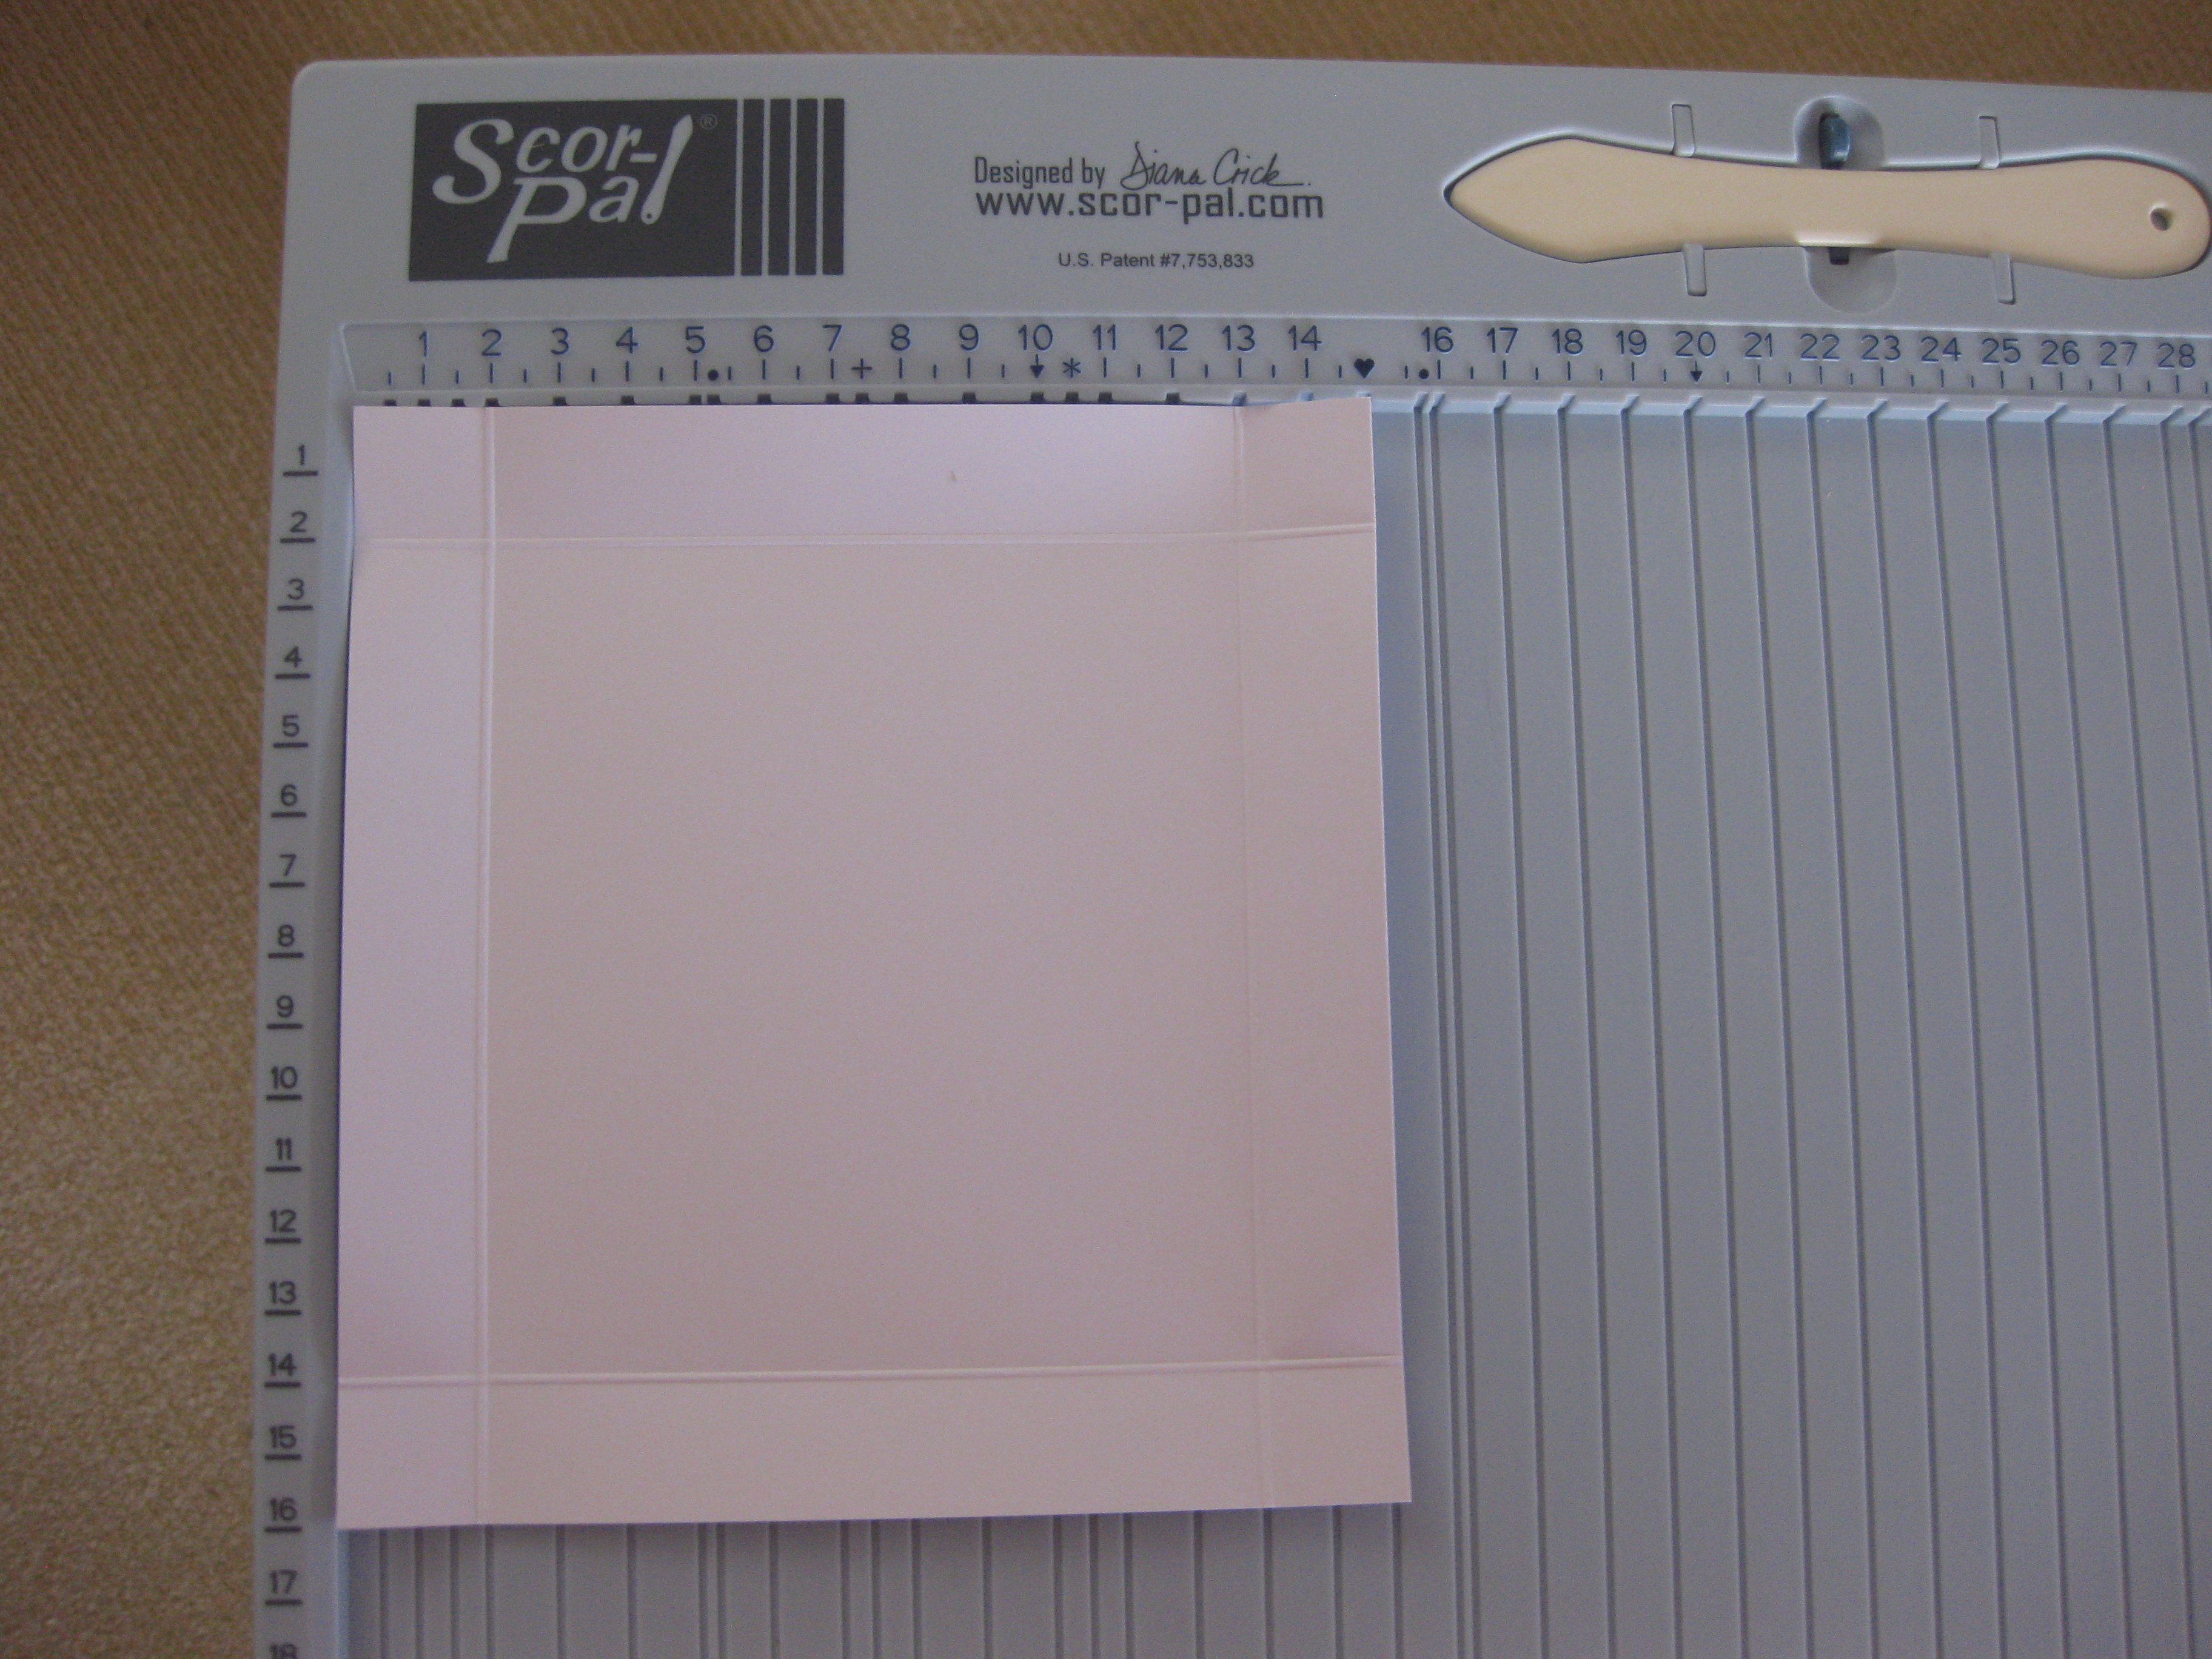
Cut a piece of card 16cm x 15cm. Score each side at 2cm.

Image

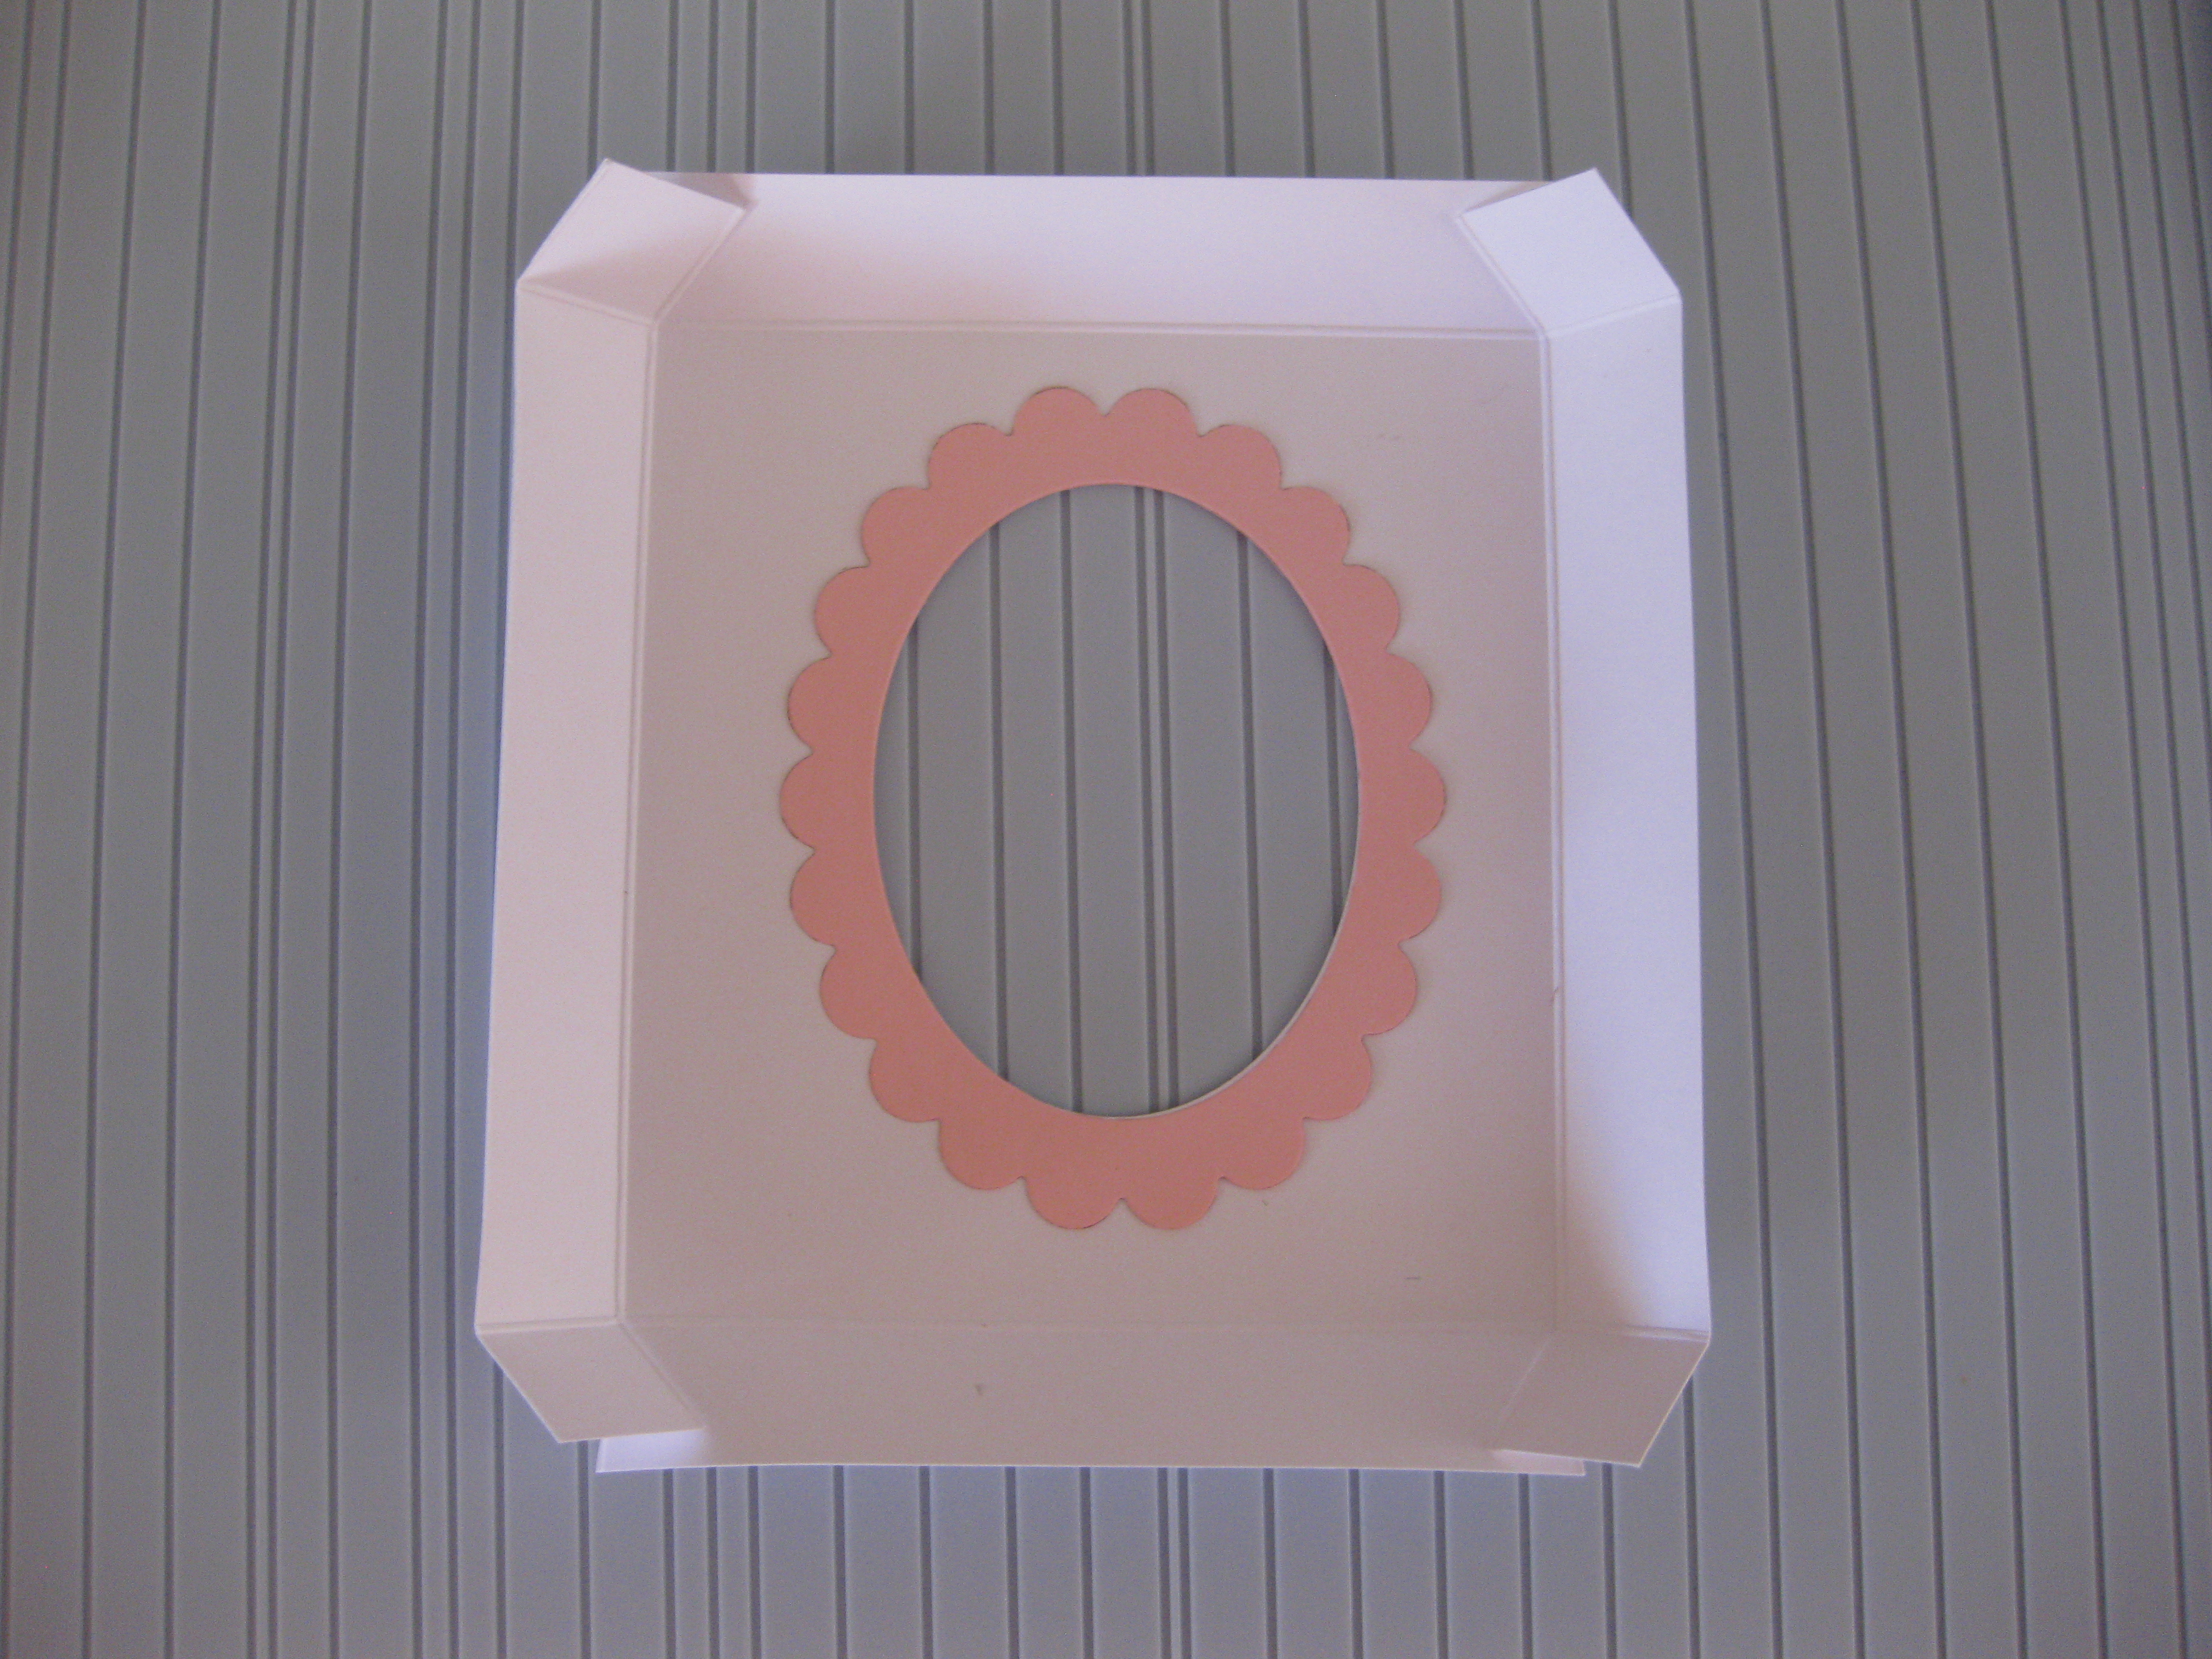
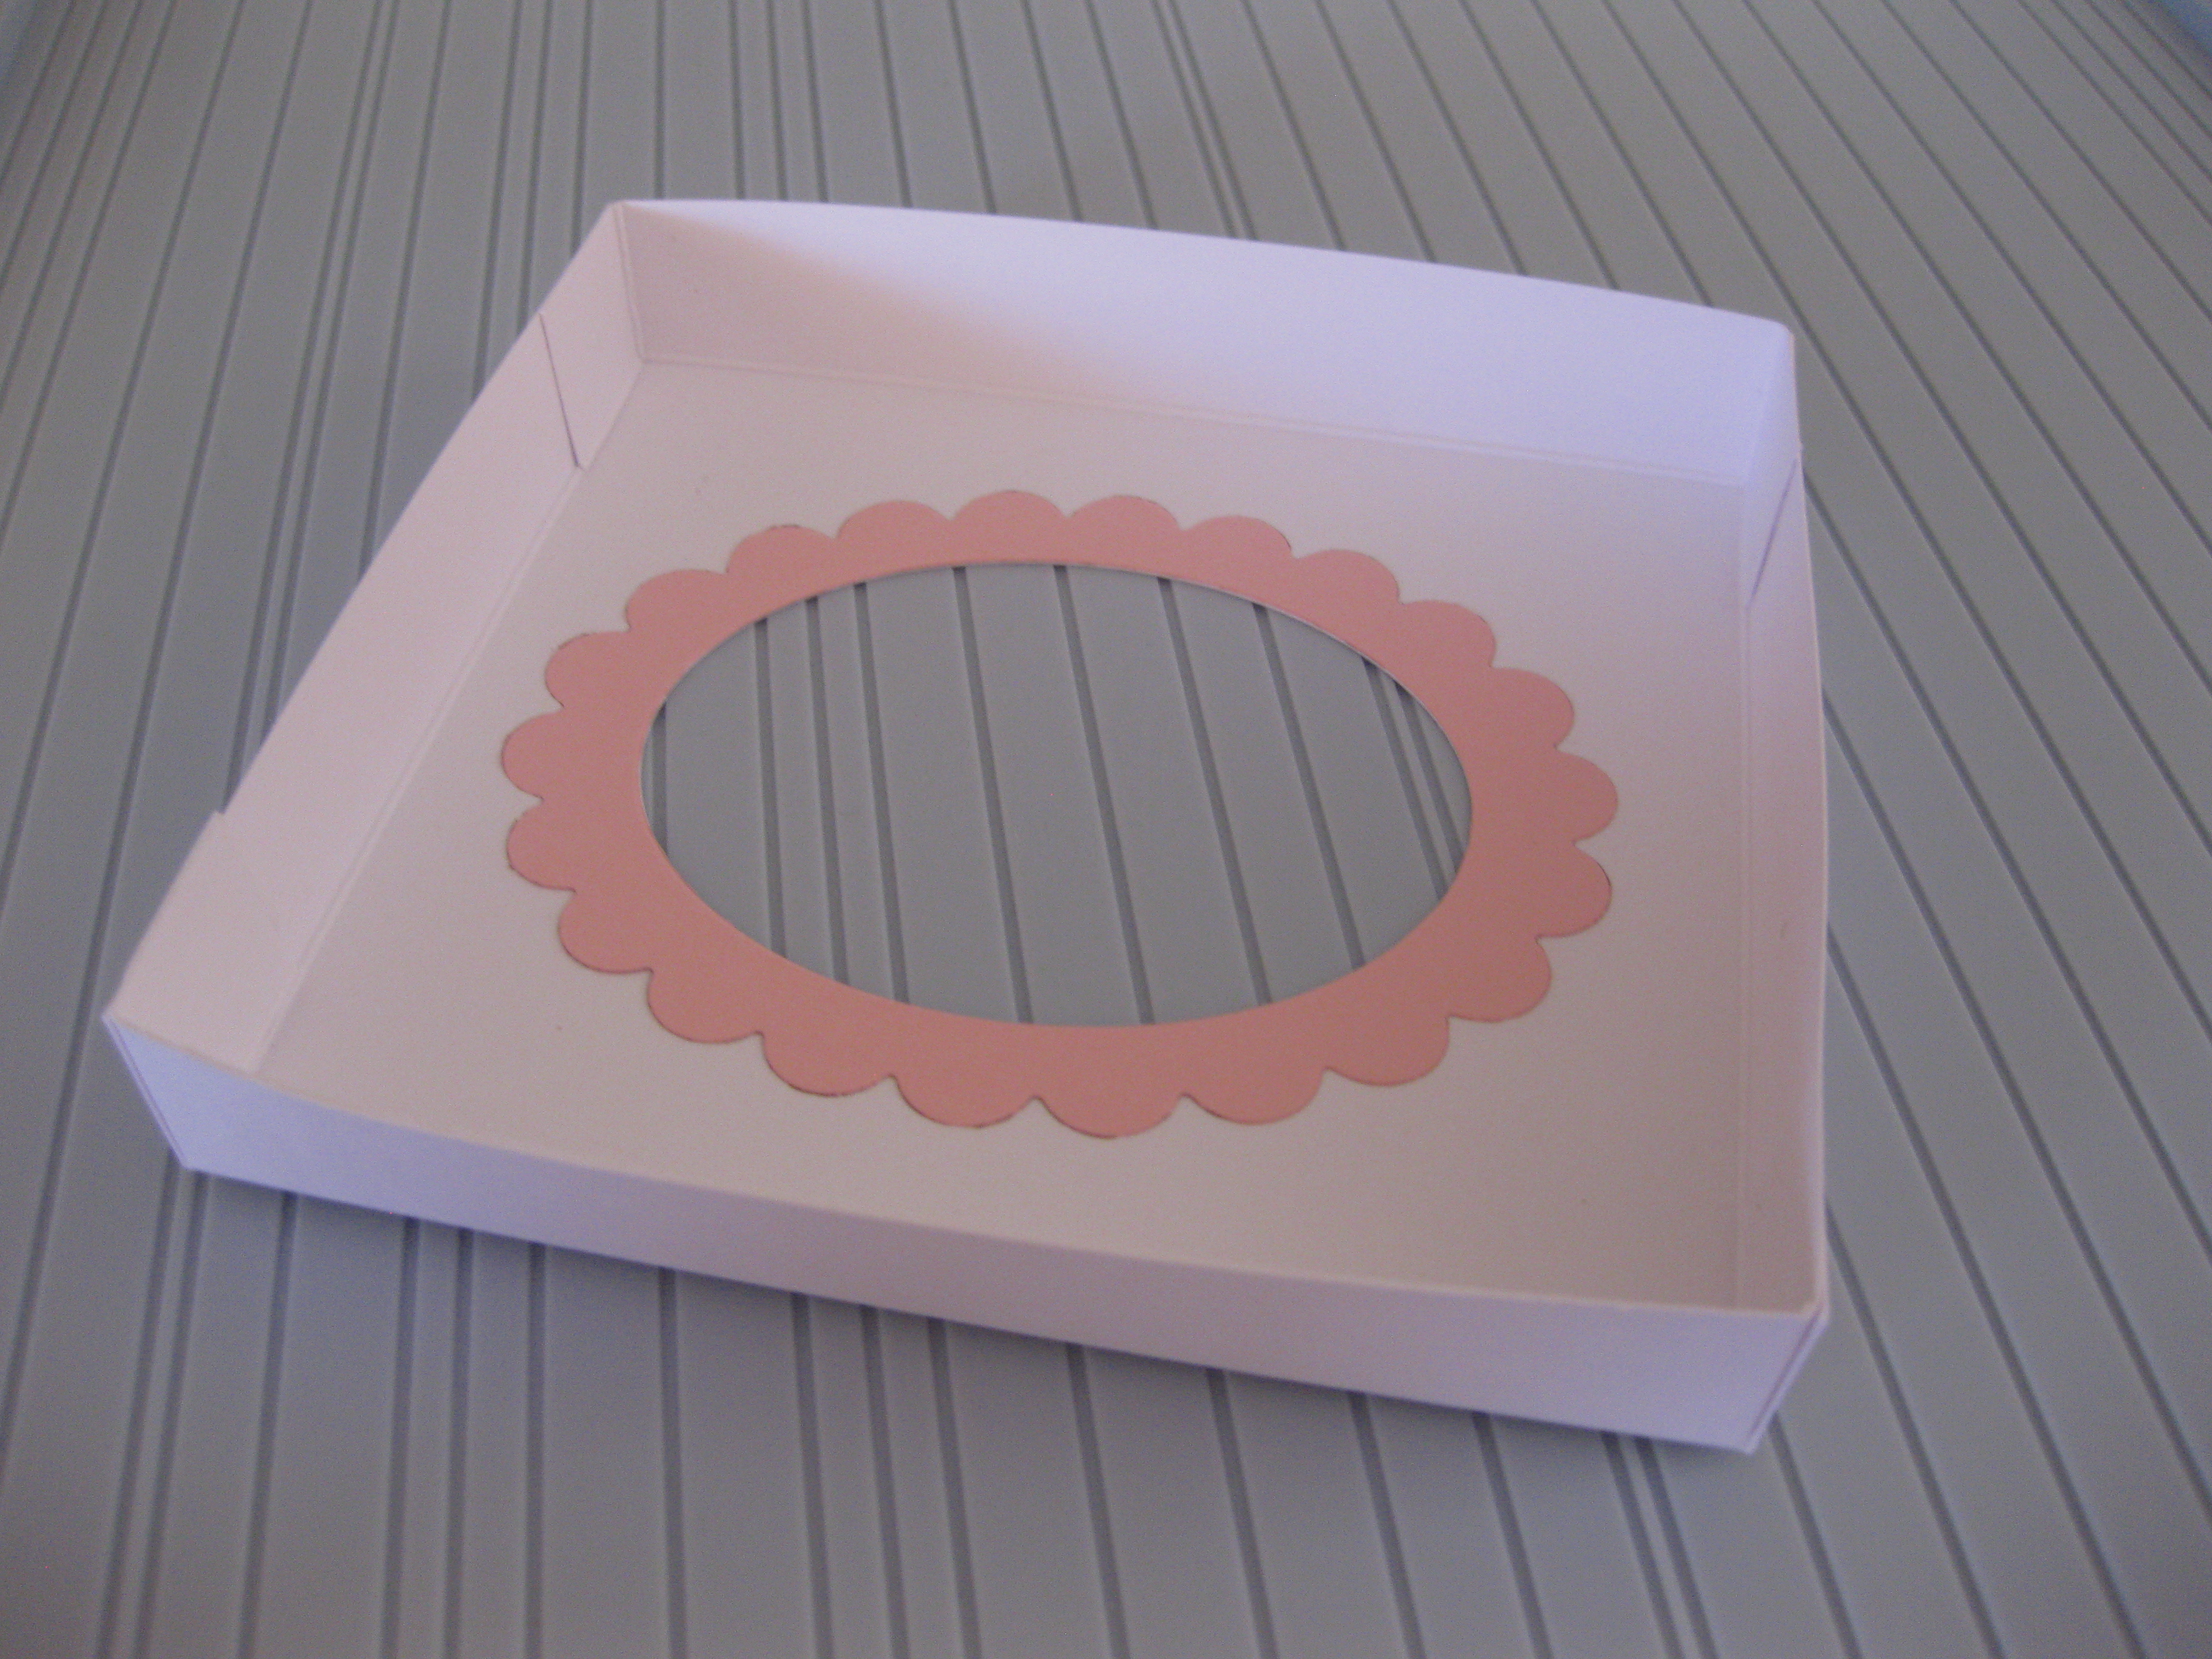
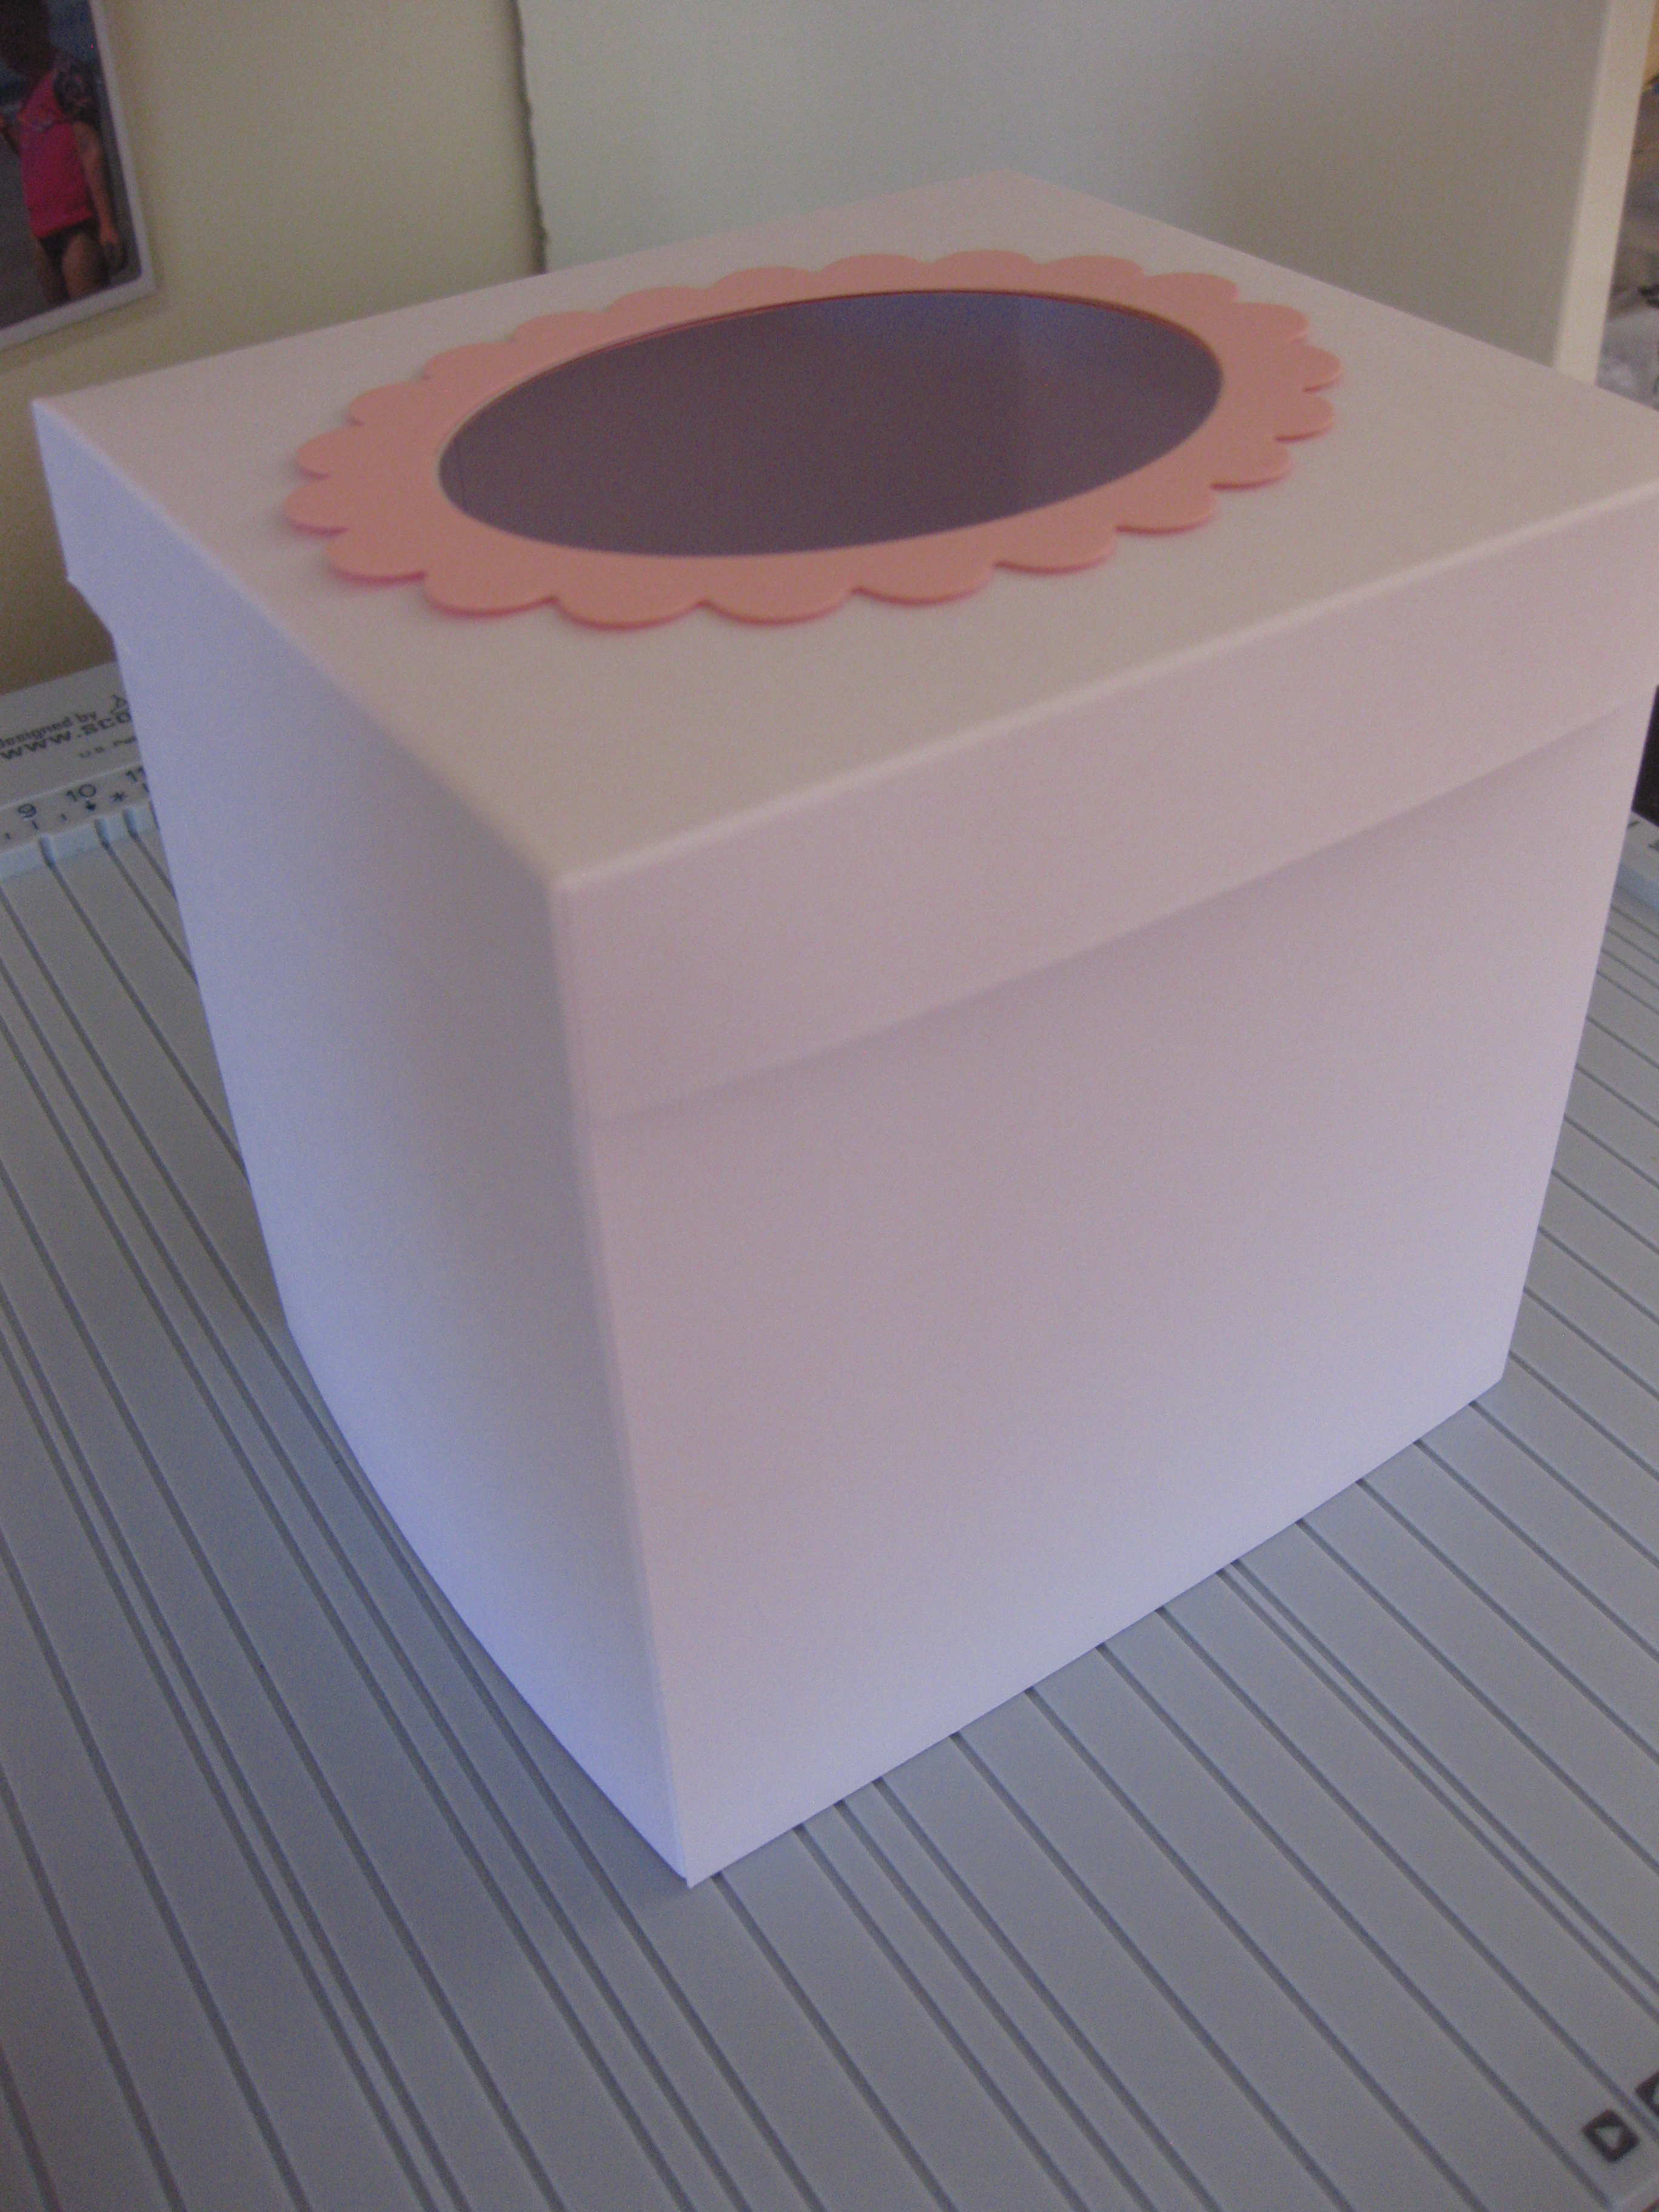
Before constructing, you must remember to die cut a circle or oval (depending on the opening of the tissue box) in the centre of the lid. I also cut a border by placing the die in the centre of the outside border die. I made 2 of these, 1 for the inside and 1 for the top!  Cut one of the score lines at each corner to the next score line.

Image

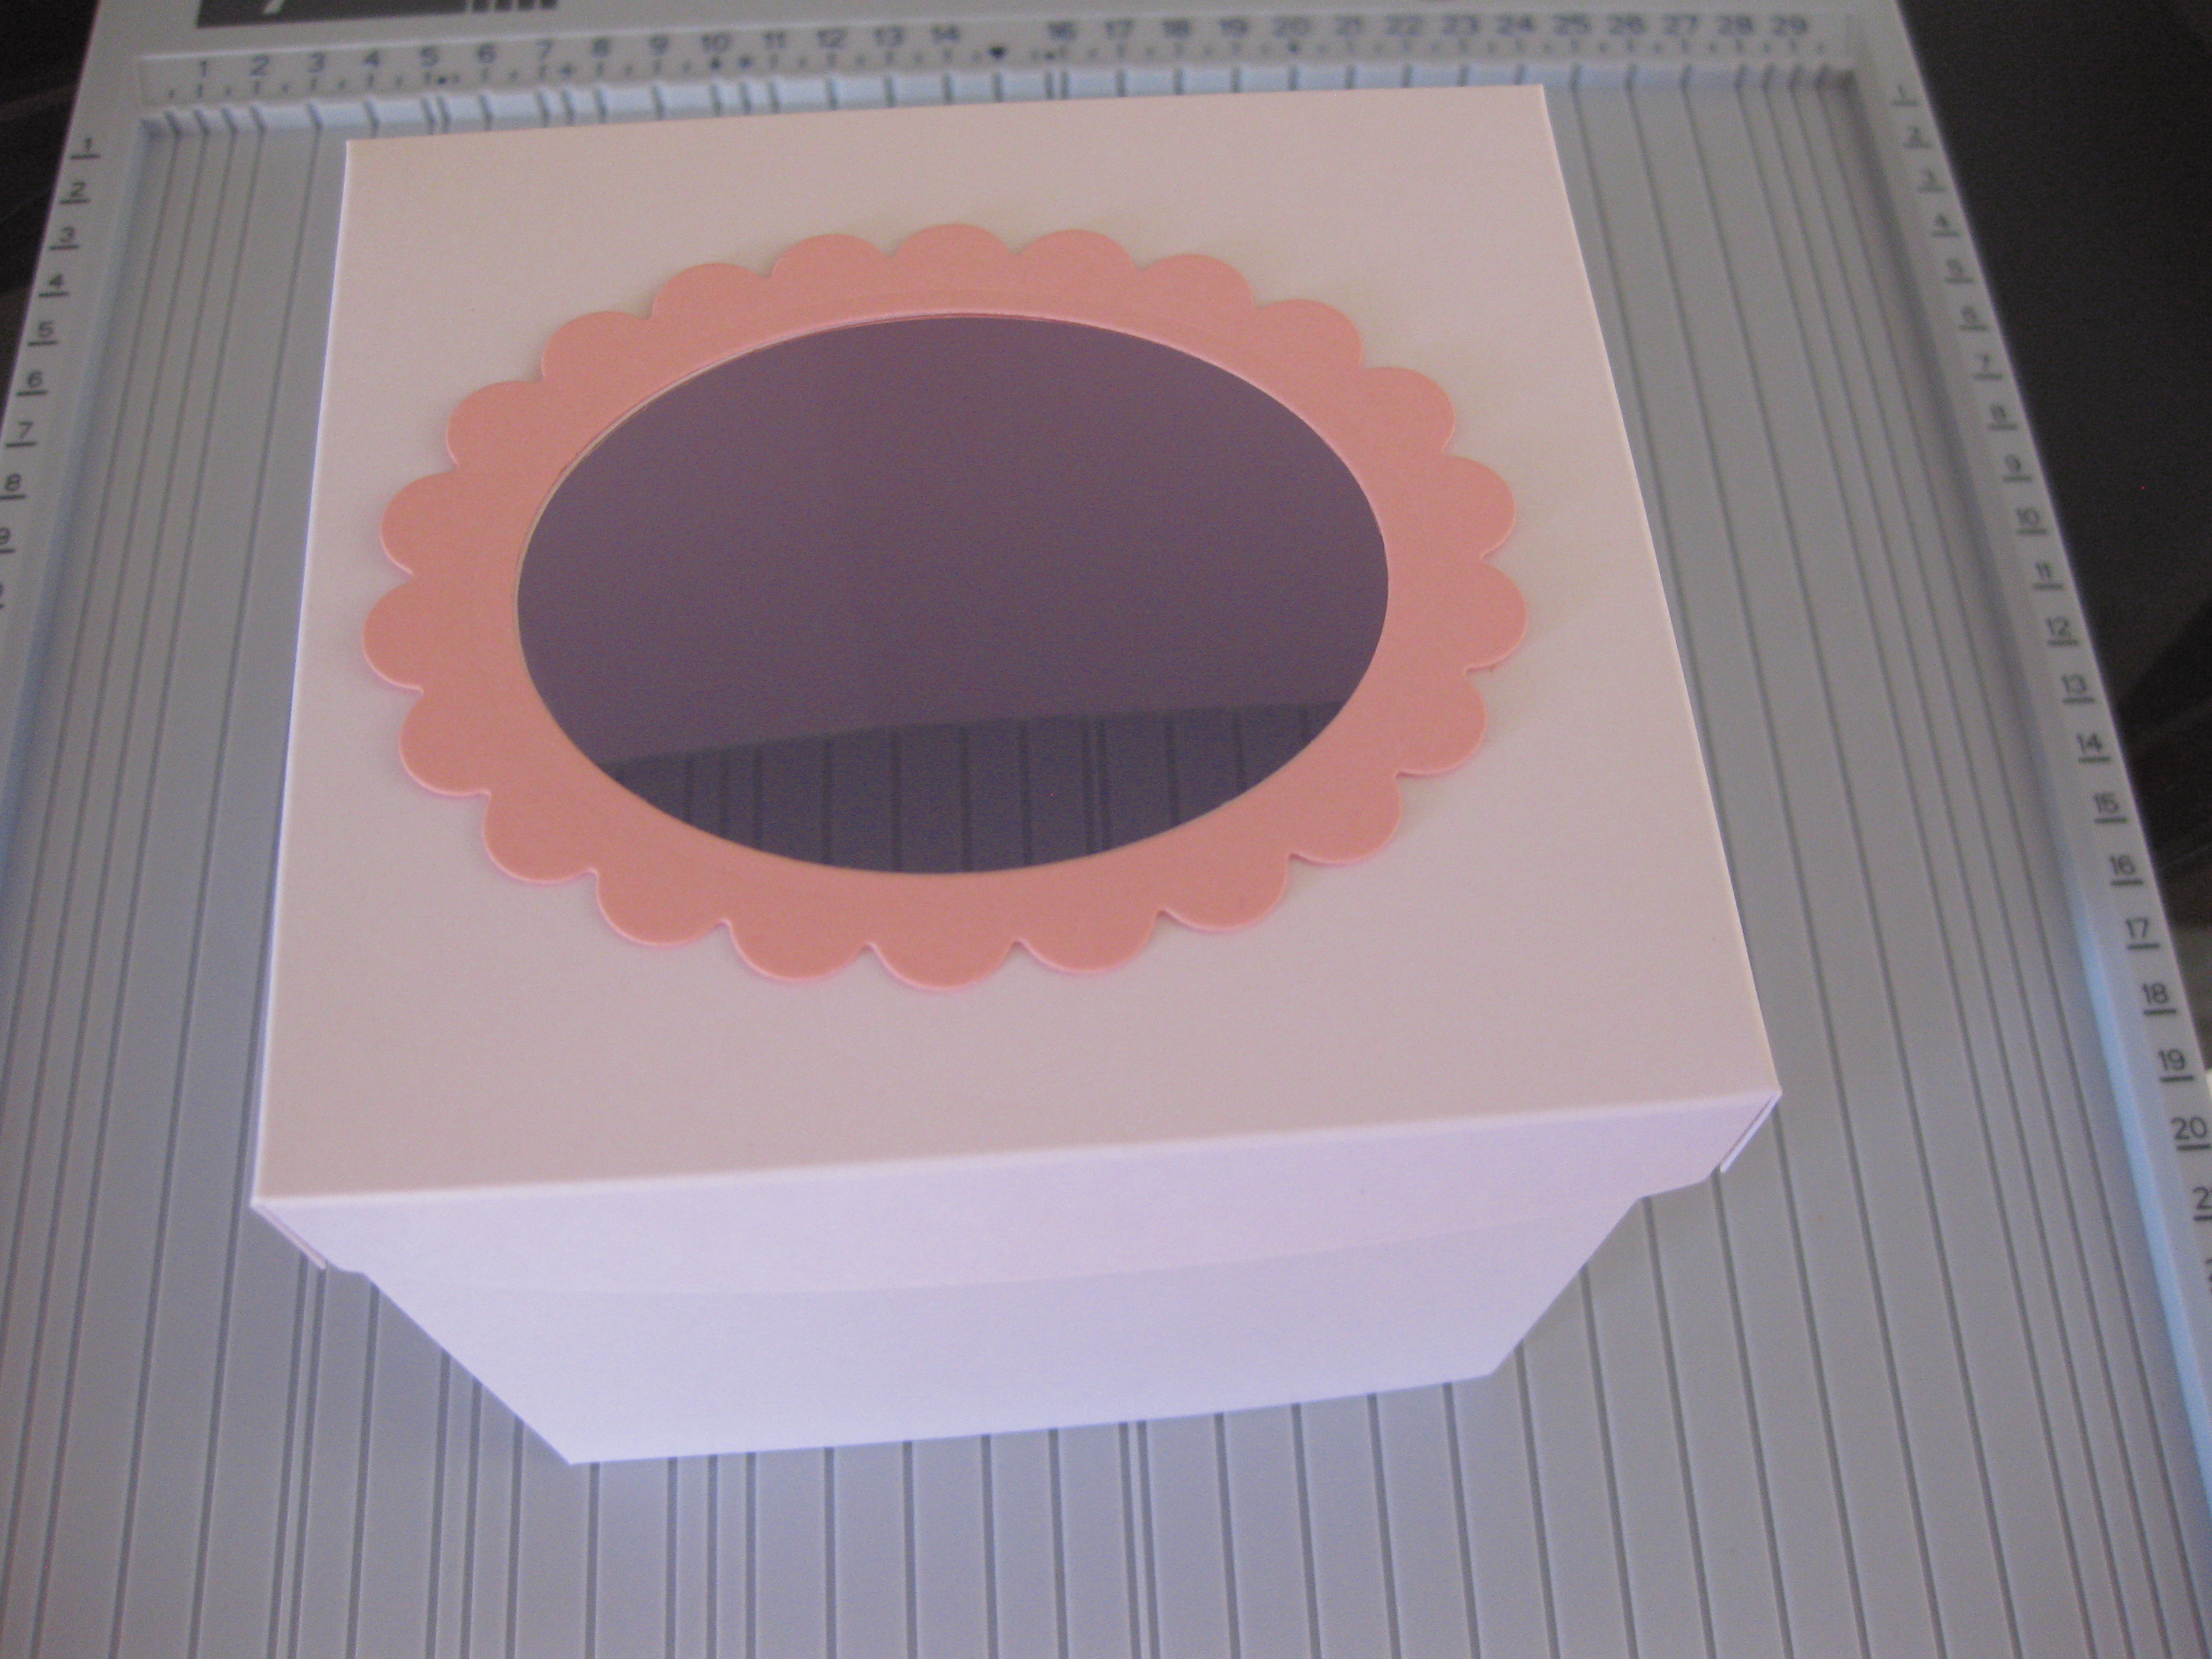
Glue together to make the lid, ensuring the small tab is on the onside of the lid. 

Image

Image

Image


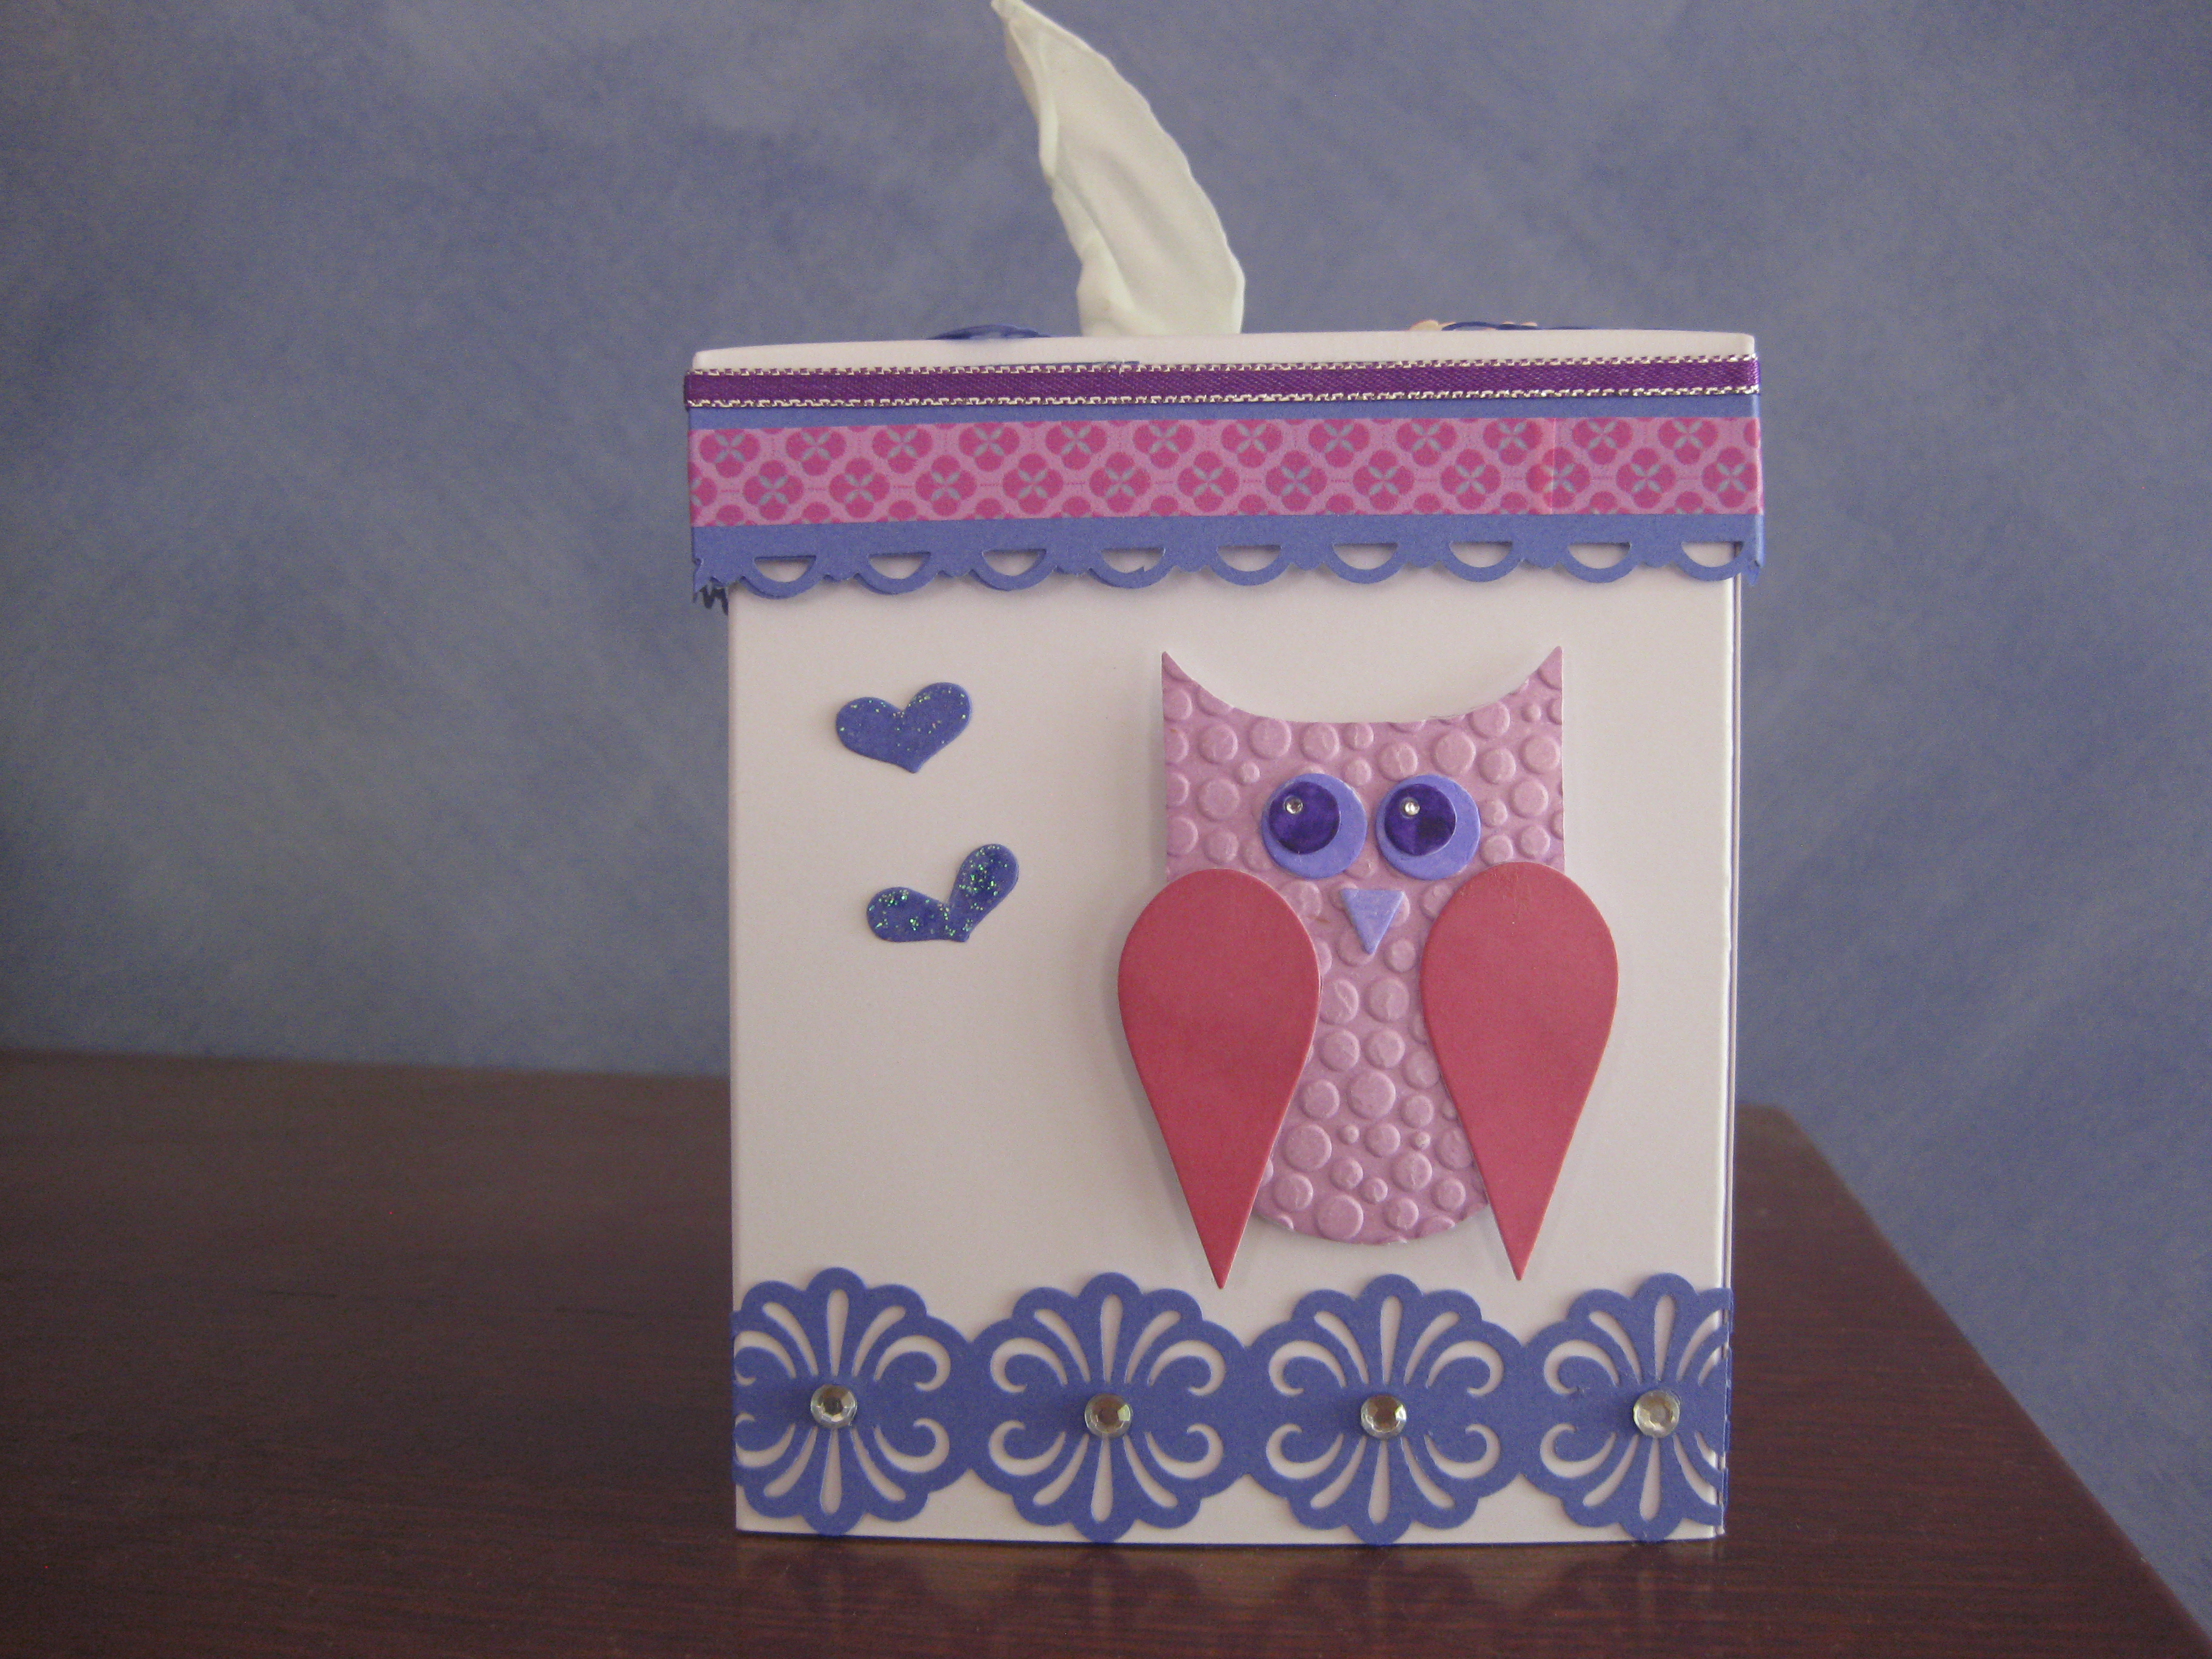
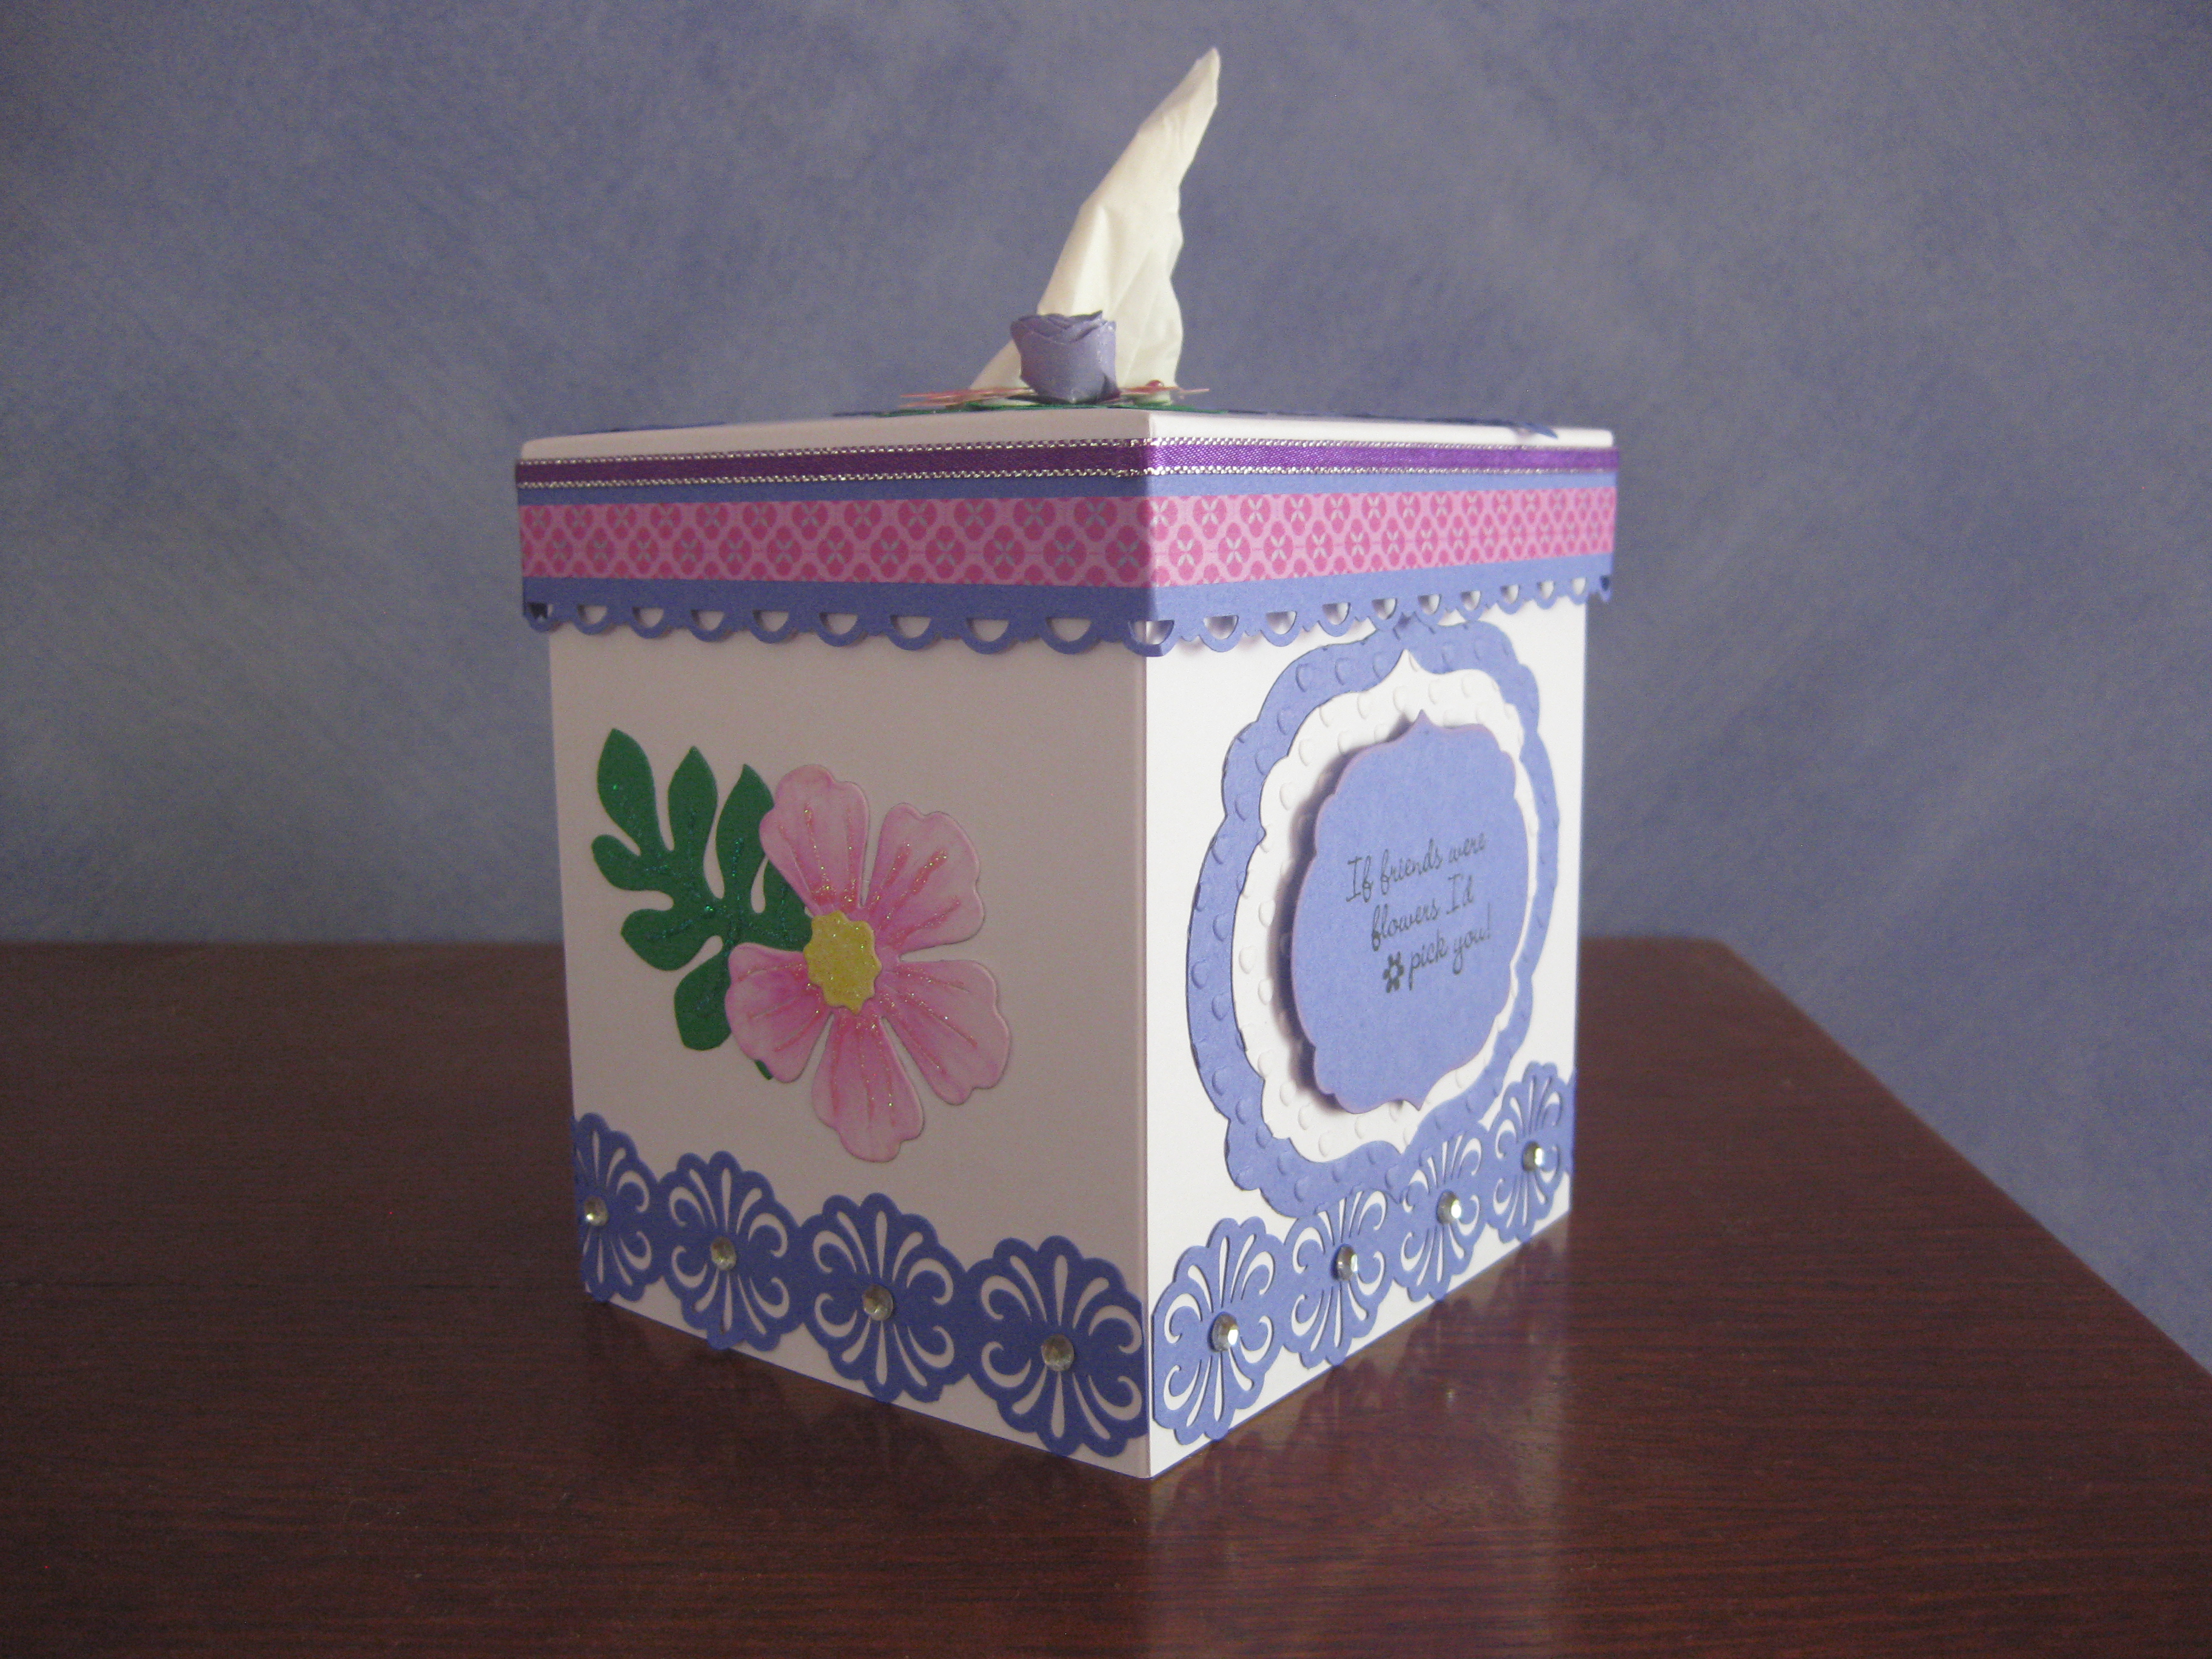
Then you can decorate as you like ~ Here’s one I made earlier!!!

Image

Image

Image

Image

Image

Image