Challenges, feminine, JAI, Techniques & Tutorials

Crazy Ovals

Hello Crafters,

Today I enter a challenge at Just Add Ink. The challenge this week is Just Add Eggs or OvalsJAI#255.

My immediate reaction to this would be Easter Eggs with only 2 weeks until the Easter Bunny arrives, but I was sure many others will head in this direction, so I have done something completely different!

I have never made a Spinning Card, so this was the perfect chance to try it.

Crazy About You

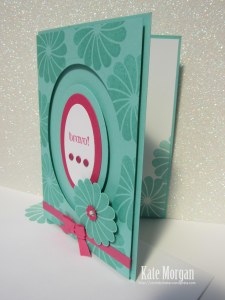
I love this Crazy About You bundle with the coordinating framelits. I wanted something fun so I chose a base card of Coastal Cabana with some Melon Mambo and Whisper White.

First, I cut the 2 ovals together before stamping the flower in coordinating ink. I also did it again on some scrap card and I used the 1-3/4″ scallop circle punch to cut it out. 

I punched two circles of cardstock with the 1/2″ circle punch and joined them together with 2 dimensionals, one on top of the other. Glue this to the centre back of the flower. Slide it into the gap between the ovals of the card so it will slide around the oval.

This is the spinning part. Move the large flower around the oval!

Crazy About You

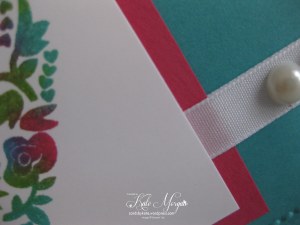
I added the sentiment Bravo and some coordinating candy dots and a rhinestone to the centre of the flower. I used double dimensionals (one on top of the other) to sit the layers up so that the flower will spin easily around the oval.

Be sure to decorate the inside panel of your card and even the envelope. I never send a “nude” envelope!
Crazy About You

This was such a fun card to make and not as difficult as I thought it was going to be!

Please leave a comment below, if you think my card met this challenge.

Why don’t you give a challenge a go, they are so much fun. Head across to the Just Add Ink page for more inspiration and see how the designers interpreted this challenge.


Sale-a-bration, 6th January – 31st March 2015

Be sure to place your online order today and for every $90 that you spend, you can choose 1 Sale-a-bration item FREE. So if you spend $180, you choose 2 items for FREE, etc.

All Catalogues, Clearance Rack & Weekly Deals are available online here! They are full of amazing new products and wonderful inspiration. It is a must have for anyone interested in Ink, Paper and Stamps!

Shop Online 24/7 for products

Don’t forget to Follow My Blog to receive blog updates and join my Newsletter Subscription for all the latest news and specials!

Happy Stamping,

Name Banner

Masculine, Techniques & Tutorials

Water Wash By The Tide

Dear Crafters,

Water Wash Technique with By The Tide

Today I share a masculine card created with the Water Wash technique, something I haven’t done a lot of experimenting with, but had some fun in the process.

Most of the cards I have seen using this technique have been feminine cards, so my challenge to myself, was to create a masculine card.

By the Tide

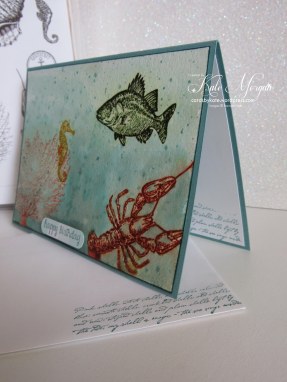
I stamped the images and embossed them all with clear embossing powder and heat set them. This was so that when I added the watercolour over the top, the images didn’t run. I used Pool Party for the first wash over the entire card, then went back and added colour from the bottom with Lost Lagoon. This added the depth to the card. I also added a little (diluted) colour of each of the images over the top and around them to give them a “glow”.

The ink pads I used for the images were: Coral (Versamark & dabbed Calypso Coral), Seahorse (Hello Honey), Fish (Mossy Meadow), Crayfish (Cajun Craze).

By the Tide

I added the splatter by tapping the brush with the Lost Lagoon ink. I used my heat tool to dry it so it didn’t run too much. I stamped happy birthday then used the Word Window punch before attaching it with dimensionals.

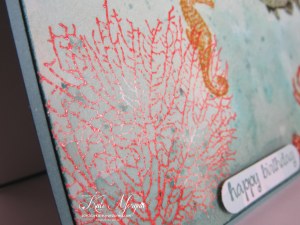
I love how this coral has a glow because I used the Versamark ink then dabbed the Calypso Coral over the top before pressing it onto the white watercolour card stock.

Once the card was dry, I also ran the Lost Lagoon Stampin’ Write Marker around the edge of the card, not only to define the border, but also to colour the side edges of the white card. This is a handy tip instead of adding another layer of card stock!

By the Tide

Don’t forget to decorate the inside of your card and your envelope! Do you do this? Because I can never send a card in the mail that has a nude envelope!!!

By the Tide

I would love you to comment below with your thoughts on this card.


Sale-a-bration, 6th January – 31st March 2015

If you wish to place an order between now and the 31st March, you may be entitled to some FREE Sale-a-bation items.

If you order $90 in product, you choose 1 item FREE

If you order $180 in product, you choose 2 items FREE

If you order $300 in product, you choose 3 items FREE and get $50 to spend on anything in any catalogue

If you order $400 in product, you choose 4 items FREE and get $100 to spend on anything in any catalogue

All Catalogues, Clearance Rack & Weekly Deals are available online here! They are full of amazing new products and wonderful inspiration. It is a must have for anyone interested in Ink, Paper and Stamps!

Shop Online 24/7 for products

Don’t forget to Follow My Blog to receive blog updates and join my Newsletter Subscription for all the latest news and specials!

Happy Stamping,

Name Banner

One Sheet Wonder, Techniques & Tutorials

One Sheet Wonder (Baby)

Dear Crafters,

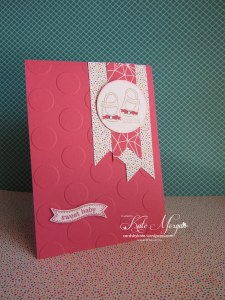
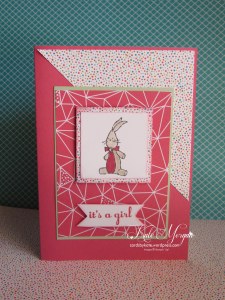
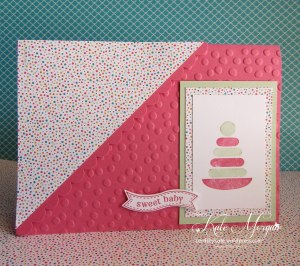
Today I share with you, 8 cards made from 1 double-sided sheet of Designer Series Paper, called the One Sheet Wonder (OSW)!

Here is how I cut my 12 x 12 sheet of Designer Paper from the Confetti Celebration Pack.

One Sheet Wonder

As you can see, each piece has a letter and the size. Below you can see each of the cards I have made with the corresponding letters. Some of these cards have extra card stock which I have used for layering, but you can see how many cards you can make from just 1 sheet of paper!!!!

Card A
Card A
Card B
Card B
Card C
Card C
Card D
Card D
Card E
Card E
Card F
Card F
Card G
Card G
Card H
Card H

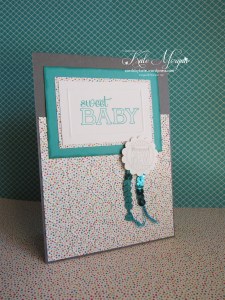
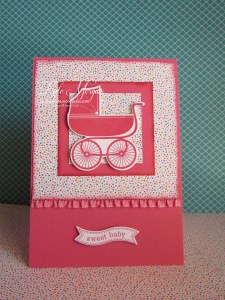
I used the Something for Baby stamp set and coordinating dies for the majority of these cards.


The Confetti Celebrations DSP colours are: Basic Gray, Bermuda Bay, Crushed Curry, Pistachio Pudding, Strawberry Slush, Tangelo Twist and Whisper White.

It just shows how much use you can get from a single stamp set, some card and 1 sheet of Designer Paper!!!!

Have a wonderful day!

Sale-a-bration, 6th January – 31st March 2015

Be sure to place your online order today and for every $90 that you spend, you can choose 1 Sale-a-bration item FREE. So if you spend $180, you choose 2 items for FREE, etc.

All Catalogues, Clearance Rack & Weekly Deals are available online here! They are full of amazing new products and wonderful inspiration. It is a must have for anyone interested in Ink, Paper and Stamps!

Shop Online 24/7 for products

Don’t forget to Follow My Blog to receive blog updates and join my Newsletter Subscription for all the latest news and specials!

Happy Stamping,

Name Banner


General, Handmade Cards, Memory Keeping/Project Life/Scrapbooking, Techniques & Tutorials

Celebrate Today ~ Travel

Dear Crafters,

Happy New Year!!!!

Seeing as it is holiday time here in Australia, although we are not going anywhere, I wanted to make some cards for those who may be heading off for their annual break.

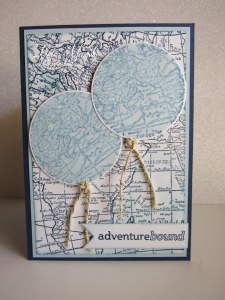
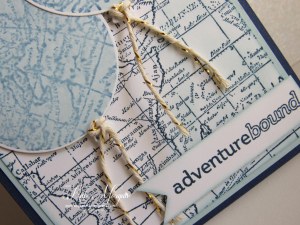
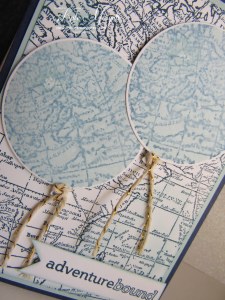
I have a new product from the Occasions catalogue (on sale from 6th January) called Celebrate Today, and I wanted to incorporate the balloons into this card. Not only can these balloons be used for birthday celebrations, but I also imagined them as hot air balloons!

Celebrate Today

I used the World Map stamp as the background and sponged it with Soft sky ink.

The balloons are inked with soft sky, but before stamping, I kissed it against the World Map stamp, then onto the paper! What a great effect!!!! Next use the Big Shot to die cut the images.

Celebrate Today

I tied a piece of twine at the bottom of each balloon and stamped the sentiment from our Project Life range, Remember This stamp set. I added these with dimensionals.

Celebrate Today

Don’t forget to stamp the inside of the card too!

Celebrate Today

Would you like a copy of the Occasions & Sale-a-bration brochures? I can mail them out for you to browse through and make your wish list prior to the sale date, 6th January 2015.

All Catalogues, Clearance Rack & Weekly Deals are available here! They are full of amazing new products and wonderful inspiration. It is a must have for anyone interested in Ink, Paper and Stamps!

Shop Online 24/7 for products

Don’t forget to Follow My Blog to receive blog updates and join my Newsletter Subscription for all the latest news and specials!

Happy Stamping,

Name Banner


Christmas, Gorgeous Grunge, Techniques & Tutorials

Bookmark Card

Hello  Crafters,

The challenge this week at Just Add Ink is a colour challenge, JAI#239.
JAI 239
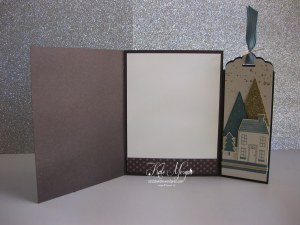
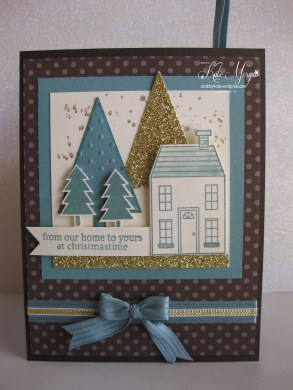
My love for Lost Lagoon continues and this was the perfect challenge for me this week. I wanted to try something new that I have wanted to create for some time and it is a Bookmark Card.  You know when you want to give someone a card but with an extra little something special? Well this is the card for you!
    Bookmark Card
 You still don’t see what I am talking about? Hmmm, check out the next photo!
Bookmark Card
Aha, now you can see the inside of the card and the right hand side is a bookmark!
Bookmark Card
This bookmark is perforated where it joins the card, so the recipient can tear it off to keep and use as a bookmark when reading their favourite novel.
How cool is that?
Bookmark Card
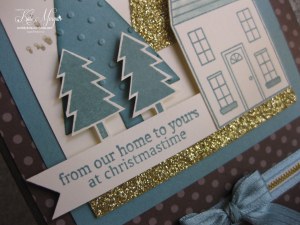
Here is a close up of the front of the card with lots of layers.
Bookmark Card
Please leave a comment below, what you think of this cute little card.

Why don’t you have a go at a challenge, they are so much fun. Head across to the Just Add Ink page for more inspiration and see how the designers interpreted this challenge.

Products Used:

Stamps: Holiday Home, Gorgeous Grunge
Inks: Lost Lagoon, Gold Encore
Card: Early Espresso, Lost Lagoon, Very Vanilla, Gold Glimmer
Accessories: Festival of Tree Punch, Scallop Tag Topper Punch, Paper Snips, Perforating Tool, Trimmer, Neutrals DSP, Polka Dot TIEF, Big Shot, Holiday Home Framelits, Tombo Glue, Dimensionals, Sticky Strip, Aqua Painter, Simply Scored, Sponge Dauber, Lost Lagoon Stitched Satin Ribbon, Gold 1/8″ Ribbon


The 2014-2015 Annual Catalogue is available online here.

The Holiday Catalogue is available online here.

The Extra Special Christmas Supplement is available here.

These catalogue’s are full of amazing new products and wonderful coloured pictures full of ideas. It is a must have for anyone interested in Ink, Paper and Stamps!

Shop Online 24/7 for products

Don’t forget to Follow My Blog to receive blog updates and join my Newsletter Subscription for all the latest news and specials!
Happy Stamping,

Name Banner

Challenges, JAI, Techniques & Tutorials

Clear Block Stamping

Hello Crafters,

The challenge this week is Just Add Ink is Clear Block Stamping, JAI#237.

I have to admit I have never tried this technique before and this is one reason I love entering these challenges. It really does challenge us to try different styles!

Clear Block Stamping

I started with a card base of Lost Lagoon. I then got out the Serene Silhouettes Stamp Set and used the Versamark Ink to stamp the image onto Whisper White card stock. Then embossed it with clear embossing powder and heat set it.

Next I chose my colours, Island Indigo, Lost Lagoon & Pool Party. I used my ‘H’ Clear Block and inked it up on the ink pads starting at the top with Island Indigo. Once I stamped all the white card, I went back over the colours with a sponge dauber to soften and fill in the missing gaps.

Serene Silhouettes

The little raindrops I created by dropping some crystal effects onto my silicone mat and letting them dry before adhering to my card with Tombo glue.

I added a strip of the clear block stamping technique to the bottom of inside of my card and stamped the same flower image in Island Indigo ink just in the bottom corner.

Just Add Ink Clear Blocking

I added the sentiment from the Good Greetings Stamp Set in Island Indigo.

This background is very cheap and easy to create, why don’t you give it a go too.

Please leave a comment below, what you think of this technique.

Why don’t you give a challenge a go, they are so much fun. Head across to the Just Add Ink page for more inspiration and see how the designers interpreted this challenge.


The 2014-2015 Annual Catalogue is available online here. This catalogue is full of amazing new products and wonderful coloured pictures full of ideas. It is a must have for anyone interested in Ink, Paper and Stamps!

Shop Online 24/7 for products

Don’t forget to Follow My Blog to receive blog updates and join my Newsletter Subscription for all the latest news and specials!
Happy Stamping,

Name Banner

Birthday, Christmas, feminine, Techniques & Tutorials

Bokeh Hearts

Hello Crafters,

With the gorgeous evenings with daylight savings, I love being outside in the evenings and looking up at the stars! The Bokeh technique sure reminds me of the stars, but in this card, I wanted to try it with hearts instead. I used Strawberry Slush, Pink Pirouette, Wisteria Wonder and Perfect Plum with the Hearts Decorative Mask and sponge daubers.

Hearts Decorative Mask     Hearts Decorative Mask

Then I wanted to try this same technique using circles! Instead of using the Circles Decorative Mask, I took a piece of acetate and punched holes into it with different size Stampin’ Up! circle punches. This card uses Crisp Canteloupe, Daffodil Delight, Pool Party & Marina Mist.

Bokeh Technique

Then I wondered if I could make a Christmas card using this same technique, and guess what? It worked!

I used the Festival of Trees Stamp Set and coordinating punch. This card uses some of the 2014-2016 In Colours of Lost Lagoon, Hello Honey & Mossy Meadow.

Bokeh Festival of Trees

I think this is a stunning technique and I am loving the backgrounds. I know I will definitely be creating more of these!

This background is very cheap and easy to create, why don’t you give it a go too.


The 2014-2015 Annual Catalogue is available online here. This catalogue is full of amazing new products and wonderful coloured pictures full of ideas. It is a must have for anyone interested in Ink, Paper and Stamps!

Shop Online 24/7 for products

Don’t forget to Follow My Blog to receive blog updates and join my Newsletter Subscription for all the latest news and specials!

Happy Stamping,

Name Banner

Birthday, Challenges, feminine, JAI, Kids Cards, Techniques & Tutorials

Stars in their multitudes

Hello Crafters,

Melbourne has turned on a gorgeous sunny day today, so I will quickly share a card I have made for the Just Add Ink Colour Challenge before heading outside to enjoy the sunshine with my girls!

The challenge this week is a Colour Challenge JAI#235.

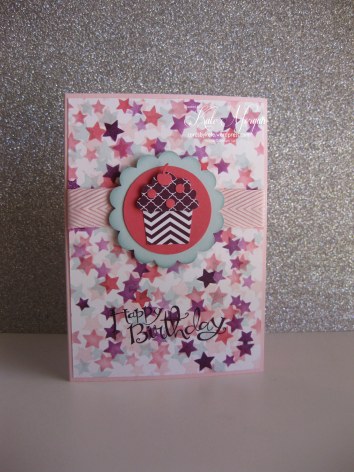
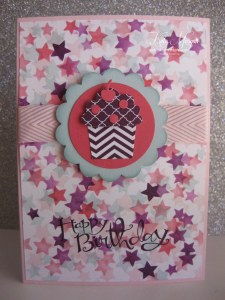
I love this colour combination and needed to make a card for my daughter’s friends birthday next weekend, and these colours screamed cupcake to me!

Birthday Cupcake Card

I started with a card base of Pink Pirouette. I then got out the Stars decorative mask and using my sponge daubers and the above colours, I began sponging from lightest to darkest randomly around some Whisper White card stock. This almost gives the effect of Bokeh!

Birthday Cupcake Card

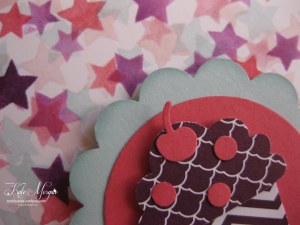
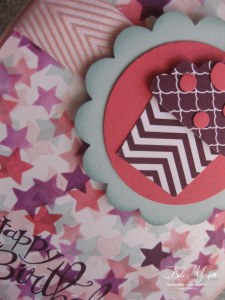
I used the Cupcake Builder punch with the 2014-2016 In Colours Backgrounds DSP, then Strawberry Slush card for the cherry and sprinkles.

I added some chevron ribbon before adding the embellishment with dimensionals.

Birthday Cupcake Card

I added the sentiment from the Sassy Salutations Stamp Set in Blackberry Bliss.

Birthday Cupcake Card

I think this is a very sweet little card and I am loving the stars background. I know I will definitely be creating more of these!

This background is very cheap and easy to create, why don’t you give it a go too.

Please leave a comment below, what you think of my card.

PS I was the winner at JAI for this card!!!

Products Used:

Why don’t you give a challenge a go, they are so much fun. Head across to the Just Add Ink page for more inspiration and see how the designers interpreted this challenge.

The 2014-2015 Annual Catalogue is available online here. This catalogue is full of amazing new products and wonderful coloured pictures full of ideas. It is a must have for anyone interested in Ink, Paper and Stamps!

Shop Online 24/7 for products

Don’t forget to Follow My Blog to receive blog updates and join my Newsletter Subscription for all the latest news and specials!

Happy Stamping,

Name Banner

Masculine, Techniques & Tutorials

Baby Wipe Technique (Masculine)

Hello Crafters,

Today I share with you another baby wipe technique but this time a masculine one.

I am just loving this fun and very easy technique!

The colours this time are: Midnight Muse, Baked Brown Sugar & Bermuda Bay!

IMG_4810

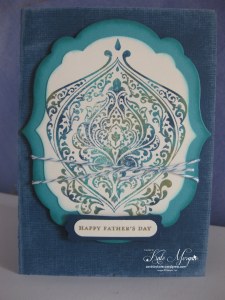
The card base is Midnight Muse Core’dinations cardstock which I sanded to give it a more rustic look.

The technique is exactly the same process as I showed you last week with the Engagement card, you can view this here.

This time I stamped the Beautifully Baroque image onto very vanilla card stock. Isn’t it just stunning?!!!

IMG_4812

I added some bakers twine around the image giving it a more masculine look.

And I added the sentiment “happy father’s day”. Yes I am getting in early this year!!!!


The new 2014-2015 Annual Catalogue goes live on 1 July, but if you would like to receive a copy before then, please Contact Me. This catalogue is full of amazing new products and wonderful colour pictures for ideas. It is a must have for anyone interested in Ink, Paper and Stamps!

Don’t forget to check the retired stamps and accessories lists, there are sure to be products to please, but hurry, only available while stocks last!

Shop Online 24/7 for products

Don’t forget to Follow My Blog to receive blog updates and join my Newsletter Subscription for all the latest news and specials!
Happy Stamping,
Name Banner
feminine, Techniques & Tutorials

Baby Wipe Technique (Engagement)

Hello Crafters,

Today I share with you another technique which I haven’t ever tried until now, but it has been on my to-do-list for some time.

I wish I had of tried it earlier as I absolutely love it and the results of this card!

And check out the colours ~ I have used Melon Mambo, Bermuda Bay & Wild Wasabi!

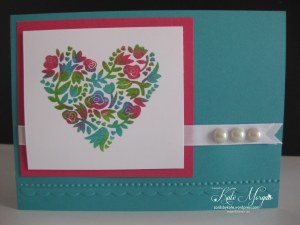
Flowerfull Heart

The card base is Bermuda Bay. Now to explain how I created that gorgeous colourful flowerfull heart.

First of all you need some baby wipes ~ who doesn’t have baby wipes?? Even though my kids are out of nappies, baby wipes are still a very handy thing to have around or in the handbag for those messy snacks!

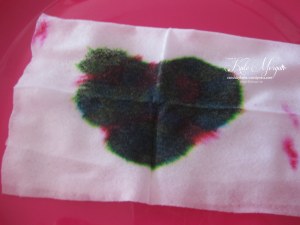
You will also need some reinkers in your favourite colours, I find that 3 works best. Drop some ink onto the baby wipes randomly to cover an area big enough for your stamp.

Babywipe Technique

Once you have put enough ink on, place your stamp on top and use it the same way you would an ink pad.

IMG_4797

Then stamp the image onto whisper white card stock. Isn’t it just gorgeous?!!!

IMG_4798

I used the Flowerfull Heart stamp  and I was able to get about 18-20 crisp images from this one use of the baby wipes. Great value and would make an easy set of cards to give someone as a gift, or if you were making cards for a particular event!

IMG_4805

I added some white ribbon and pearls to finish it off, as it is for an engagement!

Here is another image showing the inside of the card. I love adding some touches to the inside, I find it just finishes the cards off nicely.

IMG_4804

I just love this technique and will certainly try some more, maybe a masculine one next time!!!


The new 2014-2015 Annual Catalogue goes live on 1 July, but if you would like to receive a copy before then, please Contact Me. This catalogue is full of amazing new products and wonderful colour pictures for ideas. It is a must have for anyone interested in Ink, Paper and Stamps!

Don’t forget to check the retired stamps and accessories lists, there are sure to be products to please, but hurry, only available while stocks last!

Shop Online 24/7 for products

Don’t forget to Follow My Blog to receive blog updates and join my Newsletter Subscription for all the latest news and specials!
Happy Stamping,
Name Banner