Baby, Birthday, Blog Hop/Instagram Hop, Designer/Patterned/Specialty Papers (DSP), Handmade Cards, Stampin' Up!, Watercolour

Azure Afternoon: Spotlight in Nature Watercolour & Baby Duckling card

2024-25 blog header

I’m thrilled you are here to join us each Wednesday evening for the AWHT Colour Creations Blog Hop showcasing the full range of 50+ gorgeous Stampin’ Up! colours.

Week 7 – Azure Afternoon
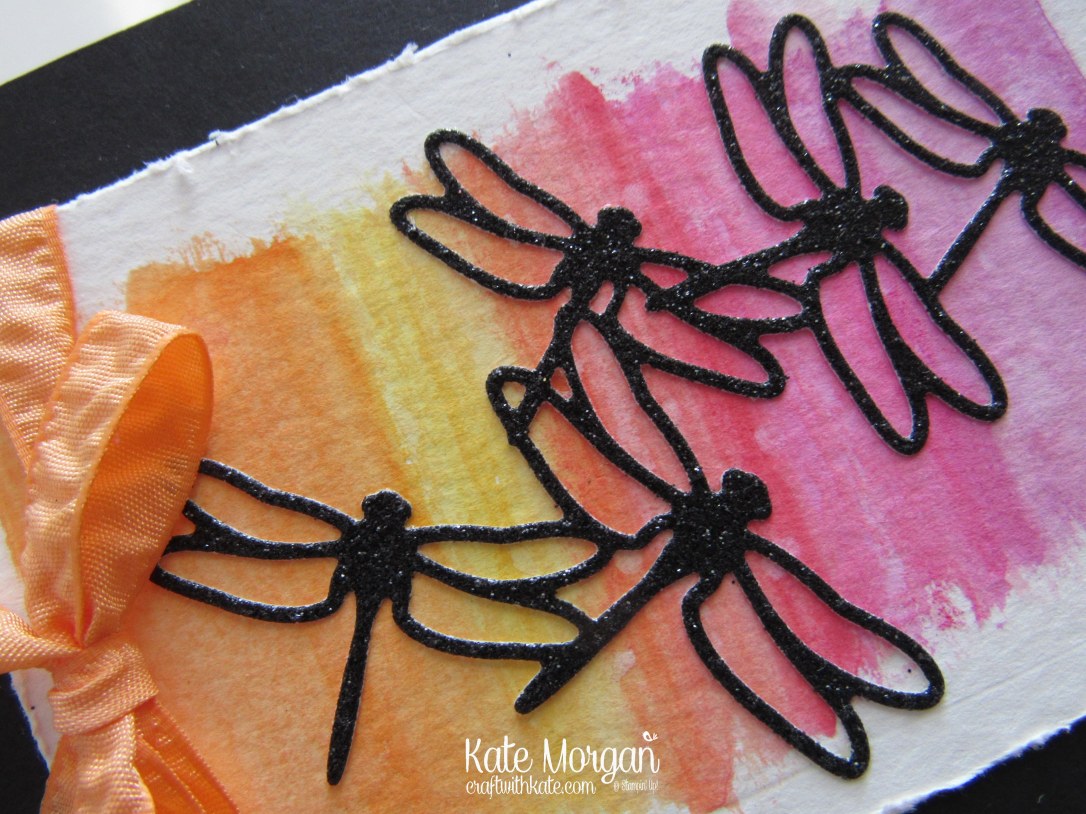
Card 1

Features the Spotlight on Nature stamp set with some beautiful watercolouring.

On a Thick White card base are 2 matt layers of Peach Pie & Azure Afternoon cardstock. The Fluid 100 Watercolour paper is stamped with the floral image with Black Stazon ink .

Watercoloured card with Spotlight on Nature for Azure Afternoon Colour Creations blog hop by Kate Morgan, Stampin Up Australia 2024

I then masked around the edges with some washi tape, before applying a watercolour wash with Azure Afternoon, Granny Apple Green & Pretty Peacock inks and a Water Painter. This is carefully applied around the floral image. Once this was dry (I used my Heat Tool to quicken the process), before adding some darker splatters and drops of water to carefully lift some of the colour. I carefully removed the washi tape.

Watercoloured card with Spotlight on Nature for Azure Afternoon Colour Creations blog hop by Kate Morgan, Stampin Up Australia 2024.

The image is coloured with Peach Pie ink for the flowers, and the leaves and stems I used Granny Apple Green & Pretty Peacock by mixing them on a clear acrylic block. The sentiment is stamped and fussy cut and added on Mini Dimensionals and one of the Brushed Brass Butterflies added.

The inside of the card and the envelope were decorated the same, by adding a masked circle of Azure Afternoon ink applied with a Blending Brush and then the beautiful butterfly image was stamped.

Card 2

Features the Charming Duckpond Bundle for a sweet baby card. A piece of the Country Woods DSP was cut to the card front size and die cut with the largest die. Behind this I added 2 more patterns from the same DSP pack, but I used a Blending Brush to add Azure Afternoon ink to the bottom section to reflect water.

Baby card with Charming Duckpond for Azure Afternoon Colour Creations blog hop by Kate Morgan, Stampin Up Australia 2024

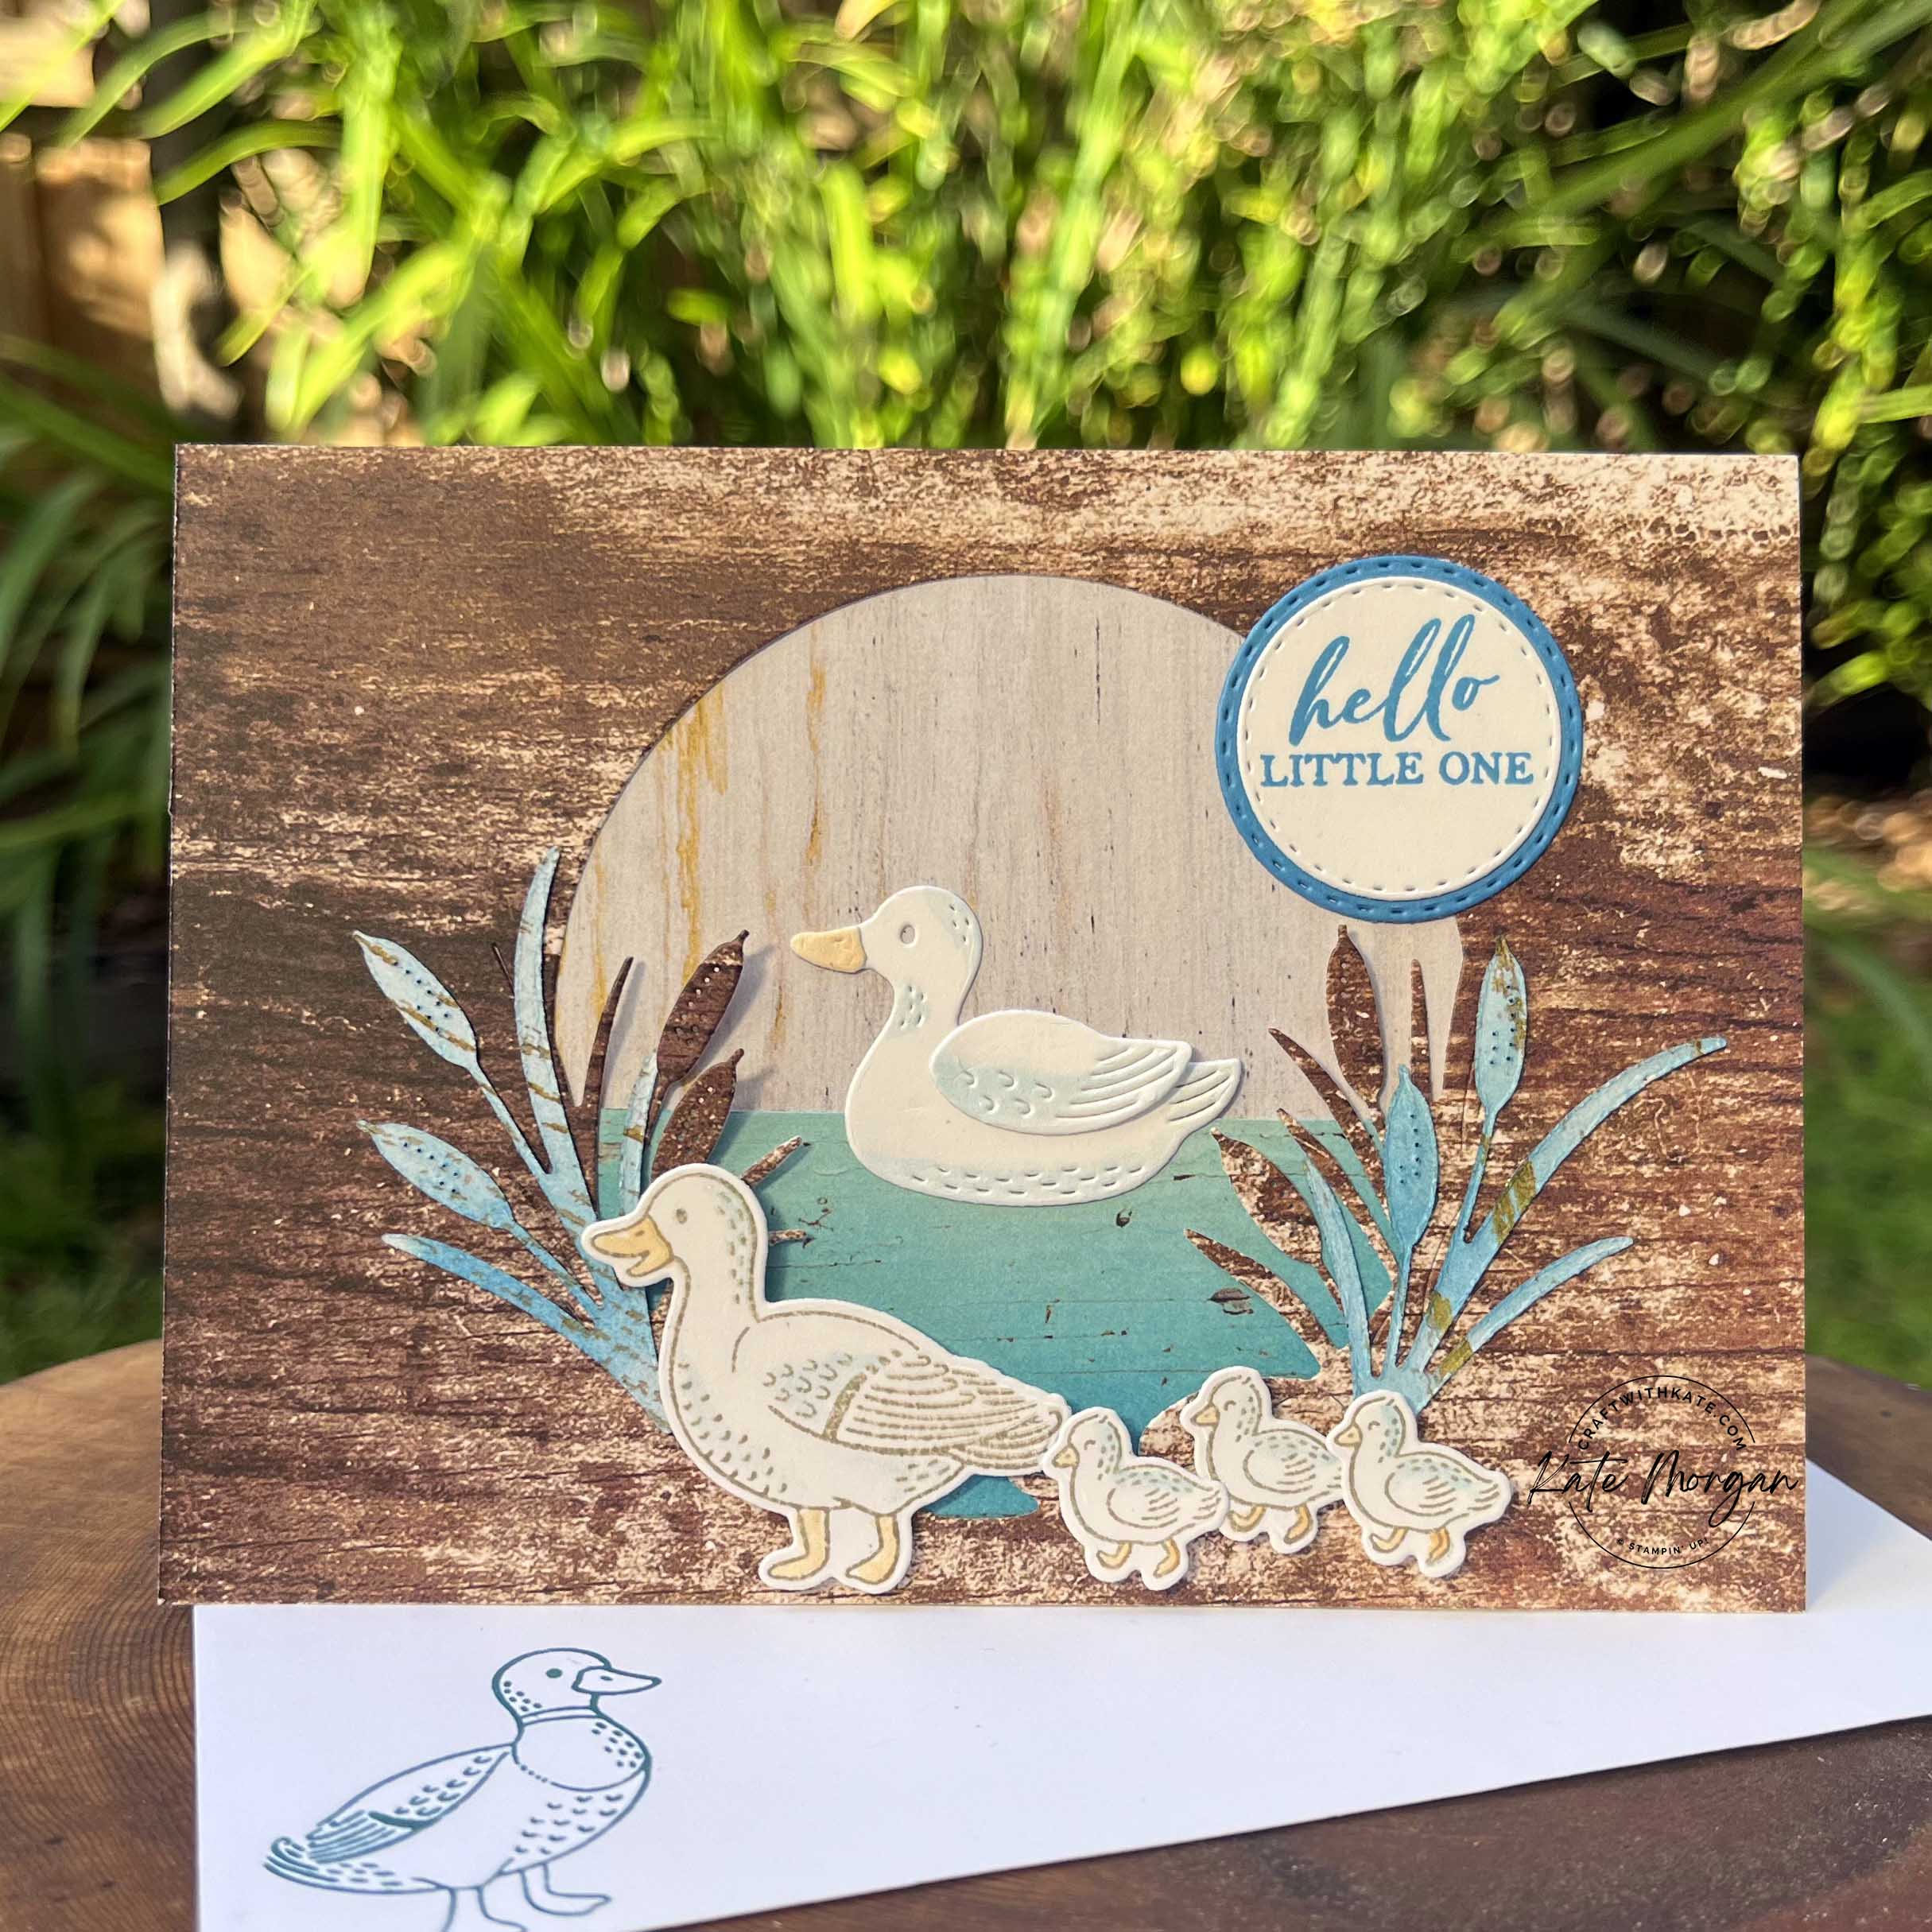
The mother duck & ducklings are stamped in Gray Granite and diecut before using my Wink of Stella to add a very light tone of Azure Afternoon ink & Peach Pie for the beak and feet. The duck in the water is just diecut and coloured. The reeds are cut from more of the same DSP and coloured the same way as the water.

Baby card with Charming Duckpond for Azure Afternoon Colour Creations blog hop by Kate Morgan, Stampin Up Australia 2024.

The sentiment is stamped using the Unbounded Love stamp set and diecut using the Spotlight on Nature dies.

Thanks for dropping by. I hope you join me next Wednesday for inspiration using Balmy Blue.

Please enjoy the wonderful inspiration of our next team member, Di Furniss.

2024-25 Next Blog Button

The full list of participants for this week can be viewed on Catherine Proctor’s blog.

Product List
Stamps: 
Spotlight on Nature*, Unbounded Love, Charming Duckpond*
Dies: Spotlight on Nature*, Charming Duckpond*
Card/DSP/Specialty Paper: Fluid 100 Watercolour, Thick Basic White, Basic White, Azure Afternoon, Peach Pie, Country Woods DSP, Basic White C6 Envelopes
Inks: Azure Afternoon, Peach Pie, Granny Apple Green, Black Stazon, Pretty Peacock, Gray Granite
Embellishments: Brushed Brass Butterflies
Accesories/Adhesives/Tools:  Blending Brushes, Wink of Stella, Paper Snips, Bone Folder, Paper Trimmer, Multipurpose Glue, Mini Stampin’ Dimensionals, Stampin’ Cut & Emboss Machine, Take Your Pick Tool, Simply Shammy, Heat Tool, Water Painters, Tear & Tape
* can be purchased together as a bundle to save 10%

Shop with Kate Morgan


Be sure to download a PDF copy of current catalogues from my SU Catalogue Library page.

Don’t forget to Follow My Blog to receive blog updates and all the latest news and specials!

Birthday, feminine, Flowers, Handmade Cards, Stampin' Up!, Watercolour

Wildly Happy Collage with Pigment Sprinkles

Tonight I have a collage scene using the fox image from the Wildly Happy stamp set. I have also used the Pigment Sprinkles on the Fluid 100 Water colour paper to create that textured background of the grass. Simply wet the paper with an AquaPainter and carefully sprinkle a very small amount of colour onto the paper. You will see it spread instantly and such vibrant colour. I also added a little water in the Stampin’ Spritzer to add a little more water to spread the colour. Leave it to dry completely before cutting the hill shape with scissors. The smaller hill is Mossy Meadow card, cut with the Layering Oval framelits and embossed with the Suble Dynamic Embossing Folder for extra texture.

Wildly Happy Fox Stampin Up by Kate Morgan Australia 2019.JPG

The tree is cut using the Sweet Silhouettes dies in Early Espresso card. I added this with mini dimensionals to add some height above the foxes.

The foxes are coloured using Stampin’ Blends markers and fussy cut before adding them to the card. I love how they are curled up resting under the tree!

Wildly Happy Fox Stampin Up by Kate Morgan Australia 2019.

A full list of products can be found at the end of the post.


2019-2020 Annual Catalogue ends 2 June 2020

2019 Holiday catalogue ends 2 January 2020

Be sure to download a PDF copy from my SU Catalogue Library page today.


Don’t forget to Follow My Blog to receive blog updates and join my Newsletter Subscription for all the latest news and specials!

 Happy Stamping,

Blog Signature

Blog Button - Catalogue  Blog Button - Shop   Blog Button - Classes  Blog Button - Join my Team  Blog Button - Watermark

Product List

feminine, Stampin' Up!, Watercolour

Happy New Year 2017

Dear Crafters,

Happy New Year!!!

Let’s hope 2017 brings us more joy and happiness than 2016 did.

Now we really can focus on the brand new products in the Occasions and Sale-a-bration catalogues available for purchase in just 2 more days!

Today I have the Detailed Dragonfly Thinlits with the Watercolour Pencils and AquaPainter!

dragonfly-watercolouring-using-stampin-ups-detailed-dragonfly-thinlits-watercolour-pencils-by-kate-morgan-occasions2017

I just added some of the pencils in a row from top to bottom and then swished the AquaPainter from left to right and down the page. So simple and so effective!

Oh, and check out those Black Glimmer Dragonflies!!!

dragonfly-watercolour-using-stampin-ups-detailed-dragonfly-thinlits-watercolour-pencils-by-kate-morgan-occasions-2017

I love these Watercolour Pencils, they make colouring super easy and you can use either the Blender Pen or AquaPainter to blend the colour. I I have used the AquaPainter!

dragonfly-watercolour-using-stampin-ups-detailed-dragonfly-thinlits-watercolour-pencils-by-kate-morgan-occasions2017

What do you think of this striking project?

Products Used:

Cardstock: Basic Black, Watercolour
Other: Big Shot, Detailed Dragonfly Thinlits, Watercolour Pencils, AquaPainter, Distress Tool, Tombo Multipurpose Glue, Trimmer, Stampin Scrub, Peekaboo Peach Ruched Ribbon, Paper Snips

shop-online-copyget-a-catalogue-free-copy  classes-in-rowville-copy  join-my-team-copy  watermark-purchase

Don’t forget to Follow My Blog to receive blog updates and join my Newsletter Subscription for all the latest news and specials!

Happy Stamping!

Blog Signature-001

Birthday, feminine, Stampin' Up!, Techniques & Tutorials, Watercolour

Watercolour Dragonflies

Dear Crafters,

Today I share another sneak peek of the Dragonfly Dreams Bundle, but this time using the emboss resist technique.

dragonfly-dreams-card-using-stampin-up-dragonfly-dreams-bundle-by-kate-morgan-stampin-up-demonstrator-classes-available-in-rowville-stampinup-craftwithkatemorgan

I love how simple but effective this technique is!

Begin by stamping the images in Versamark ink, then add clear embossing powder and heat set.

dragonfly-dreams-card-using-stampin-ups-dragonfly-dreams-bundle-by-kate-morgan-stampin-up-demonstrator-classes-available-in-rowville-stampinup-craftwithkatemorgan

Using the AquaPainter and ink, brush on the colour blending the two together in the centre. I’ve used Calypso Coral and Marina Mist.

dragonfly-dreams-using-stampin-ups-dragonfly-dreams-bundle-by-kate-morgan-stampin-up-demonstrator-classes-available-in-rowville-stampinup-craftwithkatemorgan

To get those dots, I dropped tiny amounts of water from the AquaPainter, let it sit for a minute or two, then dabbed off with some paper towel. This lifts the colour already added.

I also added a vellum dragonfly and some pearls to the body.

What do you think of this card?

Products Used:

Stamp Sets: Dragonfly Dreams
Cardstock: Marina Mist, Thick Whisper White, Watercolour card and Vellum
Inks: Marina Mist, Calypso Coral, Versamark
Other: Big Shot, Detailed Dragonfly Thinlits, AquaPainter, Heat Tool, Clear Embossing Powder, Sponge Dauber, Paper Snips, Tombo Multipurpose Glue, Trimmer, Stampin Scrub, Clear Blocks, Pearls, Silver Ribbon

shop-online-copyget-a-catalogue-free-copy  classes-in-rowville-copy  join-my-team-copy  watermark-purchase

Don’t forget to Follow My Blog to receive blog updates and join my Newsletter Subscription for all the latest news and specials!

Happy Stamping!

Blog Signature-001

feminine, Techniques & Tutorials

Water Colour Background

Hello Crafters,

Today I am sharing a card I made using the water colour technique for the background of my card. Can you believe, I have never used the watercolour paper until now?

And check out the colours ~ I have used Wisteria Wonder, Pear Pizzazz & Bermuda Bay!

IMG_4794

The card base is Bermuda Bay. Now to explain how I created that gorgeous water colour background.

I used the Chevron Textured Impressions Embossing Folder and the Stampin’ Write Markers in each of the colours alternating the colours on each of the lines on one side of the TIEF. You may notice that the ink drys, but do not worry until you have finished adding the inks. Once finished, I sprayed the embossing folder with Stampin’ Mist (you know the stuff we use with our Stampin’ Cleaner!!!) and then put a piece of water colour paper on top and closed the folder gently and rub. Open the folder and tada, you have a gorgeous water colour background. Put this aside to dry.

IMG_4795

The flower from the Mixed Bunch stamp set and punched out with the Blossom punch and the 1″ circle punch. I curled the petals using my thumb and joined the pieces with dimensionals.

Here is another close up of the image.

IMG_4793

I just love this background and will certainly try some more water colouring!!!


The new 2014-2015 Annual Catalogue goes live on 1 July, but if you would like to receive a copy before then, please Contact Me. This catalogue is full of amazing new products and wonderful colour pictures for ideas. It is a must have for anyone interested in Ink, Paper and Stamps!

Don’t forget to check the retired stamps and accessories lists, there are sure to be products to please, but hurry, only available while stocks last!

Shop Online 24/7 for products

Don’t forget to Follow My Blog to receive blog updates and join my Newsletter Subscription for all the latest news and specials!

Happy Stamping,
Name Banner