Dear Crafters,
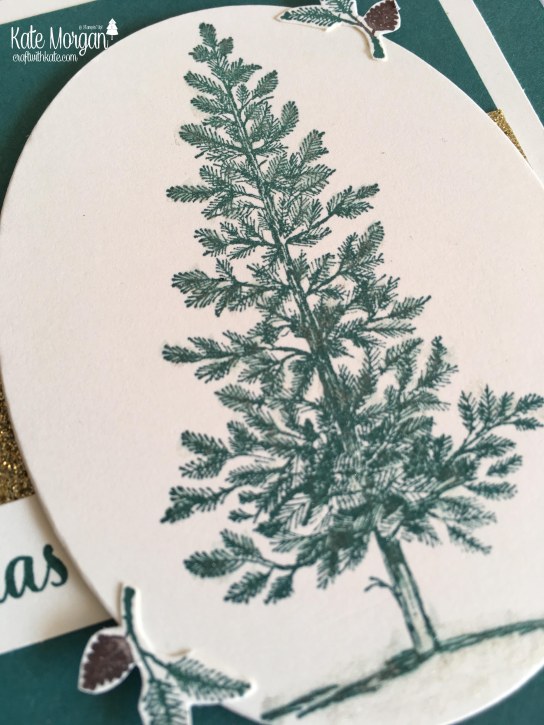
It’s coming to the end of the school year, and many teachers come and go at this time, so here is another Masculine farewell card, using the Lovely as a Tree & Hardwood stamp sets.

I stamped the woodgrain image and them used a sponge dauber to add some extra colour and tone.

I also sponged some Marina Mist ink across the branches of the trees to give some colour to the sky behind. The font was printed on my computer.

I also stamped a tree image on the inside of the card and on the envelope.
A full list of product can be found at the end of this post!
Don’t forget to Follow My Blog to receive blog updates and join my Newsletter Subscription for all the latest news and specials!
Happy Stamping,


Product List


$14.00

$15.75


$120.50

$50.00

$7.00

$30.00

$8.00

$50.00

$6.00

$17.00

$159.00

$9.00


1-1/4″ Burlap Ribbon
$14.00

Large Oval Punch
$28.00