Dear Crafters,
![]()
Today some of the Art with Heart Stampin’ Up! team girls are presenting some fabulous Christmas projects to inspire you. This year we already have new Christmas sets to play with in the 2015 Annual Catalogue, and some old favourites too. We also have a brand new 2015 Holiday catalogue coming soon. If you would like a copy of any of our catalogues, to attend a Stampin’ Up! class or join a large fabulous group of crafty women by becoming part of the team (hobby demonstrators welcome), be sure to contact me.
You have come to my blog from the lovely and very talented, Kathryn Mangelsdorf. Blogs are full circles, so you can start hopping here and then at the end of each post is a link to the next. There is also a list of participants at the end in case of any broken links.
Now let’s get started!
For my projects today, I have used the 2014-2016 In Colours along with some traditional Christmas stamp sets and non-traditional stamp sets from the Annual Catalogue!
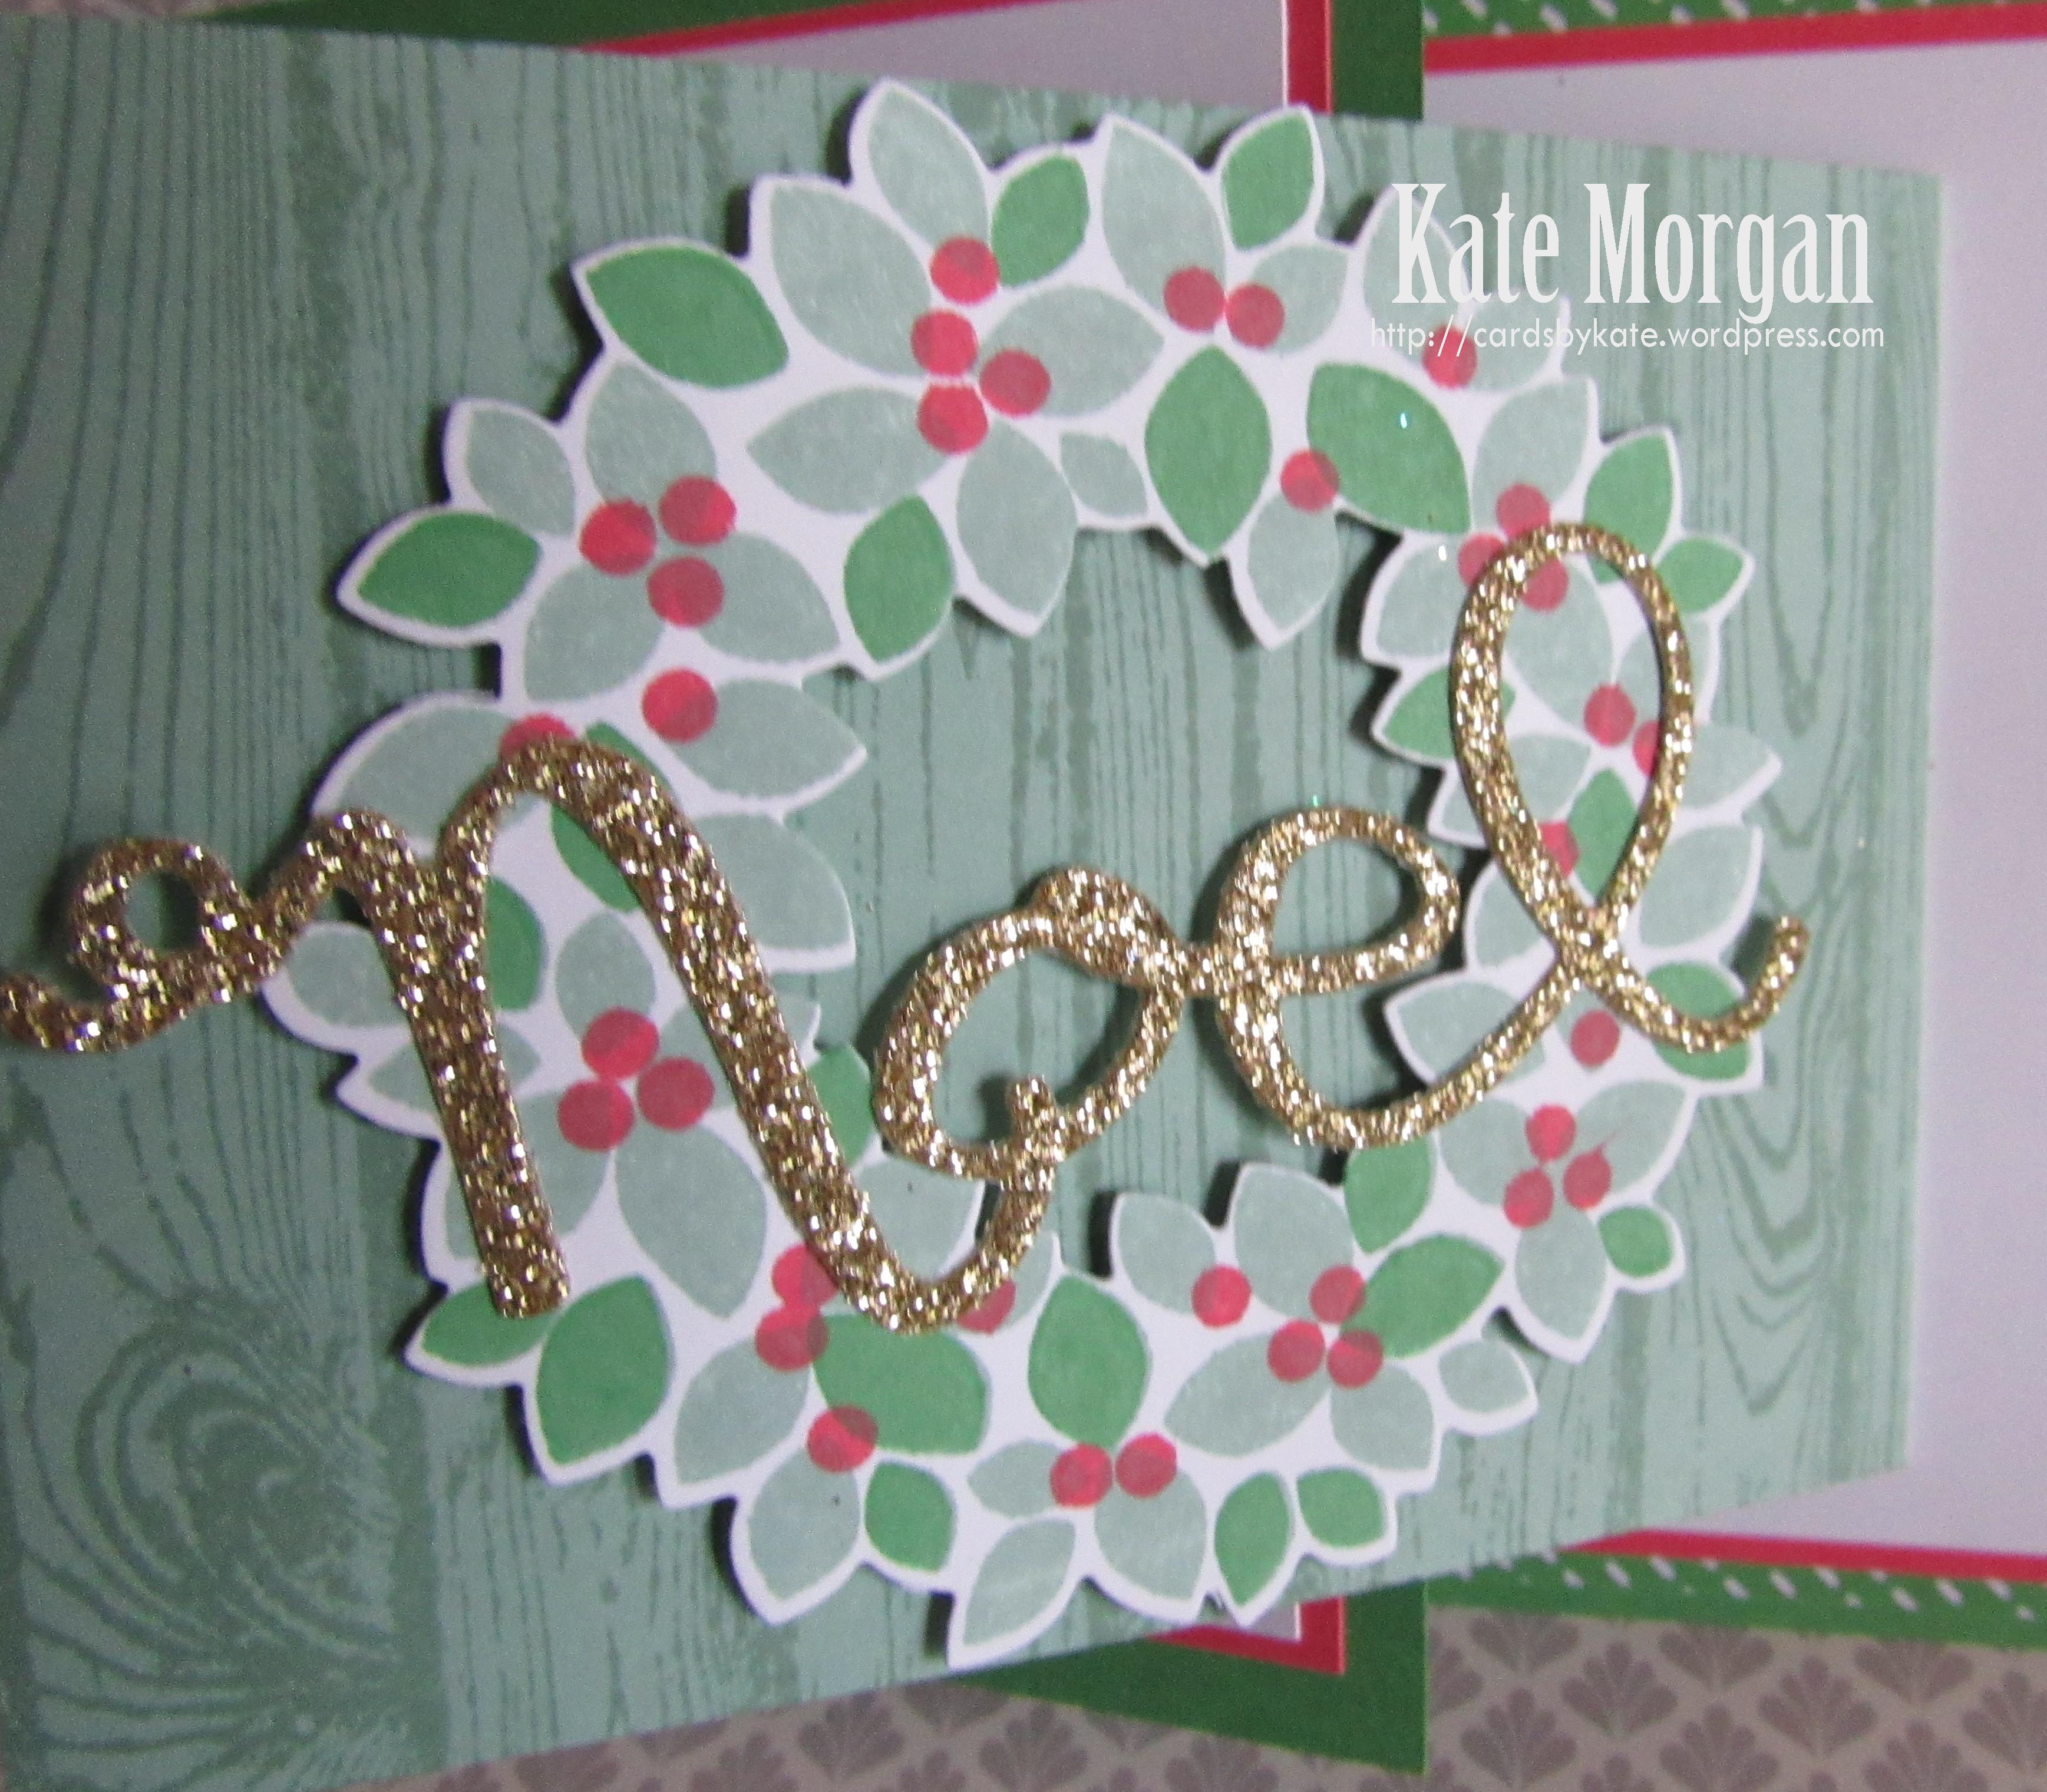
The first one is a flip flop card and uses the gorgeous Wondrous Wreath Bundle (#137624).

When the card opens, it opens out twice, first from the right, then left.

Here is a close up of the stunning sentiment die cut in gold glitter paper layered across the wreath.
The next two cards are very simple but effective.
The first uses the Festival of Trees stamp set (#135059)
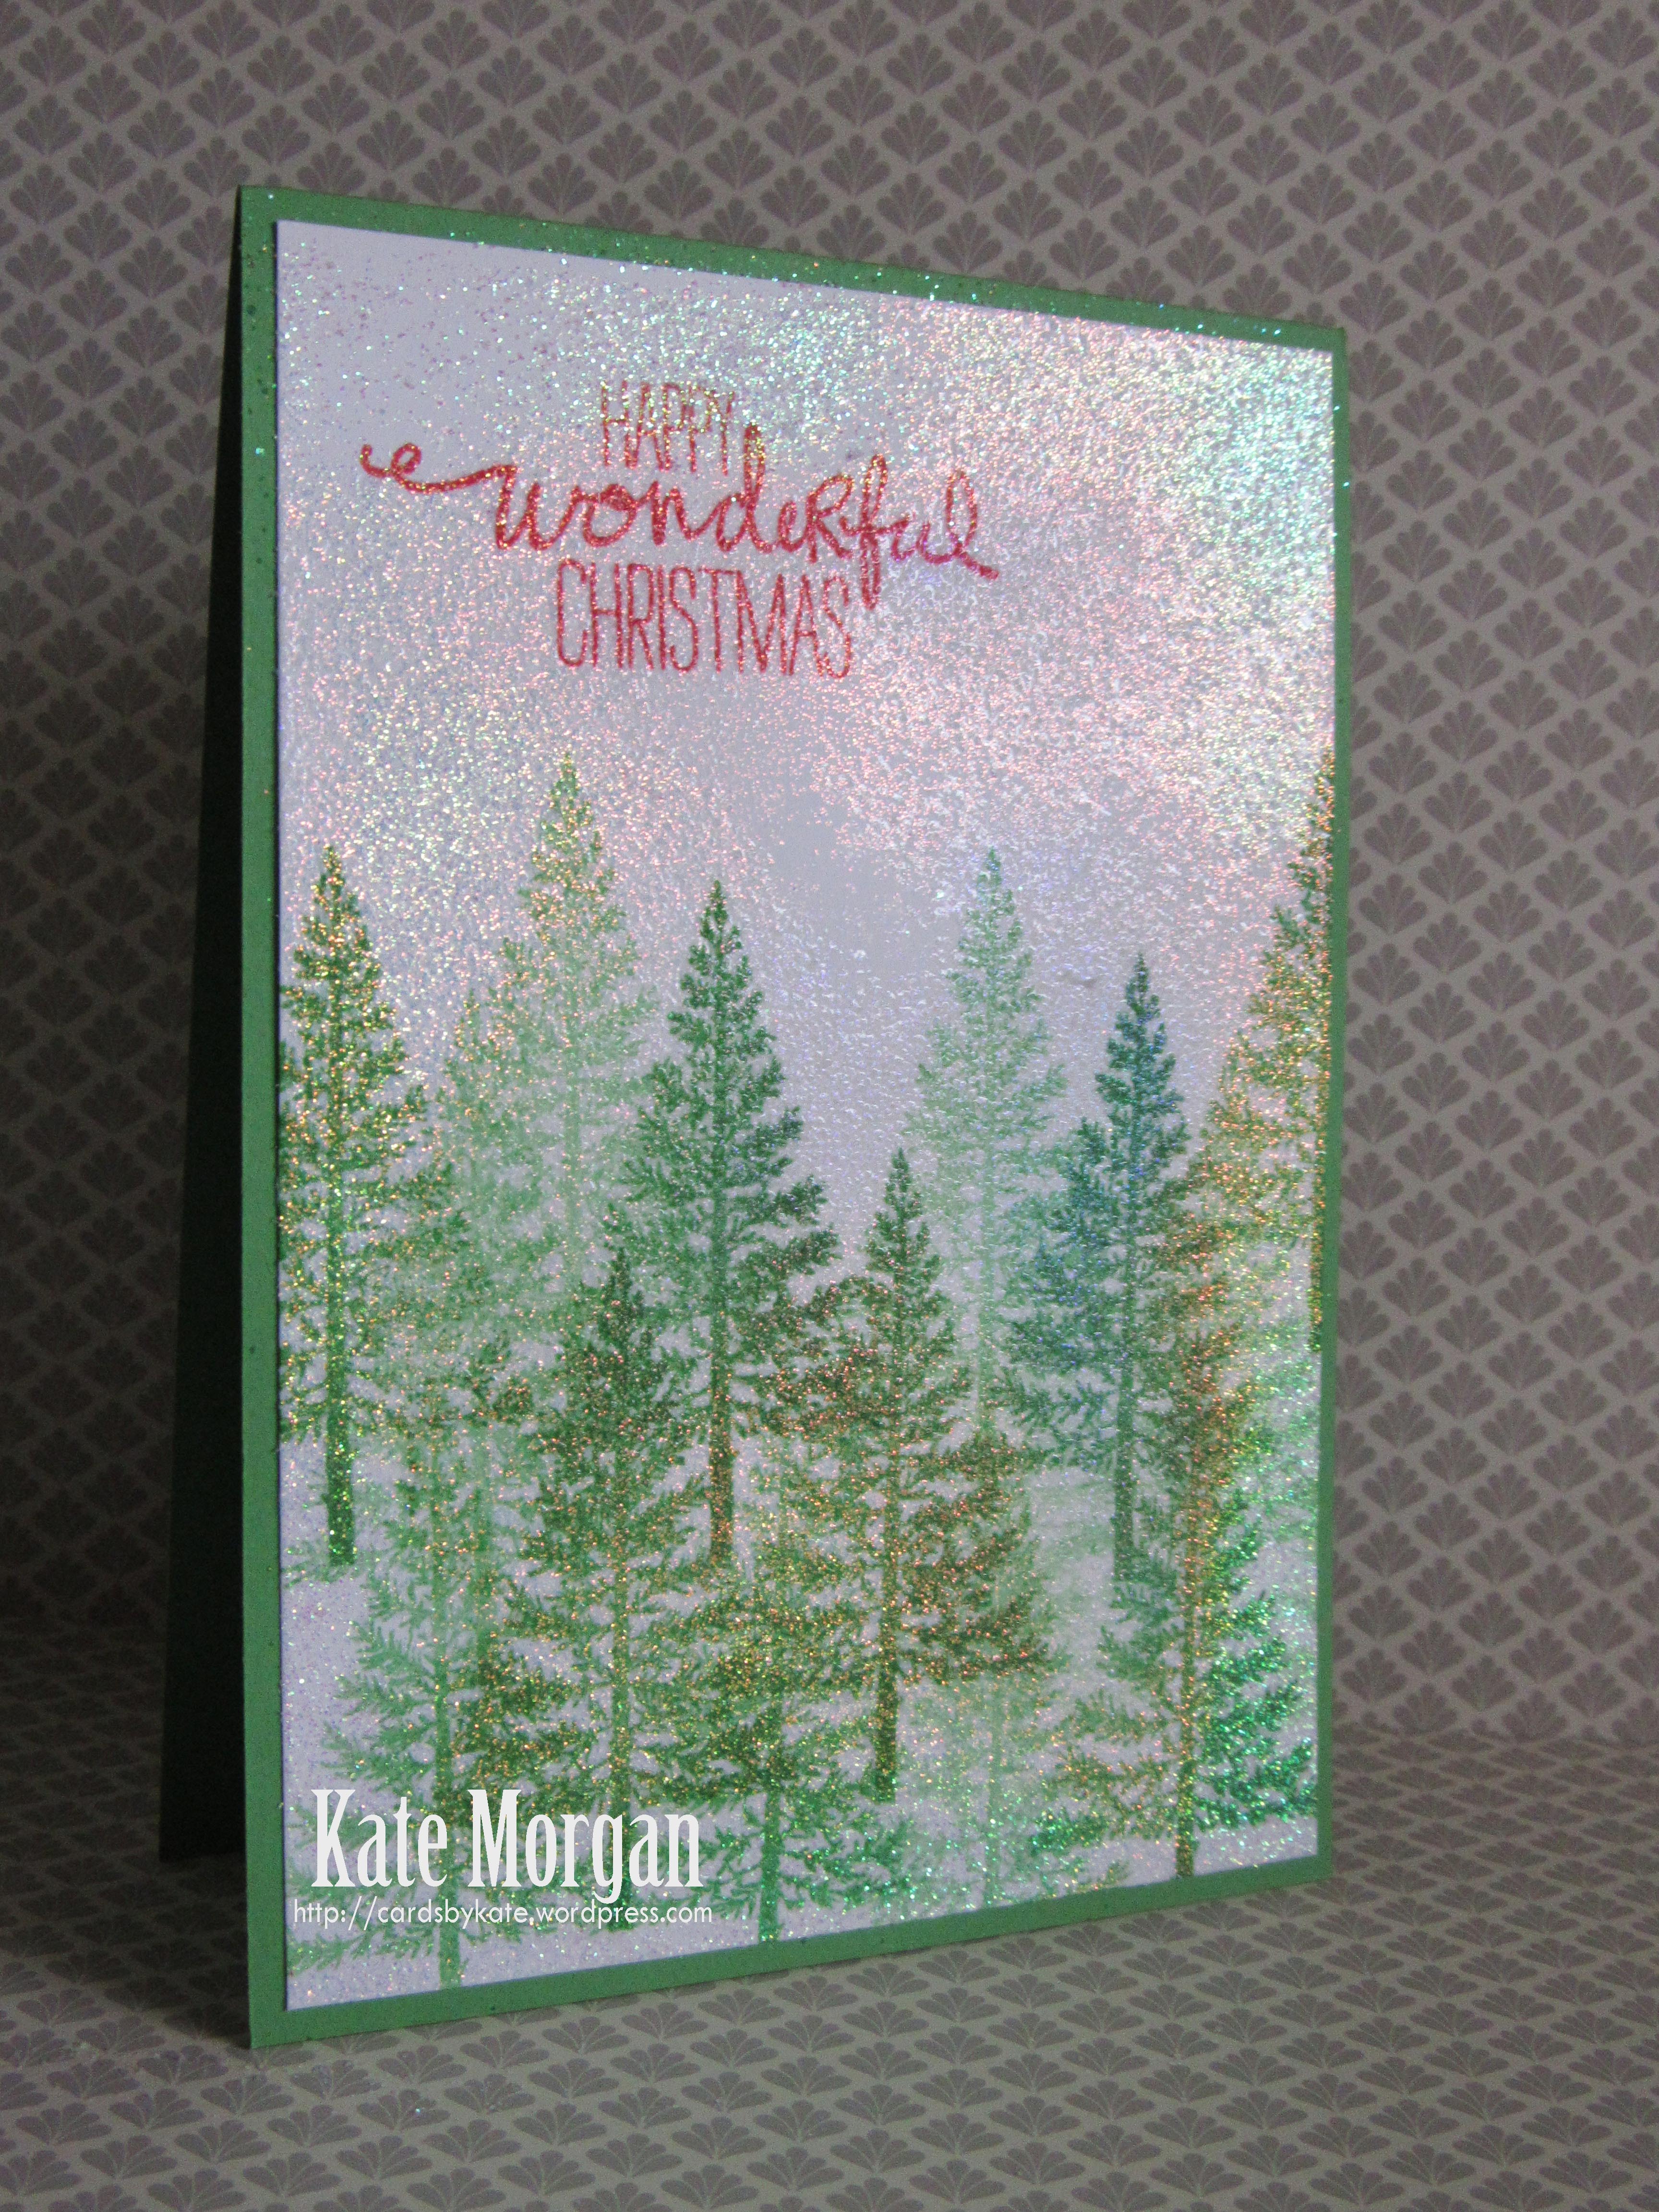
I basically stamped the tree image using only the Cucumber Crush ink multiple times. The sentiment is stamped in Watermelon Wonder then let the ink dry. I rubbed the Versamark Ink pad across the entire card before adding some Holographic embossing powder and heat setting it. Look at the sparkle!!! The base card is also Cucumber Crush.

My next card today uses the Lovely as a Tree stamp set (#128655 w, #127793 c)
Starting with the same process as the previous card, but instead I added the Dazzling Diamonds Stampin’ Glitter over the Versamark ink. How pretty is that? This didn’t stick so well, but nothing a little hairspray cannot fix!!!!


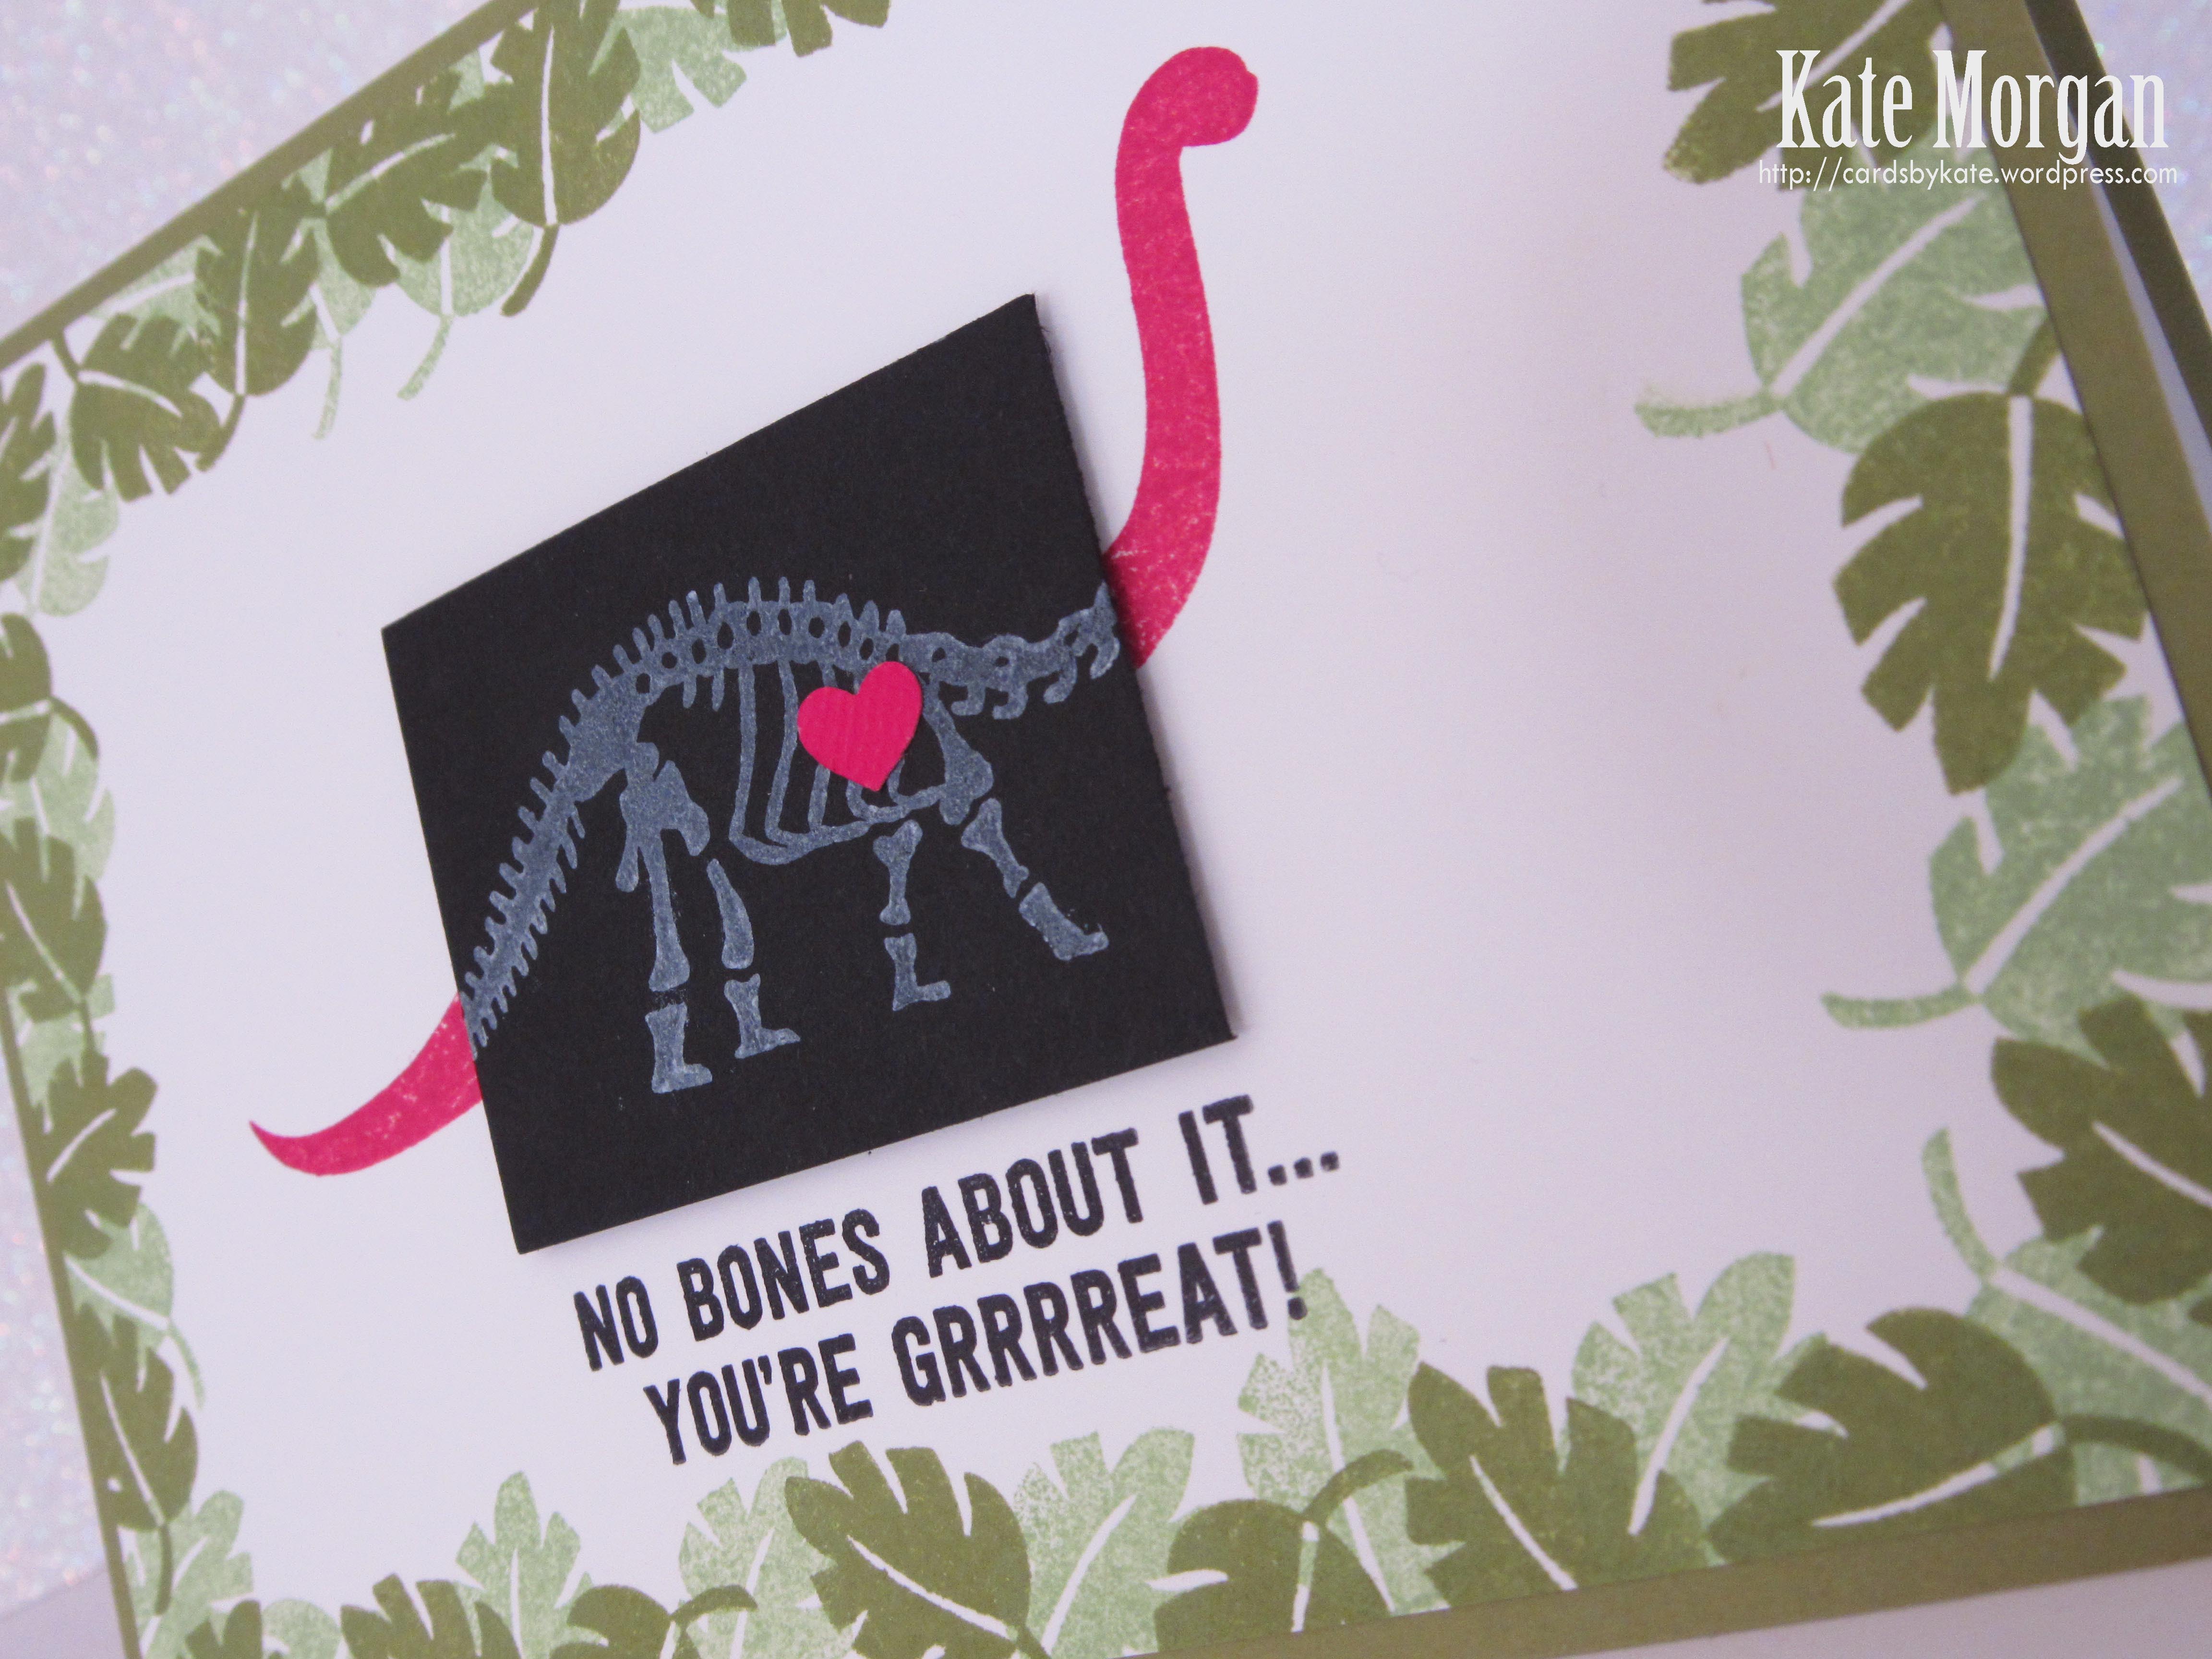
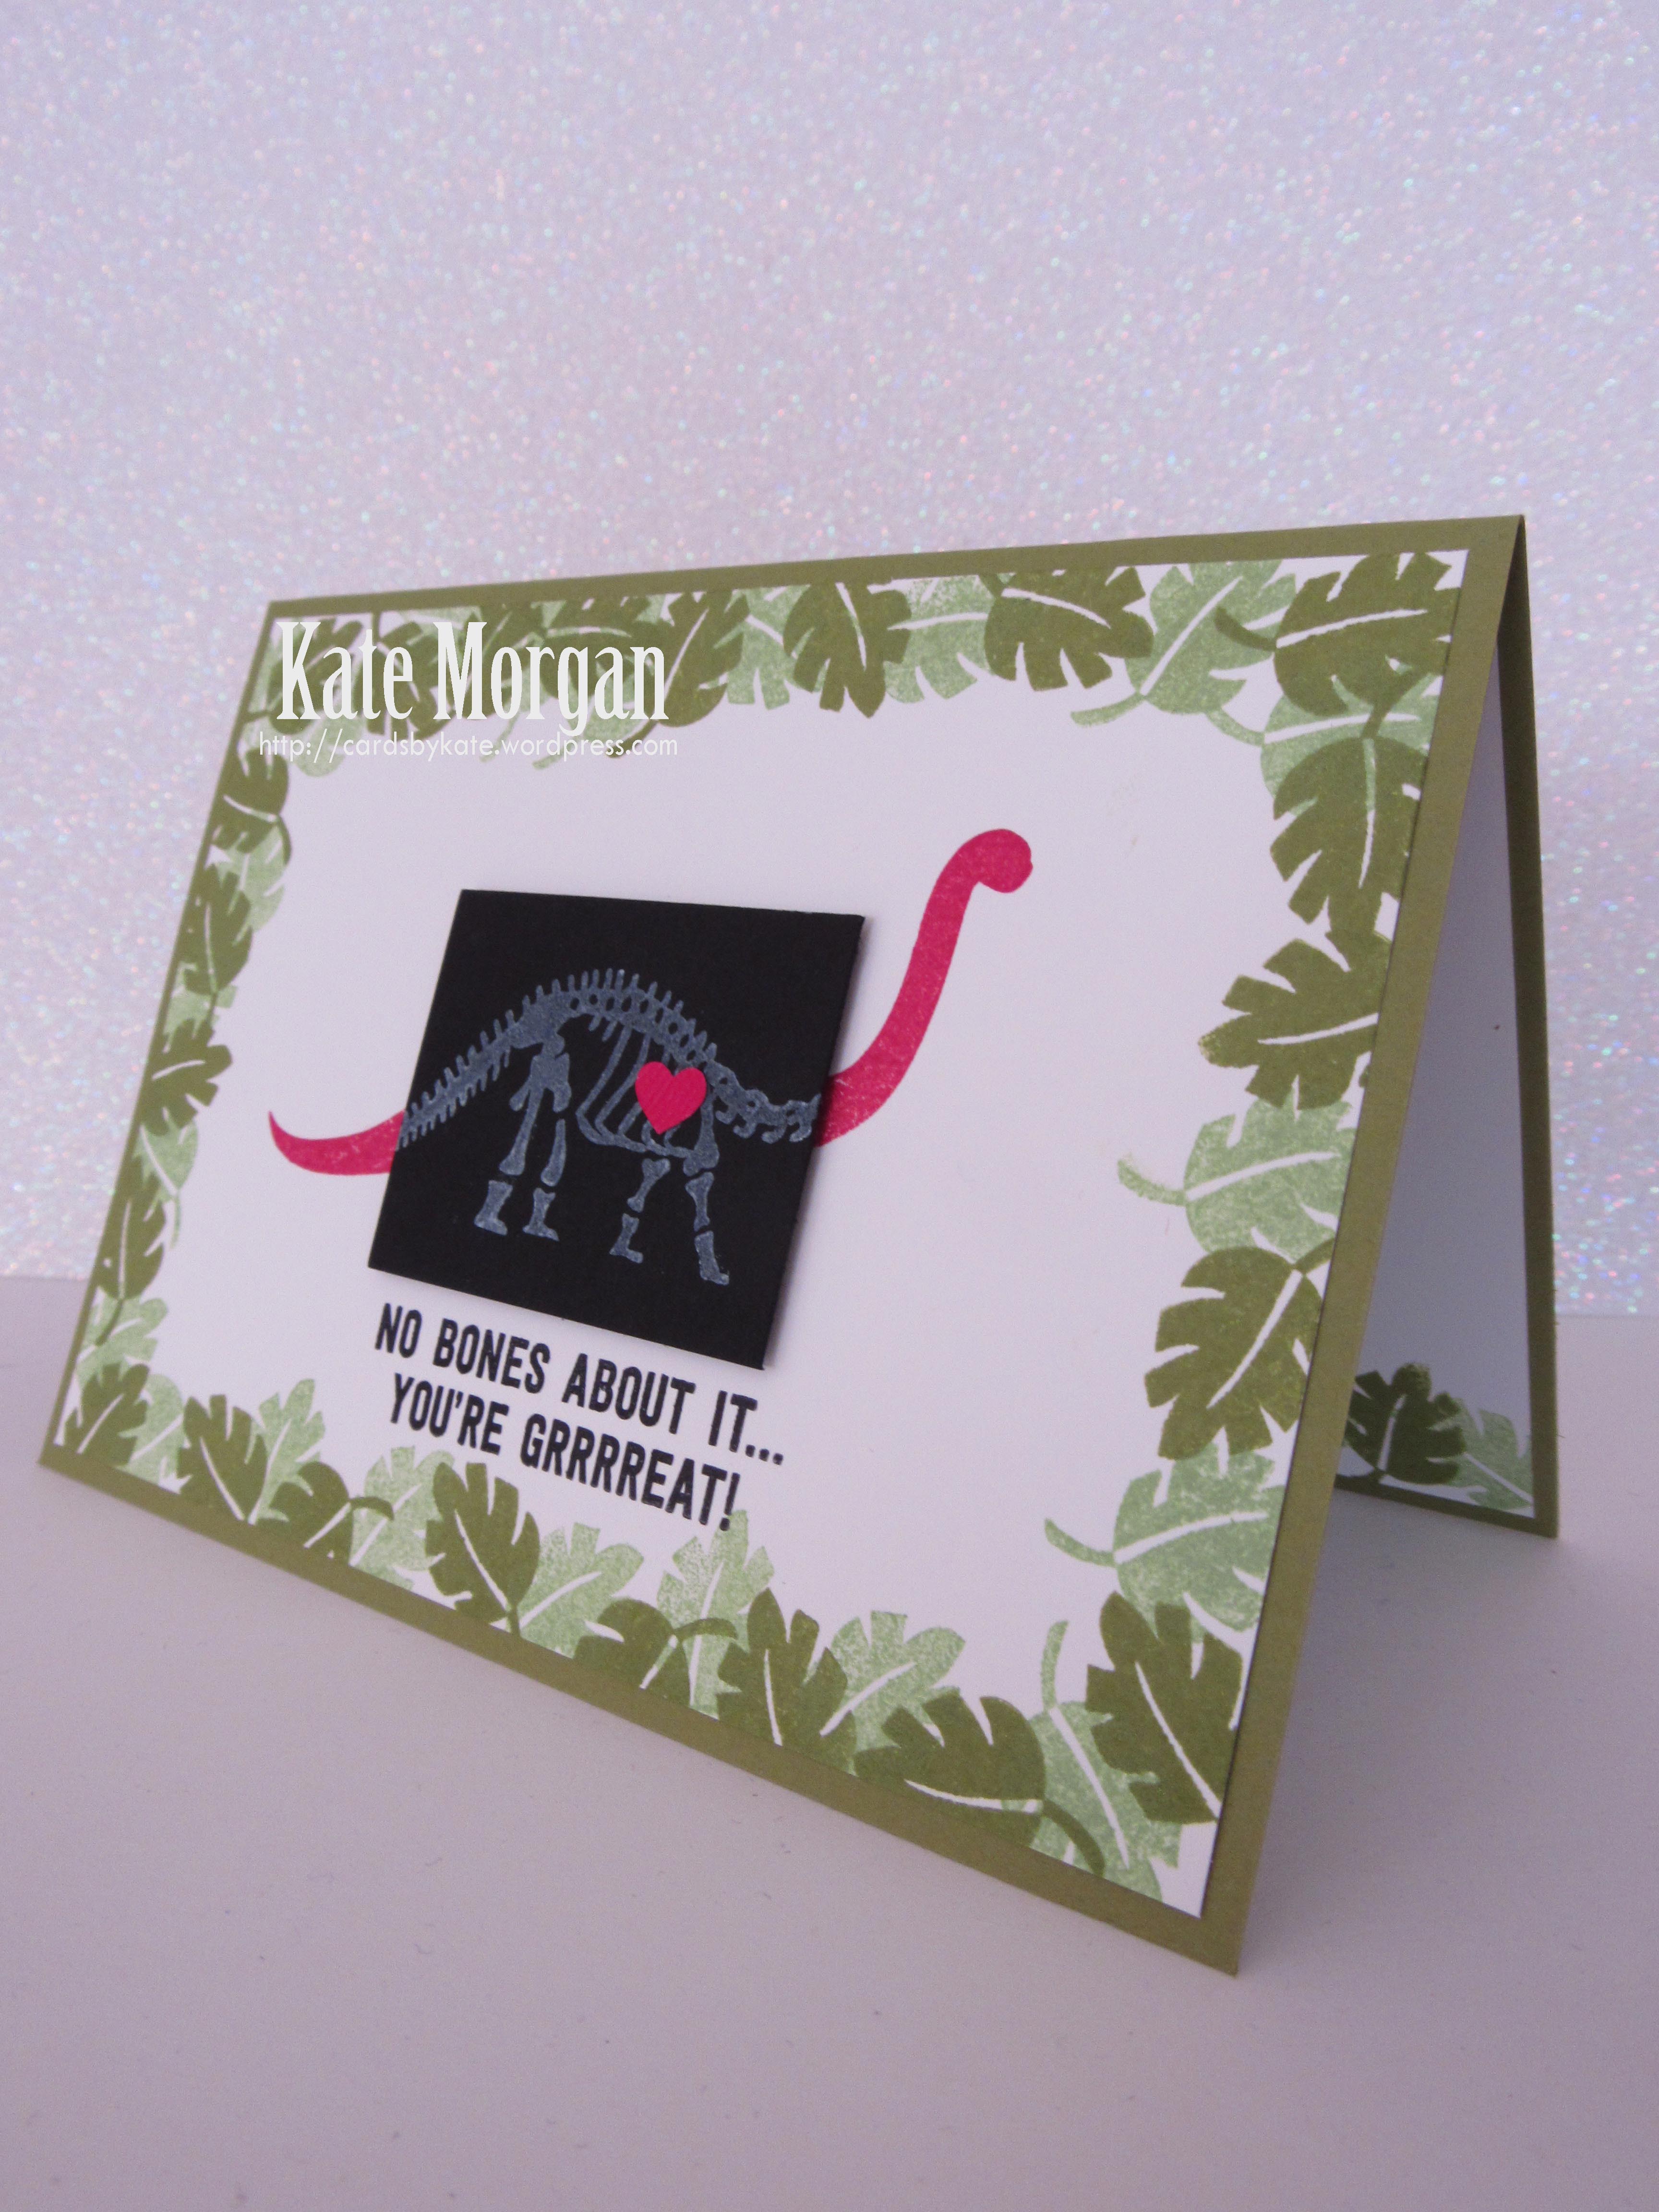
My final card today is also a simple Christmas card using strips of the Cherry on Top DSP stack, the bird builder & heart punches.
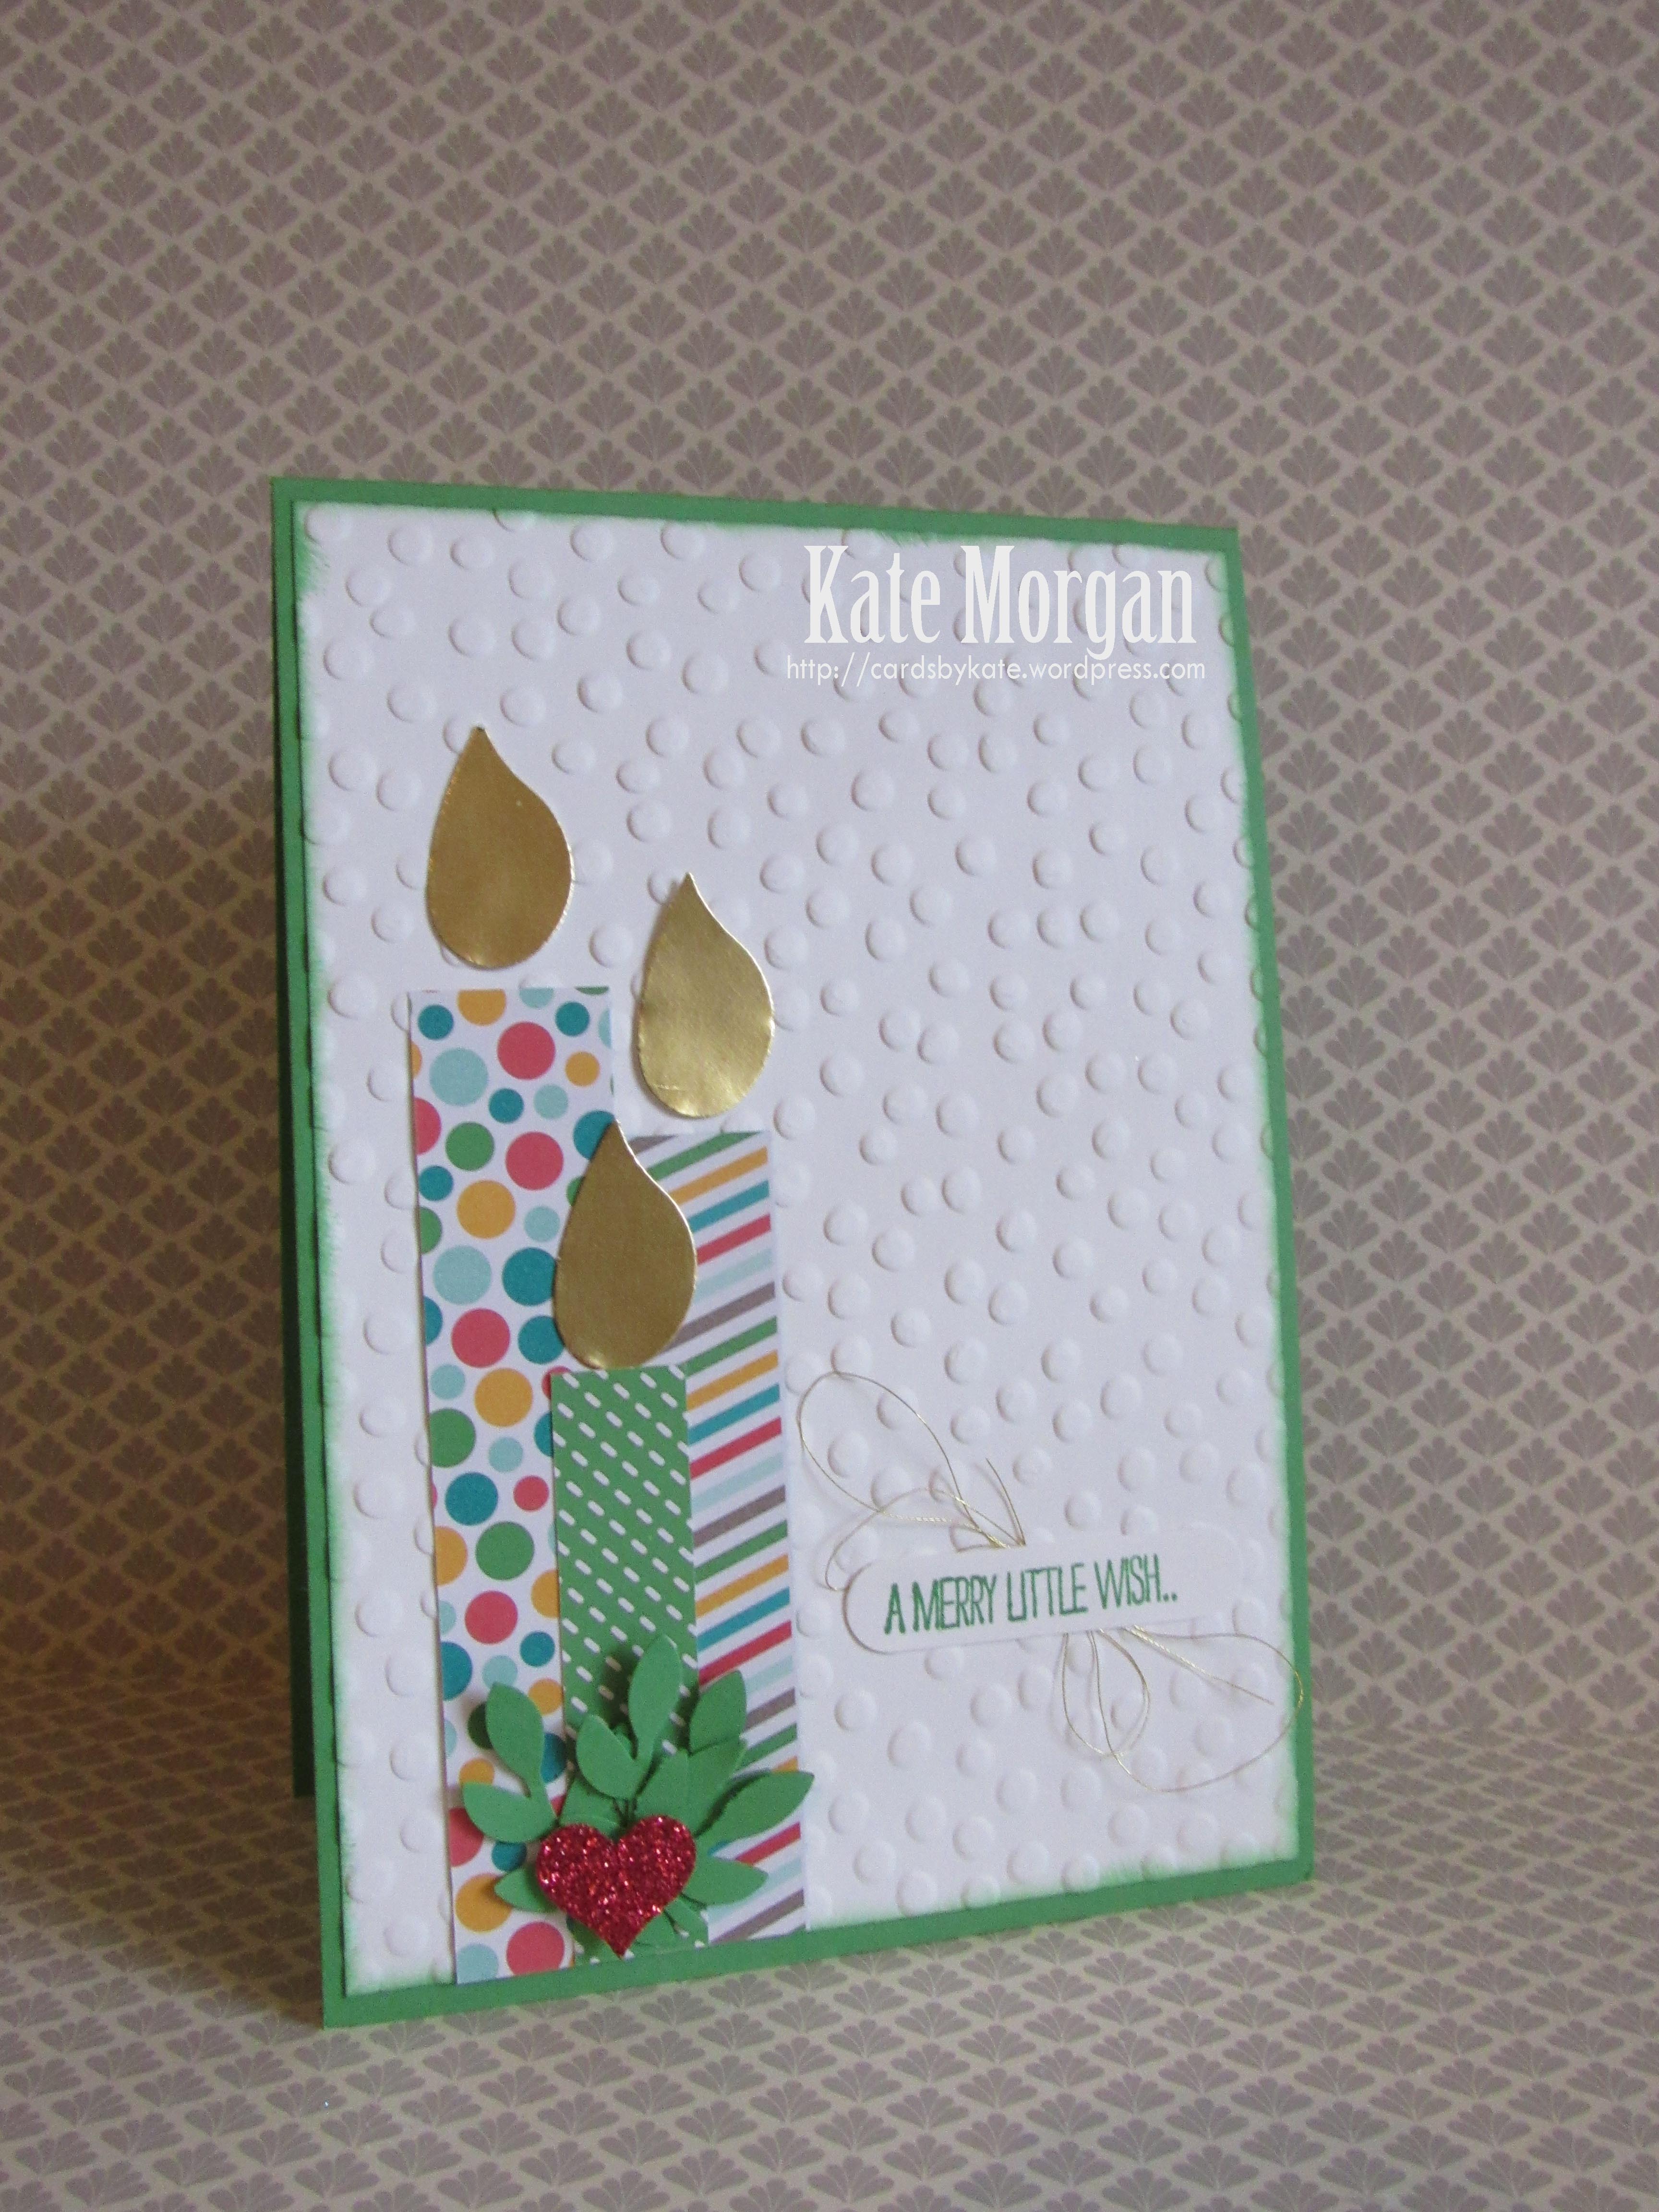
As you can see, the bird builder punch was used for the branches, but also the gold foil flames for the candles. These are not really traditional Christmas colours, but I really think they work well for a little cheery Christmas, especially bringing in the gold!!!!
I love that sentiment for this card too, very appropriate.

Thanks for visiting today. Don’t forget to email me at craftwithkate@live.com.au to request your copy of the new Annual Catalogue or to ask about joining the Art With Heart team.
Let’s keep this blog hop hopping. Next up we have the talented, Ros Davidson.
![]()
If you find a broken link or have come to this blog hop from a different entry point, you can view the participants below:
- Ros Davidson
- Rachel Woollard
- Tina Gillespie
- Kayleen McLean
- Claire Daly
- Kathryn Ruddick
- Judy May
- Kathryn Mangelsdorf
- Kate Morgan (that’s me!)