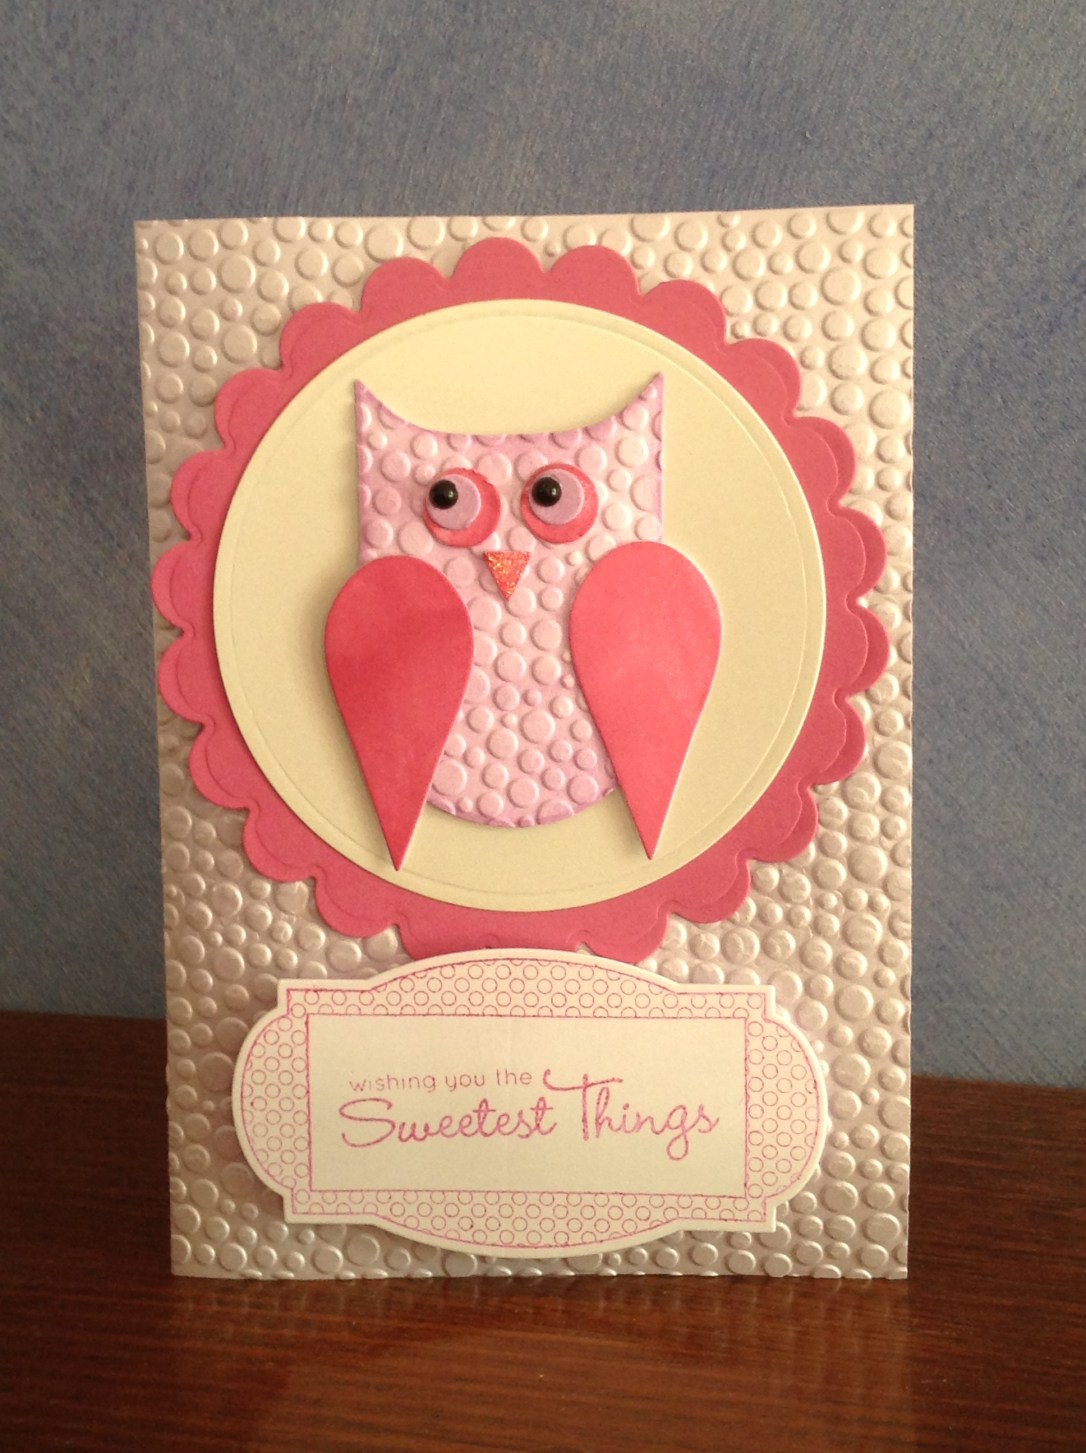
Yes, I love Butterflies….
This card below is made with Raspberry Ripple & Very Vanilla

This is a black and white Sympathy Card, using the KISS method (keep it simple silly)

very easy to make cards, but look so elegant!

I fold love into every card I make
Yes, I love Butterflies….
This card below is made with Raspberry Ripple & Very Vanilla
This is a black and white Sympathy Card, using the KISS method (keep it simple silly)
very easy to make cards, but look so elegant!
After a FREE download?
The My Digital Studio FB page has surpassed 20,000 likes and they’re giving this away for free (for a limited time).
Be sure to use Kate Morgan as your demonstrator. I’m off to get mine 🙂
http://www3.stampinup.com/ECWeb/ProductDetails.aspx?productID=126027&demoid=4000014

Earn an additional $60 in FREE products if you host a $400 party or join up between 15 April – 30 May!
The Offers:
If you host a party or place an order with $400 of sales, you not only get $60 in “hostess dollars” but an additional $60. That is a huge total of $120!
If you don’t wish to host a party, maybe get together with some friends and combine your order to take advantage of this wonderful offer.
This is a very exciting time to be joining the Stampin’ Up! family with the Colour Refresh and new Annual Catalogue coming very soon.
Also, for only $169 to join up, you actually get $295 of catalogue products of your own choice in your starter kit. Wow, this is an amazing offer.
Contact me to find out more details!
Hi lovely people,
Here is a masculine card I created using My Digital Studio.
Colours used were River Rock, Baja Breeze & Not Quite Navy.
I just love the vintage buttons, car and plane.

My Digital Studio is free to download for 30 day trial by clicking here
Once you have had a play, you will no doubt love the program like I did. The full version can be purchased for only $24.95!
click this link to view the video about![]()
Hope you all download your free trial today, don’t miss out on this great opportunity.
Kate
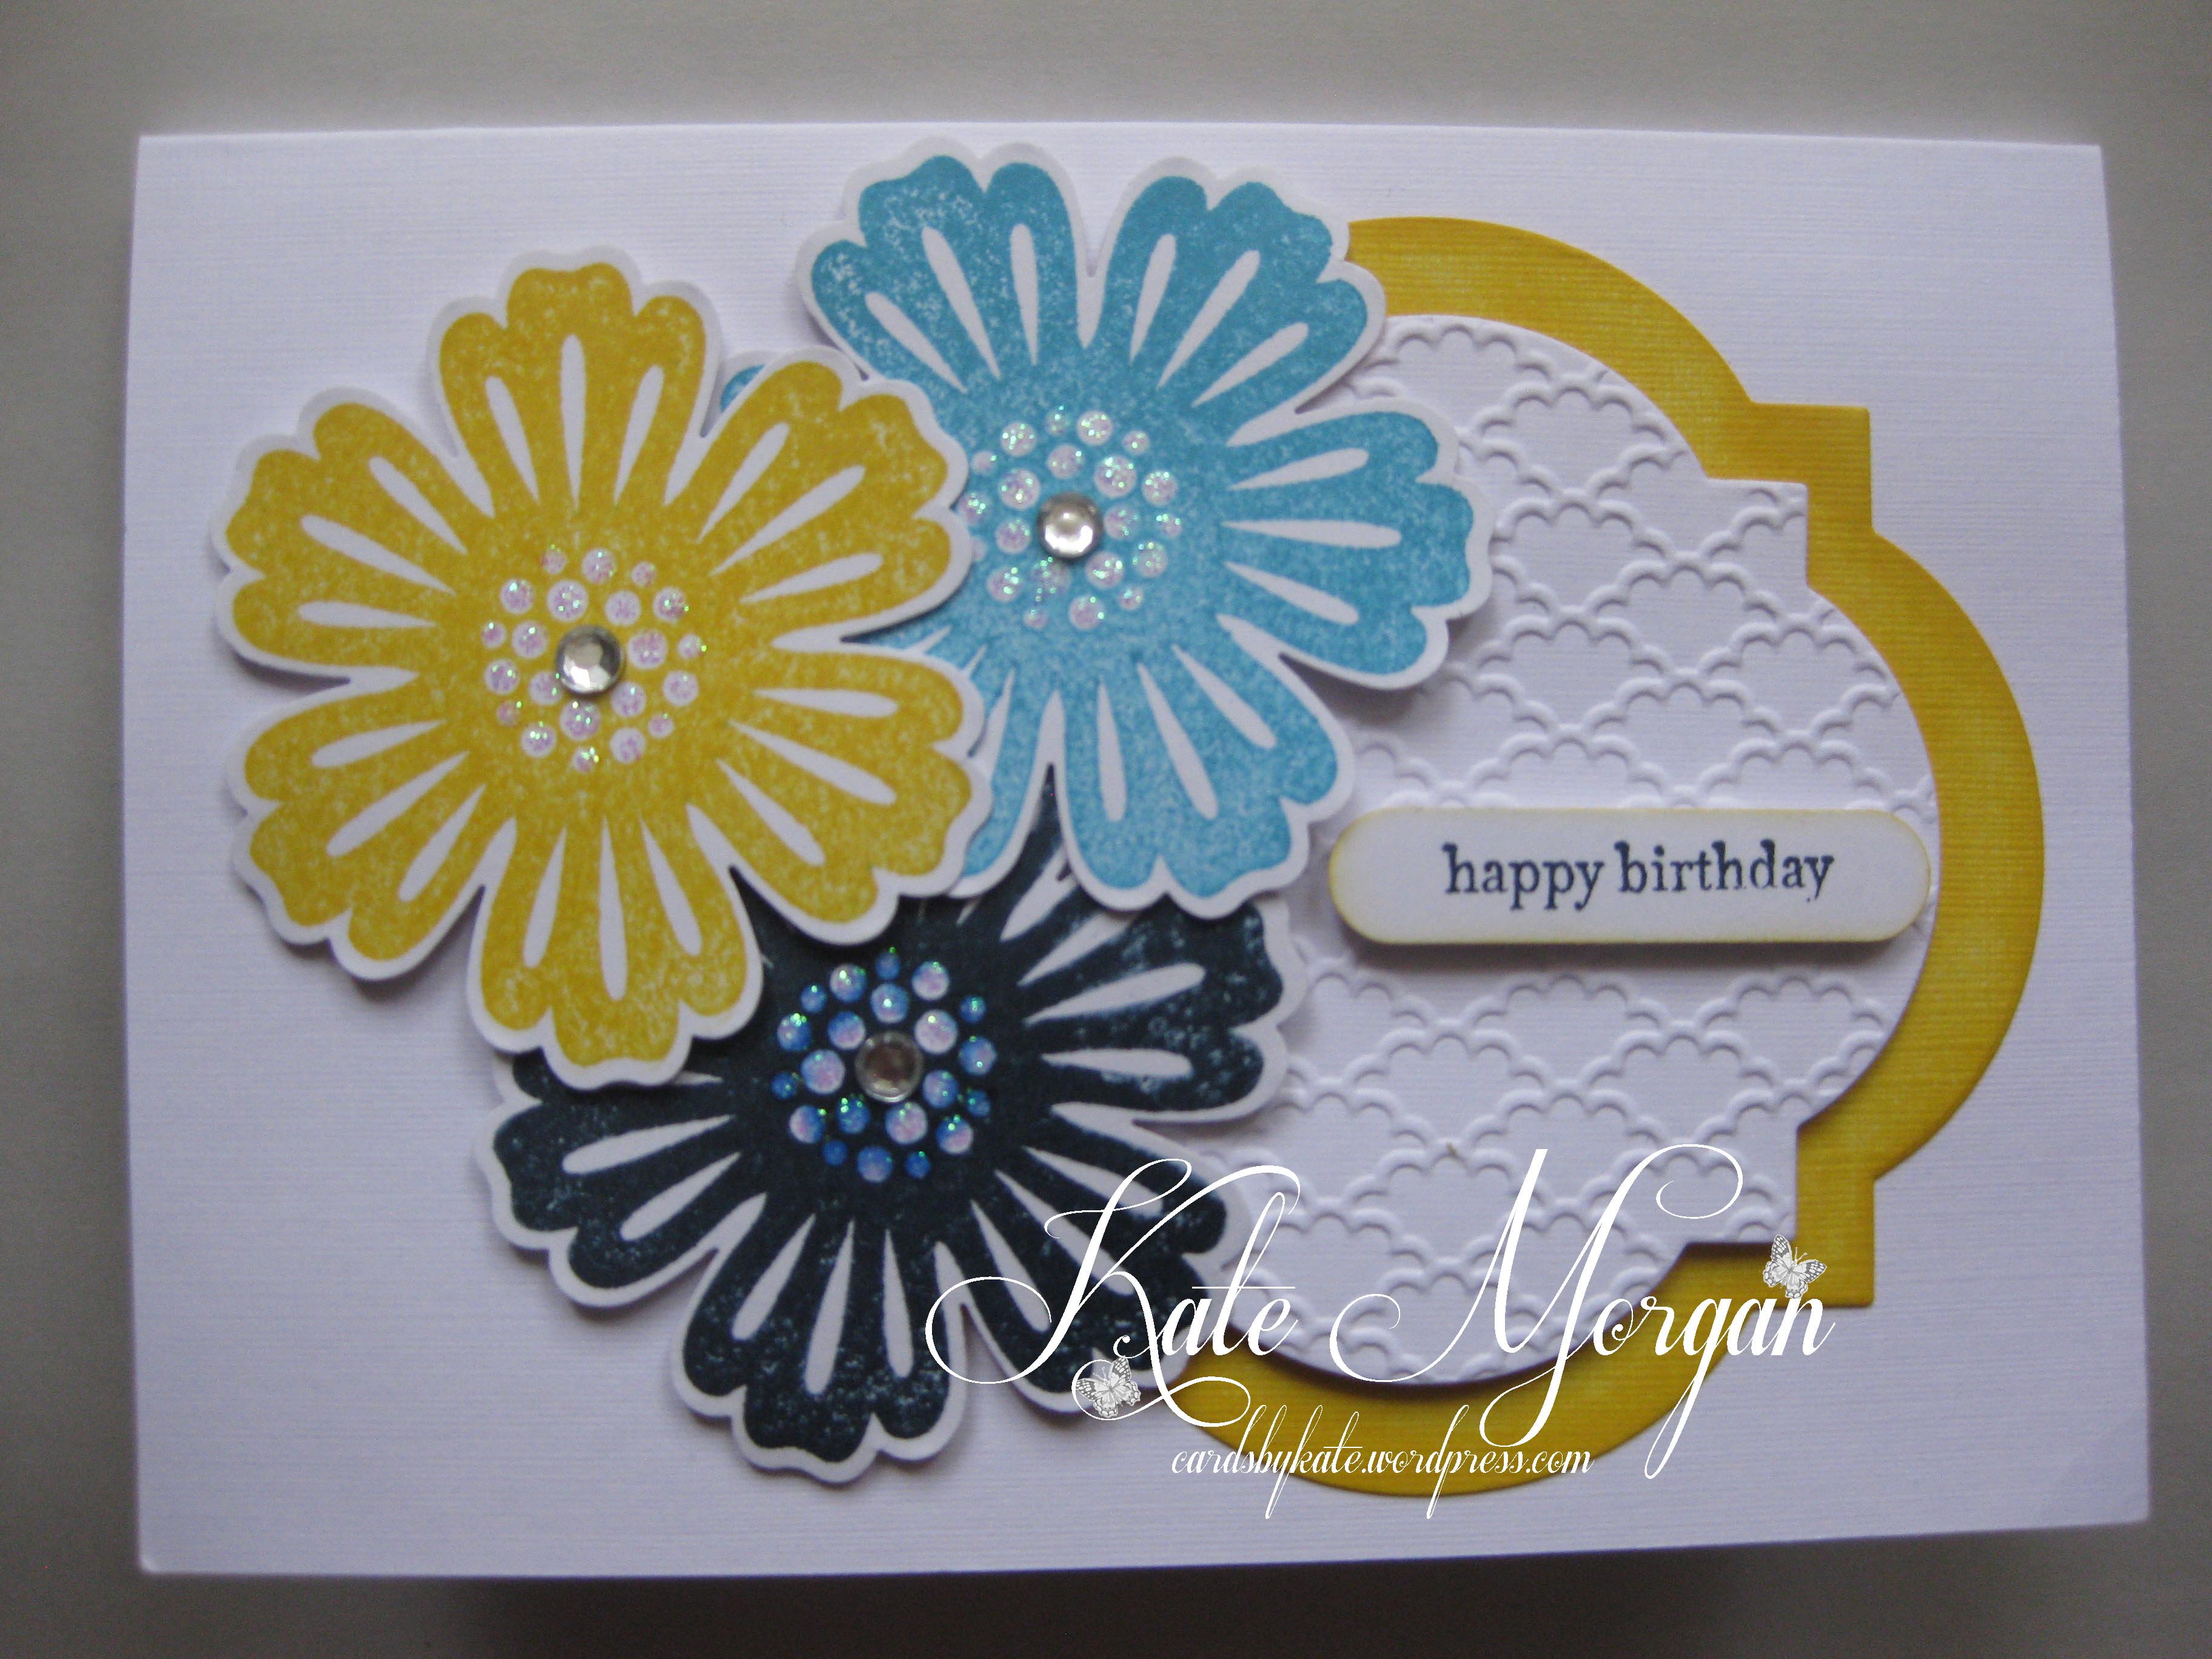
Blossom Card
Colours: Midnight Muse, Daffodil Delight & Tempting Turquoise
Stamps: Teeny Tiny Sentiments, Mixed Bunch
Fancy Fan Embossing Folder
Framelits: Windows Frames Collection
Punches: Blossom, Word Window
Elegant Butterfly Card
Colours: Daffodil Delight & Tempting Turquoise
Punches: Elegant Butterfly, Word Window
Stamps: Teeny Tiny Sentiments, Papillon Potpourri

Elegant Butterfly Card
Colours: Wasabi, Daffodil Delight, Raspberry Ripple & Midnight Muse
Stamps: Teeny Tiny Sentiments, Papillon Potpourri
Punches: Elegant Butterfly, Word Window
Fancy Fan Embossing Folder
Framelits: Windows Frames Collection

Post it Note Holder
Stamps: Patterned Occasions

Absolutely loving the new My Digital Studio Program!
You can download your free 30 day trial by adding it to the cart!
If you don’t already have an account, you will need to create this first. Once you check out you will get an email to download it straight away!
Click My Digital Studio to learn more about this amazing program.
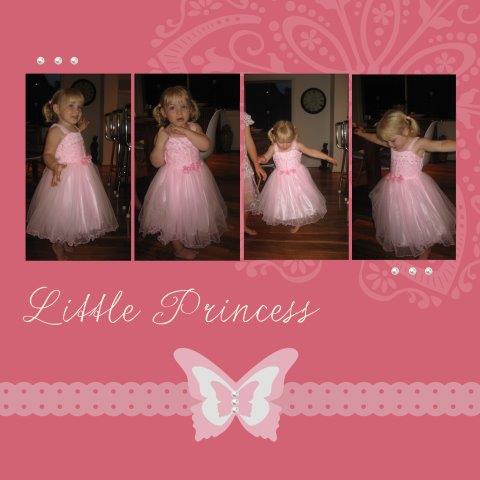
Here are a couple of my pages I have created.
Enjoy.


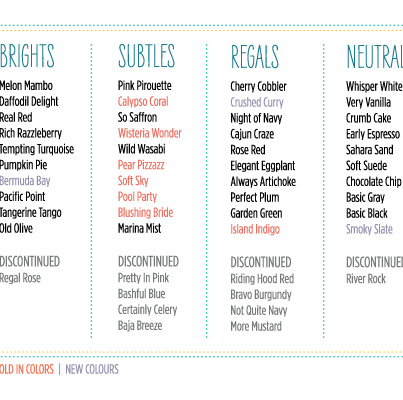
Stampin’ Up! are having a Colour Refresh for 2013. Every 3 to 5 years, to keep up with colours on trend, a refresh is now happening with the new 2013/2014 Annual Catalogue, due for release 1 July – stay tuned!
Also remember to get in quick if your retiring colour ink pad, card, reinker and embellishments before stock sells out!
To construct the box with lid, you will need 3 x A4 Card, 300gsm.
For the base
Cut 2 pieces of Card so they are 27.9cm x 12cm. Then score at 12cm & 22cm.
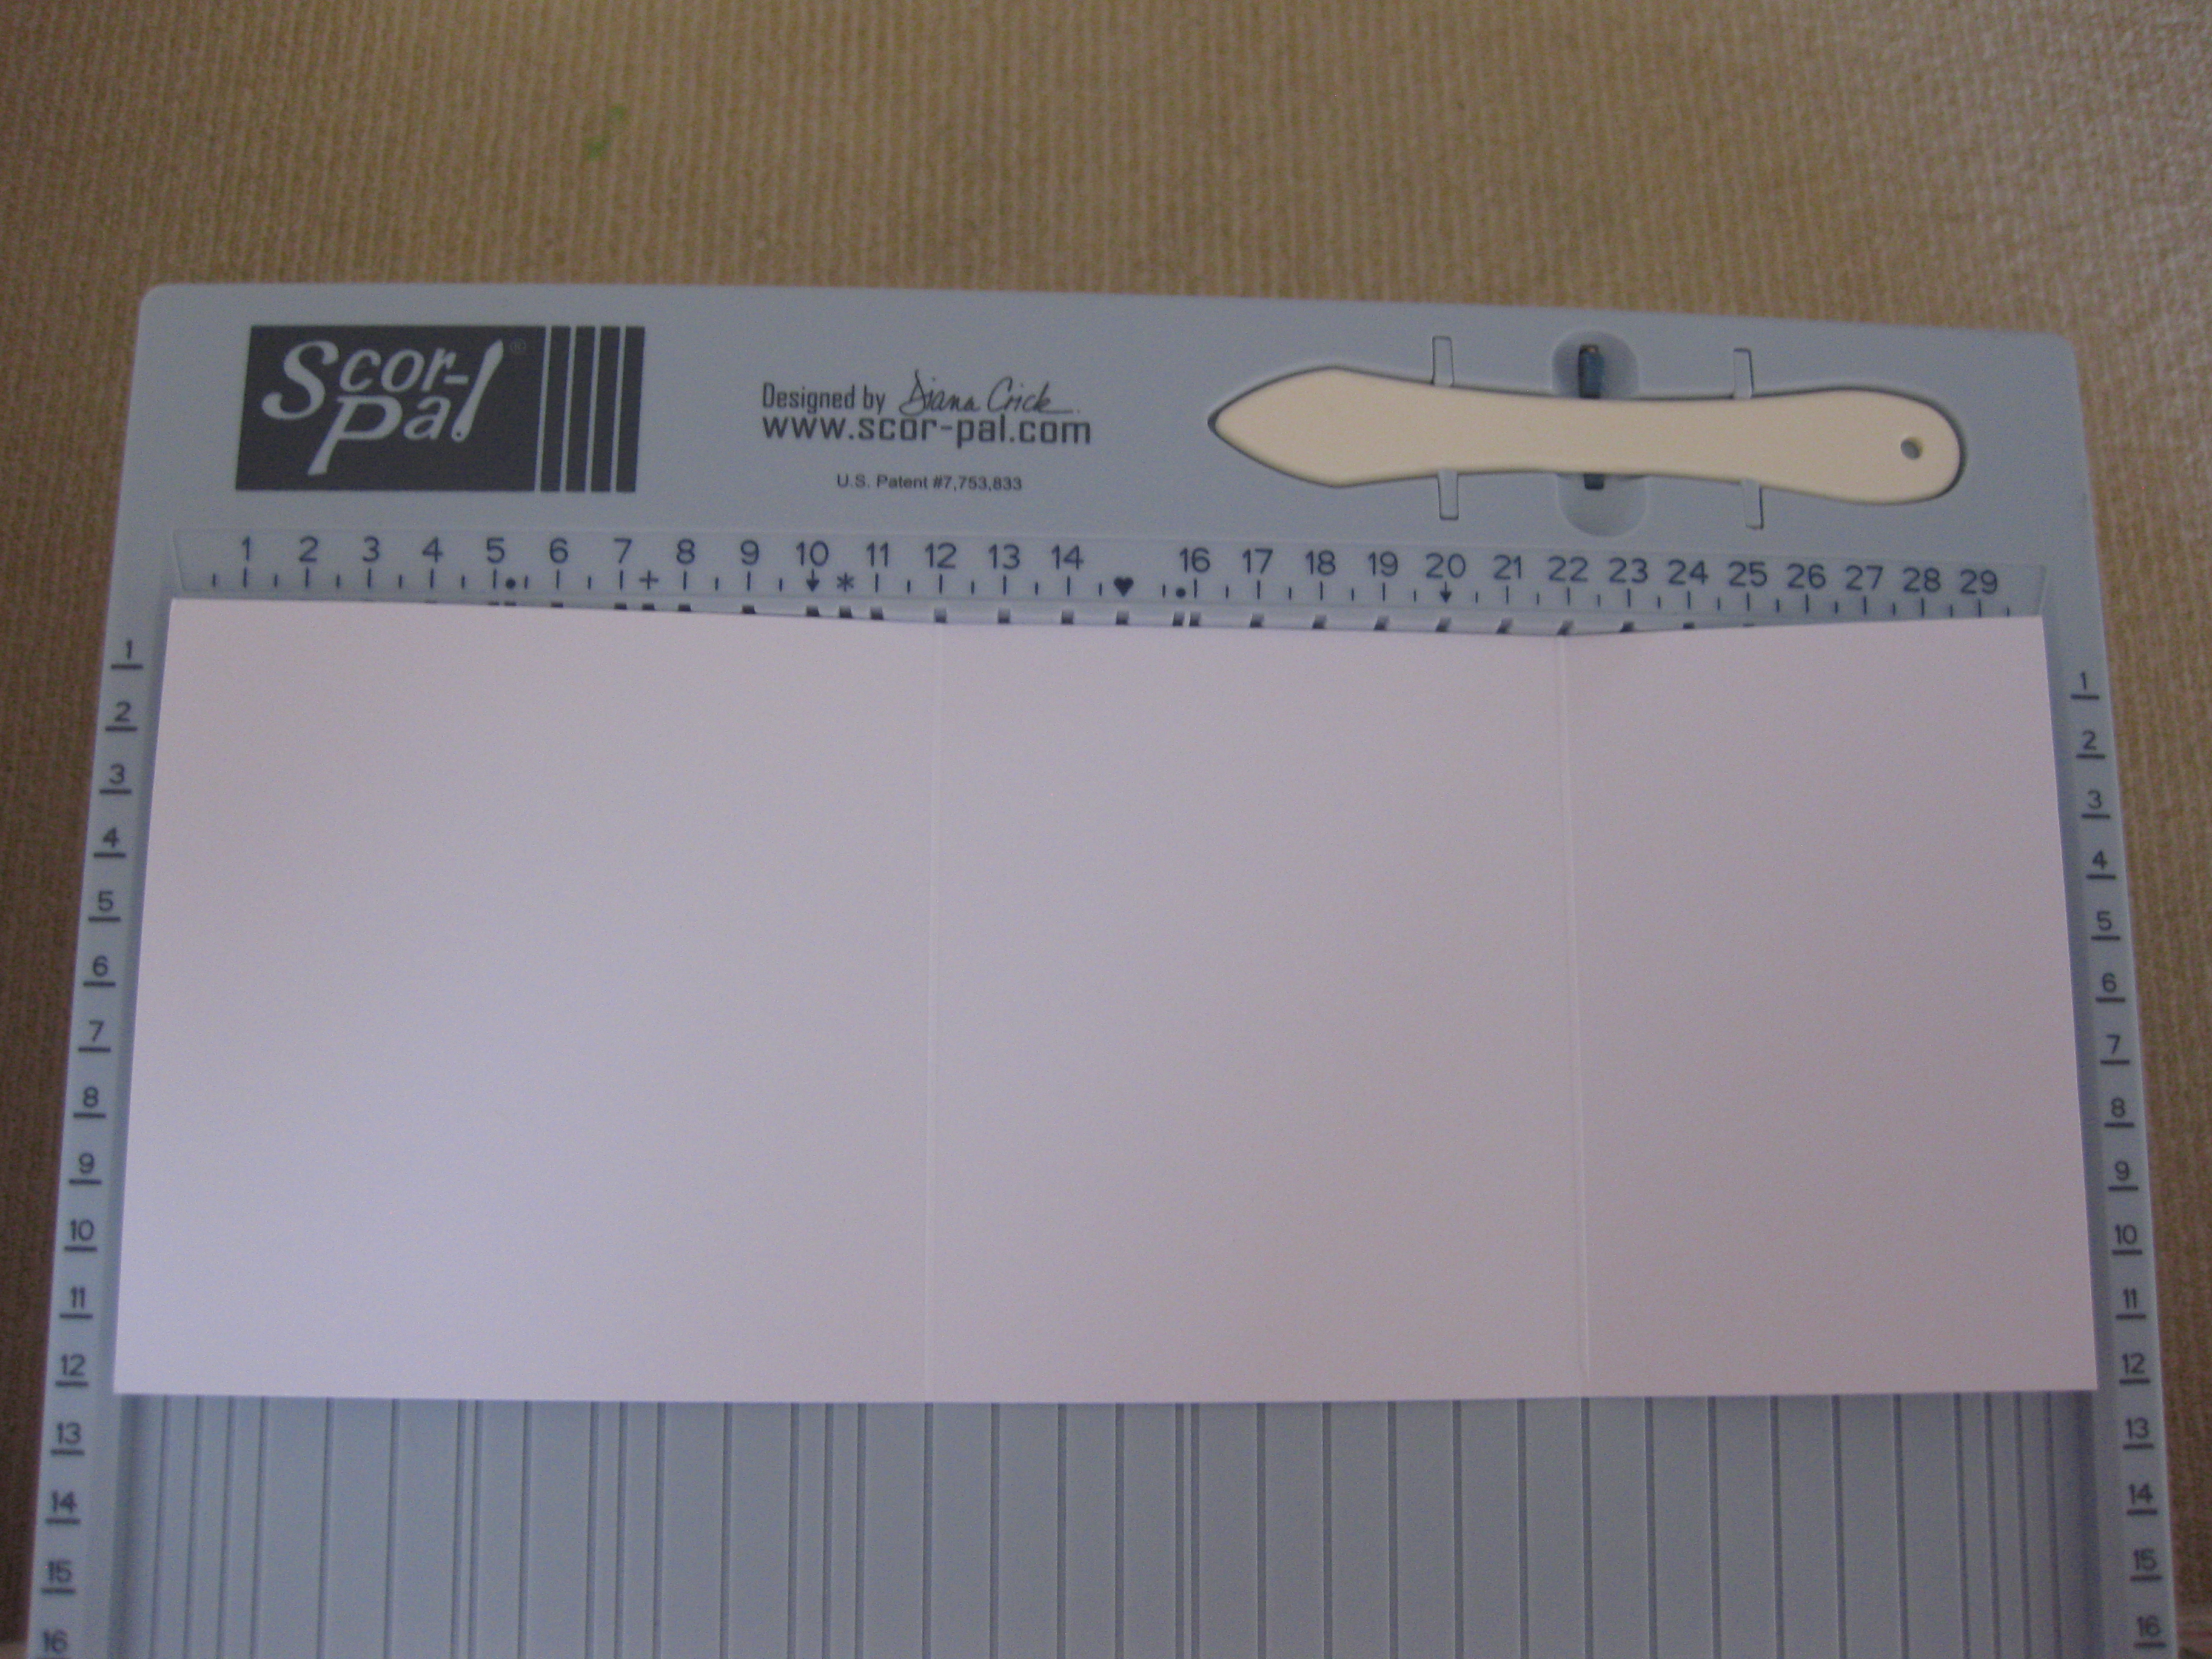
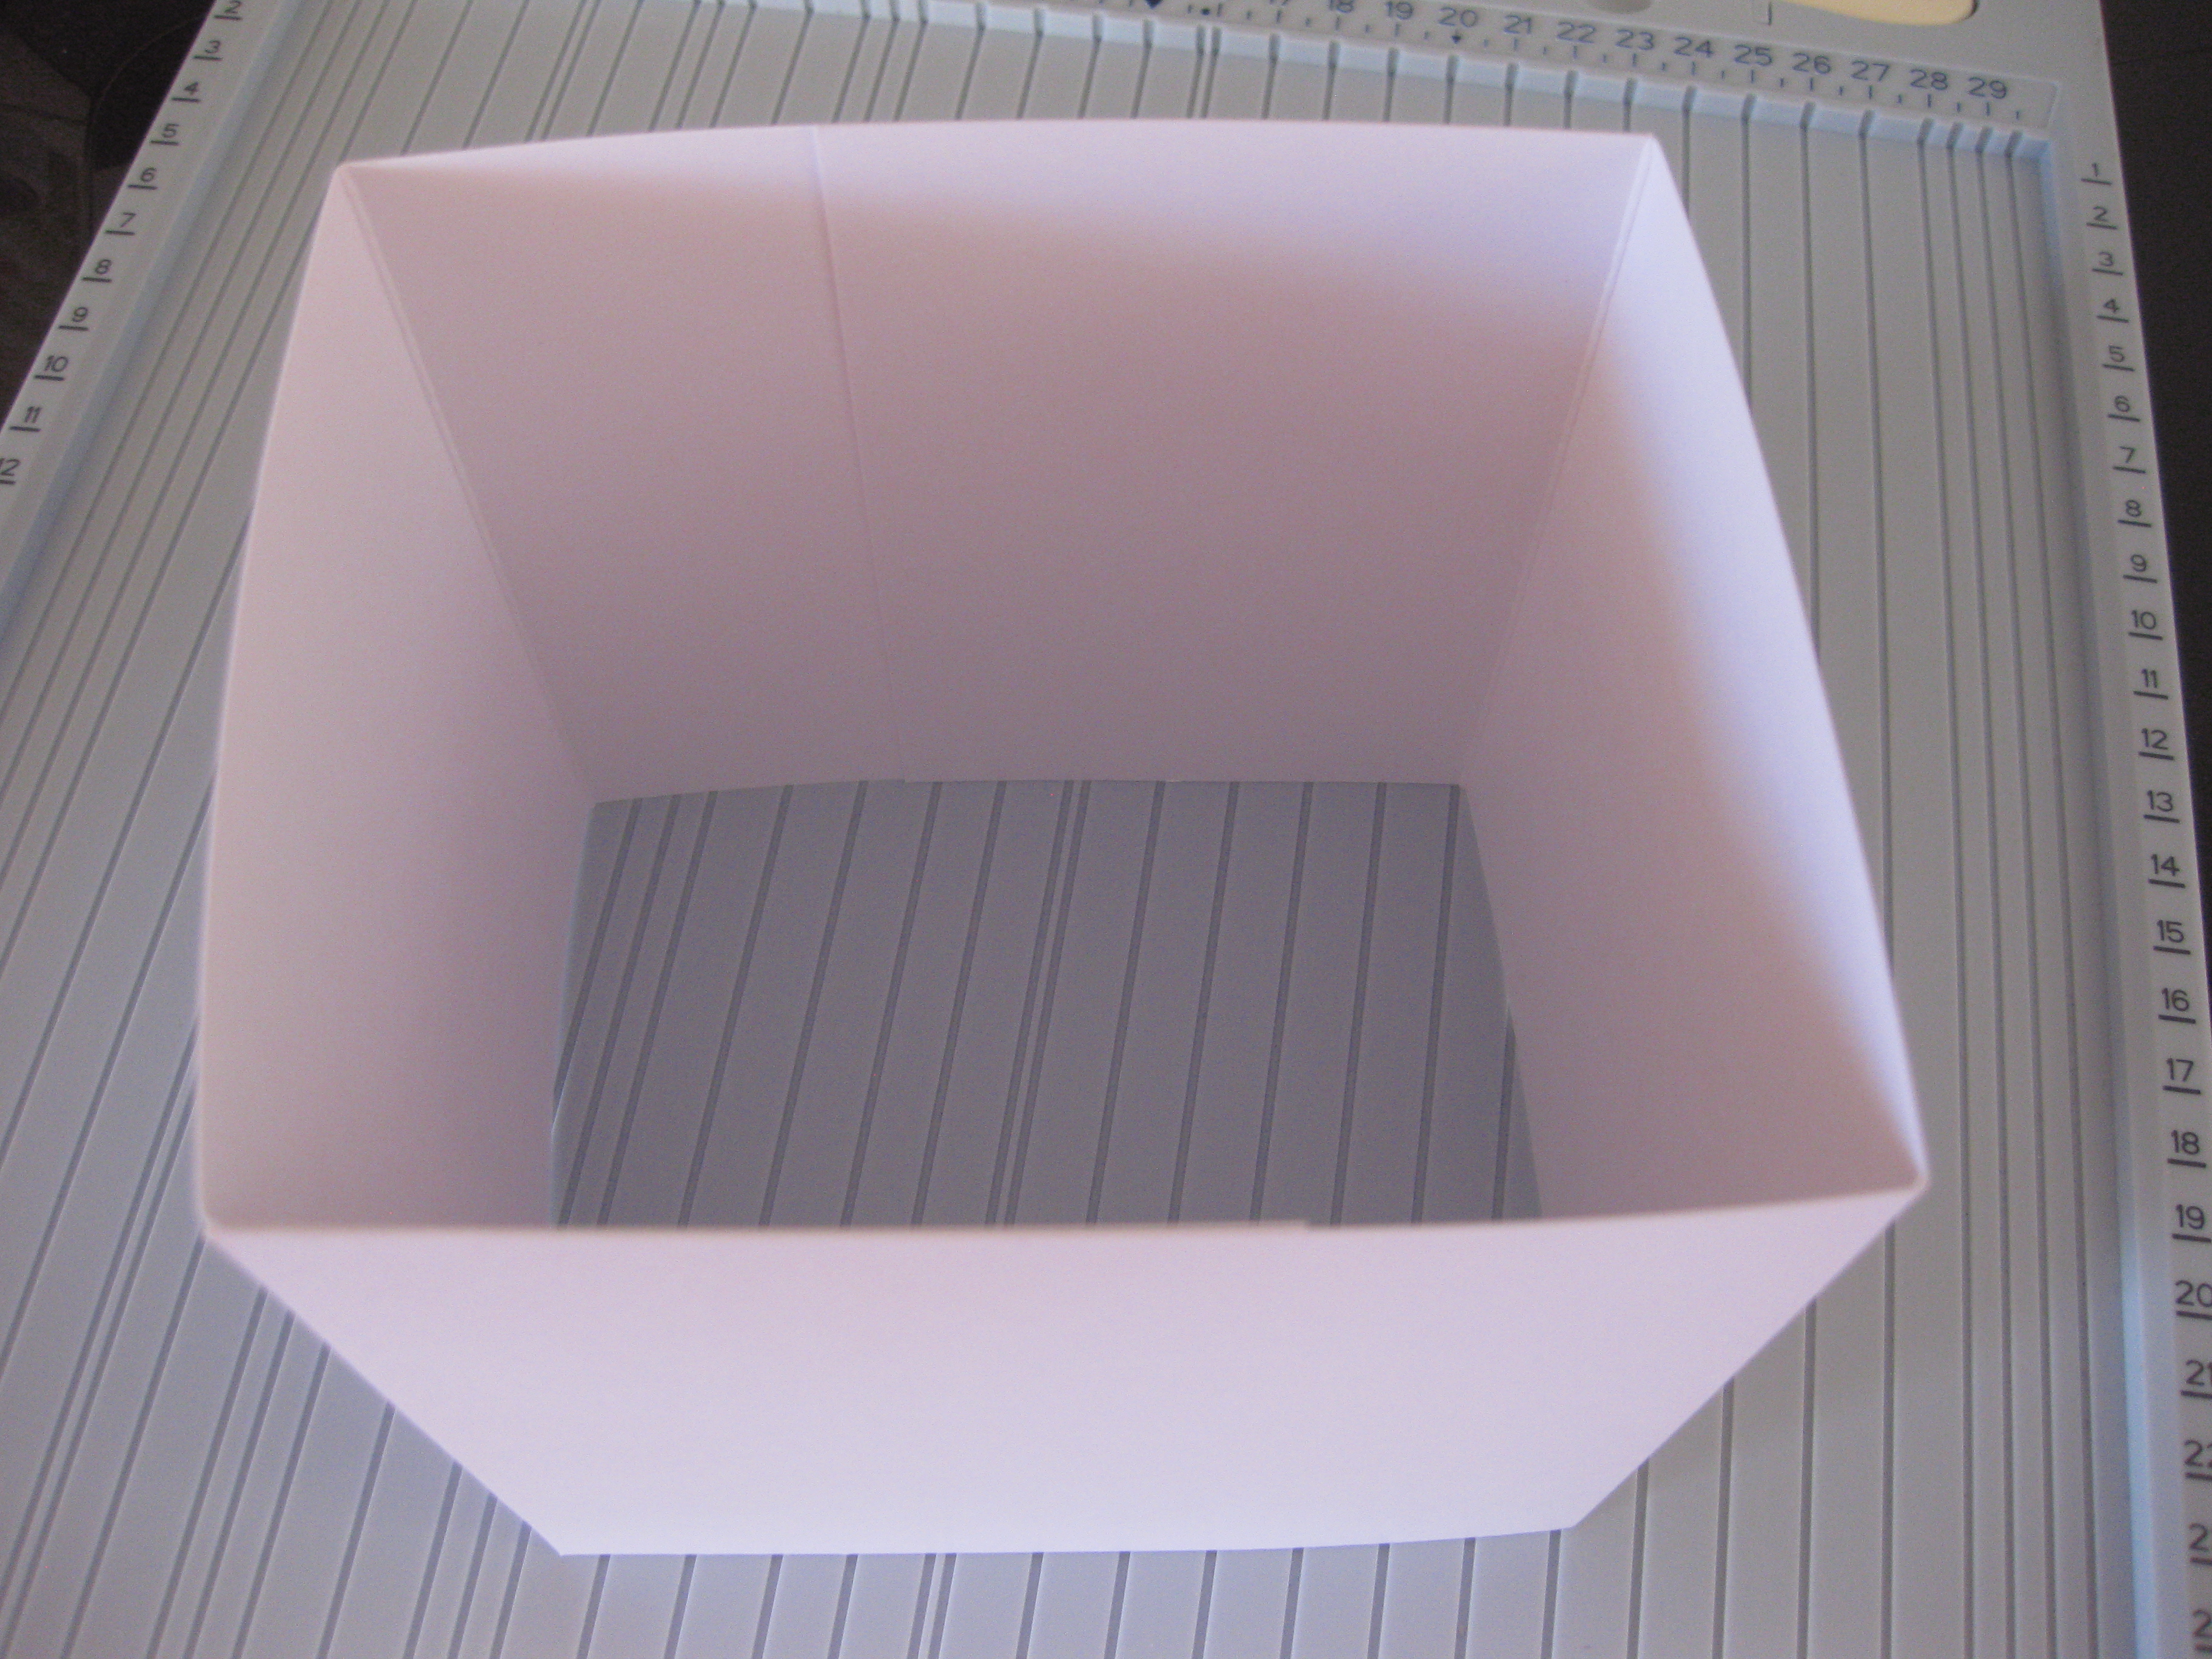
Do the same for the second one so you have 2 the same.

Join together by placing the shorter edge inside the longer edge to make the box shape and the outer edge meets the corner of the box. TIP: Ensure that it fits around the tissue box, before gluing together!

For the top
Cut a piece of card 16cm x 15cm. Score each side at 2cm.
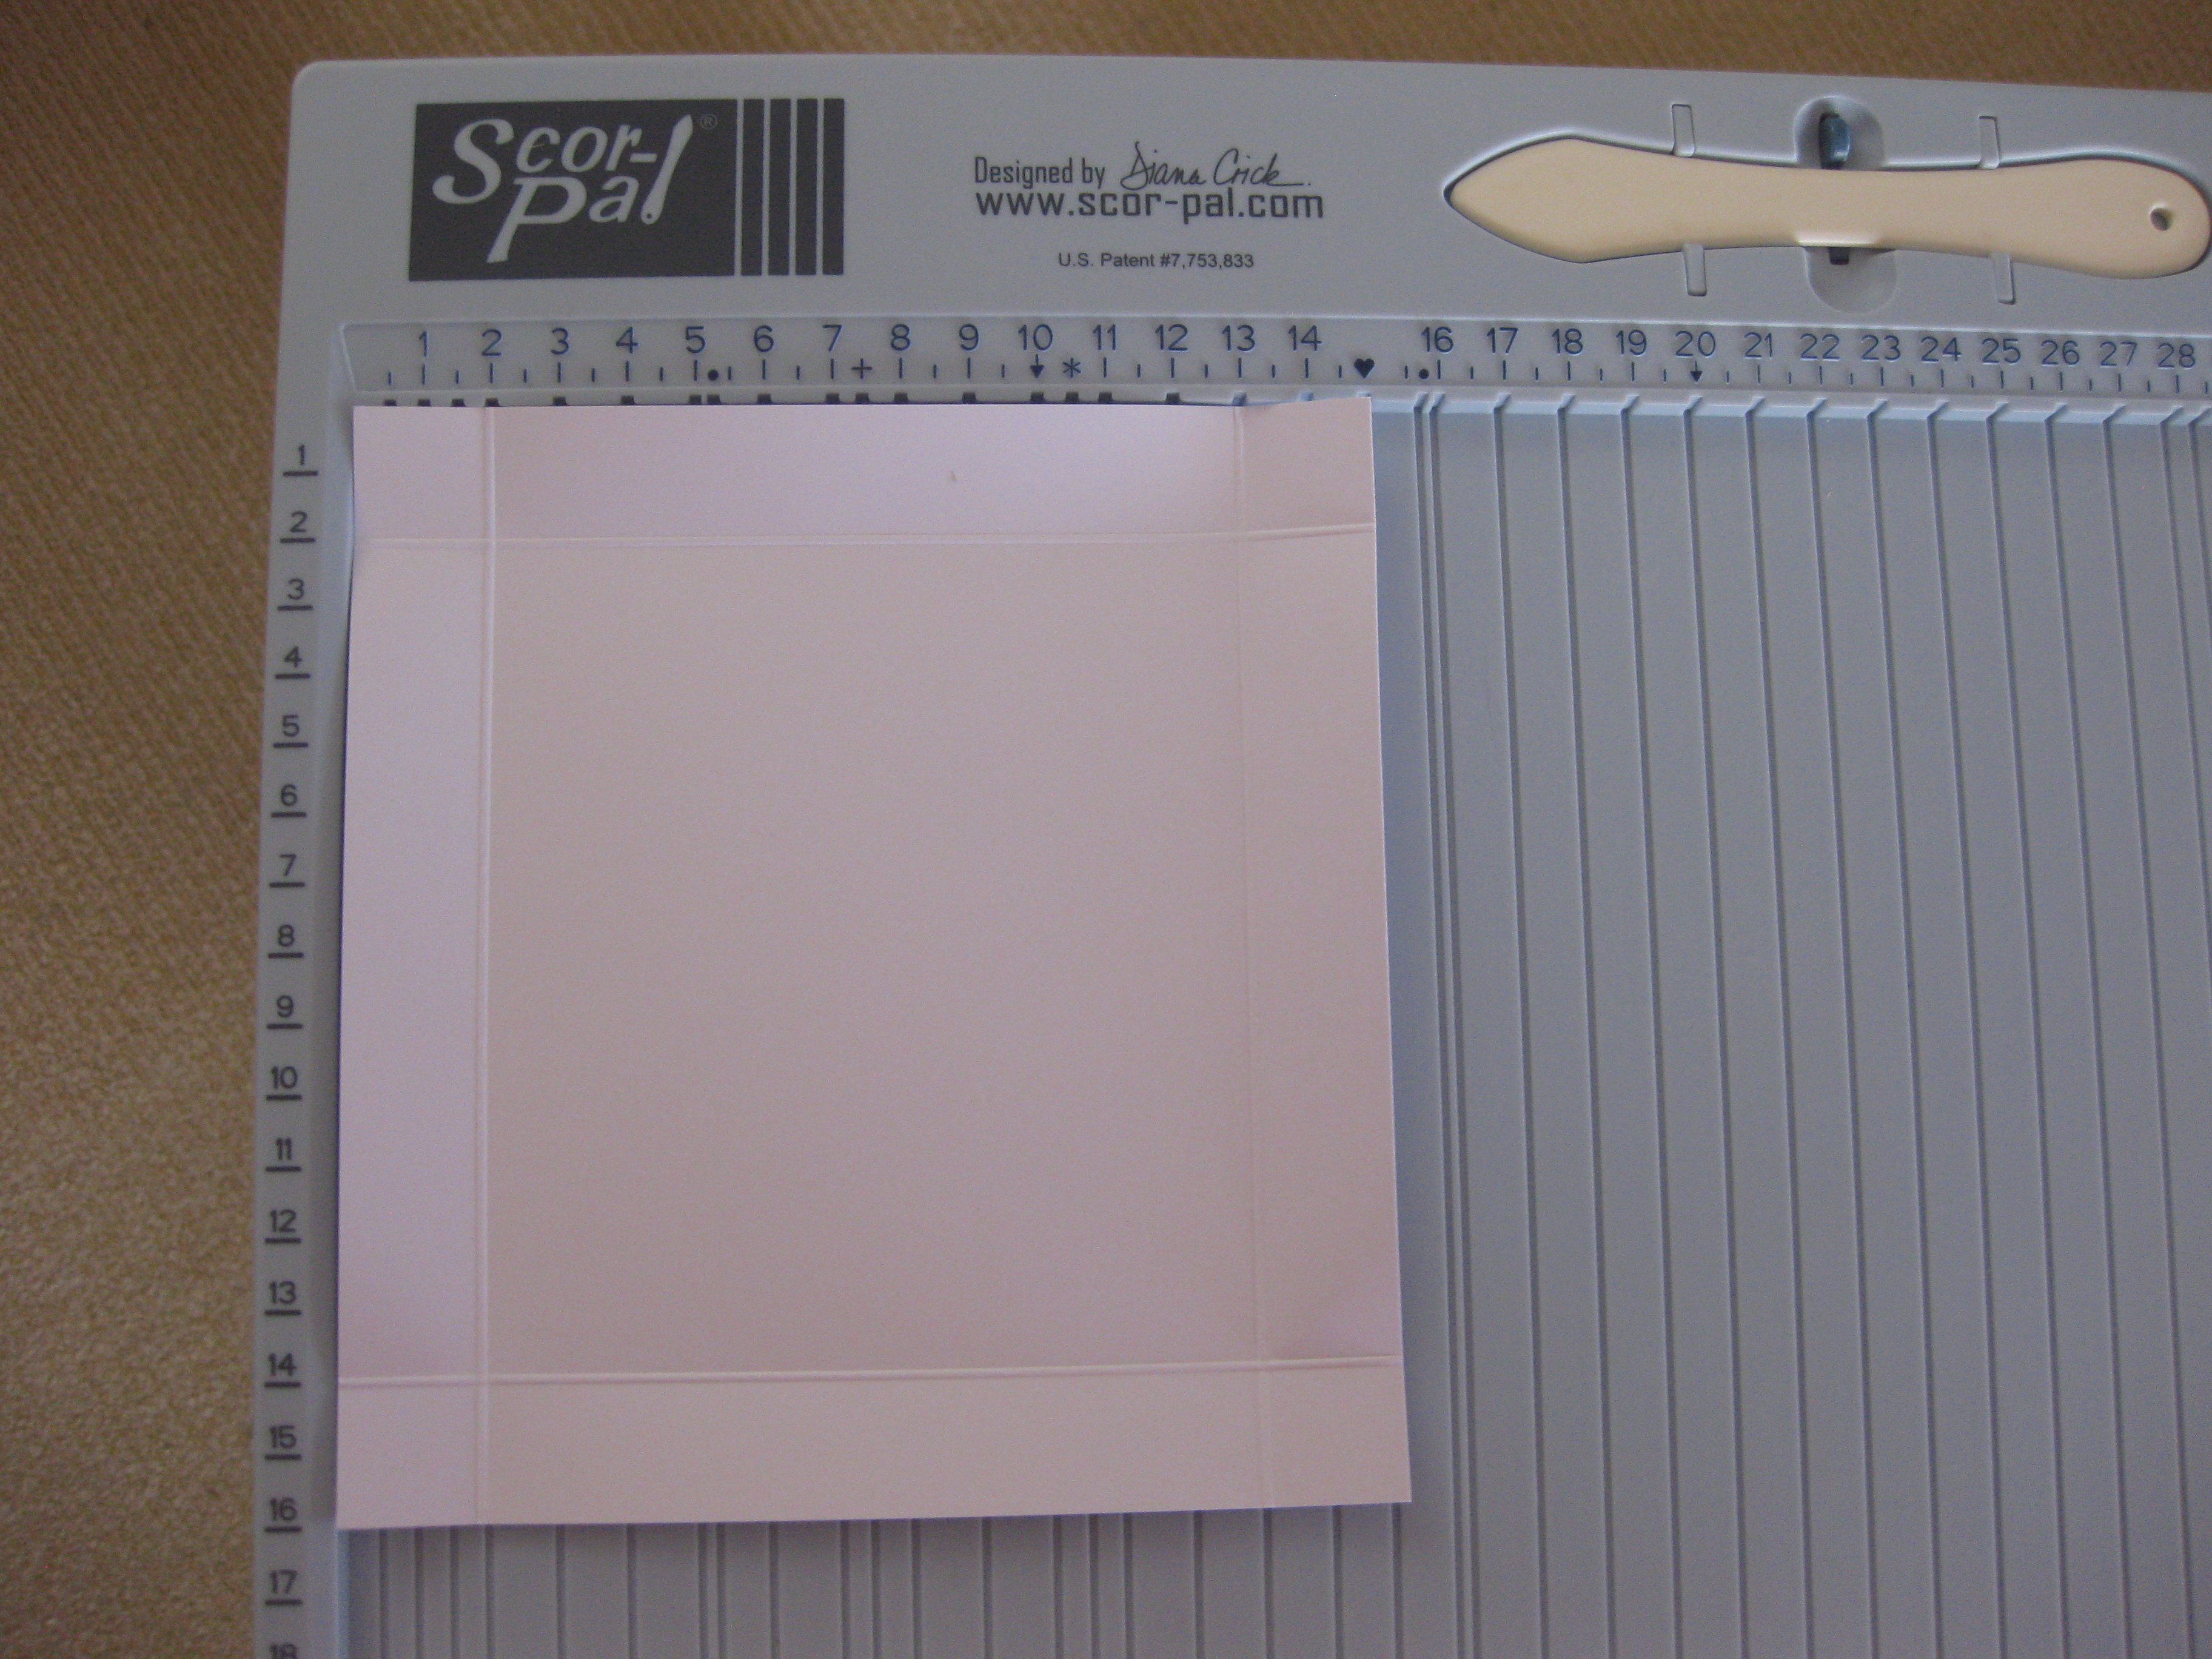
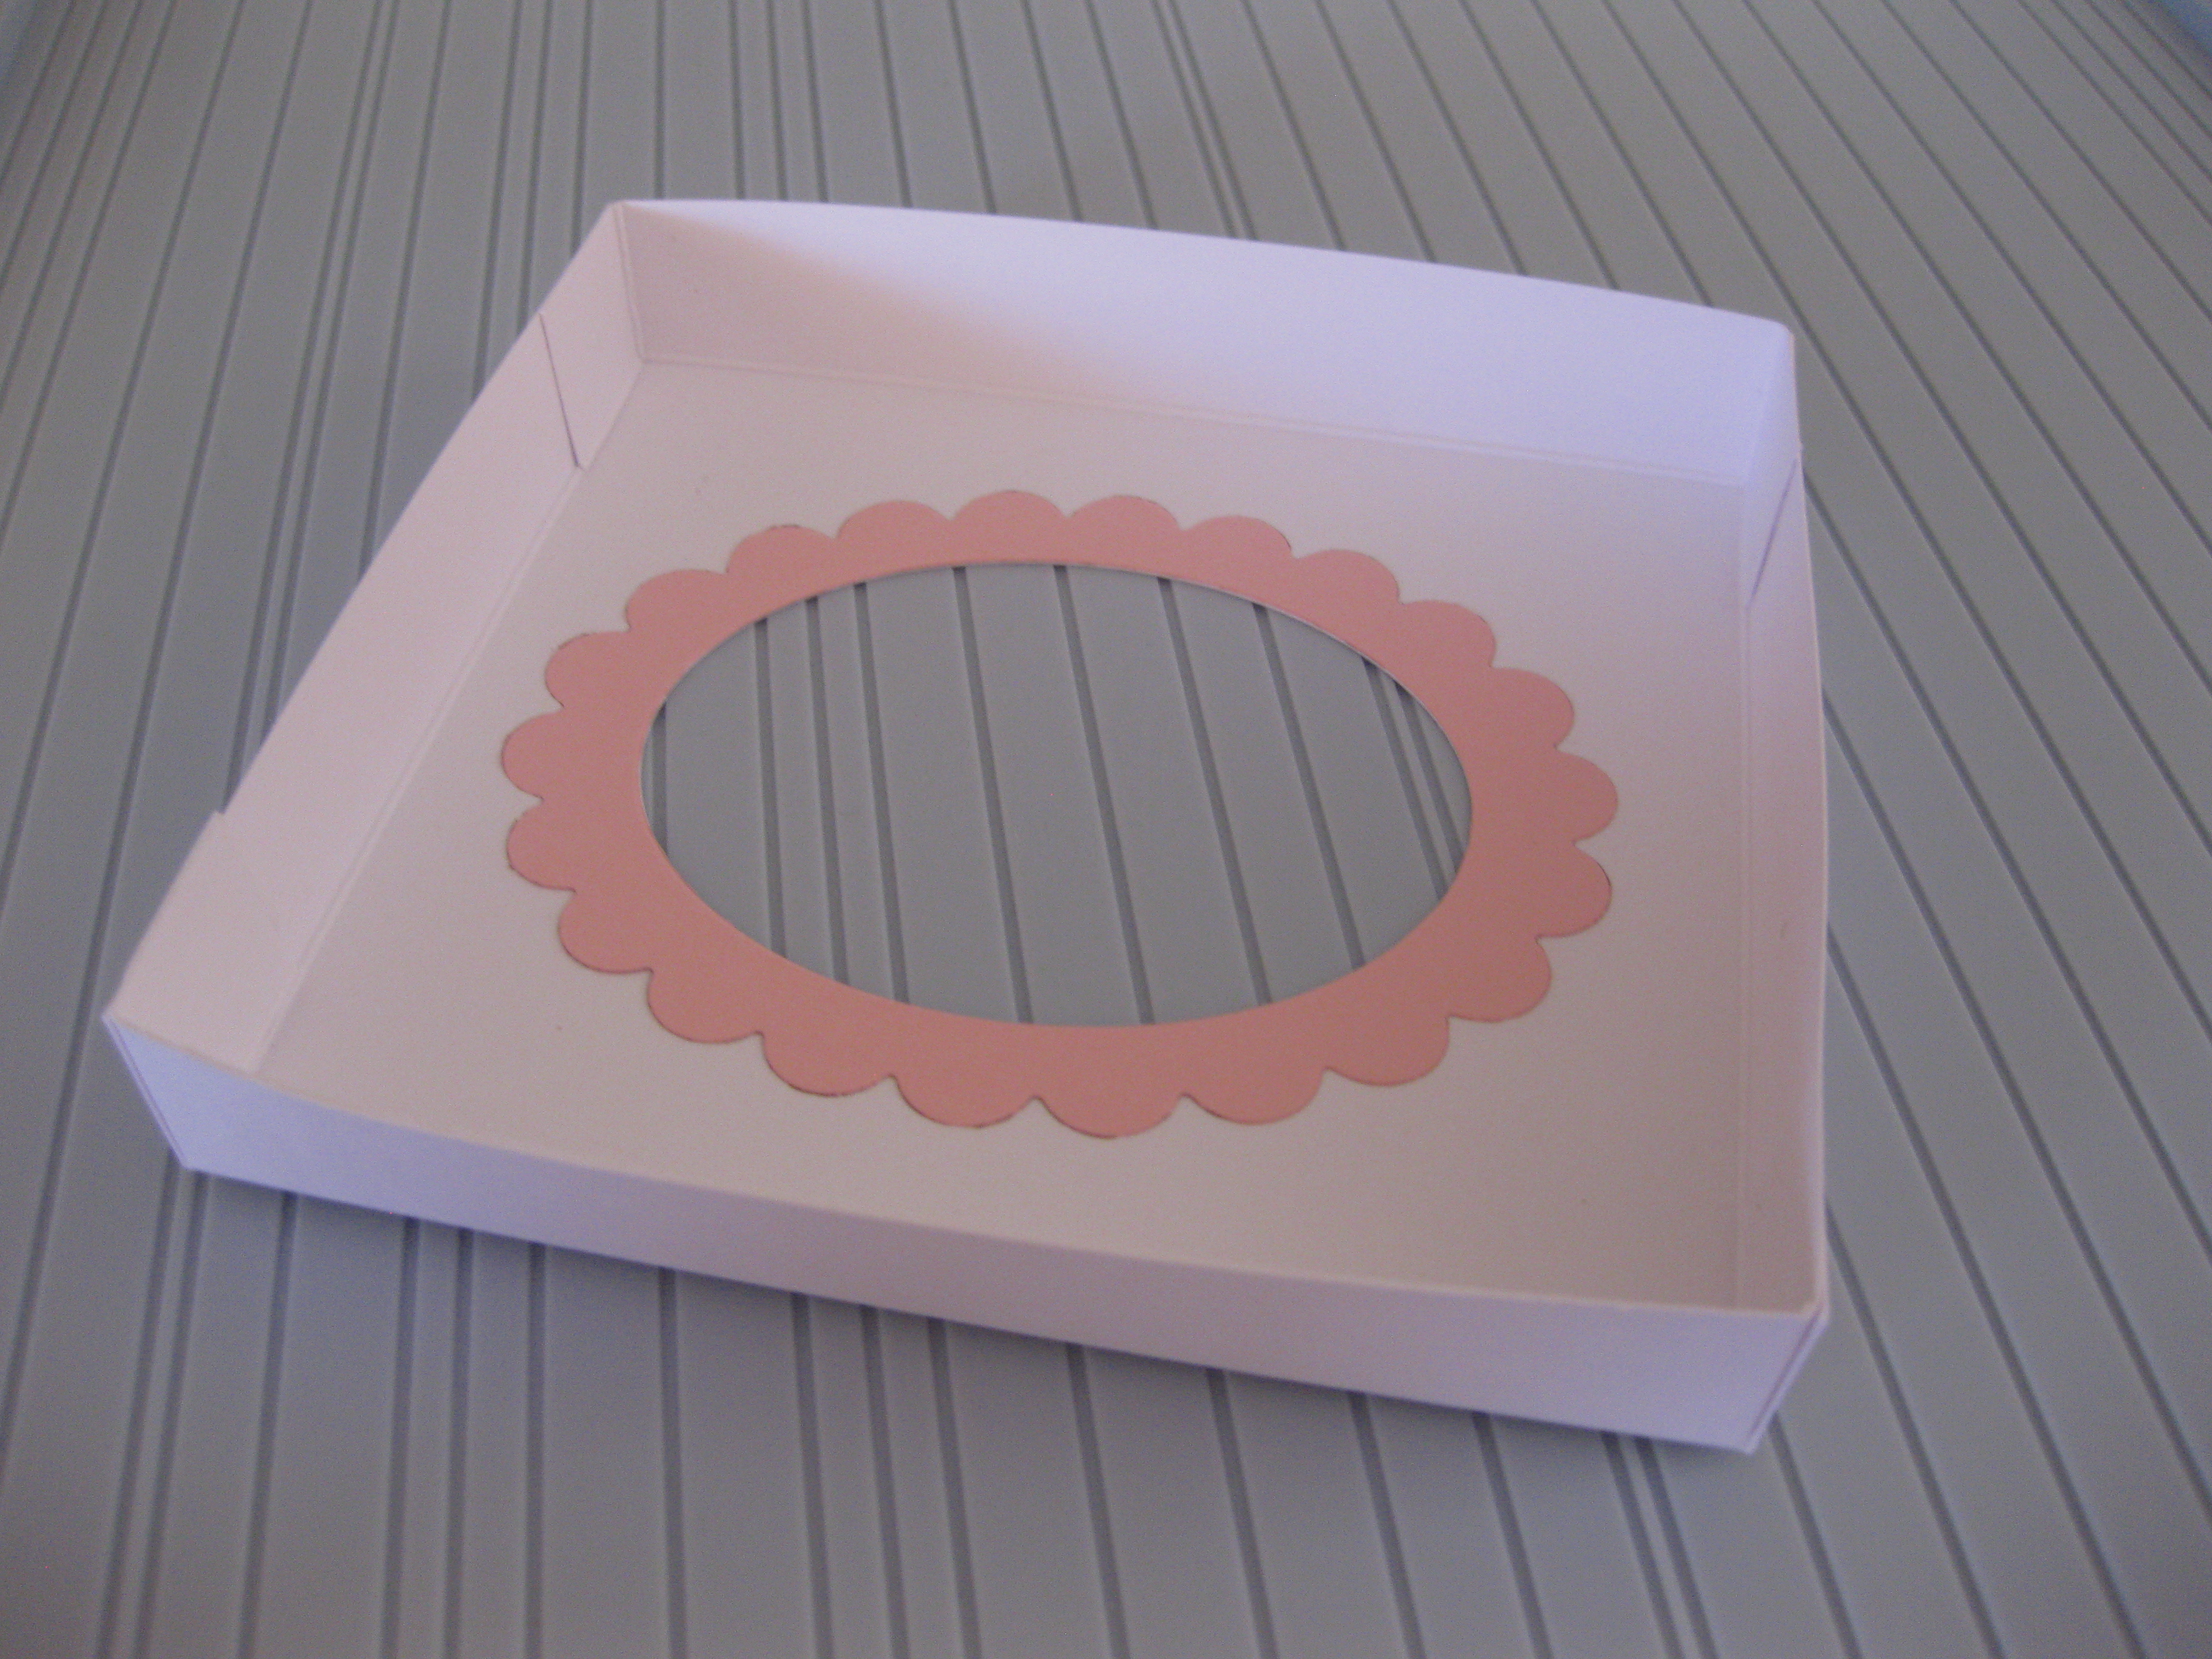
Before constructing, you must remember to die cut a circle or oval (depending on the opening of the tissue box) in the centre of the lid. I also cut a border by placing the die in the centre of the outside border die. I made 2 of these, 1 for the inside and 1 for the top! Cut one of the score lines at each corner to the next score line.
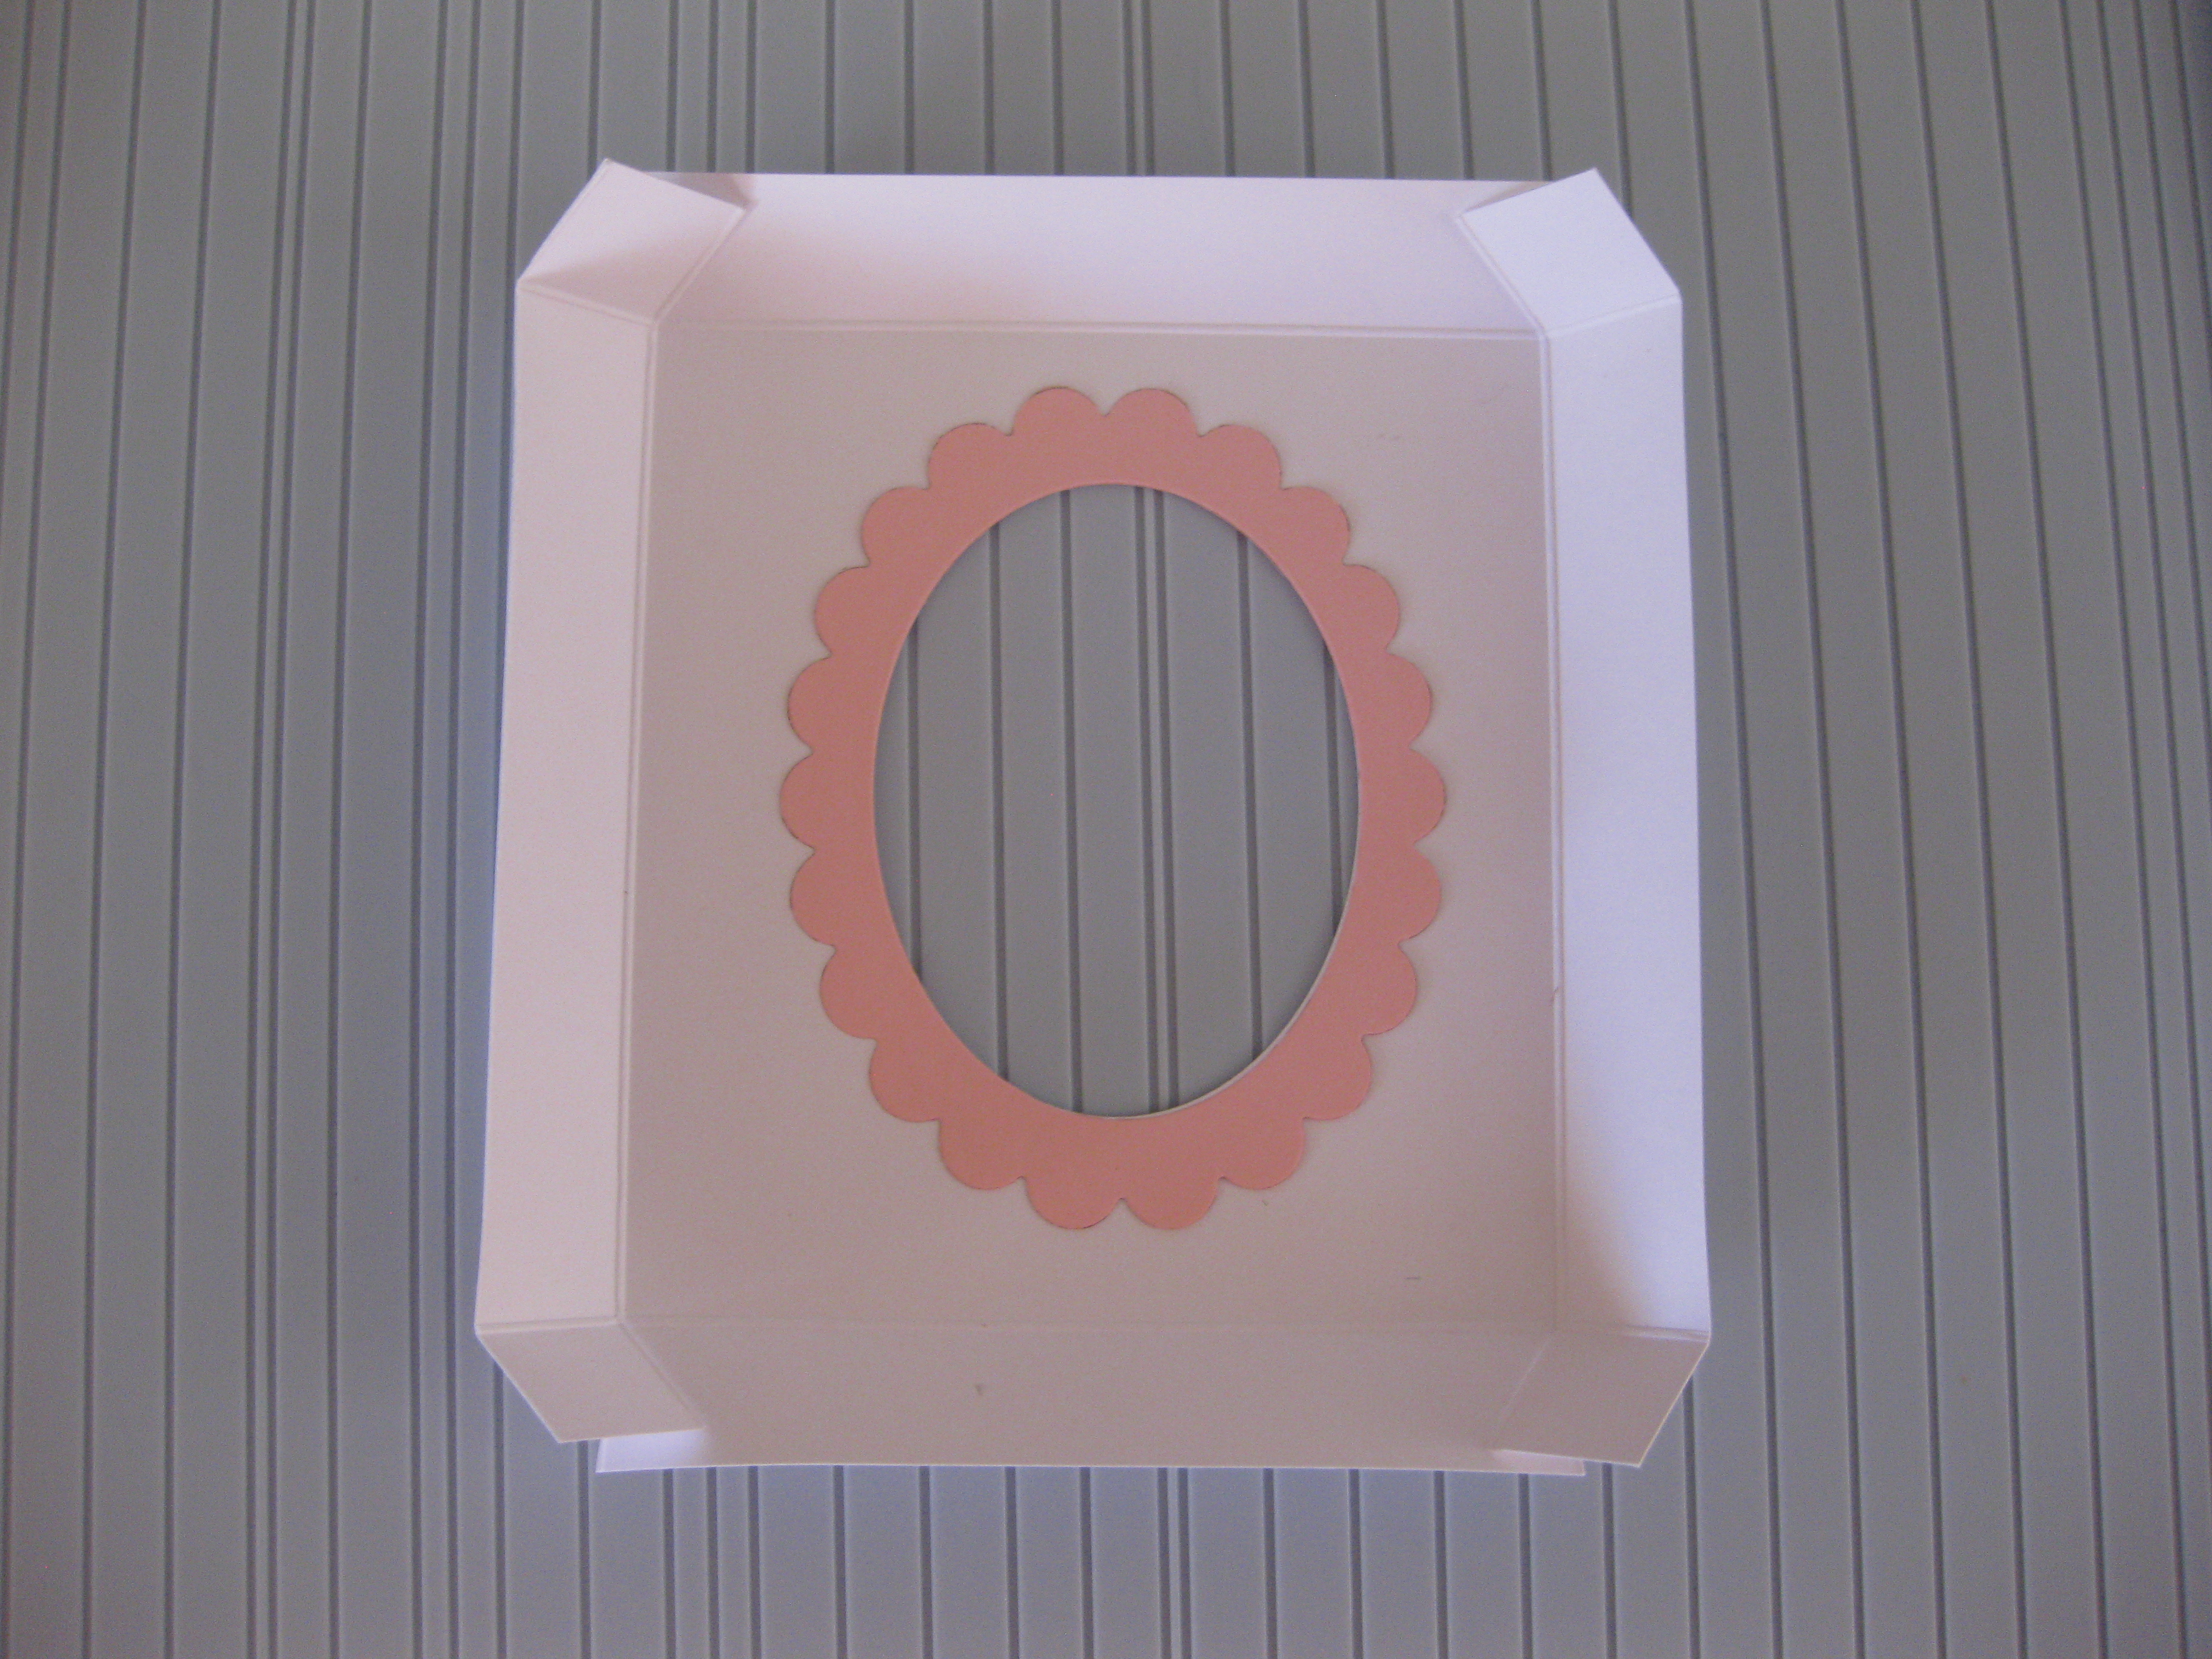
Glue together to make the lid, ensuring the small tab is on the onside of the lid.
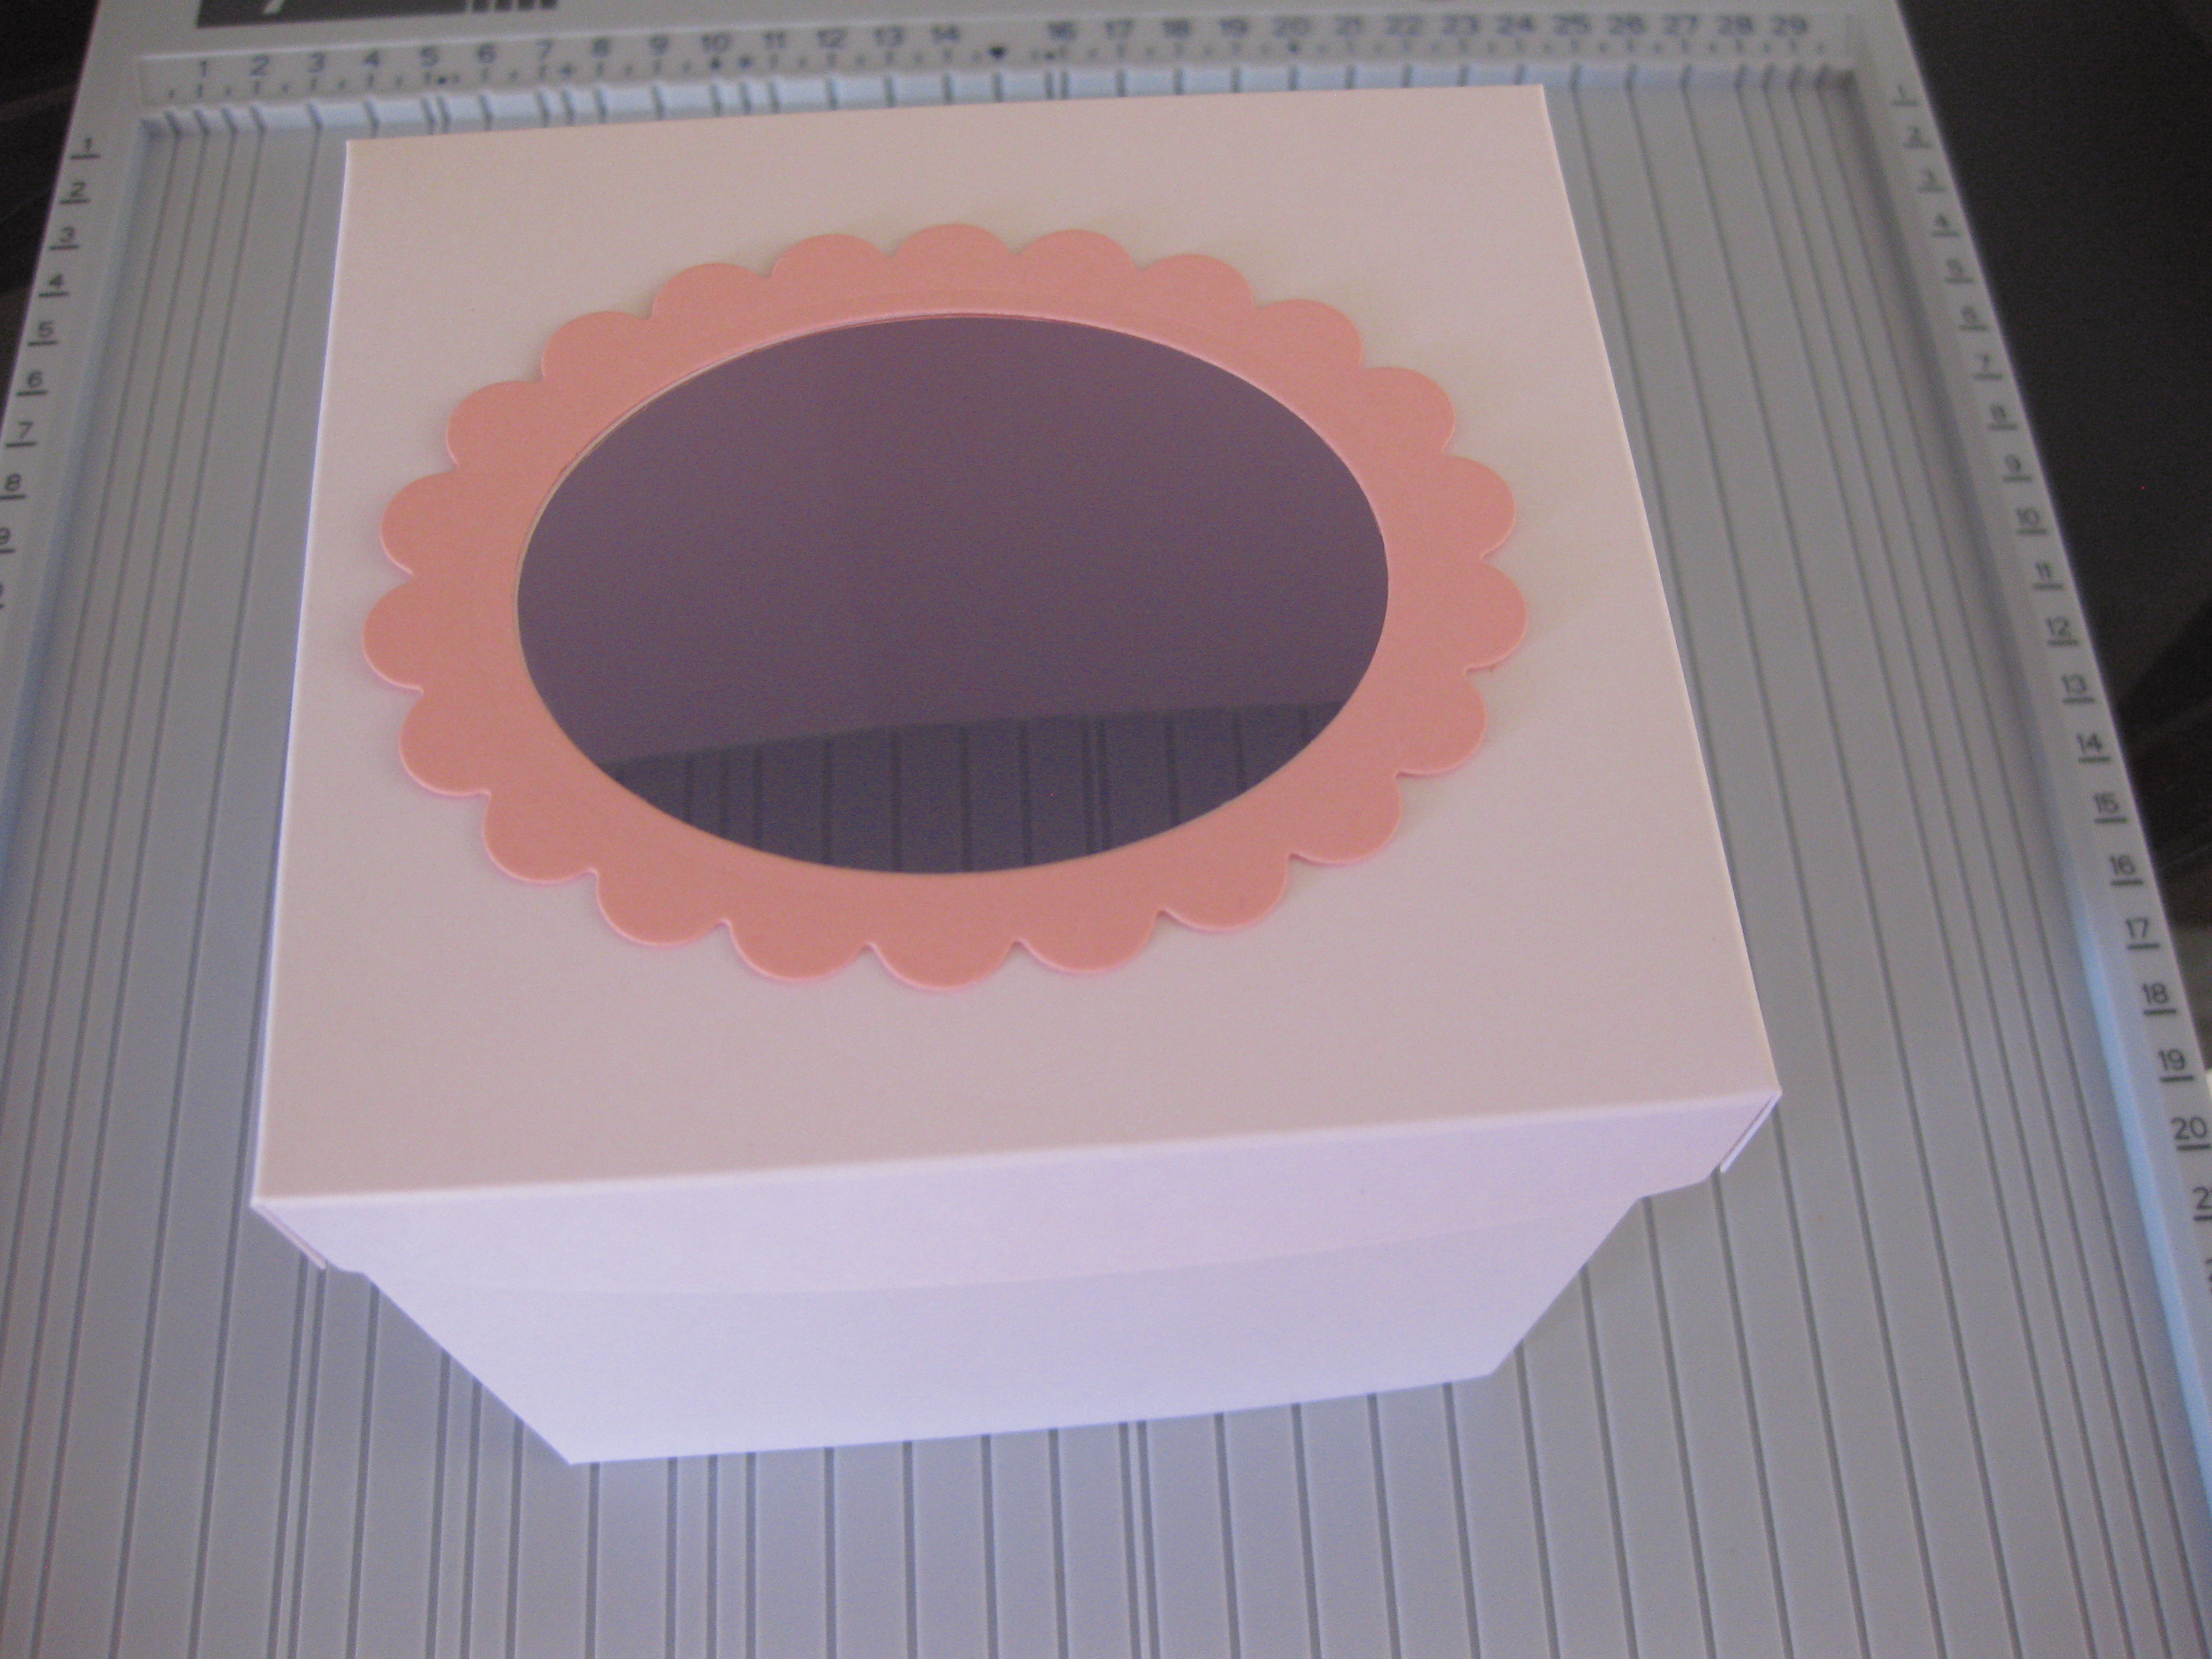
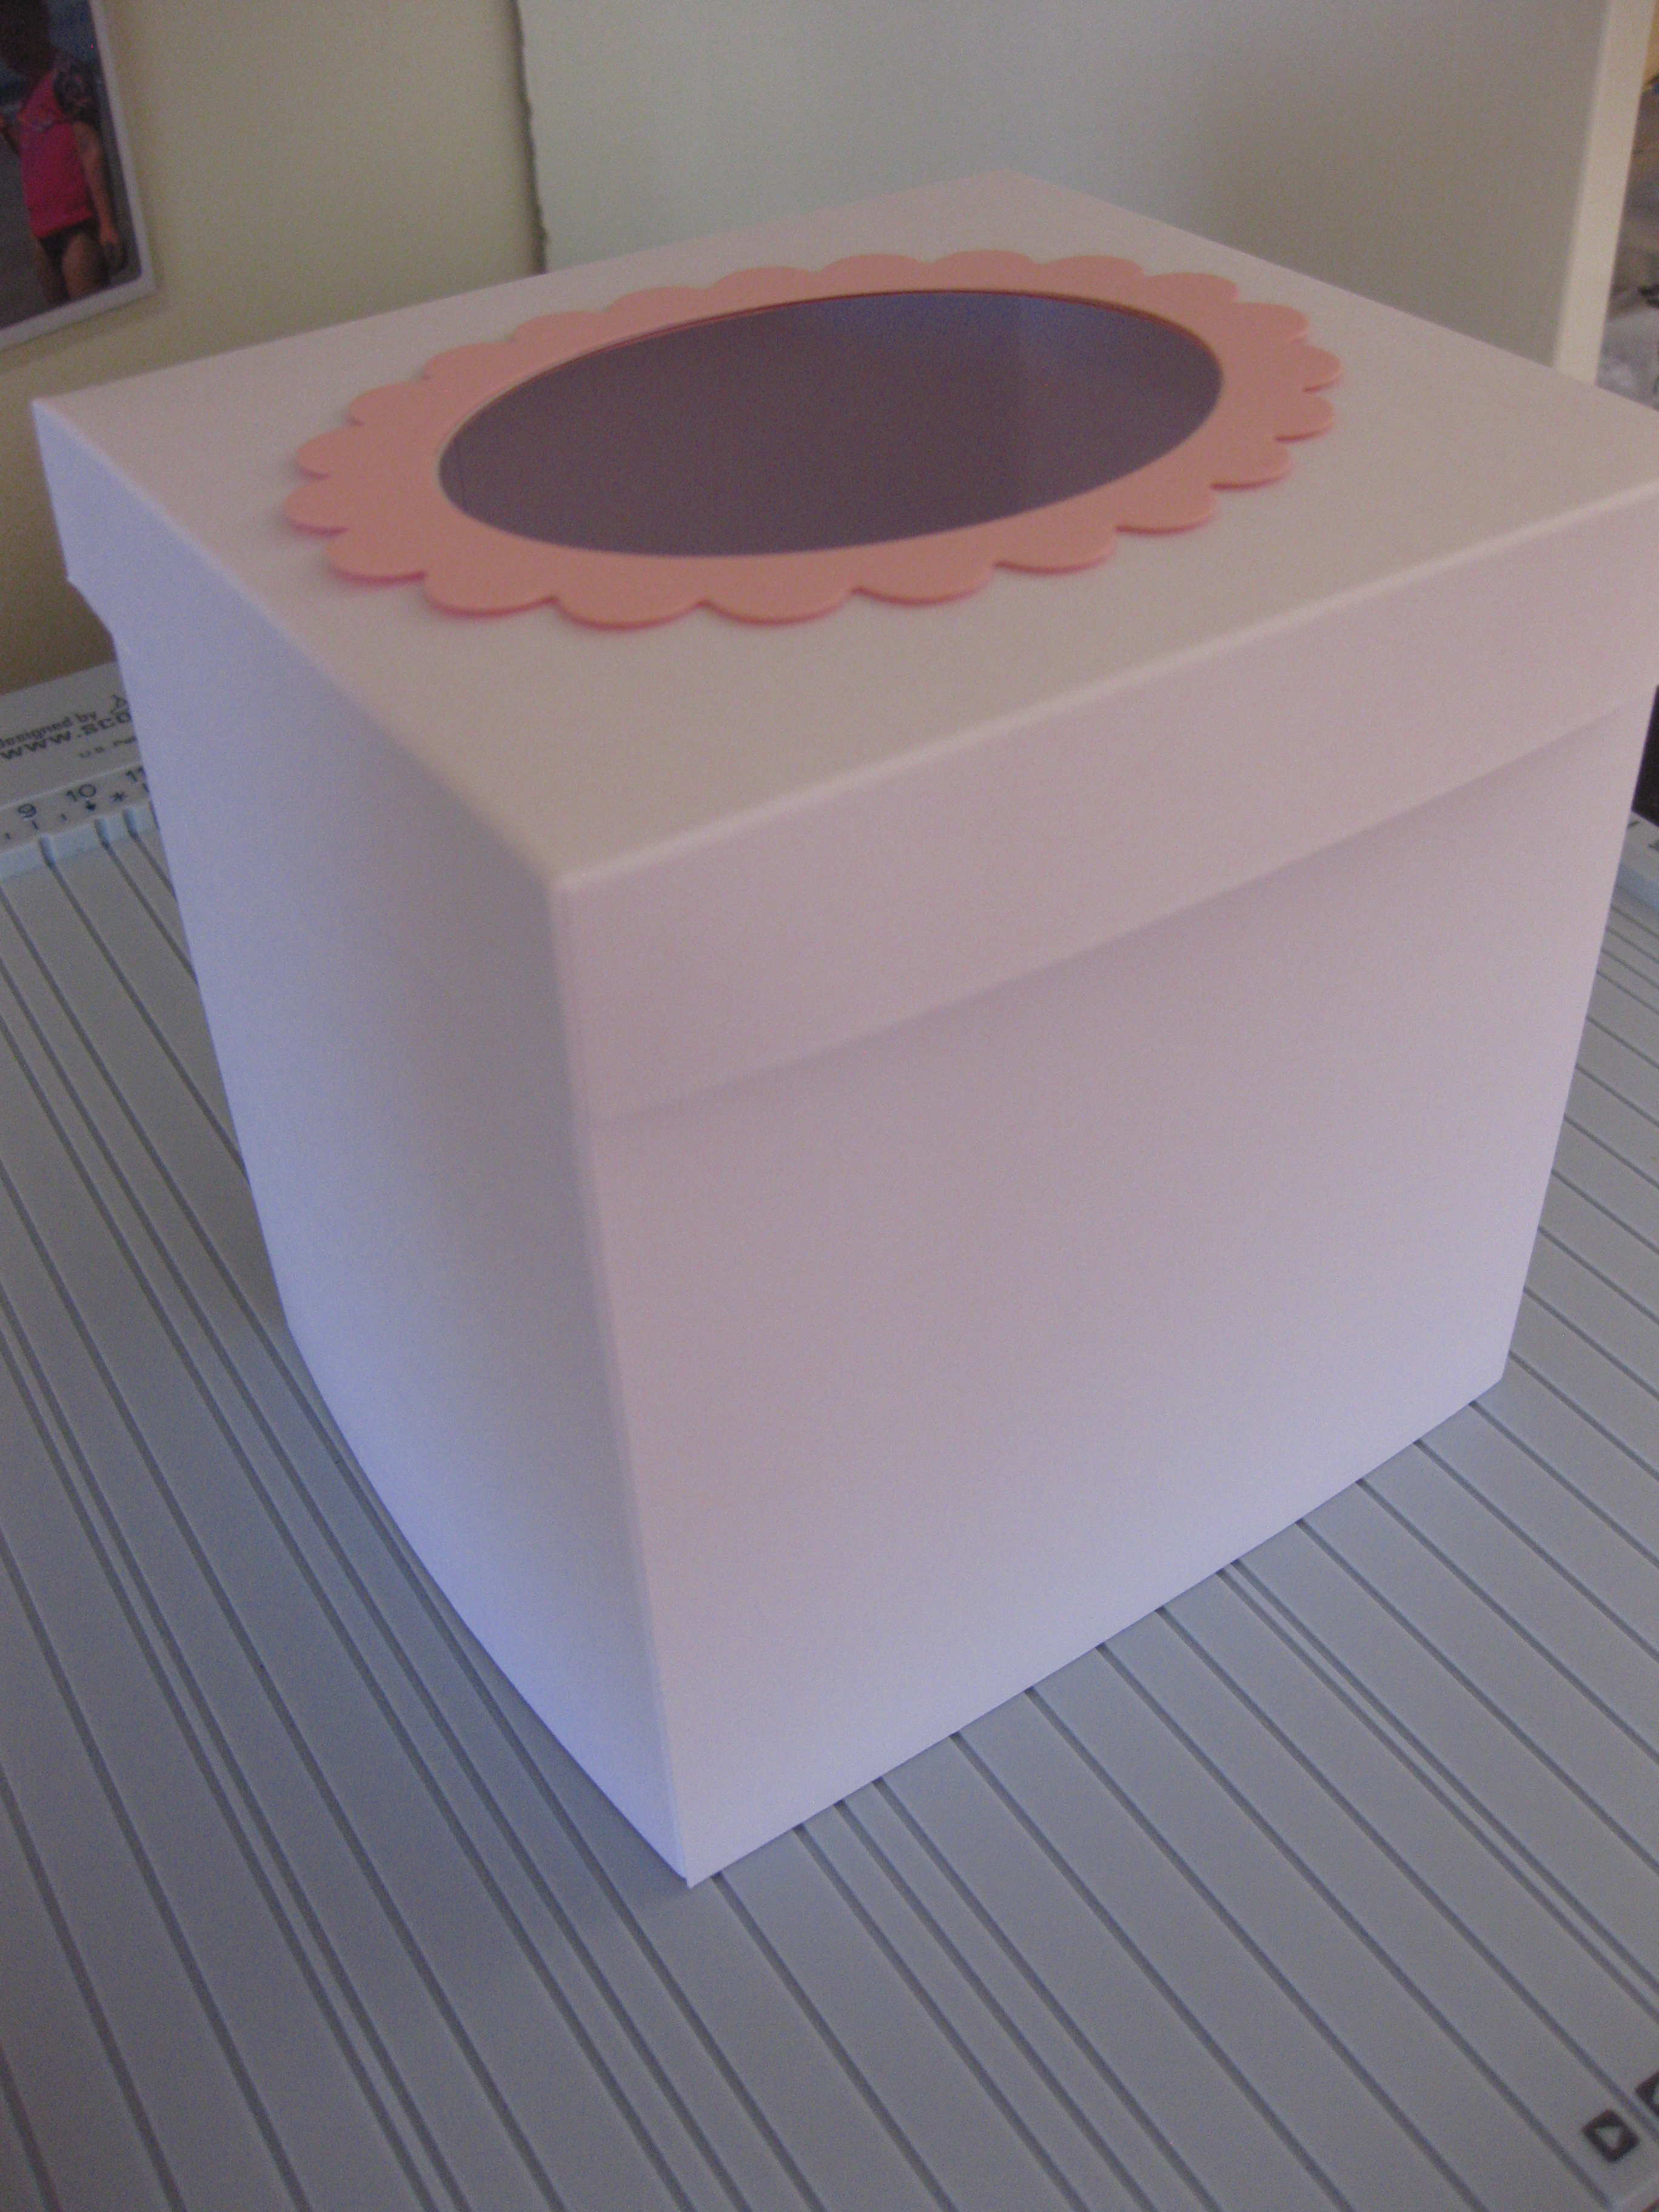
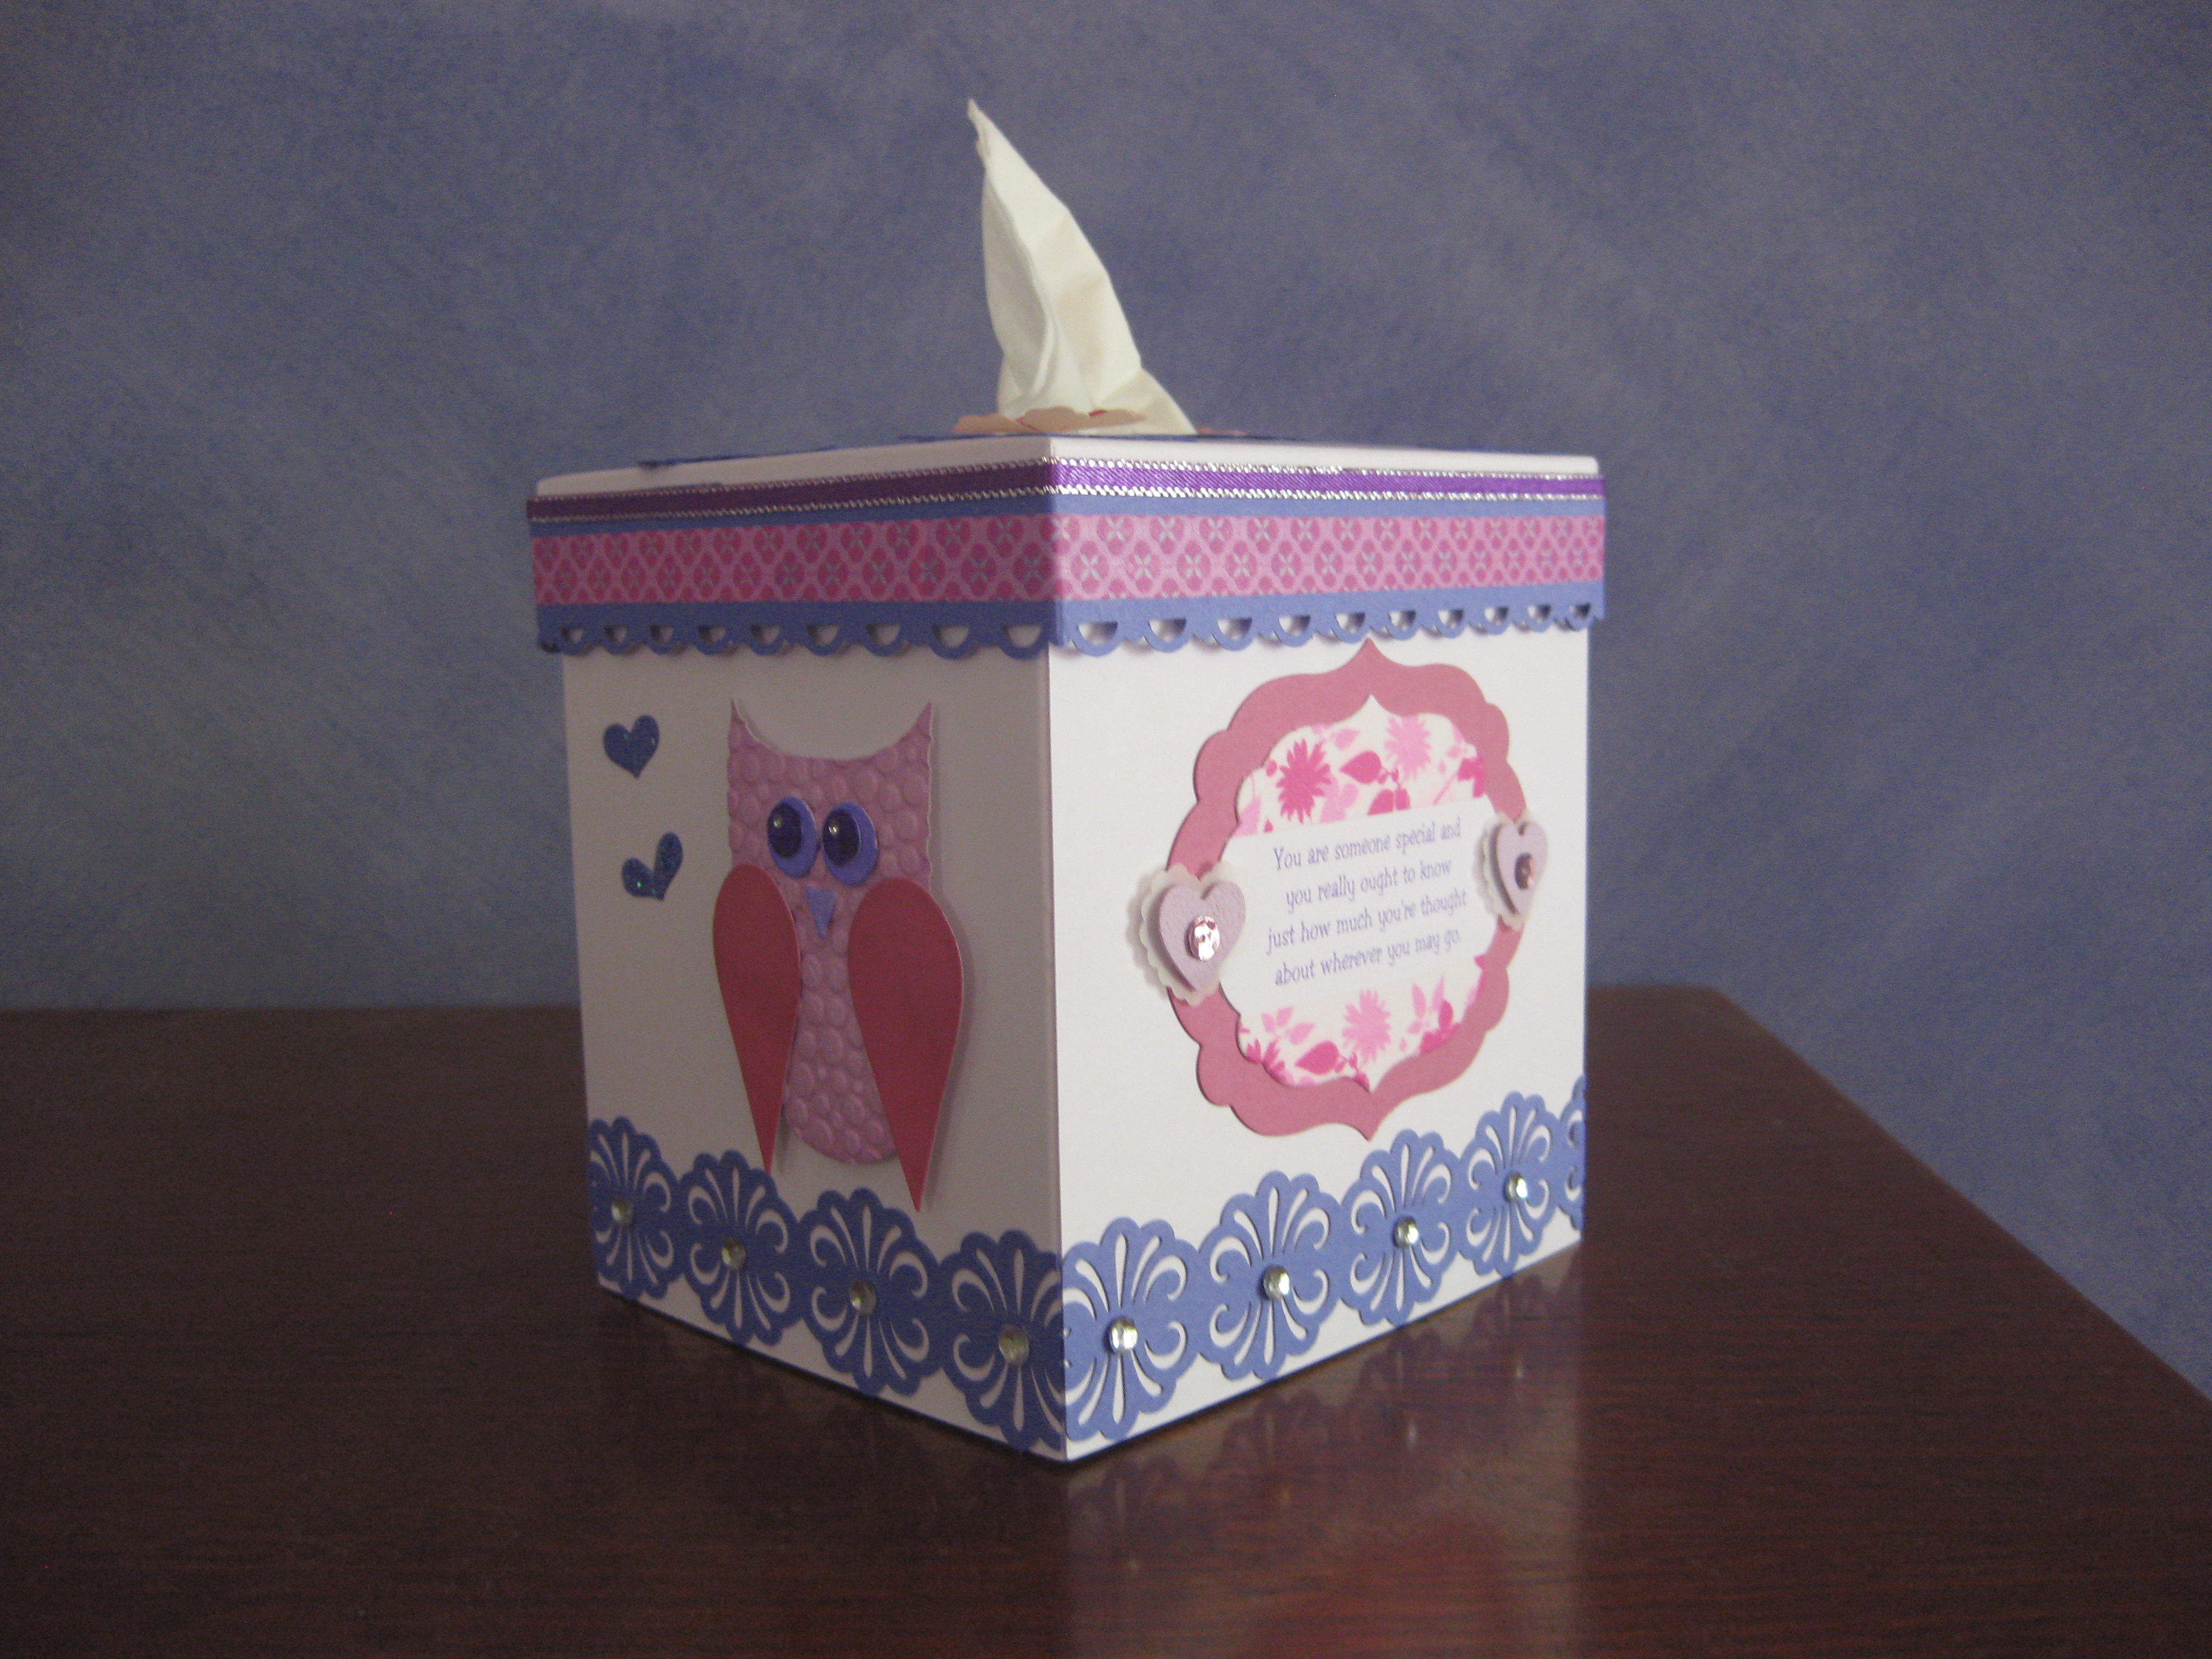
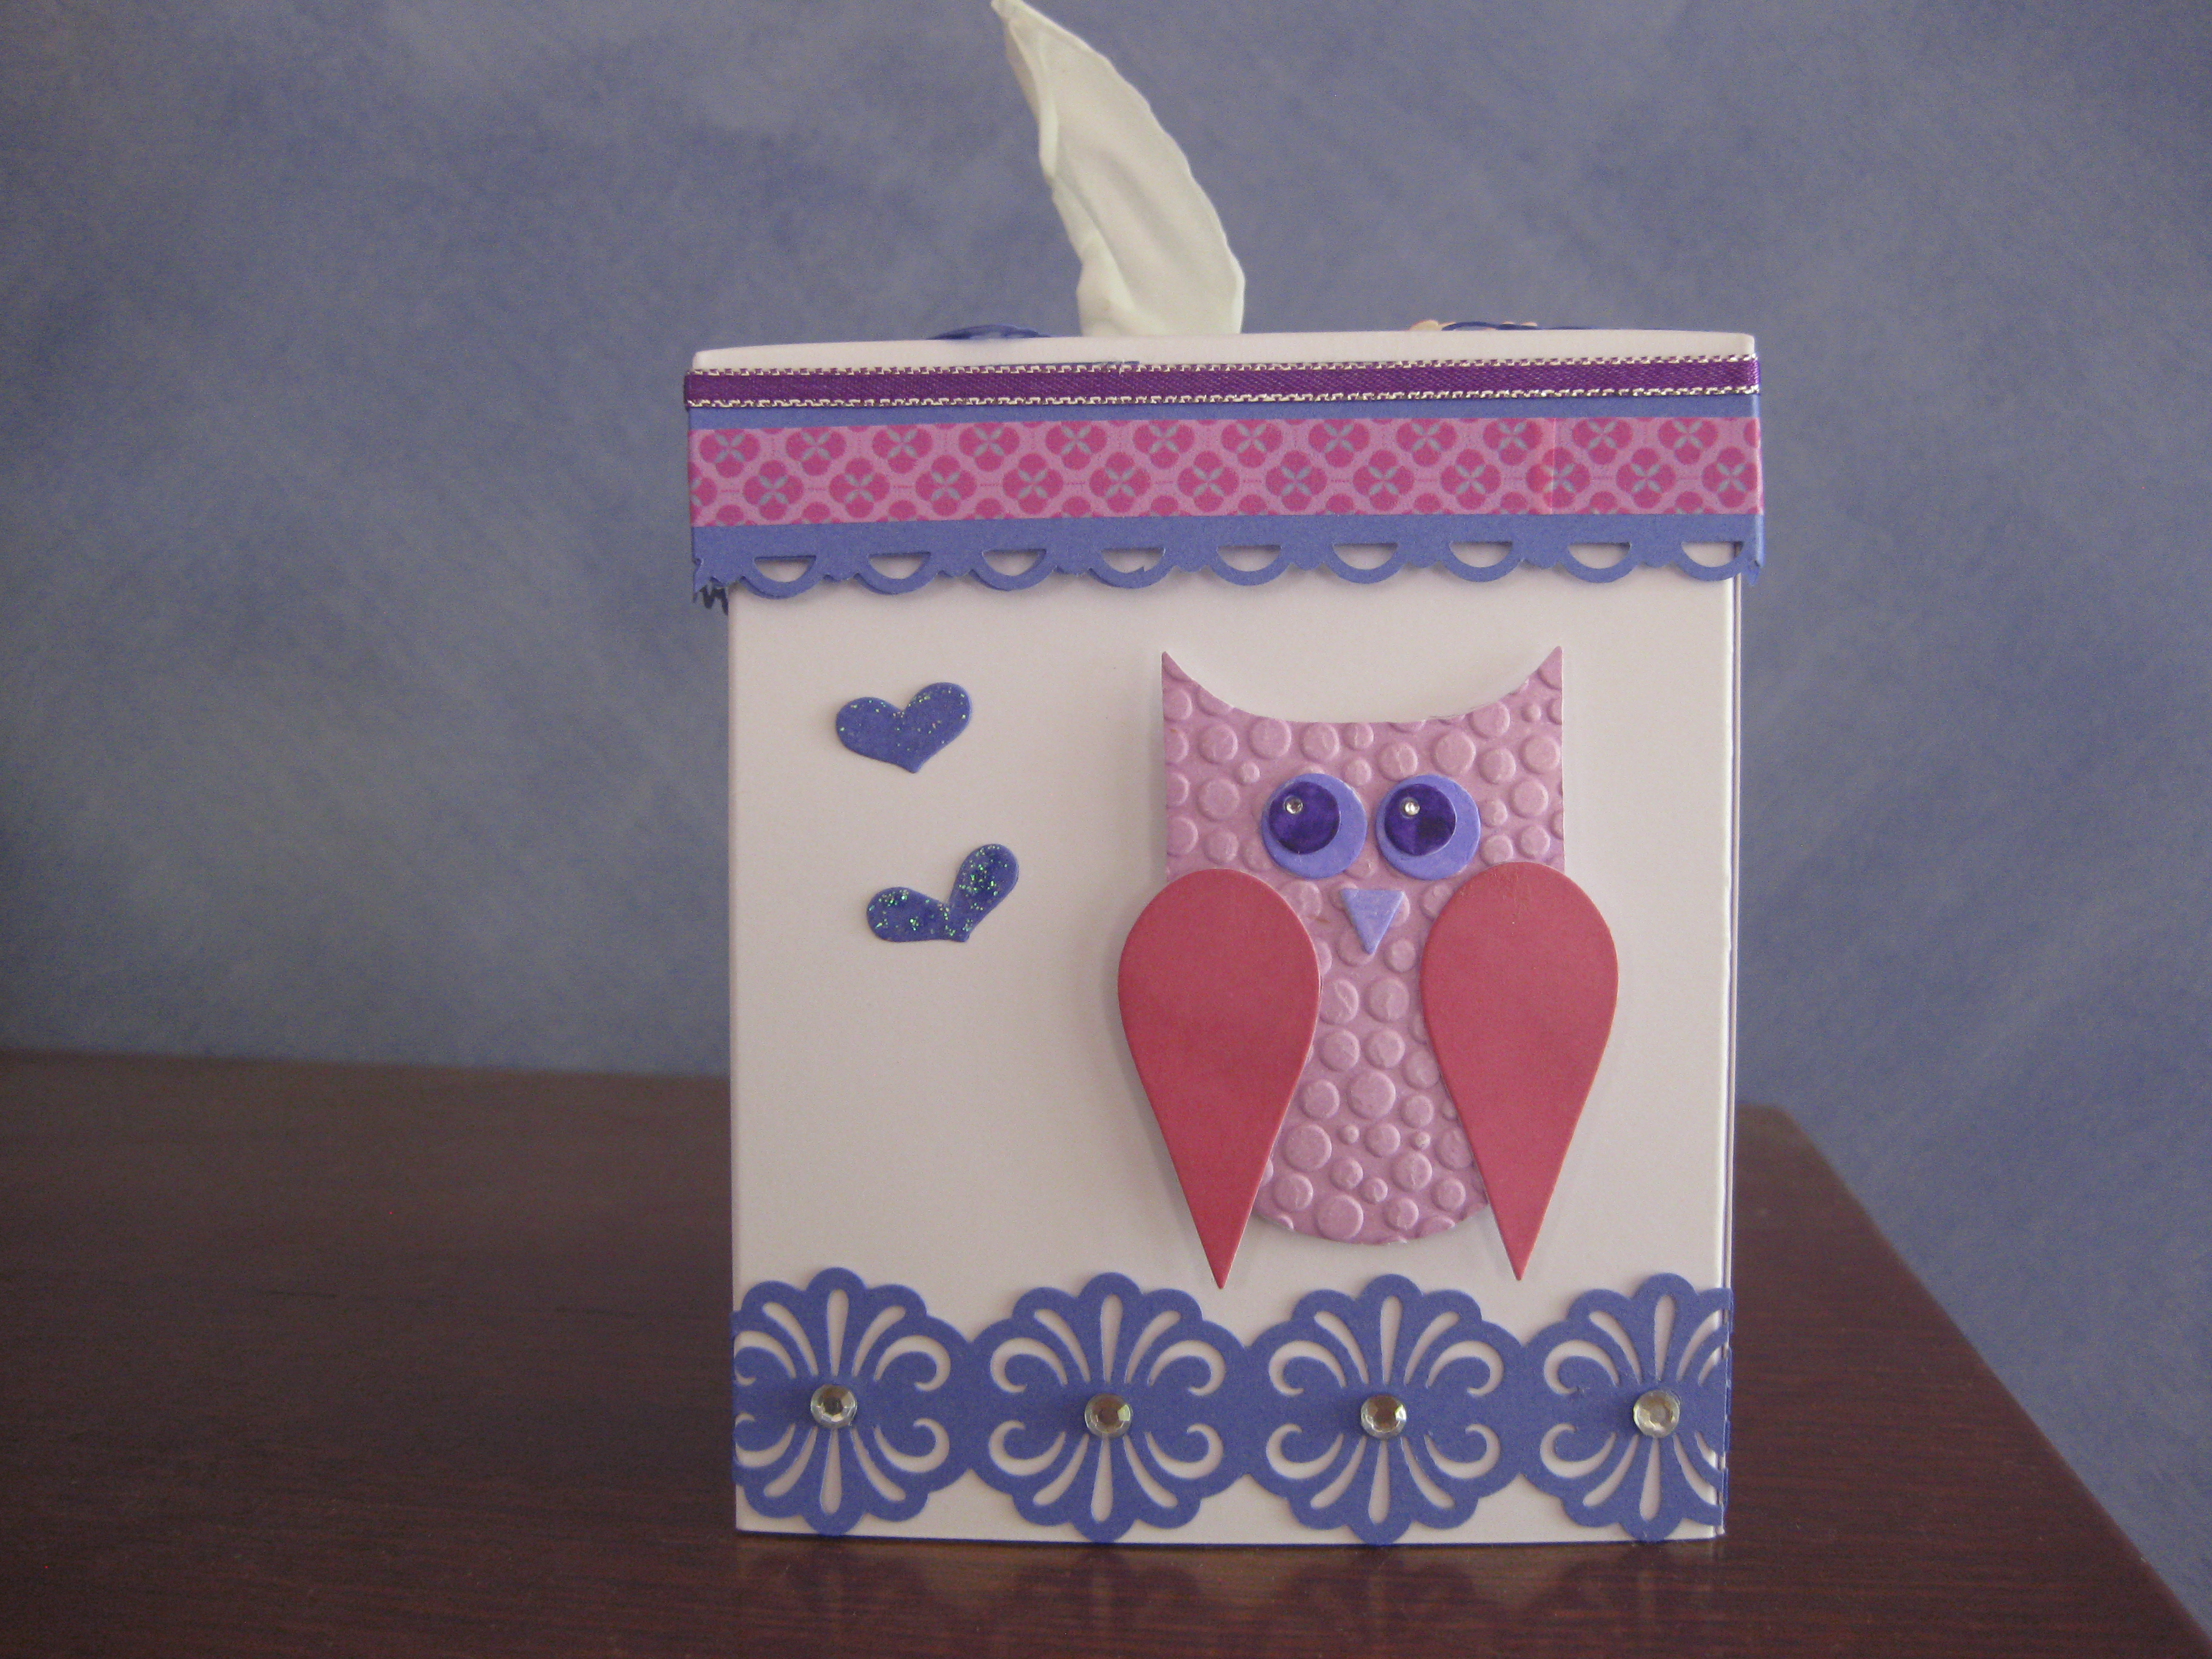
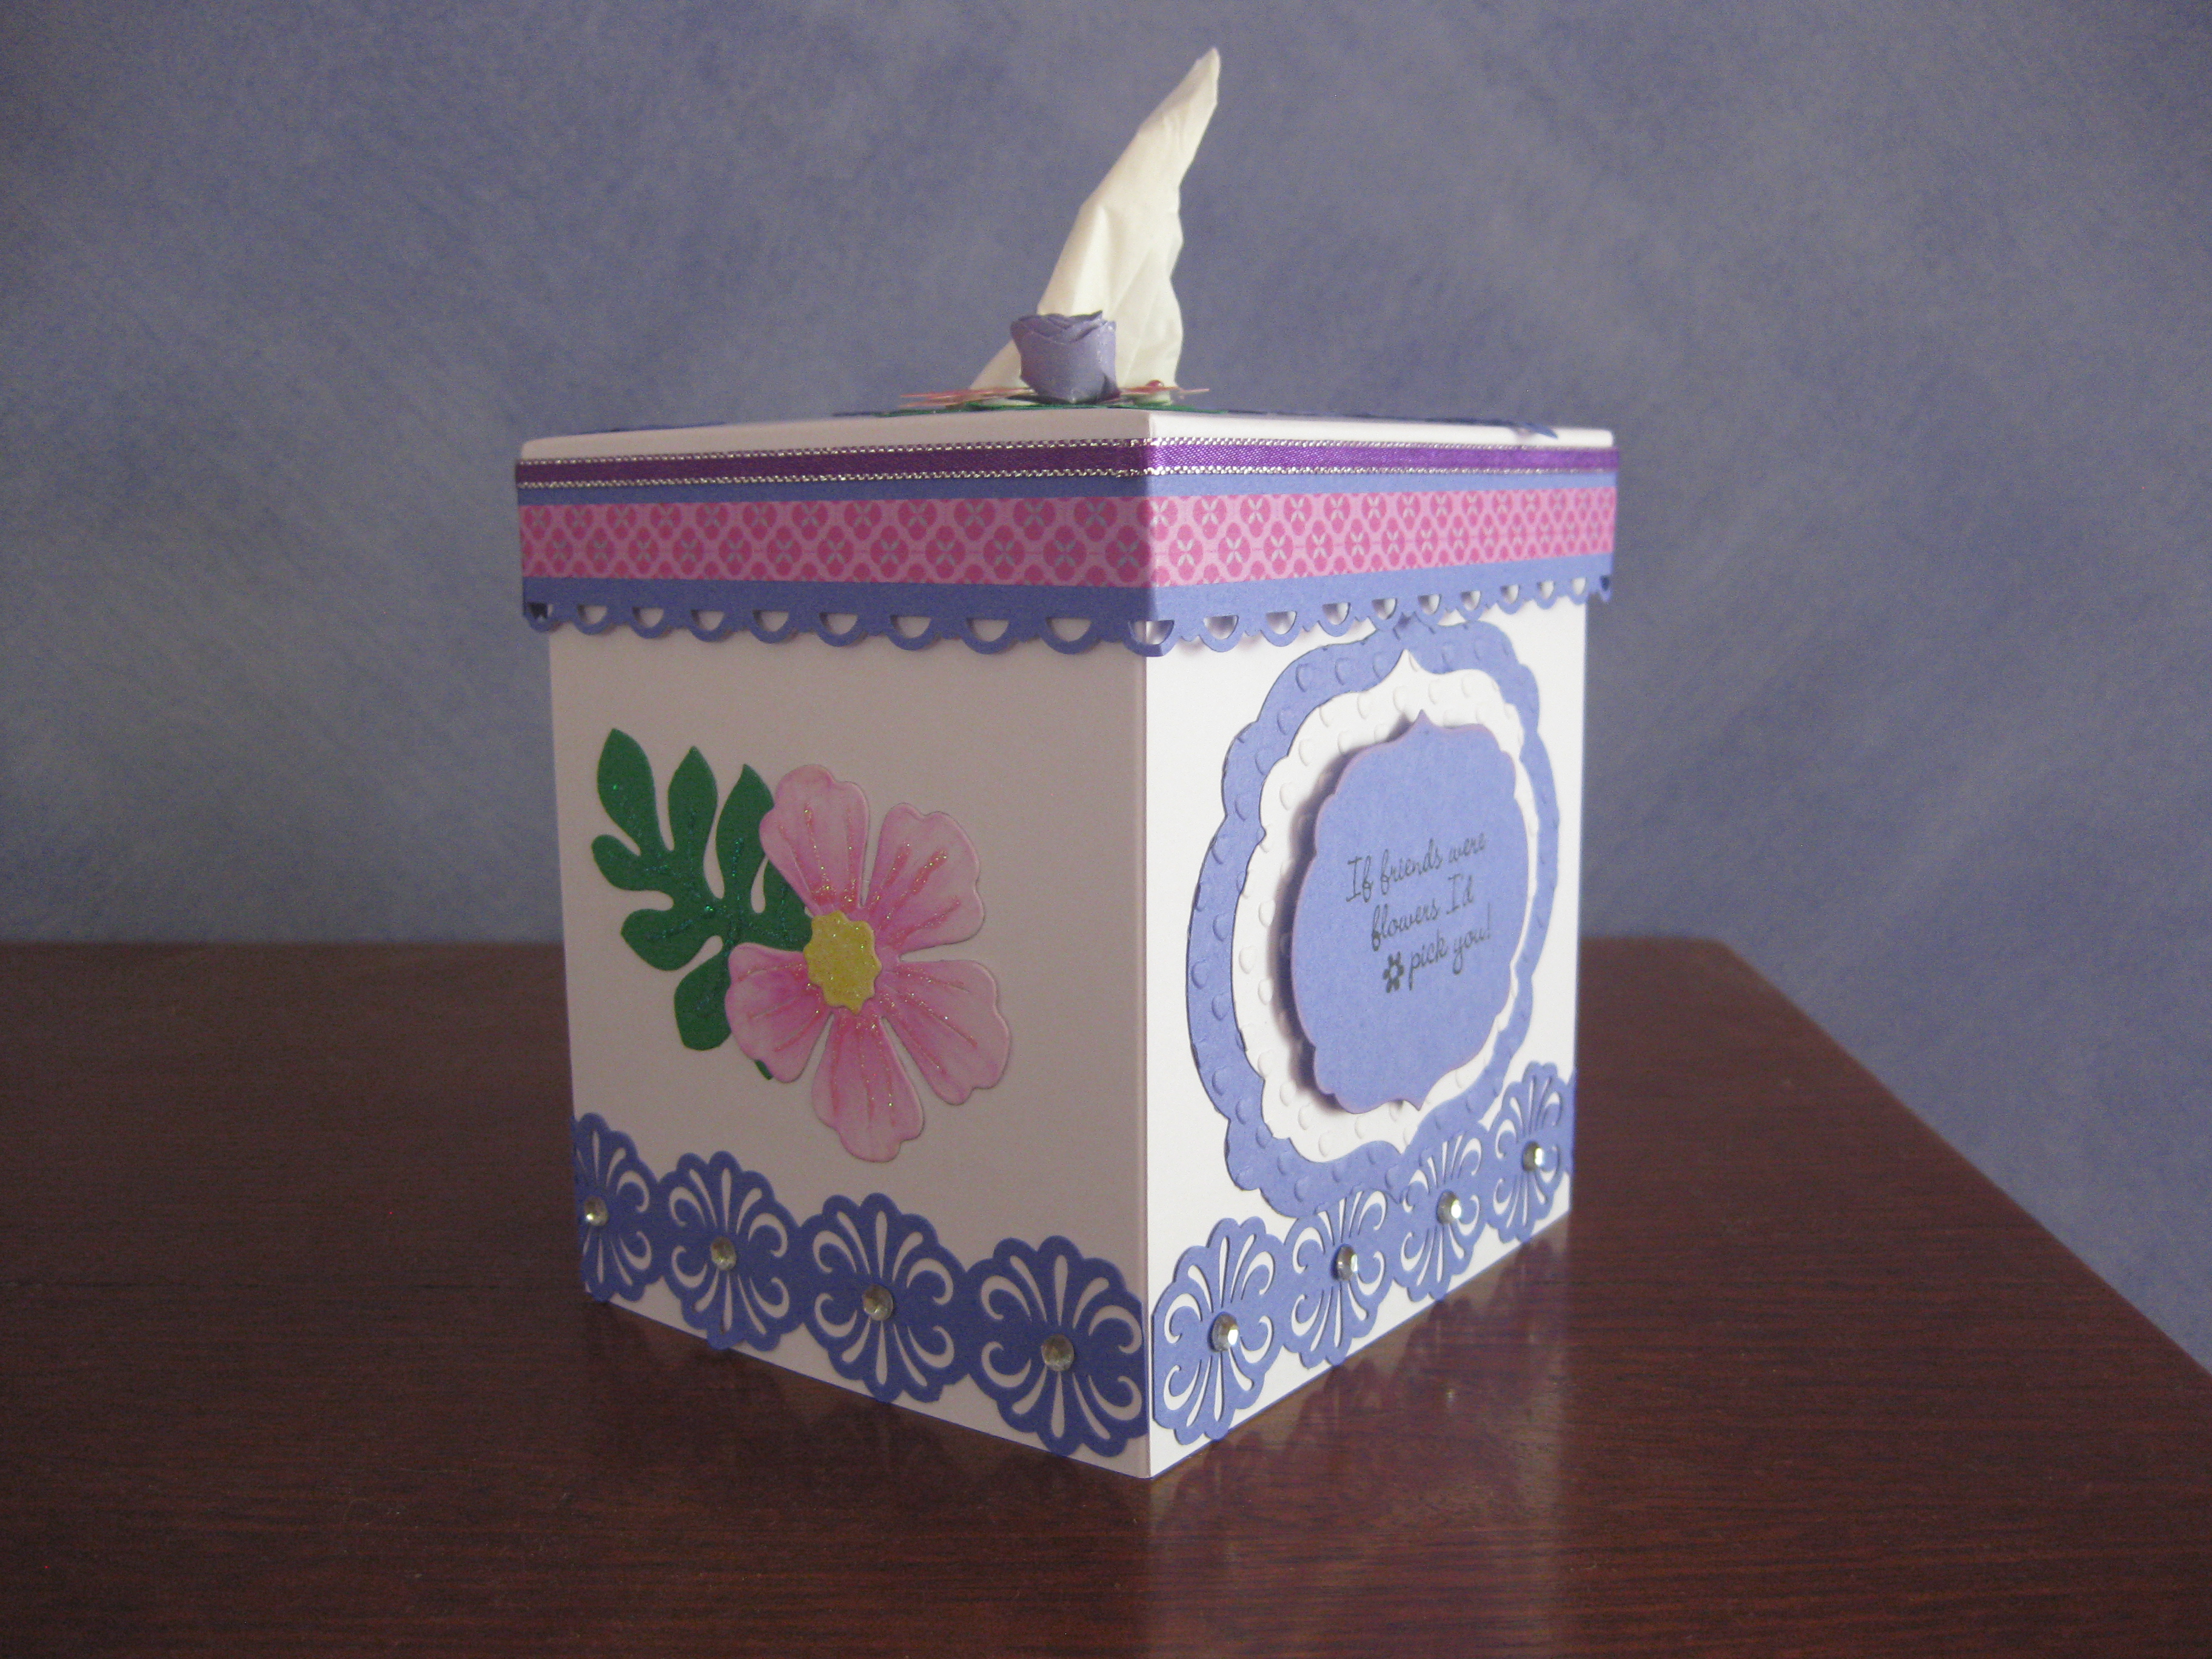
Then you can decorate as you like ~ Here’s one I made earlier!!!


Papercrafter
Card Making Made Simple
June Kempster. Independent Stampin' Up! Demonstrator
With A Little Inspiration