feminine, Kids Cards

Never Ending Card

Hello Crafters,

I have made my first ever 30 second video and it is terrible but thought I would share it anyway, as I found it very hard to show you in pictures how this card works!

It is the never ending folding card, so as you open it, it just keeps on opening. Watch the video and you will see it in action.

I have used the gorgeous, but now retired, Sweet Sorbet DSP with Crisp Cantaloupe cardstock. I haven’t yet finished decorating and embellishing it yet, but you get the gist of what is going on here!

Here is the front of the card

Never Ending Card

First opening

Never Ending Card

Second opening

Never Ending Card

Third opening

Never Ending Card

then the last time you open, you end up at the front of the card again!

Never Ending Card

Don’t you agree that kids (and adults alike) would find this fascinating?!!!! My girls loved it!


The new 2014-2015 Annual Catalogue is now live on my blog. This catalogue is full of amazing new products and wonderful coloured pictures for ideas. It is a must have for anyone interested in Ink, Paper and Stamps!

Shop Online 24/7 for products

Don’t forget to Follow My Blog to receive blog updates and join my Newsletter Subscription for all the latest news and specials!

Happy Stamping,

Name Banner

Kids Cards

Napkin Fold Origami Card

Hello Crafters,

Today I share with you a funky oragami style card that is something totally different!

Napkin Fold Origami Handmade Card

To make this card I started with an 8″ x 8″ piece of cardstock. Score at 2″ & 6″ rotate 90 degrees and score the same.

Using the diagonal plate on your Scoreboard, score at 4″ & 6″ on each side.

The folding is hard to explain, but you may be able to follow from the diagrams below.

Napkin Fold Origami Handmade Card

Here is the belly band that goes around the card to keep it closed which is 9″ x 1 1/4″ and the DSP is 9″ x 1″.

The diamond is 2″ x 2″ and the DSP is 1 3/4″ x 1 3/4″

Napkin Fold Origami Handmade Card

And here it is opened up!

Napkin Fold Origami Handmade Card

The Birthday Basics Designer Series Paper to decorate this card is:

8 squares of DSP 1 3/4″ cut in half diagonally to form triangles

2 squares of DSP 2 1/2″ cut in half diagonally to form triangles

1 square of 3 3/4″ for the middle of the card to write your message


This was such a fun card to make and not as difficult as it appears. I am sure I will be making plenty more of these in the months to come as both my girls and their friends have multiple parties!!!!


The new 2014-2015 Annual Catalogue is now live on my blog. This catalogue is full of amazing new products and wonderful coloured pictures for ideas. It is a must have for anyone interested in Ink, Paper and Stamps!

Shop Online 24/7 for products

Don’t forget to Follow My Blog to receive blog updates and join my Newsletter Subscription for all the latest news and specials!

Happy Stamping,

Name Banner

feminine, Kids Cards

Flower Heart Pinwheel Card

Hello Crafters,

Today I share with you a cute idea using the large heart punch, yes that’s right, the petals are made from hearts!

Flower Heart Pinwheel

To make this card I punched a 2 1/2″ circle out of scrap card to use as the base to stick the petals on to. Fold this circle in half and then half again then lay it flat.

I punched 6 Hearts out of Primrose Petals cardstock and 6 hearts out of Raspberry Ripple cardstock.

Each heart is folded in half.

Glue each petal onto the centre of the circle so the tip of the heart is in the centre and the next petal, slightly overlays the previous one. When you get to the last petal, lift up the first petal slightly so the last one fits underneath it.

Flower Heart Pinwheel

Layer the card base with some coordinating cardstock and then another layer of white.

I cut by hand the stem from Gumball Green cardstock and punched the 2 leaves from the Bird Builder punch and added them with glue dots.

Glue the flower to the top of the stem. I also added 2 small flowers (from the new Itty Bitty Accents Punch Set) to the centre and added a rhinestone basic jewel.

Flower Heart Pinwheel

You can see here I embossed the hearts of this flower with the Polka Dots TIEF after I punched them out. It just gives it a bit more of a WOW!

I haven’t added a sentiment yet, but I will once I know who I am going to give the card to, whether its a birthday, thinking of you, or thank you!


I loved this Flower so much I made this pretty Shadowbox Frame for a friends baby and a special Stair Step card in coordinating colours!

Shadowbox frame     Stair Step Card


The new 2014-2015 Annual Catalogue is now live on my blog. This catalogue is full of amazing new products and wonderful coloured pictures for ideas. It is a must have for anyone interested in Ink, Paper and Stamps!

Shop Online 24/7 for products

Don’t forget to Follow My Blog to receive blog updates and join my Newsletter Subscription for all the latest news and specials!

Happy Stamping,

Name Banner

Challenges, JAI, Kids Cards

JAI#220 Sketch Challenge

Hello Crafters,

Today I finally get back into some crafting after a week or two on the sidelines so to speak!

I thought the best way to start, was with a challenge at Just Add Ink. So, the challenge this week is a Sketch Challenge JAI#220.

I am also using 2 of the new 2014-2015 In Colours; Blackberry Bliss, Lost Lagoon, Mossy Meadow, Hello Honey & Tangelo Twist.

My dear sister is pregnant with her 3rd child and already has two girls, so when they found out she was having a boy, I almost went in to melt down! This will be the 5th grandchild, but the first boy, on my side of the family.

Baby We've Grown

So I need loads of practice with masculine/boy cards and what better way than to start with a Oh Baby Boy card.

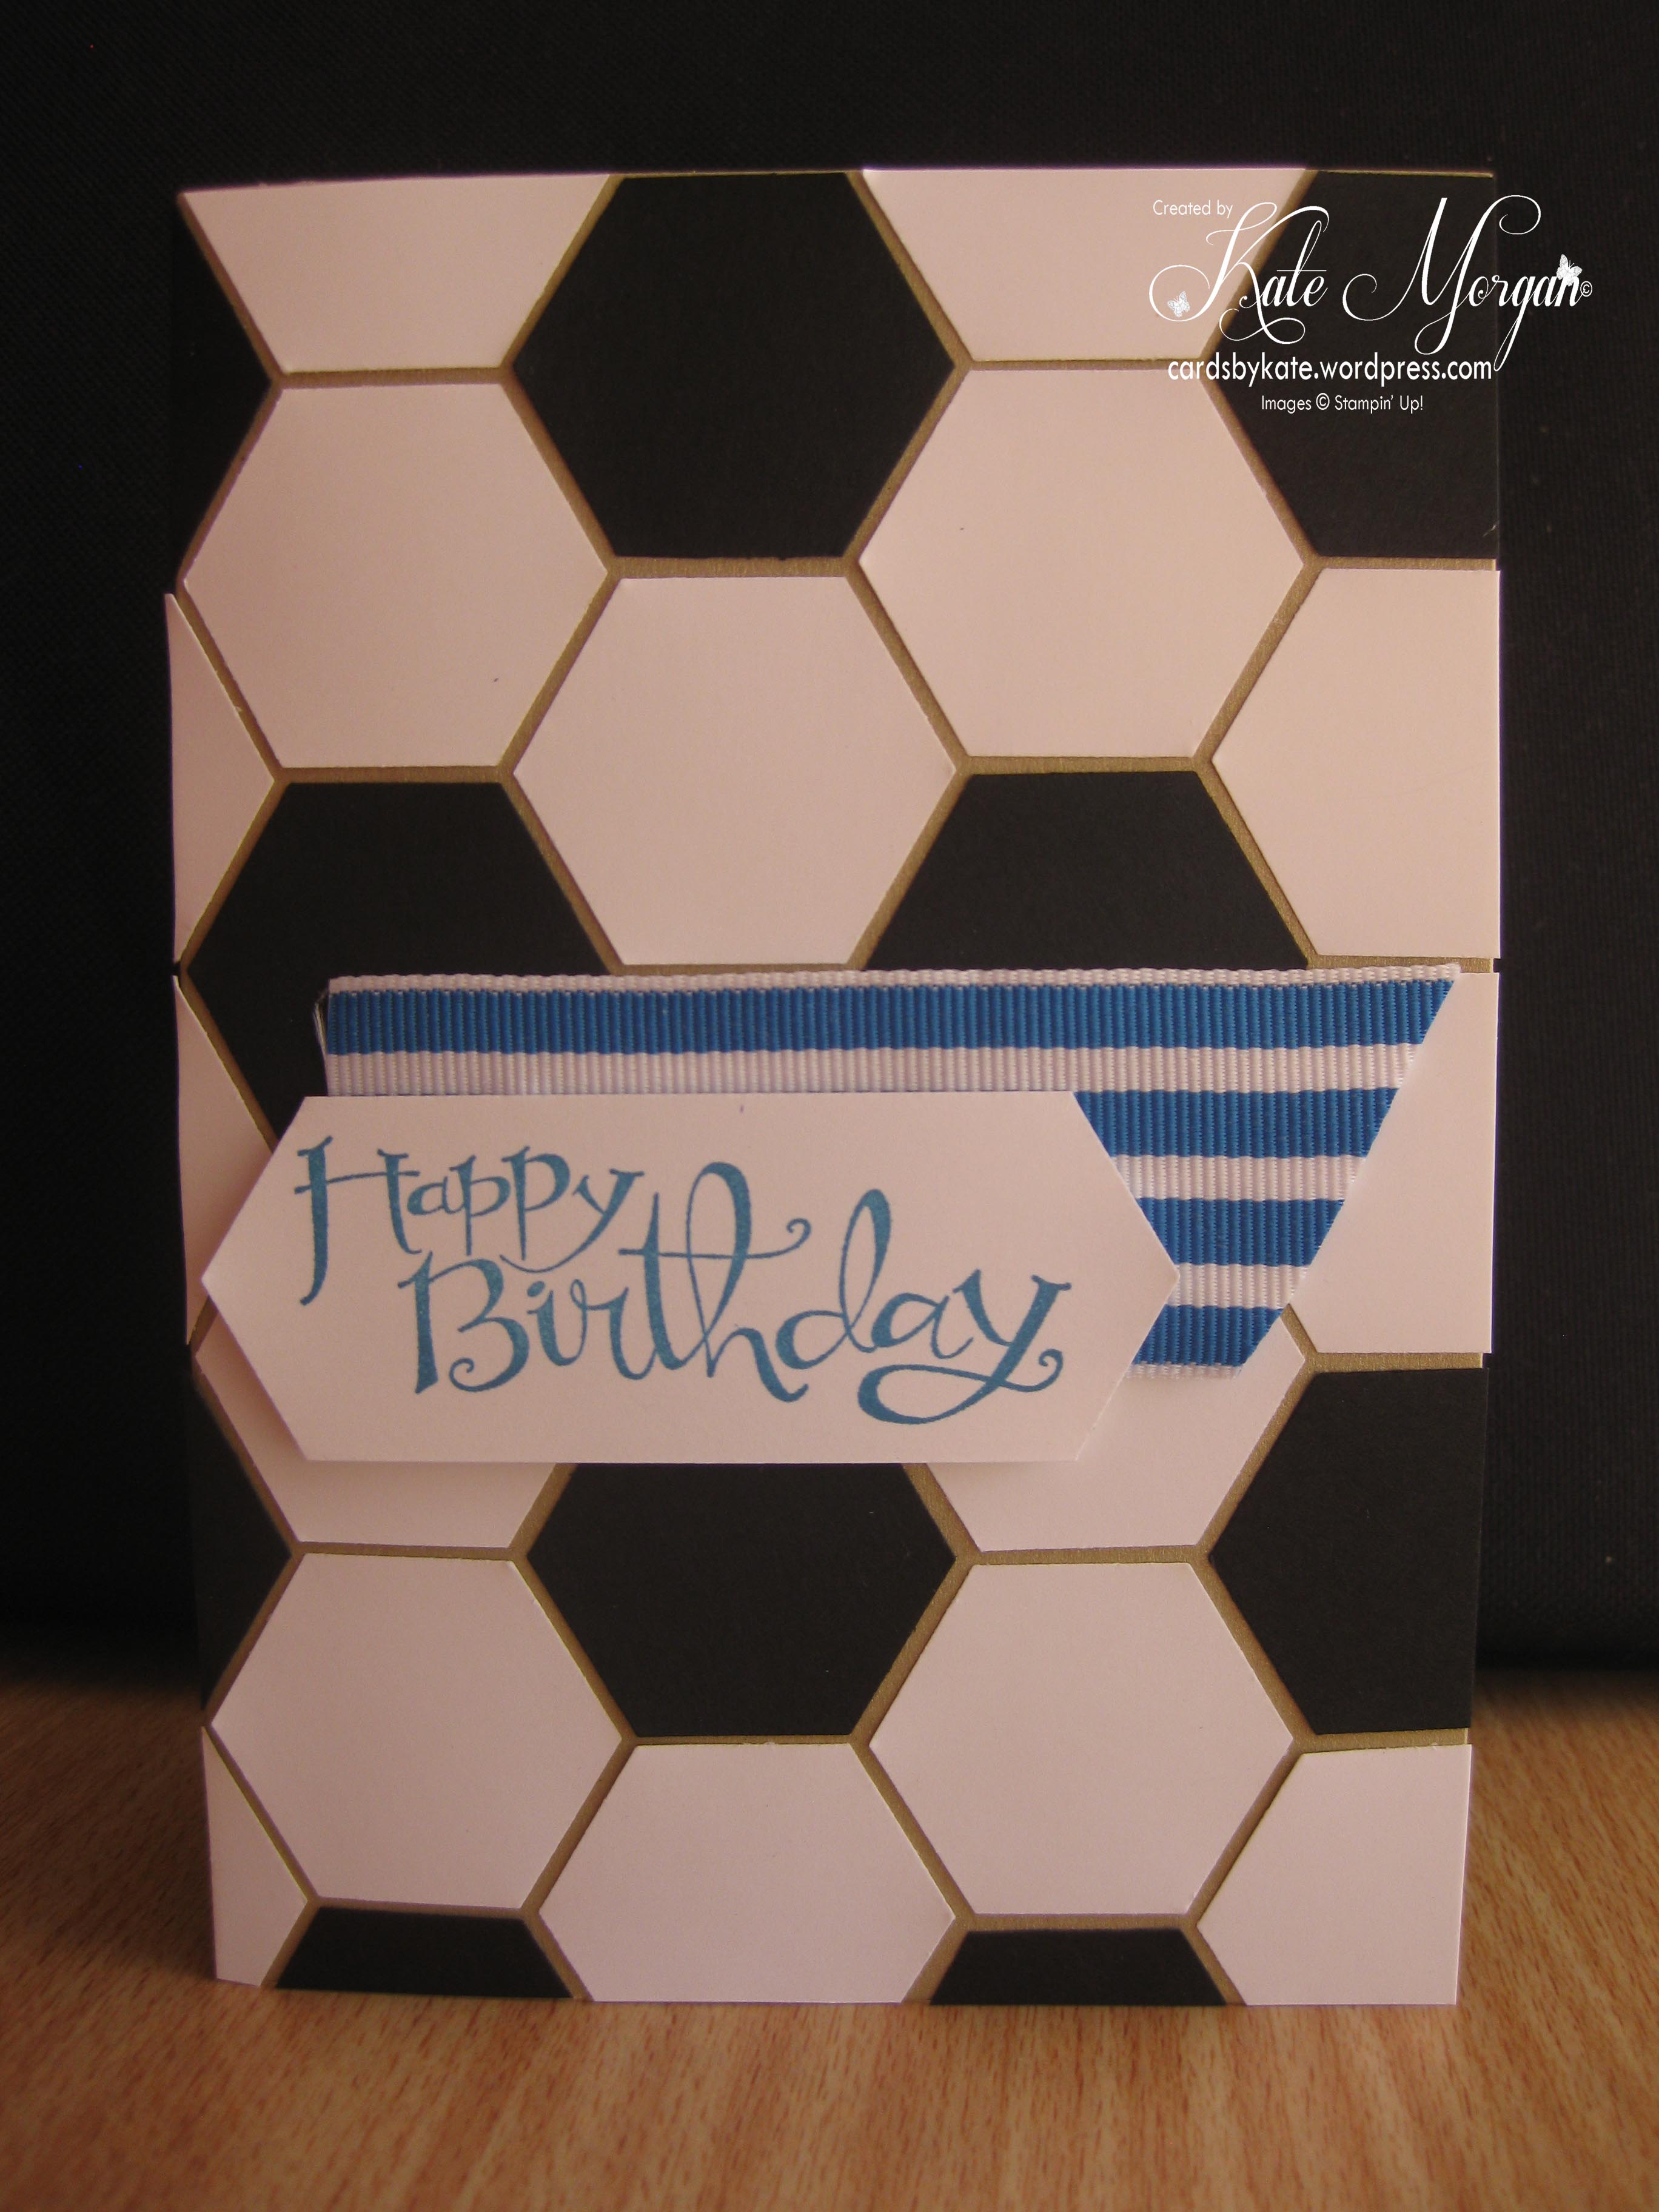
I have left the very top of the card above the ribbon with a bit of space, so once the baby is born (and I get my new alphabet framelits from the new annual catalogue, available 1 July!), I will be able to add his name!

Baby We've Grown

I stamped the Oh Baby image from the Baby We’ve Grown Stamp set in the new In Colour, Lost Lagoon. The base card is also Lost Lagoon and the Designer Series paper is from the new stack, Moonlight.

The scallop circle is die cut from Hello Honey cardstock… do you think it looks a bit like a bib?!!! I hope so, because that was the intention!

I find that these two colours coordinate so well and the ribbon is to die for! Below is another picture showing this divine ribbon!

IMG_4875

You may also notice the punched stars, part of a new punch pack of 3 (which also includes a flower and a heart), all of which I couldn’t wait to get my hands on.

Why don’t you give a challenge a go, they are so much fun. Head across to the Just Add Ink page for more inspiration and see how the designers interpreted this challenge.


The new 2014-2015 Annual Catalogue goes live on 1 July, so make sure you return to my blog to view it online. This catalogue is full of amazing new products and wonderful coloured pictures for ideas. It is a must have for anyone interested in Ink, Paper and Stamps!

Don’t forget to check the retired stamps and accessories lists, there are sure to be products to please, but hurry, only available while stocks last and ends 30 June!

Shop Online 24/7 for products

Don’t forget to Follow My Blog to receive blog updates and join my Newsletter Subscription for all the latest news and specials!

Happy Stamping,

Name Banner

Challenges, feminine, JAI, Kids Cards

Cupcake anyone?

Hello Crafters,

I am so excited to have a long weekend right now, after such a busy few weeks. So I must say Happy Queen’s Birthday Long Weekend to everyone in Melbourne and what better way to celebrate than with cupcakes! Not only did I bake some Baci cupcakes but also made this card for the Just Add Ink #217 Challenge, “JUST ADD CUPCAKES/CAKE/DESSERT“.

And check out the colours ~ I have used Wisteria Wonder, Pink Pirouette & Cherry Cobbler, oh and Soft Suede for the cupcake wrapper!

Just Add Ink #217

The card base is Cherry Cobbler along with the cherry on top of the cupcake. The background is Pink Pirouette Core’dinations cardstock embossed with the Decorative Dots TIEF and sanded. I also distressed the edges with the distressing tool!

I used Flowersoft for the top of the cupcake to give it a bit of texture.

Just Add Ink #217

The double bow is made with the SU Seam Binding in Very Vanilla and adhered with a glue dot.

The sentiment is from the Hostess Stamp Set Simply Sketched and then cut out with the Decorative Label punch and sponged edges in Wisteria Wonder ink.

Oh and here is a picture of my Baci cupcakes, I knew you were wondering about them!!! Yummy!!!!

Baci Cupcakes

Why don’t you have a go at entering a challenge? They are so much fun, so check out what the design team at Just Add Ink created this week!


The new 2014-2015 Annual Catalogue goes live on 1 July, but if you would like to receive a copy before then, please Contact Me. This catalogue is full of amazing new products and wonderful colour pictures for ideas. It is a must have for anyone interested in Ink, Paper and Stamps!

Don’t forget to check the retired stamps and accessories lists, there are sure to be products to please, but hurry, only available while stocks last!

Shop Online 24/7 for products

Don’t forget to Follow My Blog to receive blog updates and join my Newsletter Subscription for all the latest news and specials!

Happy Stamping,
Name Banner
Kids Cards

Monkey Punch Art

Hello Crafters,

Happy Good Friday to you and I hope you are enjoying the start of this Easter break!!!

I know the excitement is certainly building in our house with two very excited girls looking forward to the Easter Bunny visiting on Sunday!

In following on from Wednesday’s blog post on Punch Art, I have another one for you which is super duper cute!

Monkey Punch Art

Isn’t she the most gorgeous thing you have seen?!!! I am so pleased with this card, I can see myself making many more!

The base card is white then I layered a piece of Sahara Sand Core’dinations cardstock which I embossed with the Arrows TIEF (available until 30 June) and then sanded it.

The next layer is Melon Mambo and then White on top.

The monkey is created with Crumb Cake & Soft Suede cardstock and the nose is black.

The heart was created by stamping the largest heart in the Hearts a Flutter stamp set and die cutting it out with the coordinating Framelits. The large heart is a punch and the smaller heart is from the Hearts a Flutter framelits. The tiny heart on her head is also a punch with a rhinestone for a bit of bling!

Monkey Punch Art

I used the black Stampin’ Write Marker to draw the mouth and dots. I added some googly eyes for a more effective finish. Doesn’t she just make you go, awwww!

This was so much fun to make and see her come alive as I put it together! Go on, have a go yourself, I know you want to!

I must thank http://www.brandyscards.com for showing me how to create this gorgeous card.

Doing anything special on Anzac Day afternoon? No?

Well why not join my Punch Art Class.

Be sure to Email Me and book your seat now or join via my Facebook link!


All the punches used to create this little monkey are Stampin’ Up! products:

2-1/2″ Circle (120906)

1-3/4″ Circle (119850)

1″ Circle (119868)

3/4″ Circle (119873)

3/8″ Circle (118309) part of 3 set pack

Large Oval (199855)

XL Oval (119859)

Word Window (119857)

Small Heart (117193)

Large Heart (119883)

Shop Online 24/7 for products

Don’t forget to Follow my Blog and join my Newsletter subscription to receive all the latest news from Stampin’ Up!

Happy Stamping,
Name Banner
Kids Cards

Dragon Punch Art

Hello Crafters,

Having my gorgeous two girls home on school holidays and with the wet weather, we have had to find indoor activities and what better way to spend the day creating punch art!

Dinosaur Punch Art     Dinosaur Punch Art

Not sure exactly what they are, whether a dinosaur or a dragon, but how cool are these little fellas?!!!

Yes, they can be quite fiddly to make, but they are so much fun and look at the end result.

If you love this and want to get started making your own, all you need are a few punches. And if you don’t have some of them, they are all available in my online store and orders are shipped to your door within 48hrs of placing the order.

Using Stampin’ Dimensionals gives your creature a real life 3D effect and makes him pop up off the page!

Dinosaur Punch Art

Here I added some detail using a White Gel Pen to the nostrils and eyes (punched using a hole punch)!

Dinosaur Punch Art

These are such effective cards and wonderful characters to create. Why not have a go yourself, you may just surprise yourself!

 Dinosaur Punch Art

Be sure to click on the follow my blog link on the right had side of my homepage as I have another super duper cute card for you shortly!

Stampin’ Up! Punches used:

Shop Online 24/7 for products

 Happy Stamping,
Name Banner
Kids Cards

Who loves Lego?

Hello Crafters,

Tomorrow my little girl heads off to her first birthday party ‘she’ has been invited to, by a friend at Preschool. She is so excited to be invited and her sister isn’t!!! She feels like a big girl now!

Lego

Because it is a boys birthday, I thought that Lego was the way to go for this card (especially with the Lego movie out at the moment) and what kid doesn’t love Lego?!!!.

I started with a card base of red, layered with white and sponged the edges for a bit of a grungy look.

I cut 4 squares from coloured card and punched circles and added them with dimensionals.

I used the white gel pen to each dot to give the glossy effect.

The ribbon was tied in a bow and added with a glue dot. This ribbon was actually cut off a top I purchased recently… you know the bits they put on the inside of the shoulders to stop the top sliding off the hangers!!! Nothing gets wasted in this house!!!! LOL

The sentiment is from the stamp set, Morning Meadow, a hostess gift with the current catalogue.

Lego

This is such an effective card and so simple to create! Why not have a go yourself, you will be surprised how quickly it will come together.


Shop Online 24/7 for products

 Happy Stamping,
Name Banner
feminine, Kids Cards, Owl Punch

Owl Punch Art

Hello Crafters,

Morning everyone and what a wonderful time of year it is, with the cooler mornings and lovely days. I am thankful for the cooler change!

I know I am not the only one who loves owls at the moment, so I wanted to share with you today a gorgeous card I made which was case’d from Deb Raymer of Debzhouse Stamping.

So here it is!

Owl Punch Art

I used the Venetian Romance DSP with the coordinating card stock of Soft Suede, Pistachio Pudding, Tangerine Tango & Crisp Canteloupe.

The background is embossed with the Woodgrain TIEF. The white markings on the beak and eyes was using a White Uniball Signo Gel Pen.

Owl Punch Art

The punches used to make this cute baby owl are:

I added some green feather that I found lying around in my kids craft area and it matched perfectly for my owl!

Don’t forget there are only a couple of weeks left to place your orders before Sale-a-bration ends.  Any orders of $90+ can earn free product from the Sale-a-bration brochure (pgs 11-17). But if you place an order of $180+ you get to choose 2 free products!!! Be sure to check them out now!

To Shop Online 24/7, click here.

Happy crafting,

Name Banner

Kids Cards, Masculine

Soccer Card

Hello Crafters,

This time of year is all about sport and the AFL has begun! But instead of an Aussie rules card, I decided to make an English Football card in the form of Soccer.

So here it is!

IMG_4348

The item I have used to create this is the Hexagon punch in white and black and adhered to a crumb cake card base.

This card was so quick and easy to create I am sure I will be making plenty of these for the boys parties my kids will be invited to.

I added some of the Pacific Point Striped Grosgrain Ribbon for an interest of colour under the Happy Birthday from the Sassy Salutation stamp set.


Don’t forget there are only a couple of weeks left to place your orders before Sale-a-bration ends. Any orders of $90+ can earn free product from the Sale-a-bration brochure (pgs 11-17). But if you place an order of $180+ you get to choose 2 free products!!! Be sure to check them out now!

To Shop Online 24/7 for other Stampin’ Up items, click here.

Happy crafting,

Name Banner